


PacMan Classroom Transformation
The particular transformation is one that has been on the back burner so to speak for years and it was initially inspired by a photo found on Pinterest. With some intentional planning, this simple photo led to a day full of learning that could easily be integrated into any grade level or subject area.

Transformations are inherently interACTIVE. The act of transforming one thing into another is a great way to hook students’ attention and to engage them in the lesson at hand. Generally, we transform our classrooms towards the end of a unit or lesson of study, allowing students a fun way to demonstrate their recent learning.
The particular transformation is one that has been on the back burner so to speak for years and it was initially inspired by a photo found on Pinterest. With some intentional planning, this simple photo led to a day full of learning that could easily be integrated into any grade level or subject area. Here’s how to get started:
(click on any subheading to jump to that section)
Game Explanation
This room transformation obviously centered around the game board placed in the center of the room. Students would be divided into teams and would sit around the outside of the game board. These teams were either PacMan or Ghosts and were identified with large laminated “game pieces”. Task cards were created for each round of the game, which had a set of leveled questions on it—1 dot, 2 dots and 3 dots. The more dots the question was worth the harder it would be to solve. Students could choose which questions they answered in what order which differentiated the activity for various levels of learners or classes.
Each round was structured as follows:
1 member from each team took a spot on the game board holding their laminated game piece. The other teammates stayed at the table to answer questions.
When the round started, teammates at the table answered questions from the task card. They worked together to solve and wrote out their answers on a small whiteboard. When they were ready to have the answer checked, they simply raised their hand.
The teacher’s job is to roam the room checking answers from the teams as needed. If the team answers a questions correctly, they signal to their teammate on the game board how many spaces they can move. (The spaces moved correlate to the level of question answered)
The teacher decides the length of each round (ours were about 10 minutes) and then can repeat rounds until every student gets a chance to be the live game board piece. (ex. If you have five members on a teams you would have 5 rounds total.)
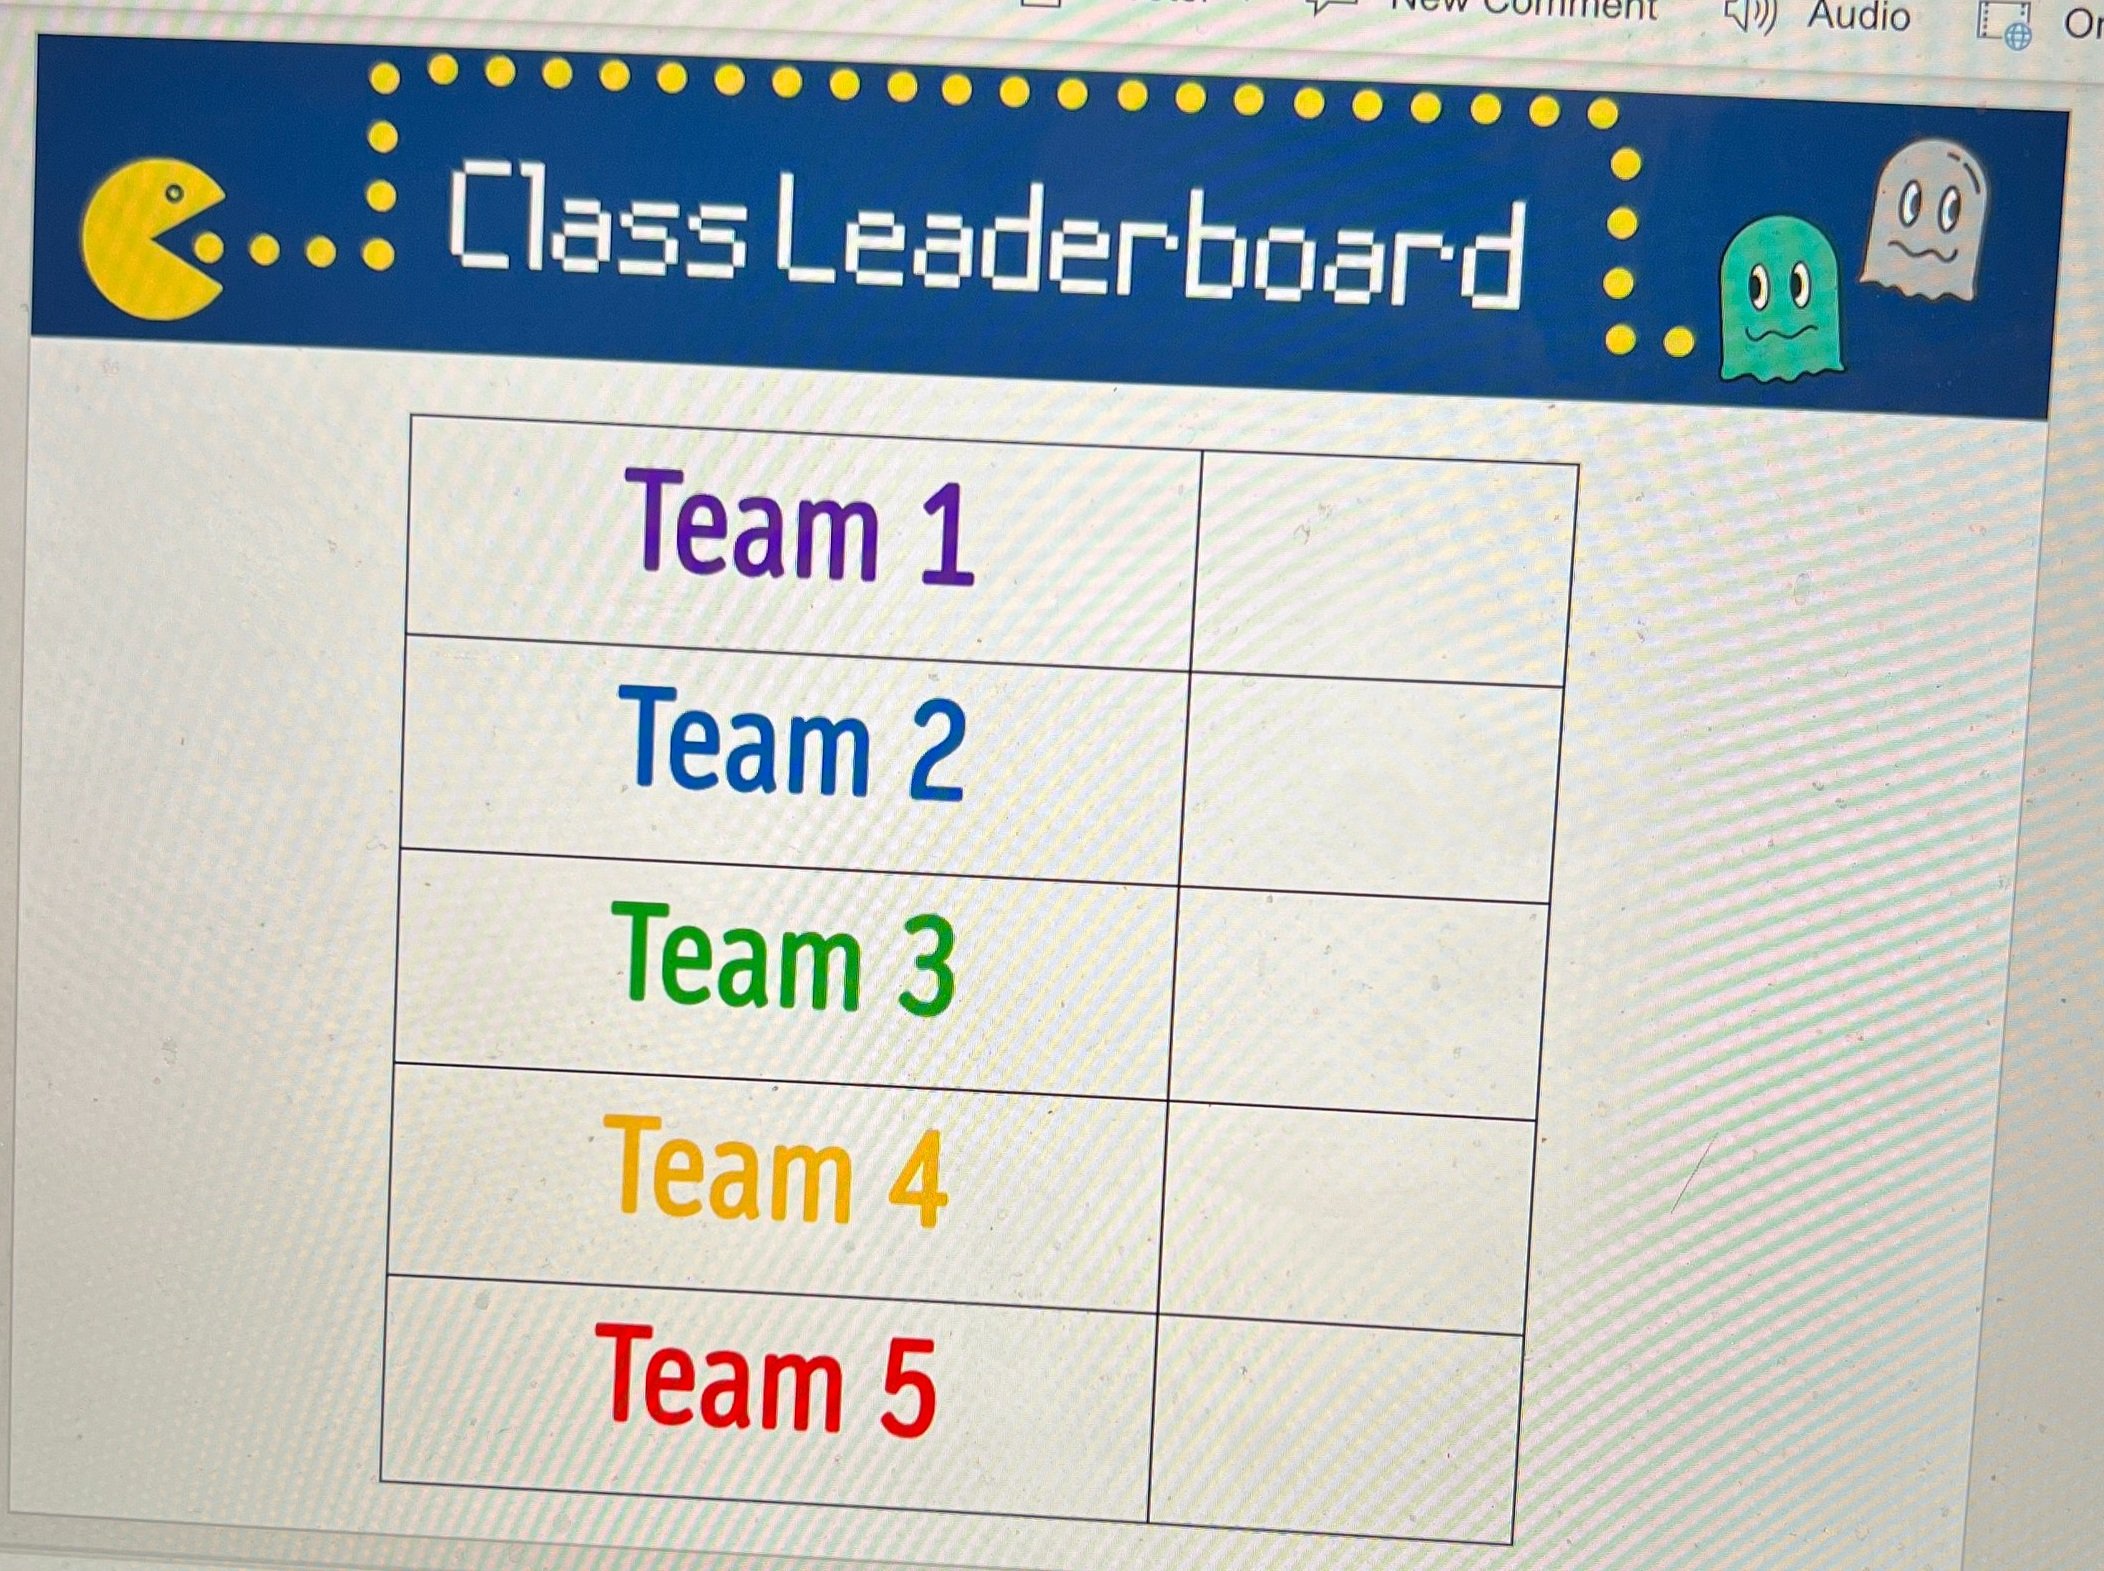
Teams accumulated points by keeping track of the dots they moved during the round. Each small dot on the game board was worth 1 point and the larger dots were worth 5 points. A team leaderboard was created online and points were tracked throughout the day.
Classroom Set Up
The beauty of this room transformation is that you can do as little or as much as you wish in regards to the set up. I started planning weeks in advance and did a little each week to avoid having a lot to do all at once. I also reached out to parents and asked for several items to be donated which cut down on what I had to gather myself.
Game board
The game board was mapped out using the already existing tiles on the classroom floor. The outline of the board was created using a simple grid in Word where we highlighted the layout until we got it to where we wanted it. Our grid turned out to be a 15 x 15 square.

When creating the board on the floor we used blue painters tape for easy removal. We used 2 inch tape for the outside lines and the innermost ghost box and then thinner, 1 inch tape for the rest of the maze. For the white dots we used a hand circle cutter to mass cut out all the smaller dots, and a larger die cut was used for the bigger dots. We spread 6 bigger dots around the game board to mimic the real game but you could have as many as you want.

We illuminated the game board with black lights. As mentioned in previous posts, black lights are one of our favorite supplies for room transformations.

Black lights can be used in so many different ways for different themes, and in this particular case they added the perfect amount of pop to make our game board glow. They gave the room that dark, arcade-like feeling which was just perfect! The link to our favorite set of lights is here.

Team Tables
Teams sat around the game board at tables that were decorated to look like ghosts. Each table simply had a colored tablecloth draped on it with large eyes taped to the front. We just hand drew these and then laminated them so they could be reused.

Score Keeping
Students earned points by answering questions correctly from their task cards. These task cards were laminated so students could write on them and circle the questions they had already completed. This, along with leaving tally marks on the page, helped them keep track of their points. Click on the image below for the FREE task card template we used.

Click on the image to download the free editable template!
At the end of each round, we recorded the total points earned by each team in a live leader board template. This was done in a document online because our classes rotate classes and it allowed each teacher to keep adding points to the teams as they rotated rooms for math/science and ELA.
Click on the image to download the FREE editable template!
Room Decoration
The exterior of the room was draped in black tablecloths. You can use the ones that are singly packaged, or if you are willing to take the time and save a little money, we also had rolls of it donated which we cut to the desired length. We hung them by attaching them to the ceiling with small binder clips which you should be able to get from any Target, Walmart, Dollar Store, or on Amazon. Attached to the tablecloths were just ghosts and PacMan images we printed out and laminated before cutting. These were the same images we used for the game board players.

Hanging from the ceiling were ghosts that we made using balloons and left over colored tablecloths. The eyes were made using circles in PowerPoint and they were just cut out and taped on top. We hung them using the same binder clips.

Other decorations were created by scratch including our PacMan sign which we just traced using our projectors, our giant PacMan posters that we put on our doors, and this adorable arcade sign that my teammate made for us all. If you are not the crafty kind, you can purchase various banners from Amazon like the one below which are pretty cool too!
Music
We used music from the game as a timers to signal the starting and stopping of each round as well as music for when the students entered in the morning. There are many options available for the ones I used are listed below:
Morning Entrance (2 min.)
Longer Medley (start and stop after 10 minutes)
As with any room transformation, it is important to always start with the standards you are looking to teach or review and then look to how you can integrate the fun theme into the learning. With this transformation, we used the day as a spiral review of standards we have covered all quarter before going on break.
-- Let us know if you’re using any of these ideas in your classroom! Be sure to follow us on social media (@TheMerrillsEDU everywhere) and tag us! 👓👗
For more tips, tricks and lesson ideas for making learning more interACTIVE, check out our books The InterACTIVE Class and Flipgrid in the InterACTIVE Class on Amazon!


How to Create a Virtual Classroom with Your Bitmoji in Buncee!
Virtual Classrooms are a great way for educators to deliver content to students in a fun and engaging way. Buncee makes creating one easy! You’ll learn how to create and share your virtual classroom to your students!
Virtual Classrooms are a great way for educators to deliver content to students in a fun and engaging way. Educators can add a Bitmoji into a virtual classroom to create an animated experience for students. You can even organize the images in your “classroom” so that they hyperlink out to external sources! Our preferred tool to create virtual classrooms is Buncee. You can sign up for an account by clicking here!
In this tutorial, you learn:
💥 HOW TO ADD A VIRTUAL CLASSROOM BACKGROUND
💥 HOW TO ADD IMAGES TO YOUR VIRTUAL CLASSROOM
💥 HOW TO ADD TEXT IN YOUR VIRTUAL CLASSROOM
💥 HOW TO ADD HYPERLINKS IN YOUR VIRTUAL CLASSROOM
💥 HOW TO SHARE YOUR VIRTUAL CLASSROOM
💥 HOW TO ADD A VIRTUAL CLASSROOM BACKGROUND 💥
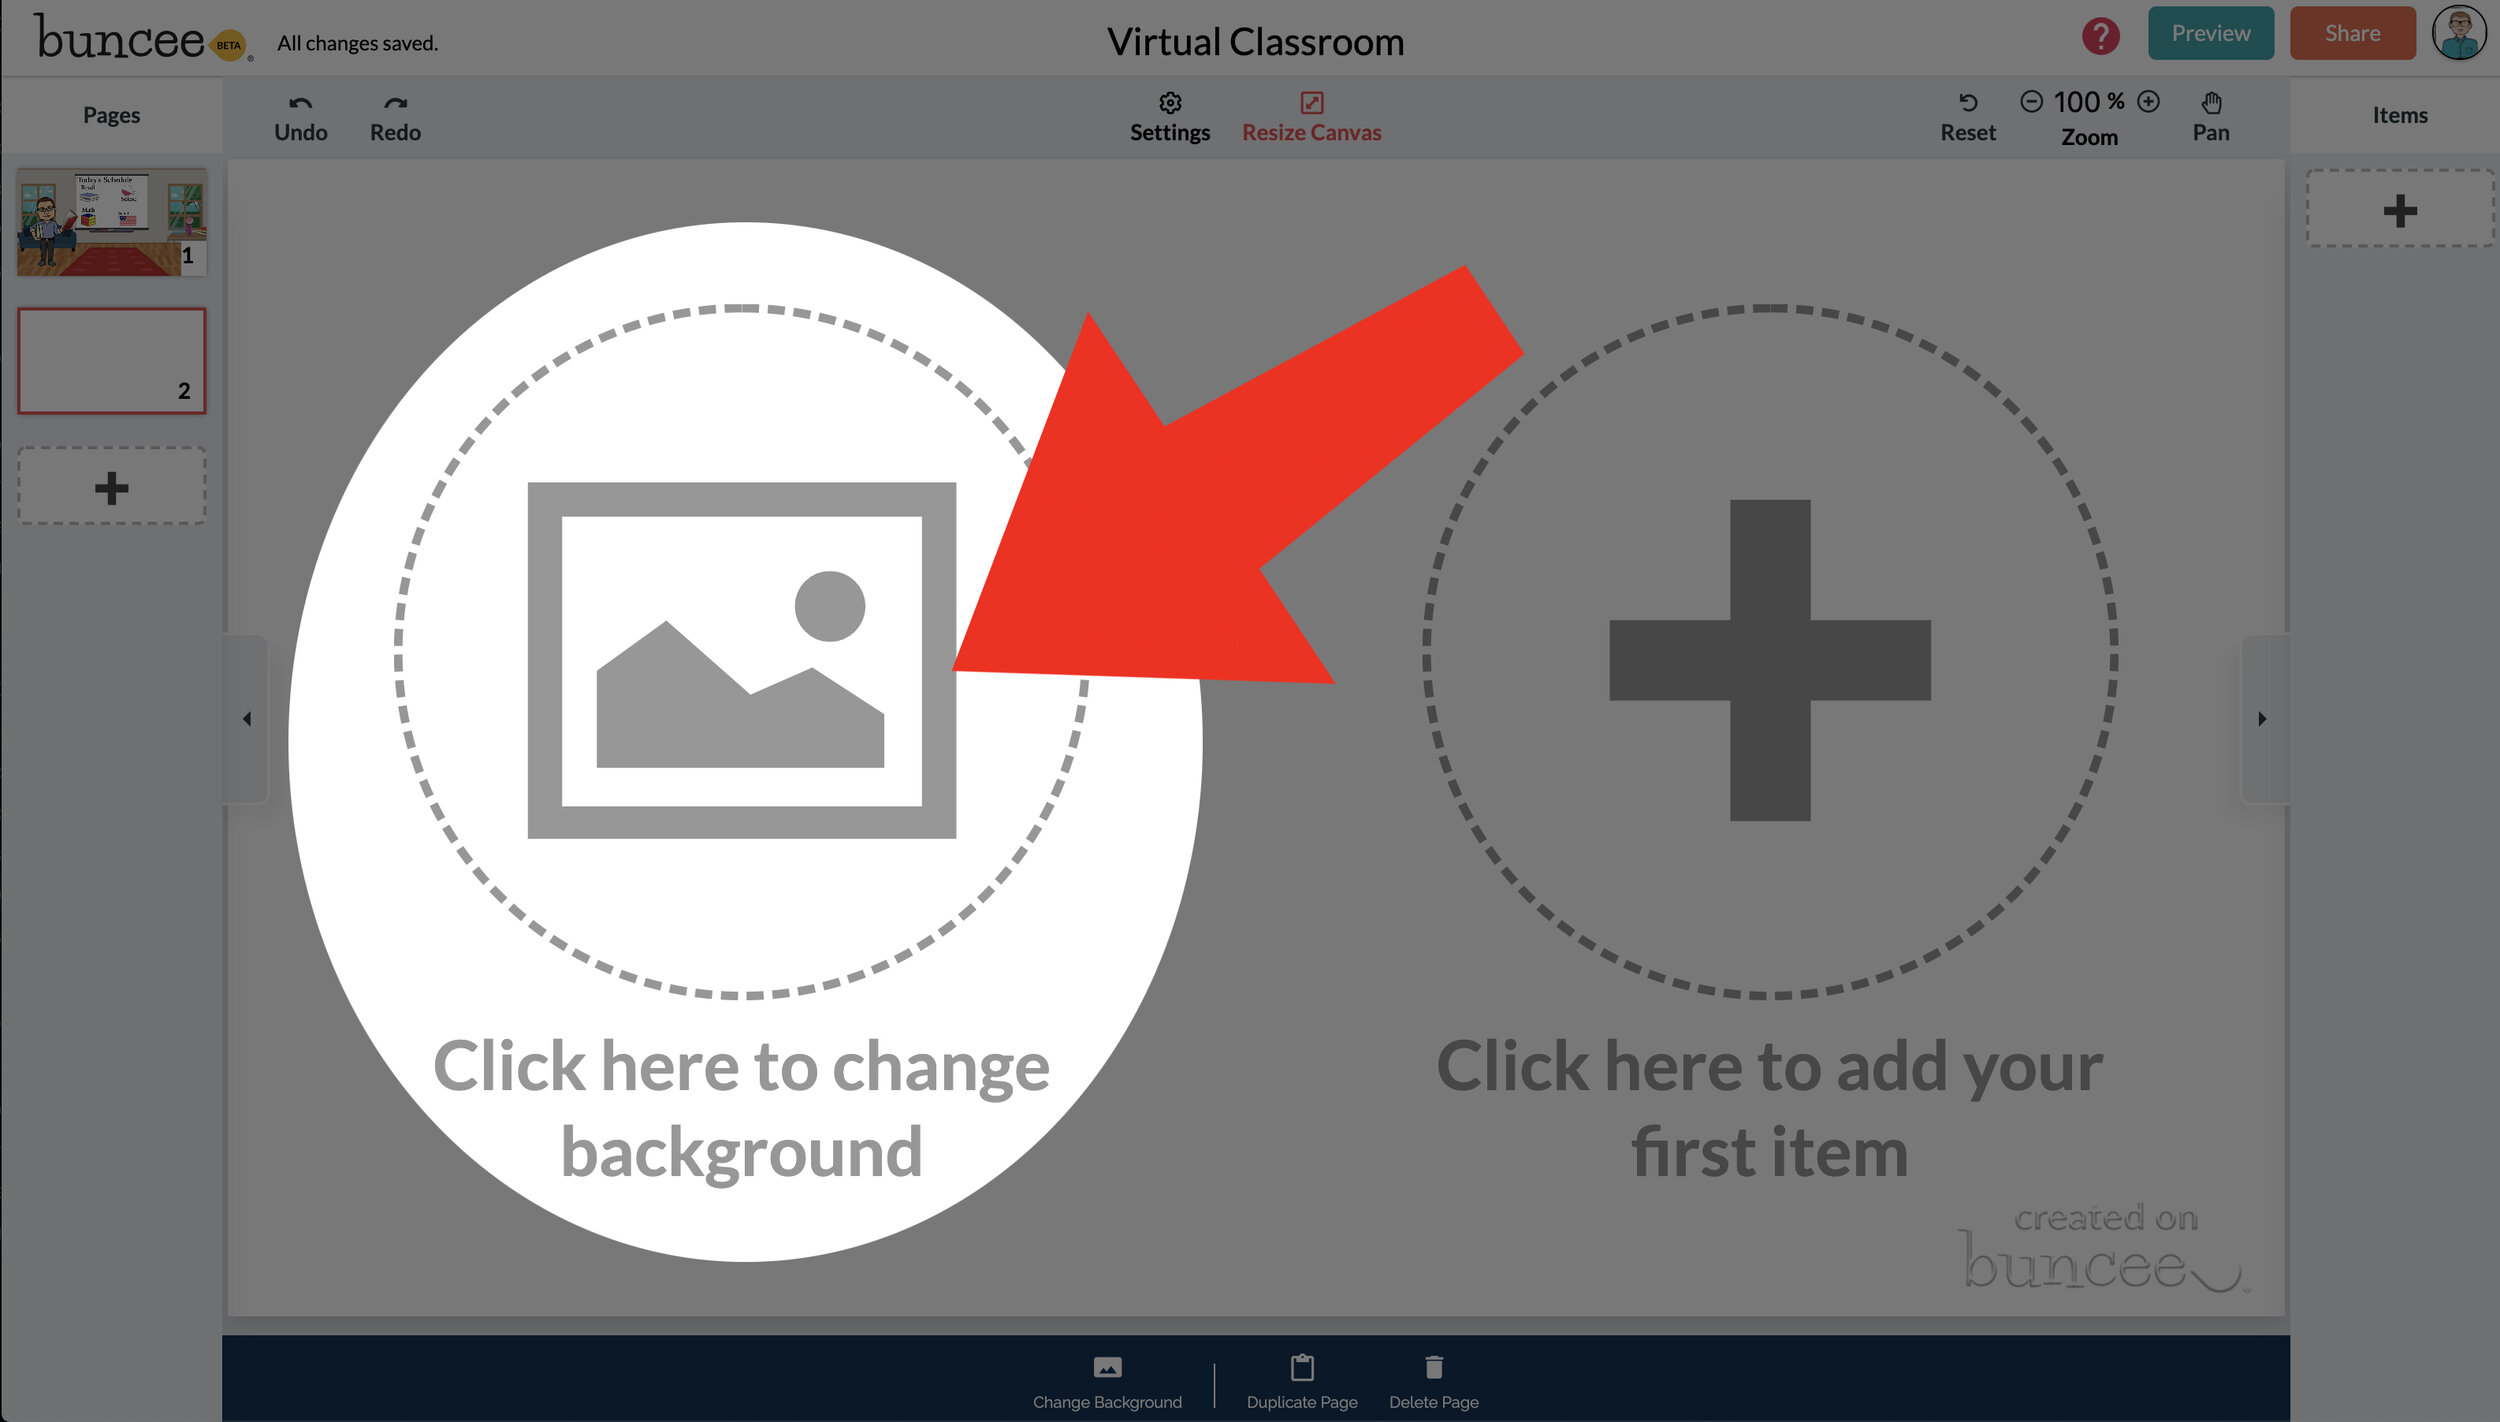

To get started, log into your Buncee account and create a new Buncee. Open the new Buncee and the first thing you’ll want to do is add a background. Follow these steps:
Tap the "click here to change background” option, then search for “class.”
Scroll through and find one that is right for you. There’s lots to choose from! You can find background images with smart boards, chalkboards, and more.
Once you find a background image that works for you, click it. Then, click the blue “add” button just to the right of the search bar. Now, your background is set and locked!
💥 HOW TO ADD IMAGES TO YOUR VIRTUAL CLASSROOM 💥
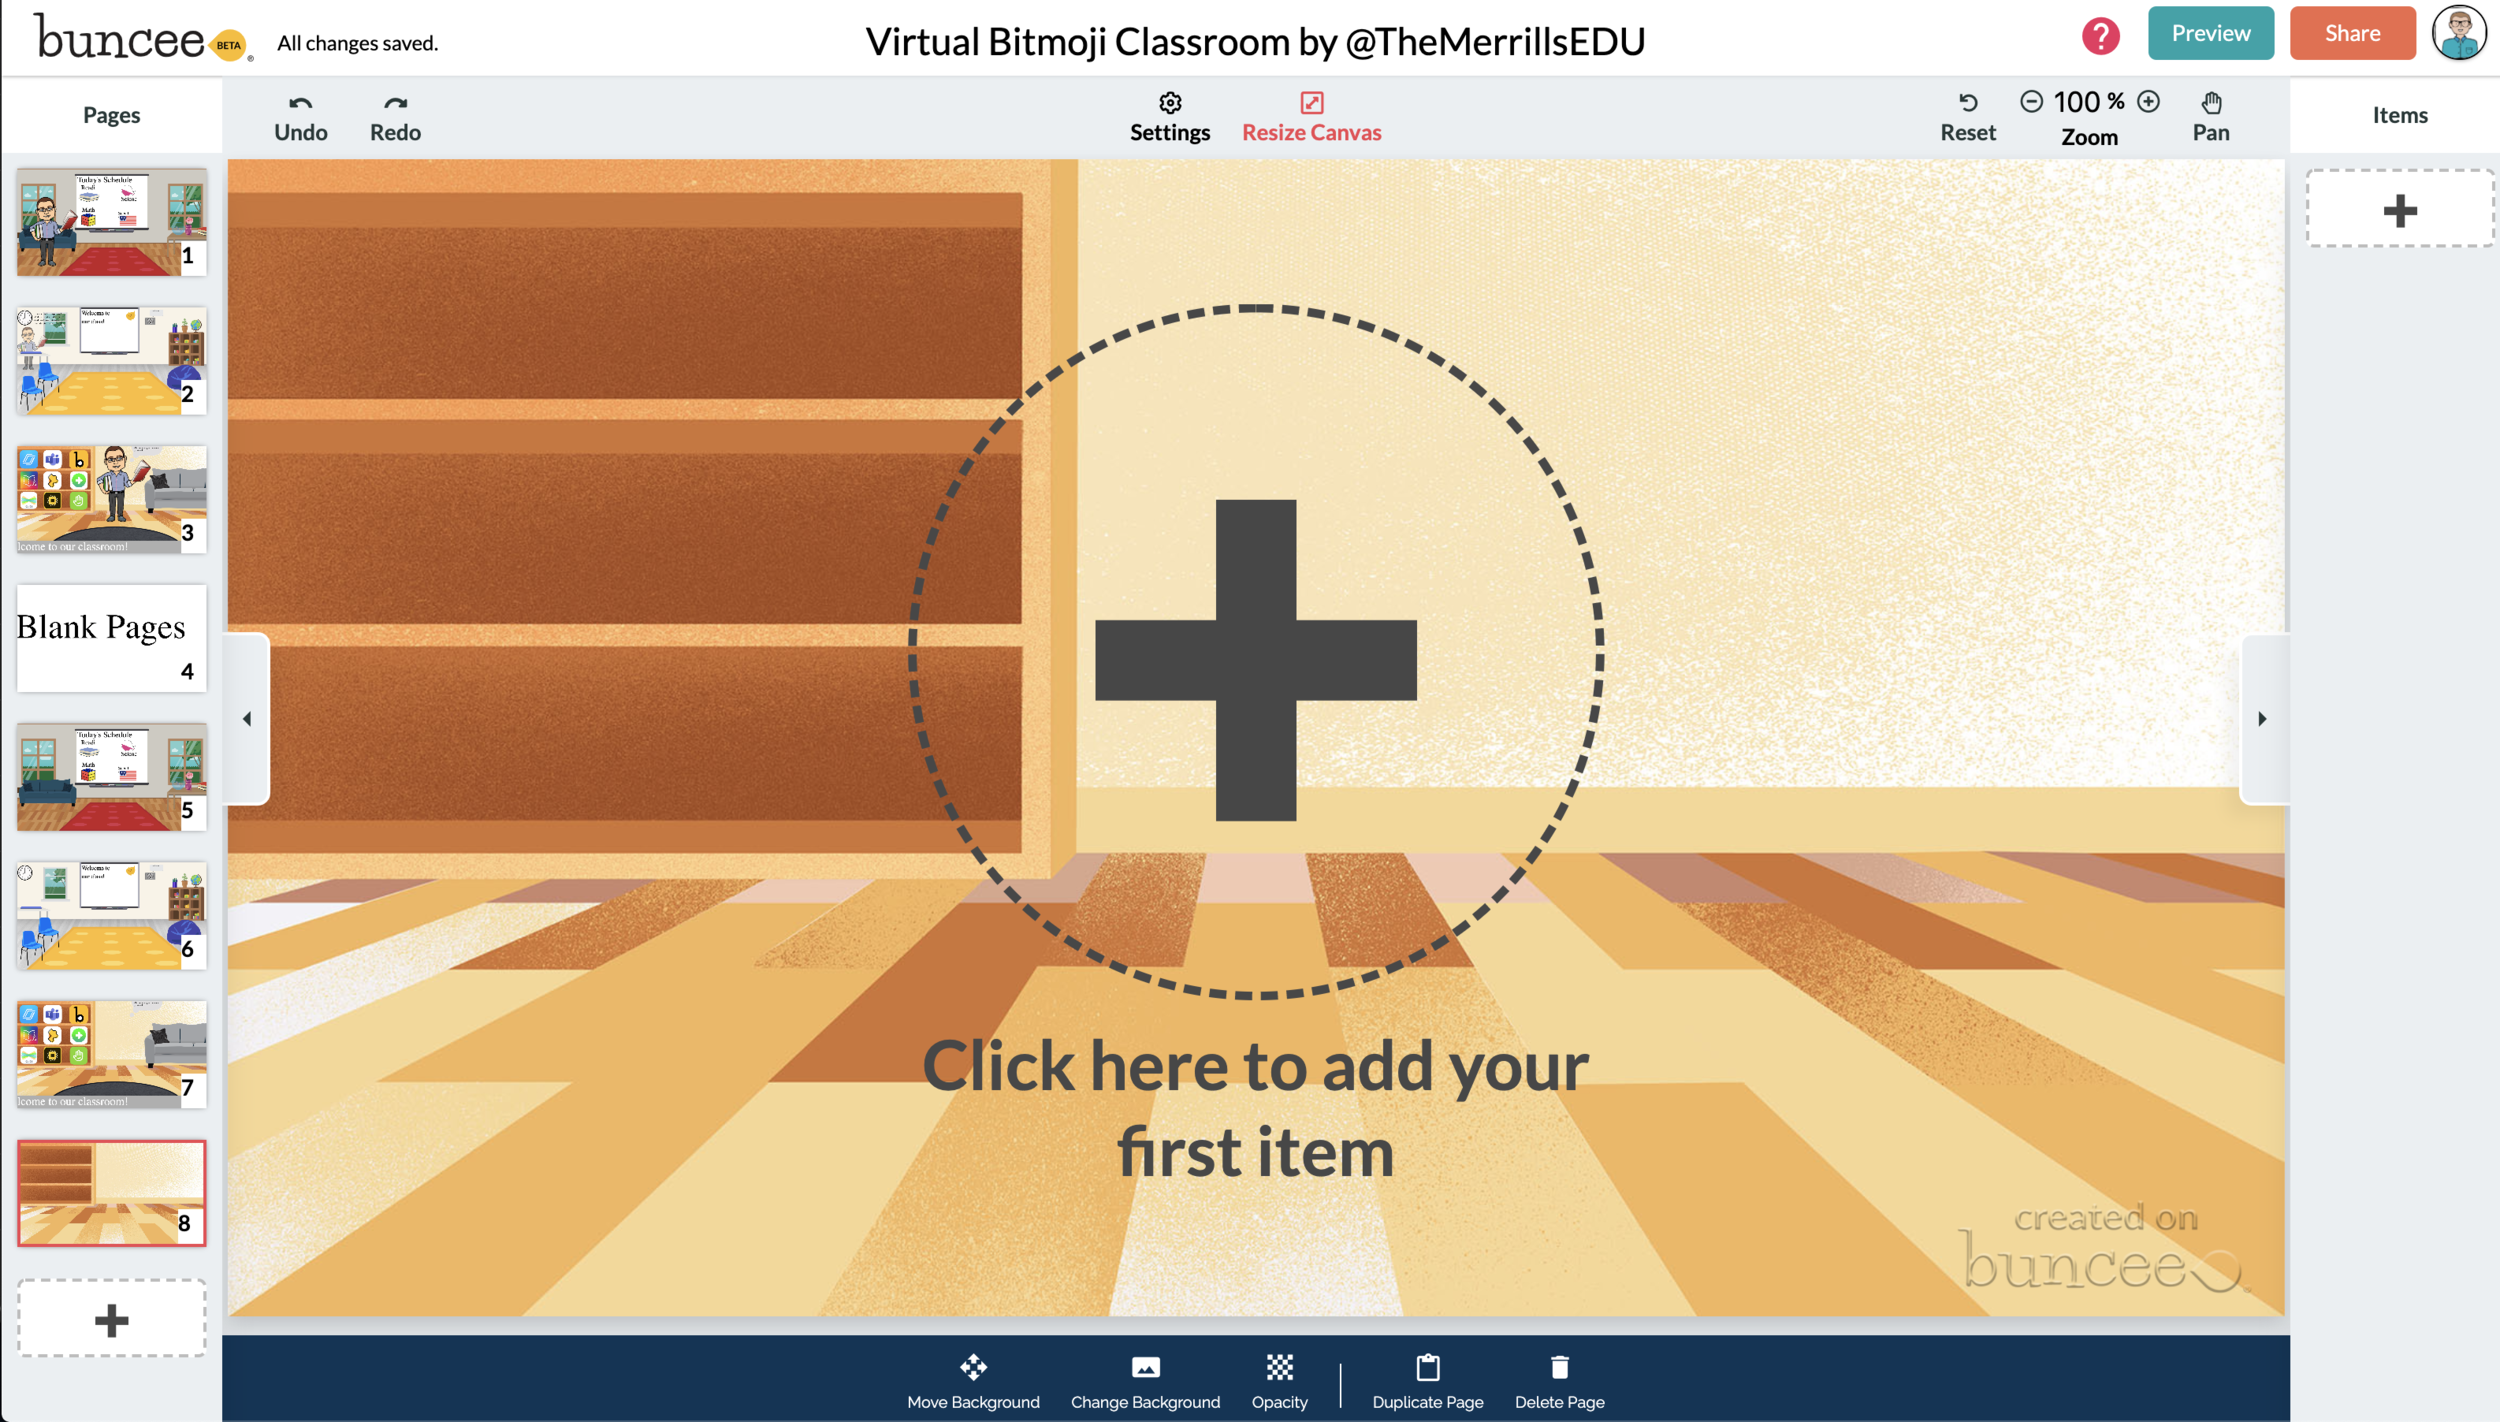

Now comes the fun part…Design your virtual classroom with some images! Click on the “+” sign to add an item. Use Buncee’s search tools to find items that you’d like to add to your classroom. Some fun things to search for include:
Smart Boards
Desks
Books
Clock
Computer
Bookshelf
Chair (you can even find a bean bag chair!)
Window
Couch
Speech (for a speech bubble)
If you’re having a hard time finding items to add, try typing “school” into the search bar. There are tons of item results that will pop up and you can use. You’ll find stickers, still images and moving gif images.
💥 HOW TO ADD TEXT TO YOUR VIRTUAL CLASSROOM 💥
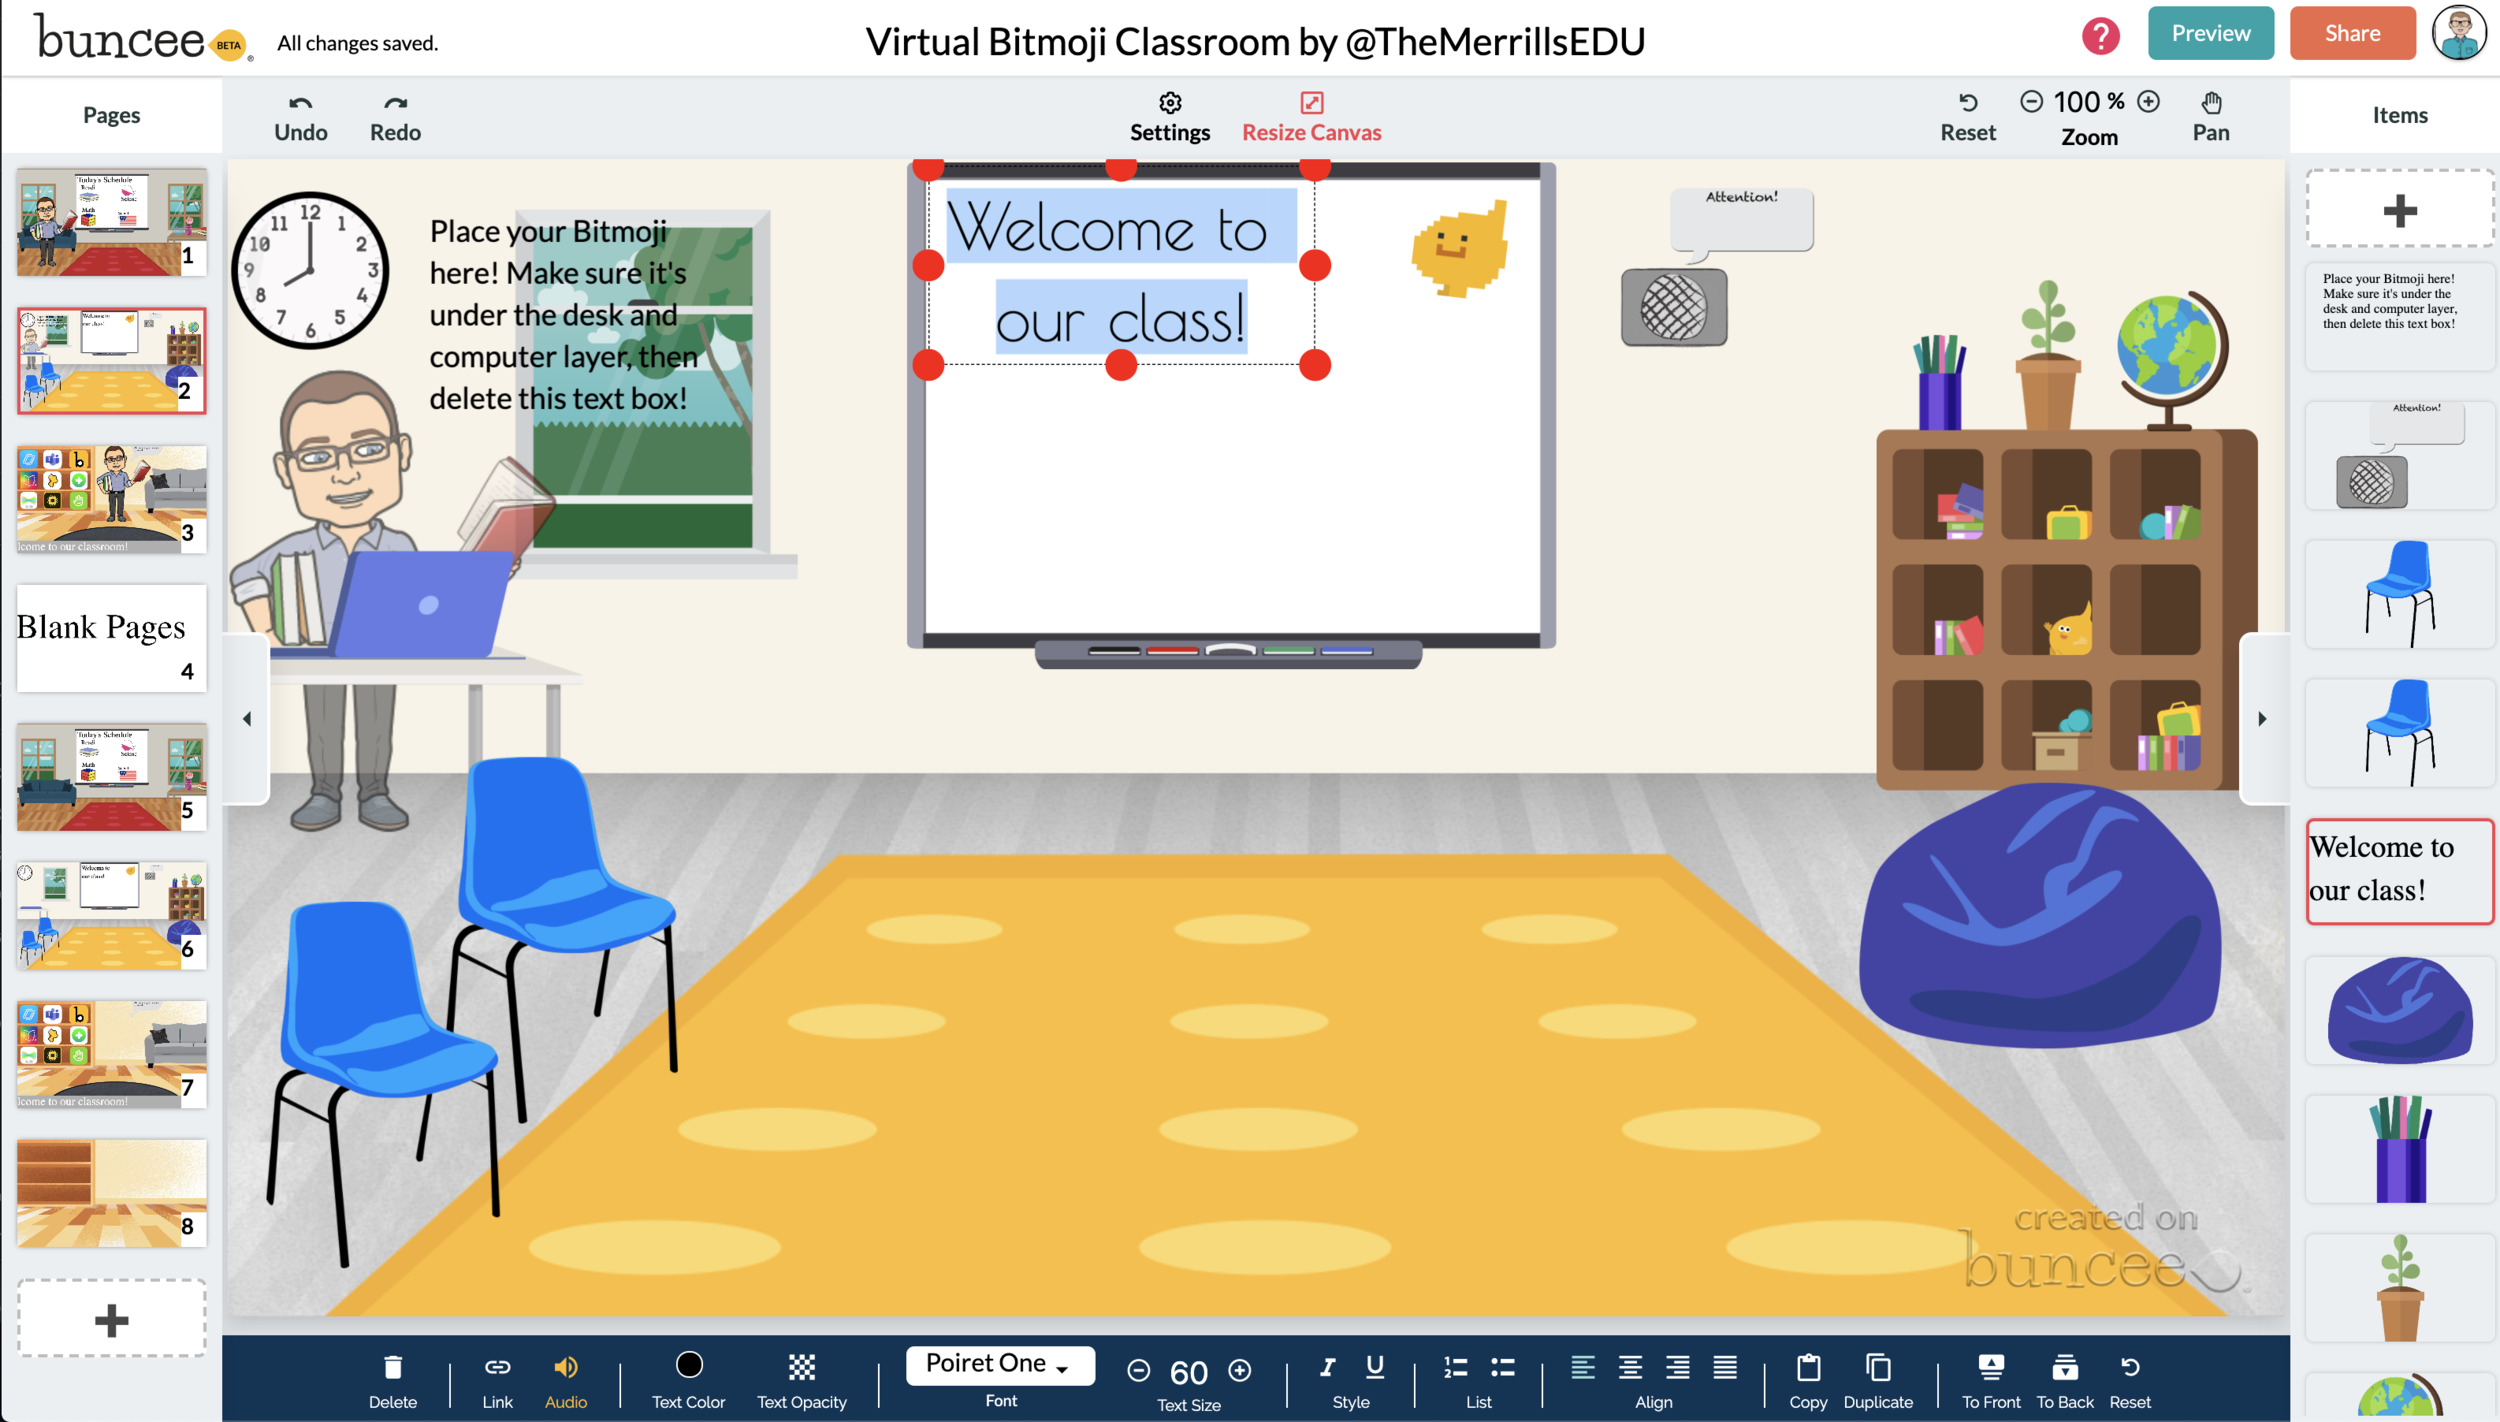
After you’ve added all the items to you virtual classroom, you may want to add text. You can add text on top of items, like your smart board. This is a great way to deliver instructions for your students. To add text in Buncee:
Click on the “+” sign
After the Buncee features window will opens, click on the “text” icon (located to the left of the window)
Double click the new item to enter your text.
Once you have your text ready, you can change the font or font size by clicking the font options located on the bottom of the screen.
Move and place your text accordingly.

💥 HOW TO ADD HYPERLINKS IN YOUR VIRTUAL CLASSROOM 💥


After you have your items and text in place, now it’s time to start hyperlinking. When you hyperlink, your students will be able to click on the items (or text) that you have entered and it will take them to an external source. For example, if you use the Buncee logo, you can hyperlink it so that when it’s clicked, it will take you right to the Buncee login screen. Hyperlinks can be added to any item or text that you have added on Buncee. To add a hyperlink:
Click on the item or text that you want to hyperlink
Click on the “link” option on the bottom of the Buncee features toolbar
Enter the URL into the box
Press enter to “update” the item
💥 HOW TO SHARE YOUR VIRTUAL CLASSROOM 💥
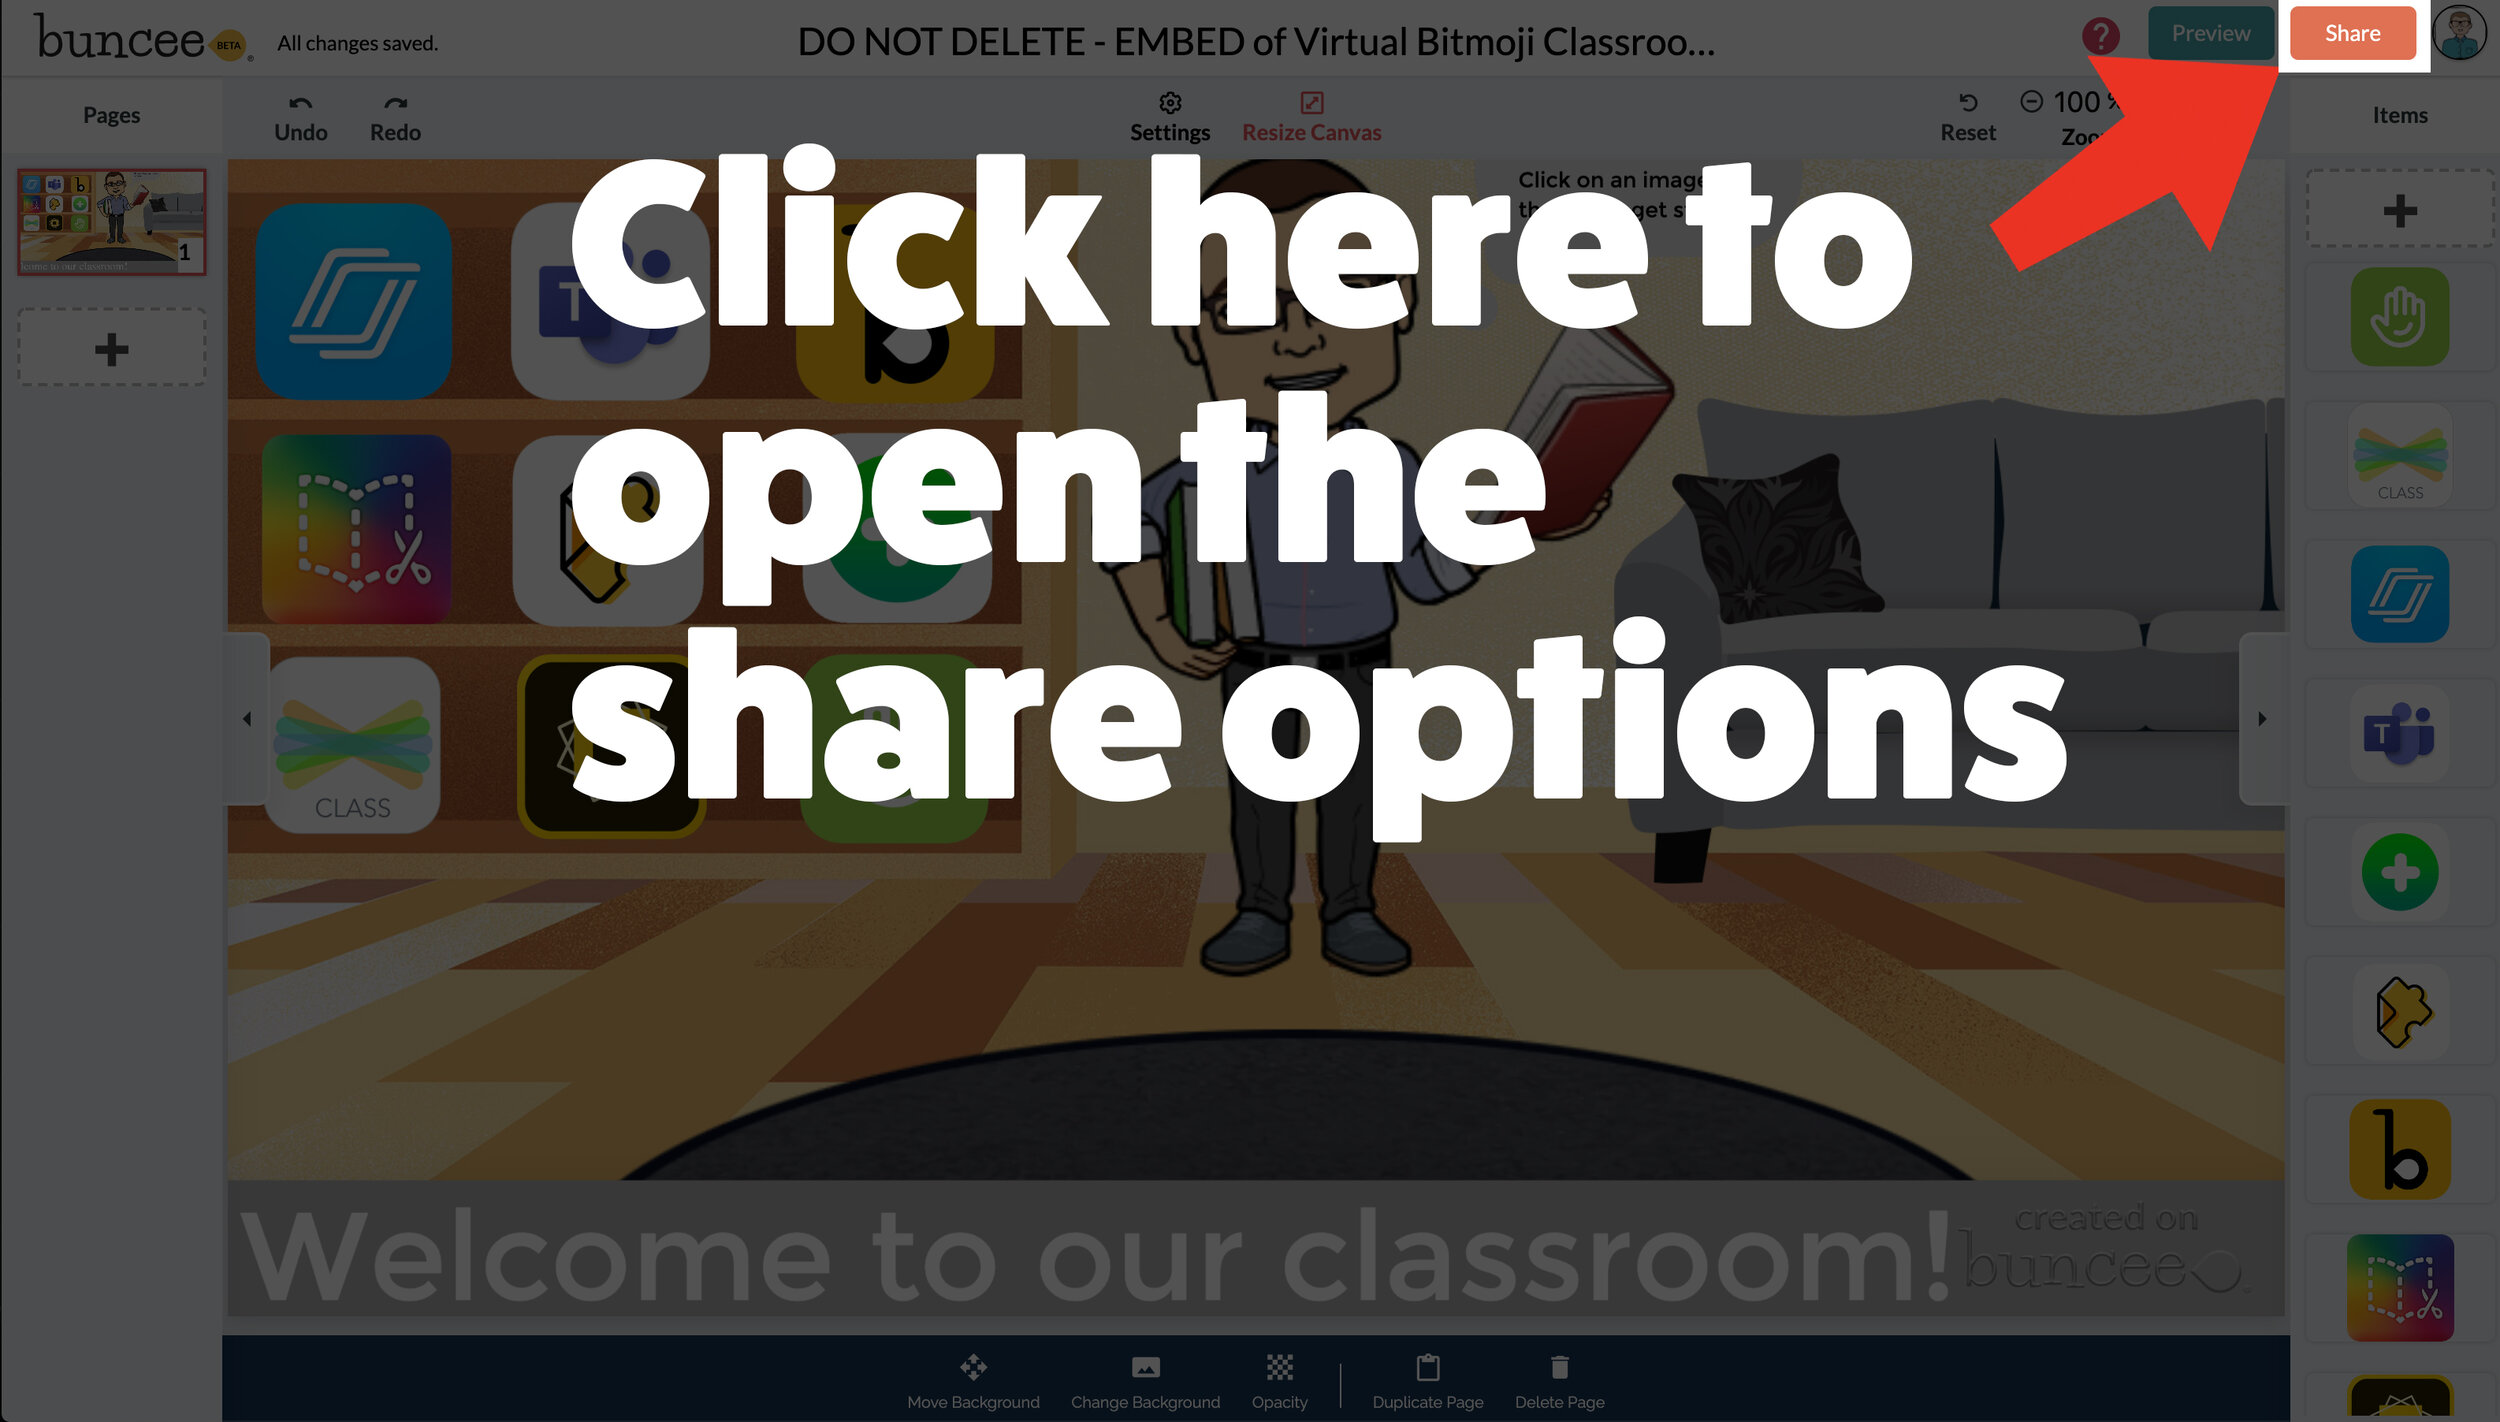

Now that your virtual classroom is ready, it’s time to share it with your students! There are several options to share in Buncee:
Share the Buncee slide deck link
Embed the Buncee slide deck into your LMS (Canvas, Schoology, Microsoft Teams, Google Classroom)
To share the Buncee slide deck link:
Click the red “Share” button
A new window will open. Click “Code” (second option from the top)
Next to the link box, click “Copy.” This will copy the URL to your Buncee.
Share the URL with your students
To embed the Buncee slide deck:
Click the red “Share” button
A new window will open. Click “Code” (second option from the top)
Next to the Embed Code box, click “Copy.” This will copy the embed code to your Buncee. (Tip: you can also click on “Show Options” to change the size of the embed)
Open your LMS (Canvas, Schoology, or anywhere you can embed) and click on the embed option. Paste the embed code from your Buncee, then hit save. Your Buncee will now be embedded into your page.
To share to Microsoft Teams, Google Classroom, or other social outlets:
Click the red “Share” button
A new window will open. Click “Social” (sixth option from the top)
Select the app that you are trying to share to, then follow the instructions

💥 FREE Templates! 💥
We’ve created several templates that you can download, copy, and edit. You can scroll through the different pages by clicking the arrow on the right. If you would like to download these, click here or the image below.

To view the templates, check out the embed of them below!
💥 YouTube Tutorial! 💥
Still not sure how it all works? We’ve got you covered! Check out this walkthrough!
For more #interACTIVE lesson ideas using Flipgrid, check out our book The InterACTIVE Class on Amazon!

