


10 Ways for Teachers to Use Canva in the Classroom
Did you know that Canva for Education is 100% free for educators and students? It is! But how does one of today’s best design programs translate into your classroom? Here are our top 10 favorite ways for teachers to use Canva!

Canva for Education isn’t just for students! Even teachers can get in on the fun! Create your own designs from scratch, or choose from our library of over 60,000 high quality, educational templates. The best part of all, it’s absolutely FREE! So, how does this translate into the classroom? Here are 10 different ways that teachers can use Canva in the classroom.
(Click on any image to jump to that section. This is NOT a paid post.)


Creating Email Signatures in Canva
An email signature is an important element of your communication. It shows your personality, introduces the person behind emails, and provides necessary contact information. Designing one in Canva is easy! Just search “Email signatures” in the search box to find plenty of templates to choose from. Looking for something a but more “teacher” and little less “business?” Check out our template! You can download the template by clicking here or the image below!


Creating Headers in Canva
Custom created headers are more important than just looks. Creating headers that are directly associated with your class are easier for students to identify, which can lead them to your content quicker. In Joe’s first grade class, he creates customer headers for everything. This tells his young learners that they’re the right place. Designing your own isn’t difficult and with Canva, it can be done quickly. Here’s an image to help save you some time - all the header dimensions you’ll need! Check out our pre-designed templates for Flipgrid, Wakelet, Google Classroom, Canva and Microsoft Teams.

A good practice here is to make sure that your images match across the different platforms. For example, if you’re using Wakelet, Flipgrid and Teams - it’s recommended that your class header / theme and picture are all the same. This allows students to quickly identify where they are supposed to be. To save some time, we’ve created and collected some of our favorites in the template below. Click here or the image below to download them for yourself!

Once you’ve decided on an image, you can resize it to fit the platform you’re designing for. Just use our header dimensions guide (pictured above) and resize the image appropriately. If you’re not sure how to resize the image in Canva, just follow the steps below!


Creating Newsletters in Canva
Communication with your students’ families is an important key to providing success for your students. Canva’s newsletter templates for school publications make designing easy - even while on the go. Teachers can build and maintain their newsletters on a desktop or mobile device. These templates can be printed and then copied, or simply send out the share link to your families to save paper. Updating your families has never been easier! Check out some newsletter templates by searching for “School newsletter,” or just “newsletter.” Check out one of our favorite templates below! Click here or the image below to download it and edit it for yourself!


Student Awards on Canva
Are you looking to motivate your students? Generic awards can have positive effects, but what if you could design target specific achievements that can be printed and shared - either on a computer or mobile device? With Canva, you can! These can be printed or shared digitally. Stop using outdated programs - there’s an easier way! Check out the templates to choose from. Just search for “Student Award” in the search bar.

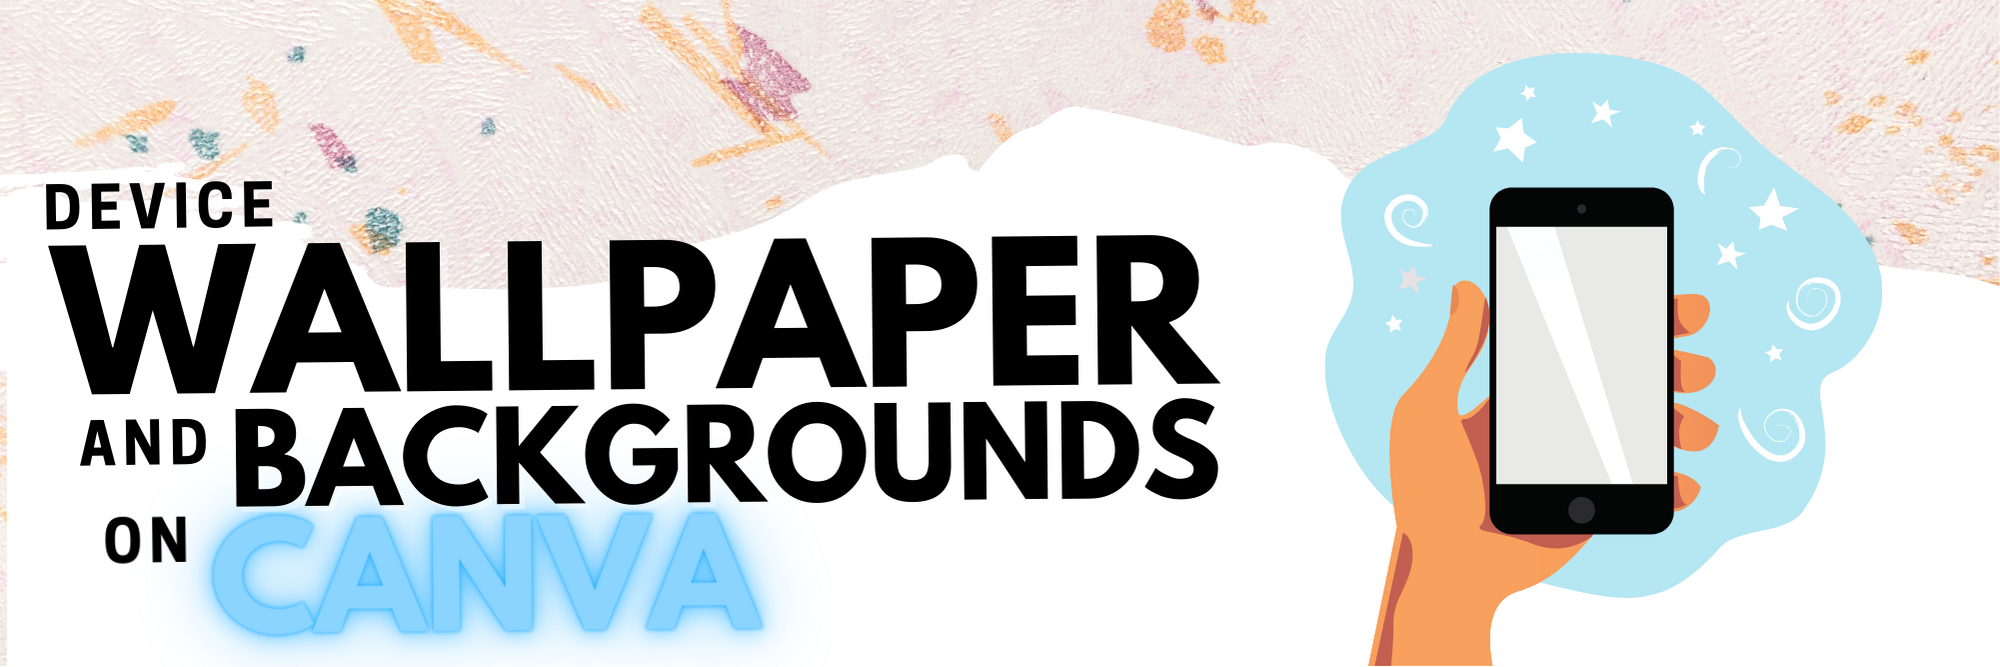
Device Wallpaper and Backgrounds on Canva
If you’re in a situation where your students use shared devices (or perhaps you just want to be able to tell the devices apart from one another), you can design wallpaper and backgrounds on Canva. This will help keep your tech organized and easy to maintain. No more, “Did I put that app on iPad #7?” Wait…Which one is #7?” 😂
There are different sizes depending on your device. Check out our image below to guarantee your creating the appropriate size for your devices.


Generally speaking, when designing it’s always better to start with an image that’s too big. Trying to stretch an image that’s too small can cause it to pixelate. So, be careful with your sizes. If you’re looking for some inspiration, or just something easy - we’ve got you covered! Check out our templates! Click here or the image to download them!

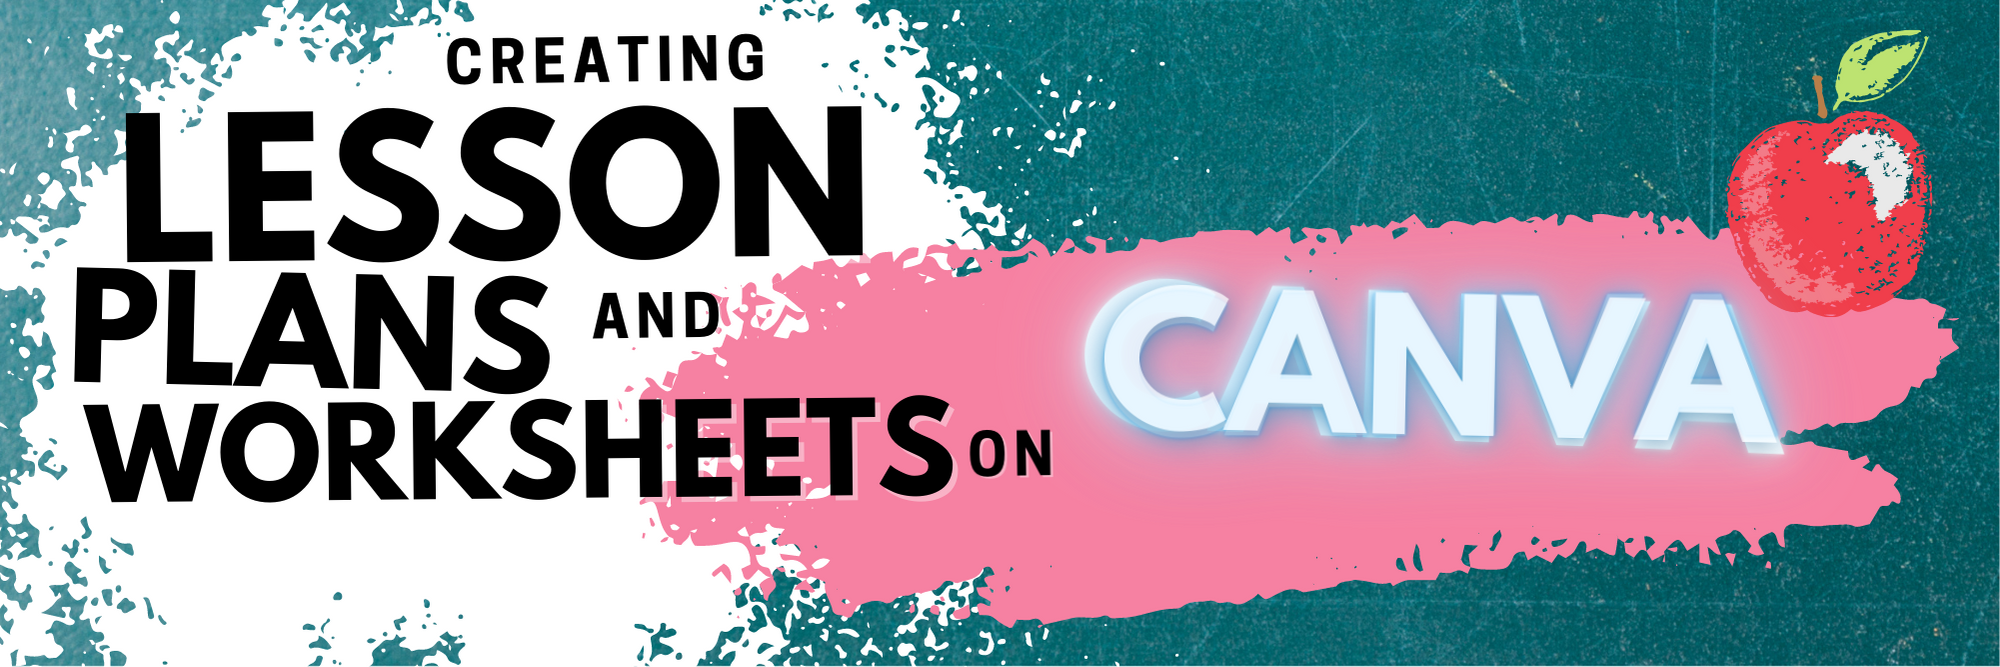
Creating Lesson Plans, Worksheets
and Resources on Canva
Using Canva to create lesson plans is definitely beneficial. For one, easy access to files provides quick and efficient editing. So, when a lesson doesn’t go as planned and you need to re-evaluate the next day’s plans, it can be done quickly (and from any device). We also love the idea of being able to share and collaborate on your plans with your teammates. Click on the image to the above to download some of our favorite templates. These templates can be duplicated for the day, or even the week.

Canva is also a great place to create your own worksheets and resources. The advantage here is that you can create target specific content that will deliberately meet the needs of your students - something that you cannot accomplish easily from downloading from other sites. Another advantage is that you can assign your resources to your students directly within Canva - so you can avoid the copier and save the environment! Check out a template we designed and a few others that we found below. Click here or the image above to get started!

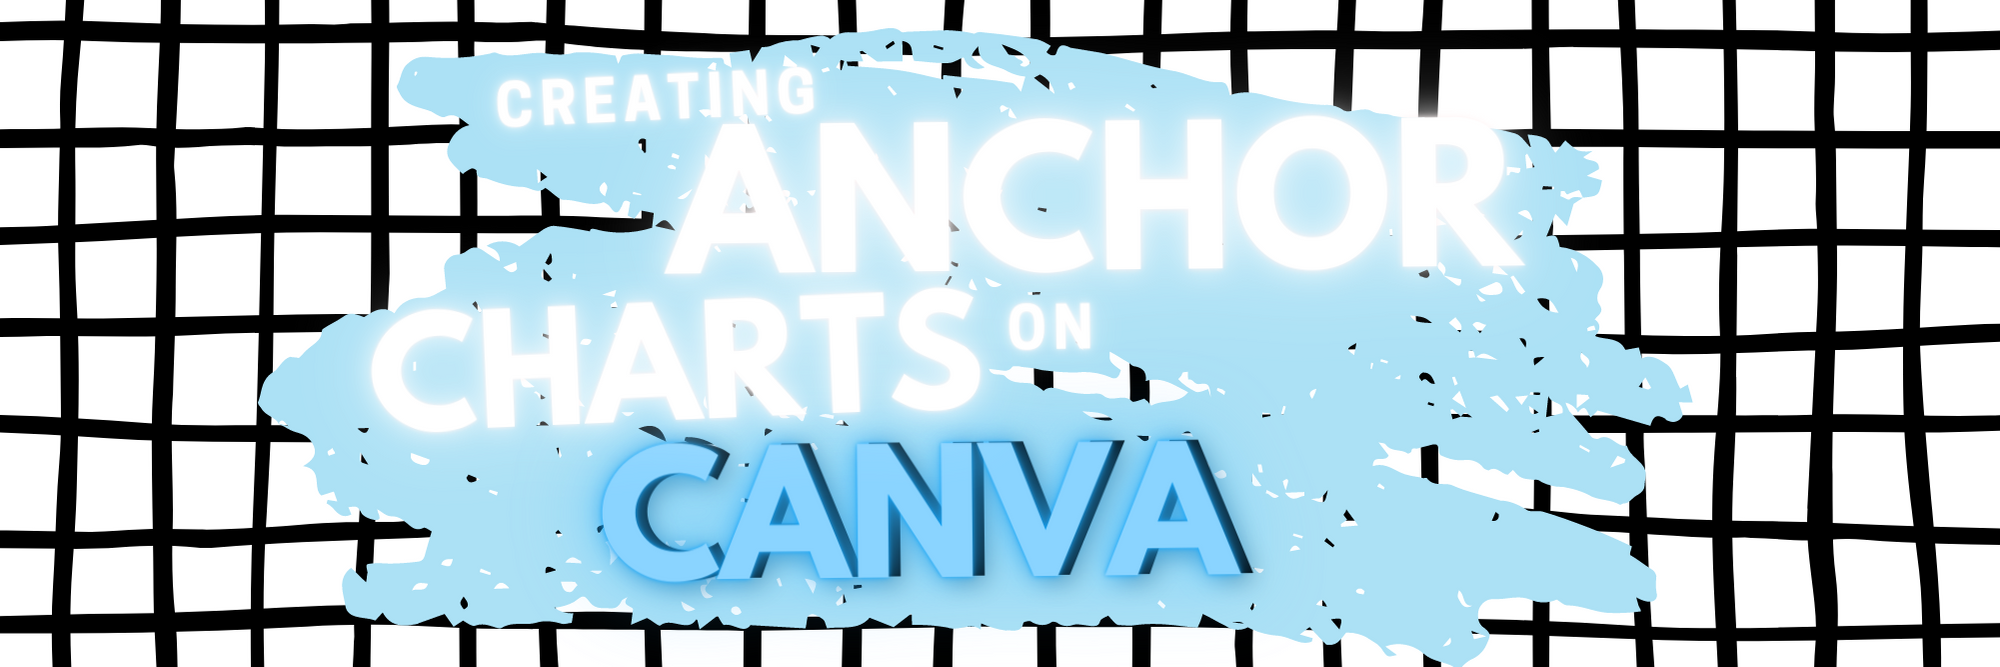
Creating Anchor Charts on Canva
The whole point of an Anchor Chart is to provide an artifact of learning. They contain students' and teachers' thoughts, ideas and processes pertaining to the lesson. But often times, after the lesson concludes, the anchor charts fade into the distance. Creating your anchor charts on Canva serves a valuable purpose. For example, you will always have access to those files - meaning you can open them back up at any time. These can be shared with your students, but most importantly - collaborated on! You can start with a template, share it to the class and then have everyone working on the file at the same time. Now, your students can participate in the actual creation of the anchor chart. With a few clicks, this file can be exported / downloaded and uploaded into any LMS or even a Flipgrid video. Check out our example below and click here or the image to download it for yourself!


Yard Signs Created and Printed on Canva
If you’re interested in looking for a new way to build your classroom environment, we love this idea: Yard signs! Create a yard sign that your students can take home for a week (or two) at a time and then bring back to give to the next person. Maybe you’ve got a student of the week or terrific kid that the entire neighborhood deserves to know about? Or perhaps it’s for a broader school-wide effort. Just design the sign by searching for “yard sign” on Canva. Design your sign and then send it to Canva to print! To print from Canva, follow the steps below.

The $30 fee includes a yard sign. Shipping is free unless you need the sign in a hurry. In which case, you can pay for expedited shipping. We’ve created two signs that you can download and edit as you see fit. Click here or the image below to get started!


Digital Classroom Badges on Canva

This is a great way to kick off the new school year or returning from a break. Educators can create digital classroom badges that can be designed for any types of rewards that you feel as though should be given out throughout the year. Some good examples include: “Tech Trainer or “CANva” (students who can teach others about Canva). Check out our template by clicking here or the image! Looking for some easy inspiration? We’ve got you covered! You can download our template for free! Click here or the image above to download it!

Embed Anything Created in Canva
A little known secret is that anything that you create in Canva can be embedded into your LMS or classroom websites. For example, if you create a resource in Canva, you can then embed it onto your Canvas or Schoology class page. To do so, follow the steps below:
Click the three dots on the top right side of the screen
In the search box, type “embed”
Click on Embed when it pops up, then click the purple “Embed” button
Copy the code and paste it into your destination (rich media editor)


BONUS: Canva Presentation Hacks
If you’re using Canva as a presentation tool, these hacks will come in handy! Note, you must be in presentation mode for these to work. To enter presentation mode, click the three dots on the top right, then click “Present.” Now for the fun:
Letter C for confetti rain
Letter D for a drumroll animation
Letter O for floating bubbles
Letter Q for quiet
Letter B to blur the current slide
Any number for a timer (1 for one minute, 2 for two minutes, etc.)
You can also press Shift + / or ? on your keyboard to open the magic effects menu.
To exit presentation mode, press ESC on your keyboard.
-- Let us know if you’re using any of these ideas in your classroom! Be sure to follow us on social media (@TheMerrillsEDU everywhere) and tag us! 👓👗
For more tips, tricks and lesson ideas for making learning more interACTIVE, check out our books The InterACTIVE Class and Flipgrid in the InterACTIVE Class on Amazon!


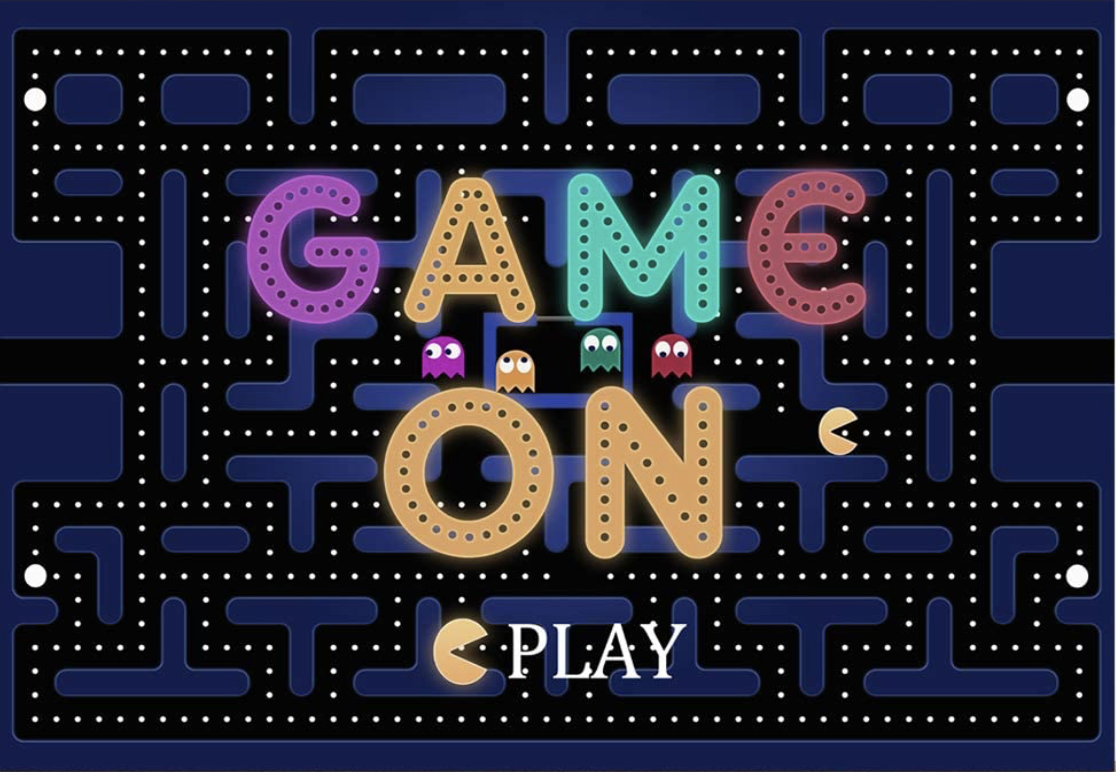
PacMan Classroom Transformation
The particular transformation is one that has been on the back burner so to speak for years and it was initially inspired by a photo found on Pinterest. With some intentional planning, this simple photo led to a day full of learning that could easily be integrated into any grade level or subject area.

Transformations are inherently interACTIVE. The act of transforming one thing into another is a great way to hook students’ attention and to engage them in the lesson at hand. Generally, we transform our classrooms towards the end of a unit or lesson of study, allowing students a fun way to demonstrate their recent learning.
The particular transformation is one that has been on the back burner so to speak for years and it was initially inspired by a photo found on Pinterest. With some intentional planning, this simple photo led to a day full of learning that could easily be integrated into any grade level or subject area. Here’s how to get started:
(click on any subheading to jump to that section)
Game Explanation
This room transformation obviously centered around the game board placed in the center of the room. Students would be divided into teams and would sit around the outside of the game board. These teams were either PacMan or Ghosts and were identified with large laminated “game pieces”. Task cards were created for each round of the game, which had a set of leveled questions on it—1 dot, 2 dots and 3 dots. The more dots the question was worth the harder it would be to solve. Students could choose which questions they answered in what order which differentiated the activity for various levels of learners or classes.
Each round was structured as follows:
1 member from each team took a spot on the game board holding their laminated game piece. The other teammates stayed at the table to answer questions.
When the round started, teammates at the table answered questions from the task card. They worked together to solve and wrote out their answers on a small whiteboard. When they were ready to have the answer checked, they simply raised their hand.
The teacher’s job is to roam the room checking answers from the teams as needed. If the team answers a questions correctly, they signal to their teammate on the game board how many spaces they can move. (The spaces moved correlate to the level of question answered)
The teacher decides the length of each round (ours were about 10 minutes) and then can repeat rounds until every student gets a chance to be the live game board piece. (ex. If you have five members on a teams you would have 5 rounds total.)
Teams accumulated points by keeping track of the dots they moved during the round. Each small dot on the game board was worth 1 point and the larger dots were worth 5 points. A team leaderboard was created online and points were tracked throughout the day.
Classroom Set Up
The beauty of this room transformation is that you can do as little or as much as you wish in regards to the set up. I started planning weeks in advance and did a little each week to avoid having a lot to do all at once. I also reached out to parents and asked for several items to be donated which cut down on what I had to gather myself.
Game board
The game board was mapped out using the already existing tiles on the classroom floor. The outline of the board was created using a simple grid in Word where we highlighted the layout until we got it to where we wanted it. Our grid turned out to be a 15 x 15 square.

When creating the board on the floor we used blue painters tape for easy removal. We used 2 inch tape for the outside lines and the innermost ghost box and then thinner, 1 inch tape for the rest of the maze. For the white dots we used a hand circle cutter to mass cut out all the smaller dots, and a larger die cut was used for the bigger dots. We spread 6 bigger dots around the game board to mimic the real game but you could have as many as you want.

We illuminated the game board with black lights. As mentioned in previous posts, black lights are one of our favorite supplies for room transformations.

Black lights can be used in so many different ways for different themes, and in this particular case they added the perfect amount of pop to make our game board glow. They gave the room that dark, arcade-like feeling which was just perfect! The link to our favorite set of lights is here.

Team Tables
Teams sat around the game board at tables that were decorated to look like ghosts. Each table simply had a colored tablecloth draped on it with large eyes taped to the front. We just hand drew these and then laminated them so they could be reused.

Score Keeping
Students earned points by answering questions correctly from their task cards. These task cards were laminated so students could write on them and circle the questions they had already completed. This, along with leaving tally marks on the page, helped them keep track of their points. Click on the image below for the FREE task card template we used.

Click on the image to download the free editable template!
At the end of each round, we recorded the total points earned by each team in a live leader board template. This was done in a document online because our classes rotate classes and it allowed each teacher to keep adding points to the teams as they rotated rooms for math/science and ELA.
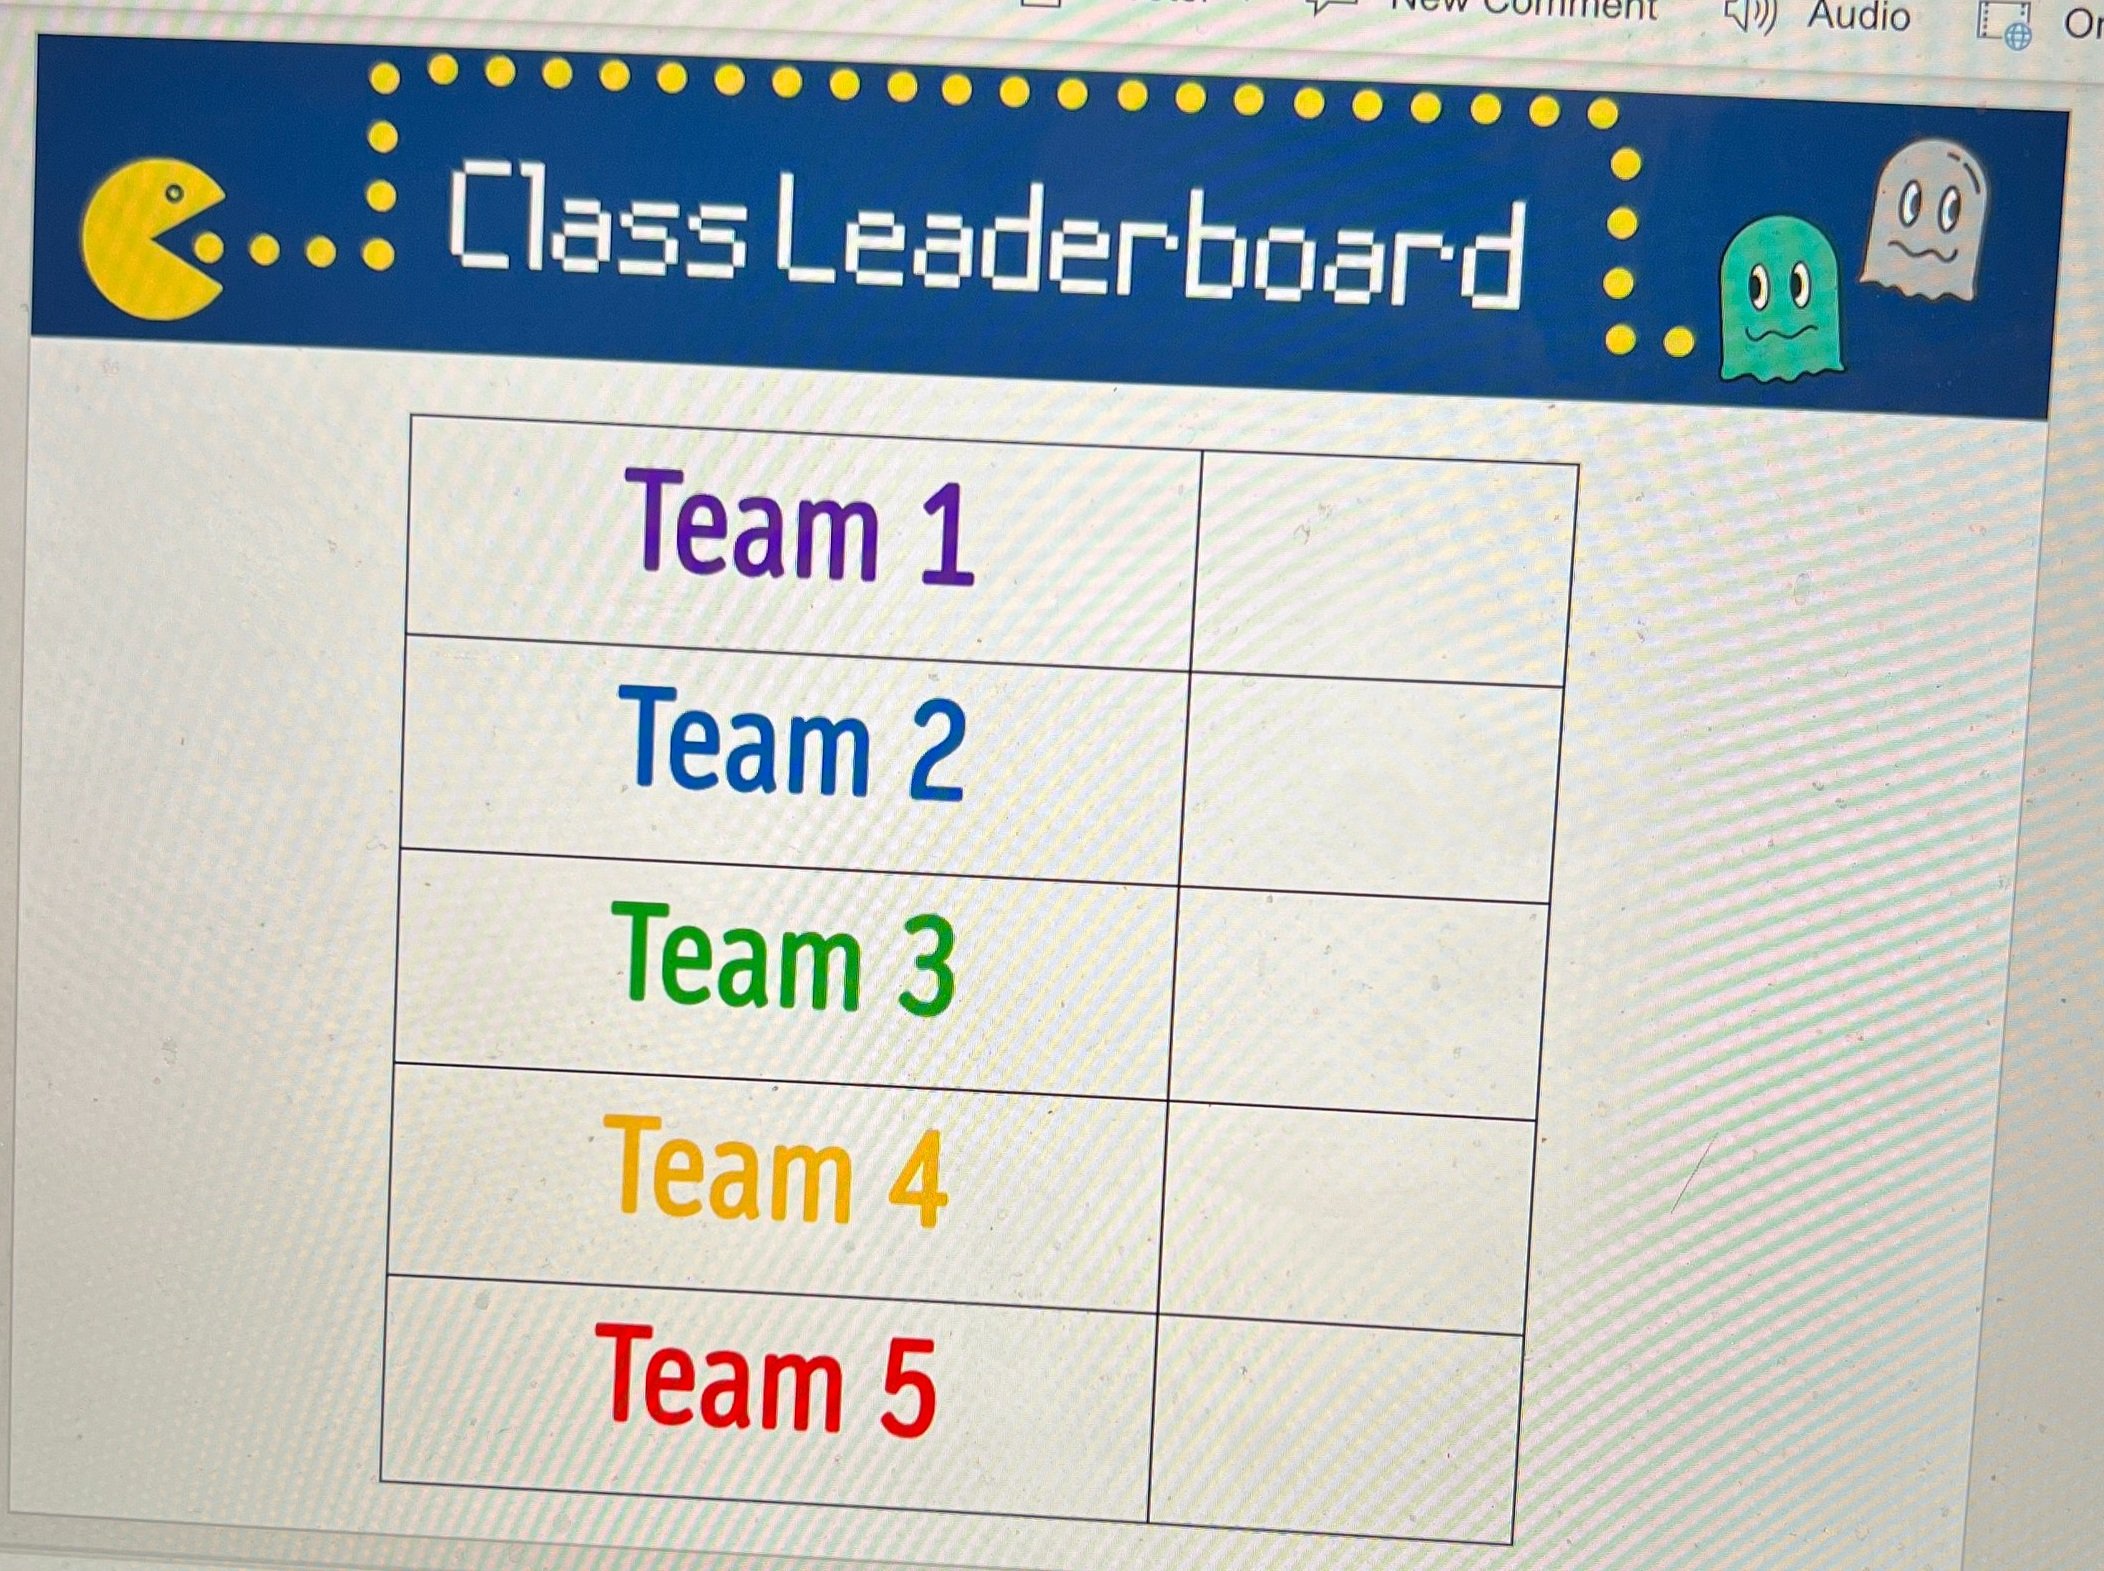
Click on the image to download the FREE editable template!
Room Decoration
The exterior of the room was draped in black tablecloths. You can use the ones that are singly packaged, or if you are willing to take the time and save a little money, we also had rolls of it donated which we cut to the desired length. We hung them by attaching them to the ceiling with small binder clips which you should be able to get from any Target, Walmart, Dollar Store, or on Amazon. Attached to the tablecloths were just ghosts and PacMan images we printed out and laminated before cutting. These were the same images we used for the game board players.

Hanging from the ceiling were ghosts that we made using balloons and left over colored tablecloths. The eyes were made using circles in PowerPoint and they were just cut out and taped on top. We hung them using the same binder clips.

Other decorations were created by scratch including our PacMan sign which we just traced using our projectors, our giant PacMan posters that we put on our doors, and this adorable arcade sign that my teammate made for us all. If you are not the crafty kind, you can purchase various banners from Amazon like the one below which are pretty cool too!
Music
We used music from the game as a timers to signal the starting and stopping of each round as well as music for when the students entered in the morning. There are many options available for the ones I used are listed below:
Morning Entrance (2 min.)
Longer Medley (start and stop after 10 minutes)
As with any room transformation, it is important to always start with the standards you are looking to teach or review and then look to how you can integrate the fun theme into the learning. With this transformation, we used the day as a spiral review of standards we have covered all quarter before going on break.
-- Let us know if you’re using any of these ideas in your classroom! Be sure to follow us on social media (@TheMerrillsEDU everywhere) and tag us! 👓👗
For more tips, tricks and lesson ideas for making learning more interACTIVE, check out our books The InterACTIVE Class and Flipgrid in the InterACTIVE Class on Amazon!


How to Use the Elgato Stream Deck in the Classroom
Elgato’s Stream Deck is a simple and powerful tool that commits an action once a button is pressed. Quickly play a sound effect, animated GIF and much more! Introducing this into the classroom is can take your engagement through the roof. Learn how it all works in this blog post!

Elgato’s Stream Deck is a tool that streamlines productivity. Coming in as many as 32 and as little as 6 buttons, users can efficiently launch apps, play sounds, mute / unmute, trigger GIF’s and videos and much more - all with just one press of a button. This all sounds fantastic - if you’re a gamer or streamer. But, what about teachers? How can we integrate this tool into our classrooms? Learn how more below!
(click on any subheading to jump to that section)
Which Stream Deck is best for me?
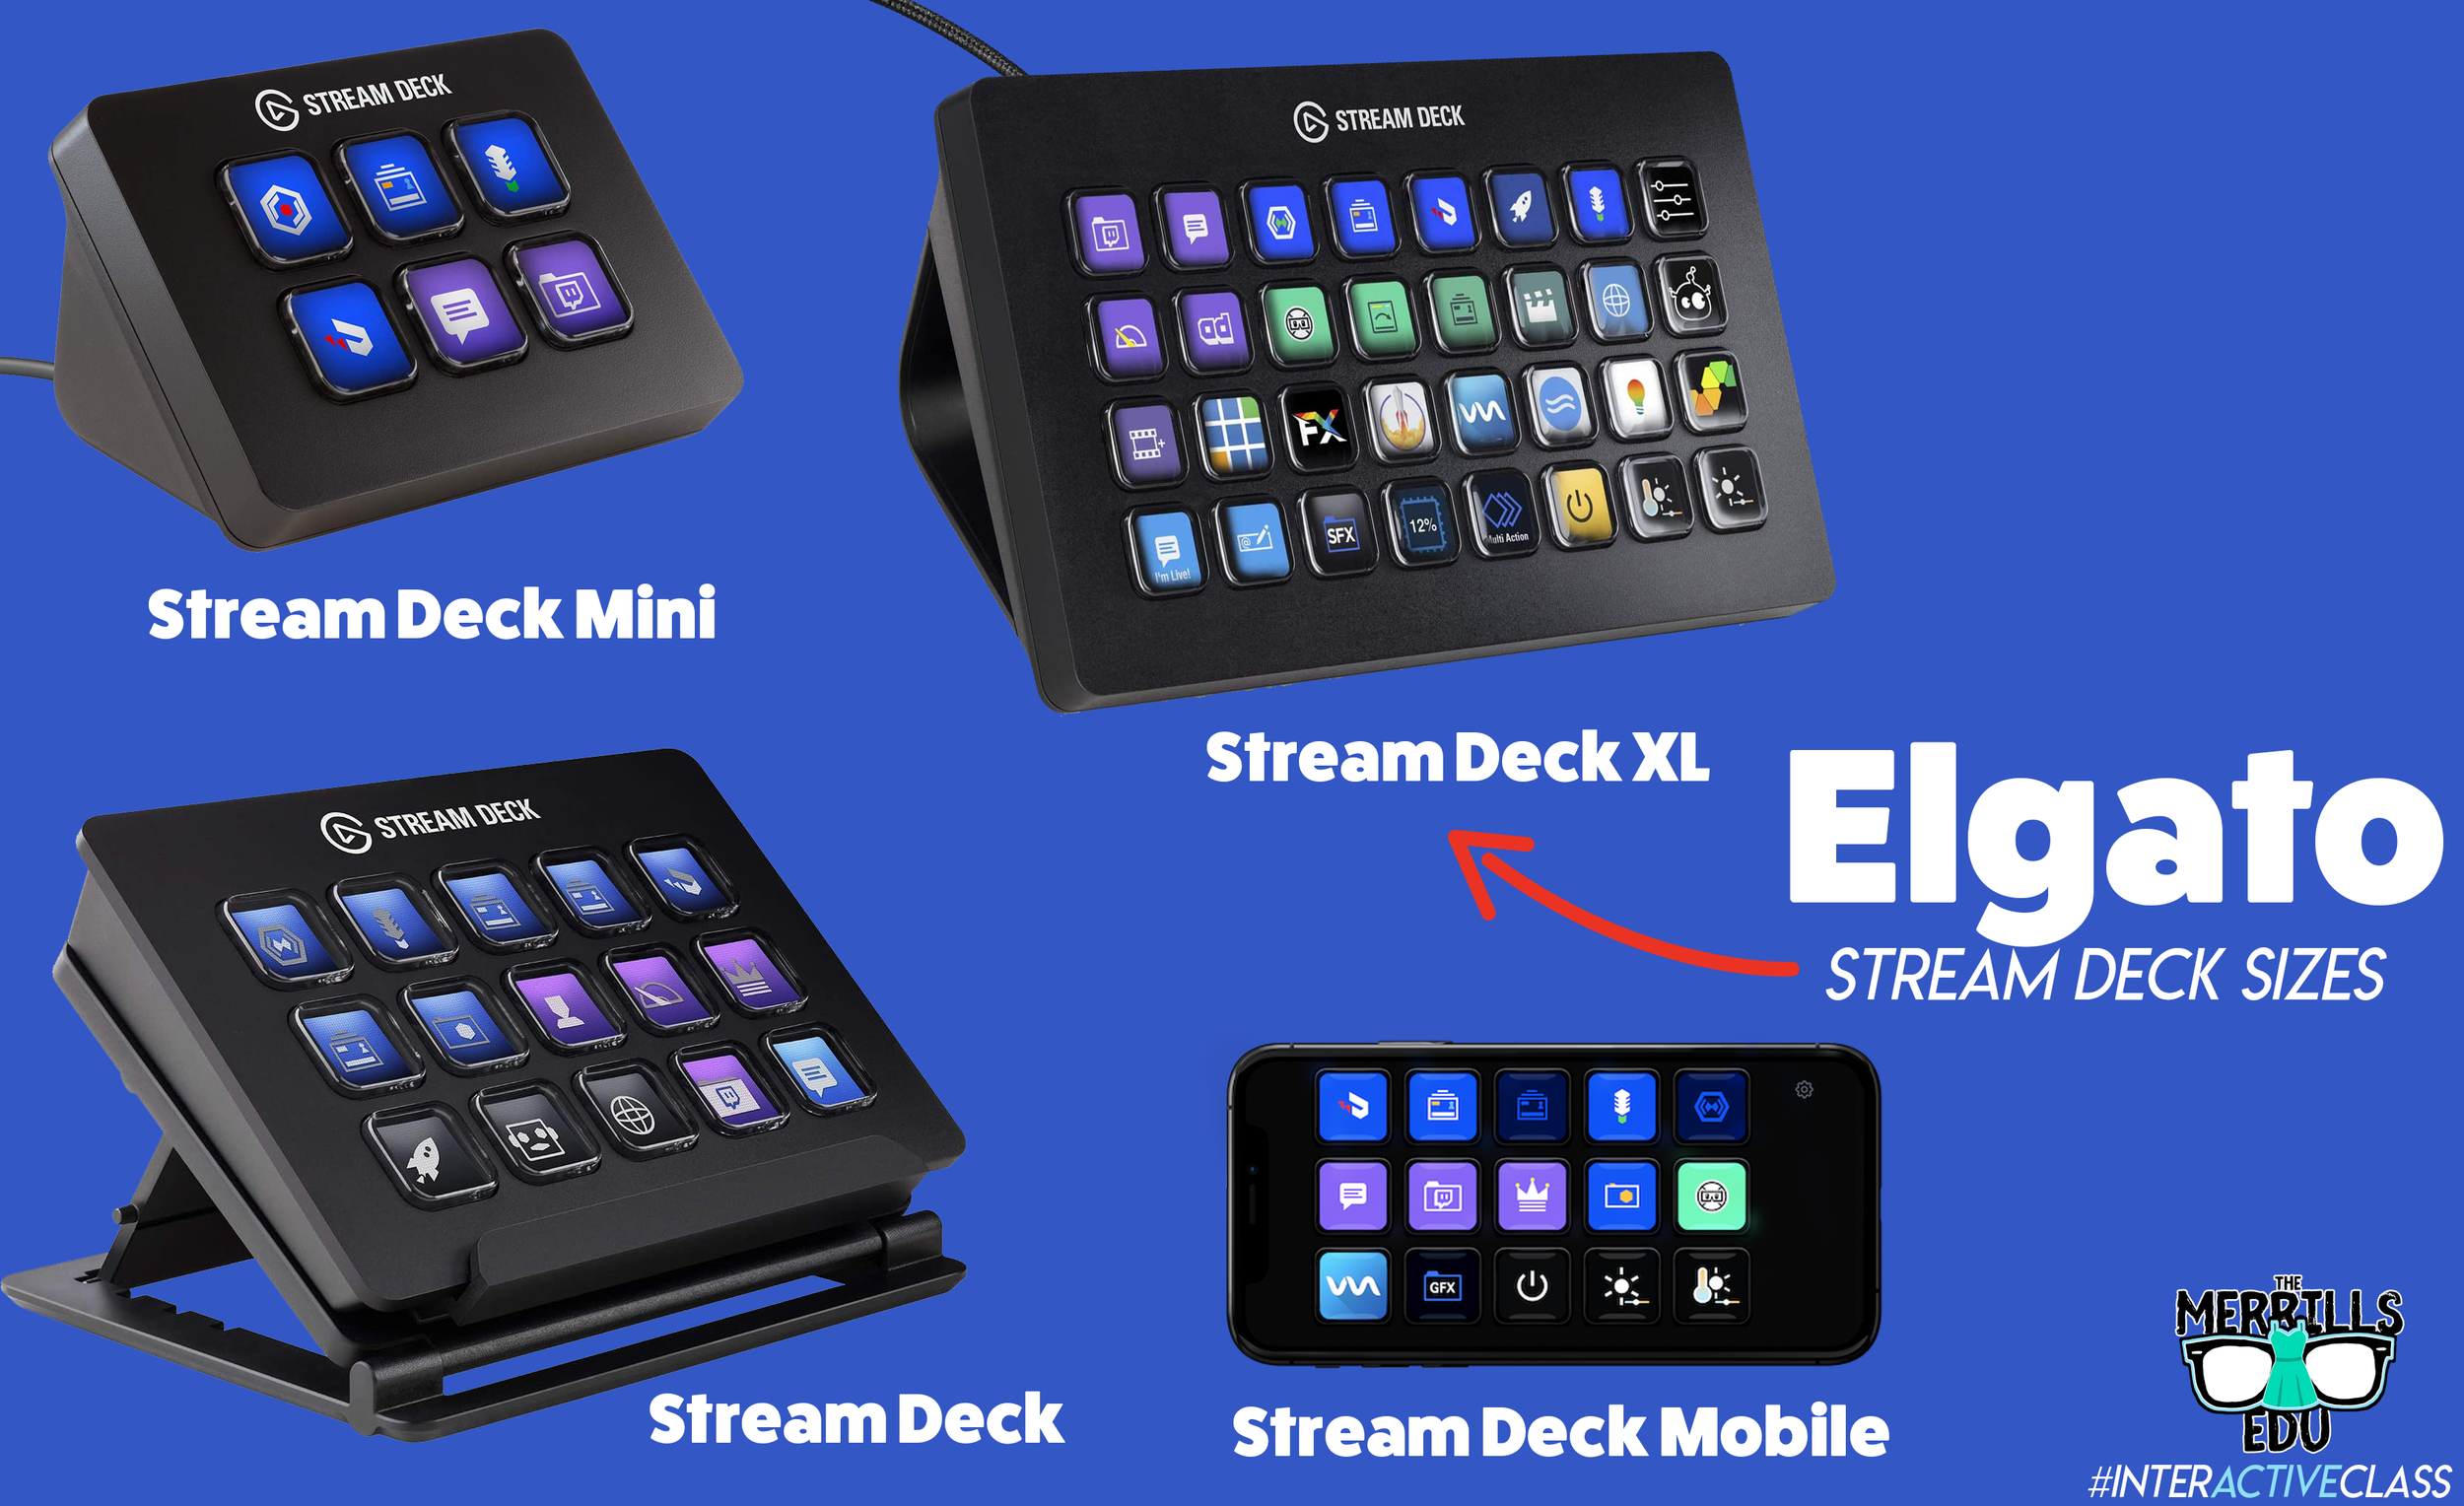
Elgato’s Stream Deck comes in several different sizes: 32 buttons, 15 buttons and 6 buttons. The prices range from $250 (32 buttons) to $80 (6 buttons). There’s also an option to turn your mobile device into a Stream Deck using Elgato’s app.
When deciding which is best for you, it’s important to note that there are an infinite number of actions that can be assigned to each stream deck. For example, if you’re working with the 6 button stream deck, users can create folders inside of folders to organize their actions. This features is available on every Stream Deck, so there’s always room for more!
So, which one is best for me? That depends…If you’re looking for more control, you’ll definitely want a bigger deck. More buttons = more options. If you’re looking for something small (pocket sized) and see yourself using the same actions all the time, then the Mini may be right for you. Speaking from experience, we prefer the larger sizes because you don’t have to assign actions to all the keys if you don’t want to - but at least they’re there if you do! Click below to purchase:
Elgato Stream Deck Mini (6 Buttons)
Elgato Stream Deck (15 Buttons)
Elgato Stream Deck (32 Buttons)
Elgato Stream Deck Mobile (app w/ 15 Buttons)
Once you’ve decided on which stream deck is right for you, check out Elgato’s starter guide right here!

Where Can I Find Sound Effects and GIF’s for my Elgato Stream Deck?
So, you’ve got your deck and you understand how the software works. But, where can you find sound effects and GIF’s to use? Here are a few places we recommend!

SuperLuigiBros.com
Looking for video game sound effects? Check out SuperLuigiBros.com for a collection of Mario Kart effects. No account required!

Free SFX
Free SFX requires you to sign up for a free account. But, once you’ve created your account, you can easily access tons of free sound effects that can be downloaded directly to your device.

Free Sound
Free sound also requires you to create an account before you can download, but doing so will give you access to tons of free sound effects!

Zapsplat
Zapsplat doesn’t require an account to download files. Users can select a sound effect, then Zapsplat generates a file link to download.

Giphy
Giphy is home to countless GIF’s, all of which are available to use for free. GIF’s can be downloaded (right click, save image as), but the true magic comes from making your own. This can be done right within the site. We also recommend checking out Giphy’s stickers - which have transparent backgrounds.

Tenor
Another fantastic website that features countless GIF’s! Like Giphy, users can create their own GIF’s in Tenor by uploading content and using the sites GIF creator tools.
How Can I Use the Elgato Stream Deck in My Classroom?
This all sounds awesome - but how does this translate into the classroom? How can this benefit my students and their learning experience? Like with the Stream Deck, the possibilities are endless. But, here are a few ways that we’re using it in our classrooms:
Engagement

Kids today are able to process information in a much quicker pace than ever before. They are also able to take in information for multiple resources and know exactly what to do with it. This means our students are excellent multitaskers! In a world where sound effects appear right on top of videos that they’re watching, kids need engagement. So, try using the Stream Deck to load up some sound effects. Create buttons for things like “oh, no” or “oops.” Maybe even create one for “money” (when something good happens) or “kerching” (for when something great happens). Then, when those situations arise, be quick with your buttons and press the appropriate one!
Timers
The Stream Deck can play short sound effects and long songs. So, program your Stream Deck with a timer - or song. We try to keep ours at 1 min and 30 seconds. We use this same song for all transitions, clean up, etc. Playing the same song gets the kids familiar with it, so they know exactly how much time they have until the timer / song runs out.


Mini Brain Breaks
Sometimes your students are a bit ansy. If your students have a case of the wiggles, keep them on their toes with the Stream Deck! Teach the kids that when a sound effect or song is played, they can get up and dance. The trick is that they must be back working and on-task once the sound effect of song is over! Check out our example below!
-- Stay tuned for more on how to use Elgato’s Stream Deck in your classroom! Already own one? We’d love to see how you’re using it! 👓👗
For more tips, tricks and lesson ideas for making learning more interACTIVE, check out our books The InterACTIVE Class and Flipgrid in the InterACTIVE Class on Amazon!


InterACTIVE Student Kits
The interACTIVE class isn’t a place. It isn’t just flexible seating or colorful props, but rather it is the idea of creating learning opportunities for students that are memorable and engaging. So with that attitude in mind, I have set out to come up with a way to keep the learning in my classroom as engaging and interACTIVE as possible. So my newest idea for the fall is the idea of InterACTIVE Student Kits.
How to keep learning InterACTIVE during a time of transition through the use of individual student kits.
It’s like the classroom is in a time warp and we are traveling back in time 30 years. No community spaces. Desks in rows all facing the same direction. Independent work recommended over anything partner or group related. If the InterACTIVE Class were the magic carpet in Aladdin, we would be at the point in the movie where the string of the carpet is being pulled and it is quickly unraveling, barely resembling its former self, and surely unable to function as it was used to.
With every new update, mandate, policy revision and guideline its hard to not feel deflated. It’s a challenge to not feel anxious or overwhelmed. And we are just coming at this whole situation from the teaching and instructional point of view—don’t even get us started on the health concern side of this ordeal. (that is a post for another day and another time) So for the time being, with so little out of my control, I (Kristin) am going to take one something I can control—my teaching style and my lessons.
The interACTIVE class isn’t a place. It isn’t just flexible seating or colorful props, but rather it is the idea of creating learning opportunities for students that are memorable and engaging. So with that attitude in mind, I have set out to come up with a way to keep the learning in my classroom as engaging and interACTIVE as possible. So my newest idea for the fall is the idea of InterACTIVE Student Kits. You can call them whatever you want, but the idea behind them is this—every student will have their own small kit of tools to use daily in our attempt to make learning engaging, creative and fun.
Creating Student Kits
Now this idea of a student kit could take on SO many different forms so don’t feel limited by the way I am choosing to do it. My personal goal is to have kits that can be housed together, in individual student cubbies, in a hanging seat sack or inside a desk. This way, I am leaving my options open once my classroom furniture and set up is finalized. I also have kept in mind that if we have to abruptly go back to learning at home these kits would be something feasible to send home with students and for them to keep track of. (hopefully!)
Small Student Kit
So to start off with you need to decide on what type of “kit” your items will be housed in. Once I had decided on a few of the items for my personal kits, I came to the conclusion that these kits needed to be hard and sturdy. At the time of this post, Michaels had an AMAZING sale going on for the rainbow boxes and storage kit going on. I chose this option over some of the others mentioned below simply because the smaller individual boxes can be housed in the larger one if I need them to and because I also have one of these sets in my classroom so it gave me more individual boxes to work with while keeping them all matching. They are also about 2 inches larger than the others I found and were flat enough to fit within all of the places mentioned above.

In addition to the boxes above, Target had some great options in store in their Dollar Spot for $1. They were a tad smaller, but also a good option if you want a matching, sturdy set. (I have not been able to find these online so going to a store in person would be your best bet.)

InterACTIVE Items List
Once I had decided on a container for the kits, I went searching for items small enough to fit inside. These are the things I have included so far in my interACTIVE kit but I am constantly looking to add more as I go.
Dice: I intend to put various dice in each kit. Obviously the regular 6-sided white dice, but I also found some great colored ones. These not only add the opportunity of rolling larger numbers, but also introduce color into the kits. These colors could be used to call out answers, group students, or allow for other interACTIVE spins on simple tasks.


Fidget Spinner: These have been used in the past for math, but I intent to increase how we use them. Maybe one day they spin and serve as a timer for sharing, and the next day they spin on the desk with problems waiting to be solved based on where the marked end lands. I am also going to work on some type of “mat” that we can make for various lessons that they can be spun on top of to decide actions based on the specific content matter the mat was created around. Still a lot of ideas floating on how to use, but they have increased engagement in the past so I think they are a safe bet.

Mini Flashlight: If for nothing else that taking out a flashlight to read in the dark, these mini lights will be fun. When all else fails, we can dim the lights and work on center work, read aloud or do something quietly with our lights.

Black Light Pen: These are ALWAYS a hit when I do spy themed room transformations and such, but I think they will also come in handy for various search and rescue activities around the room with each student being able to use their own. I am still thinking on other creative ways to integrate them, like possibly having a secret student of the day who you identify with a code on the top of a paper assignment. Stay tuned for more ideas with these!

White board marker: There isn’t much engaging and exciting about white board markers, but students sure do love them and I am including them in this kit merely to try and keep track of them! For whatever reason, students eat them and they always go missing. Maybe by buying some fun colors, these will stick around in our kits longer! Also, we use them to write on our desks (which students LOVE and makes any lesson instantly more engaging!) and they will work well for the individual paper sheet protectors I plan on giving to each student as well.
Finger Eraser: These were not part of my original kit list, but when I saw them I just had to add them. I would be shocked if they last until Christmas but hopefully they will work for our first 9 weeks which I expect to be all separate and spread out due to the specific classroom guidelines our school has in place. These were found in the Target Dollar Spot and were tough to find but they will be a fun addition!

As far as what learning is exactly going to look like, there is no way to know and surely no way to fully prepare and plan. But putting these kits together has made me feel a bit more prepared and dare I say a little more excited to start teaching and learning with my new group of students.
Have an idea on another item to add to an interACTIVE student kit? Message me on Instagram or Twitter at @FriendsinFourth. I’d love to update this post with other great ideas!
Looking for other ideas in regards to teaching during remote learning? Check out some recent blogs:
15 Ways to Connect with Students During Remote Learning
Lessons Resources for Remote Learning: Spy Transformations
If you’d like to learn more about interACTIVE teaching and learning, check out our book The InterACTIVE Class today!


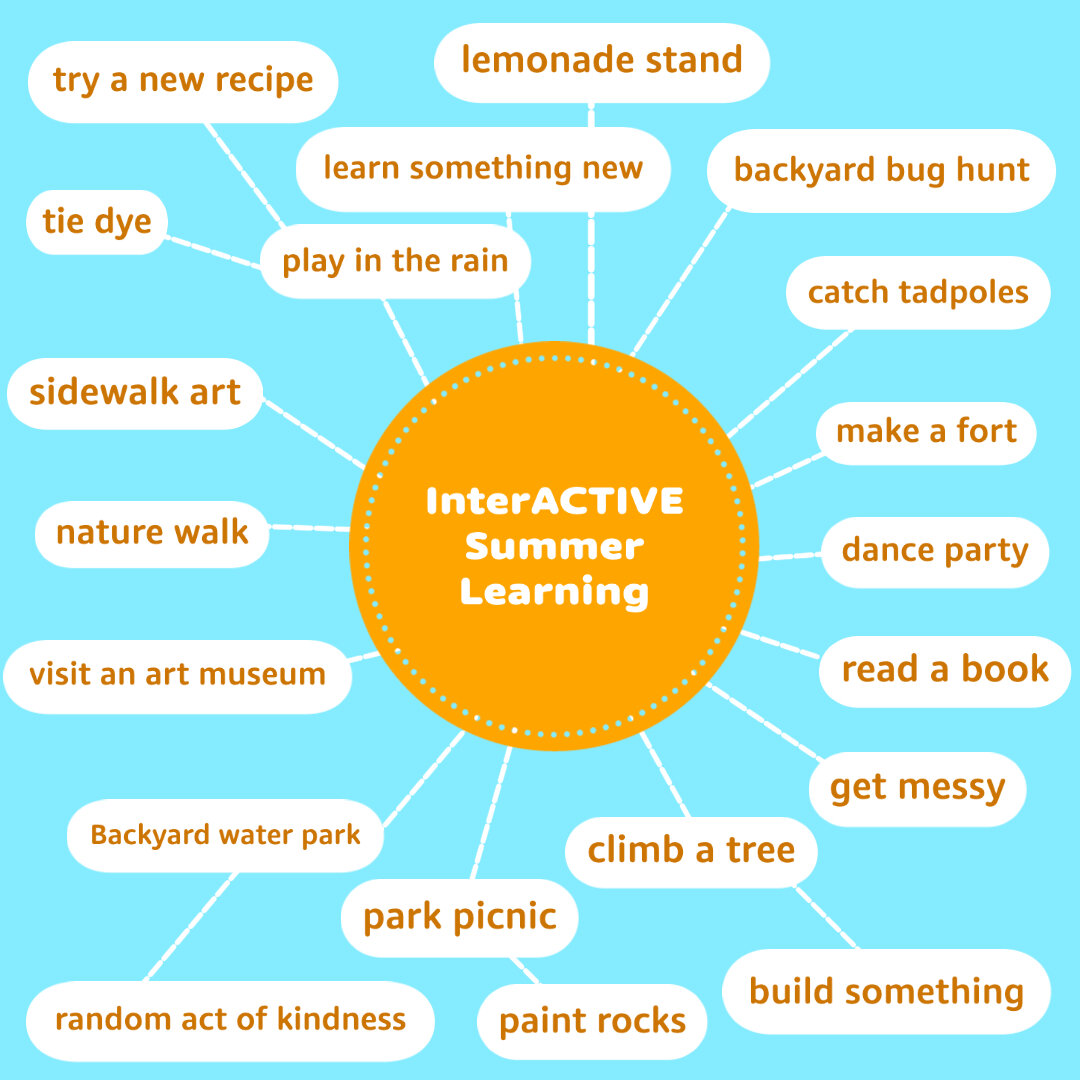
InterACTIVE Summer Learning
For those of you who have been following us for some time now, and if you’re new you’ll now find out, we are not only educators but parents of two young boys. We acknowledge that a few skills may have been lost or at least lessened during remote learning, so this summer we wanted to take an interACTIVE approach to keeping the learning alive.

For those of you who have been following us for some time now, and if you’re new you’ll now find out, we are not only educators but parents of two young boys. I don’t know about your students or personal children at home, but as for ours, the ending to this school year left them with a bitter taste in their mouths for this thing we call “learning.” As educators, this is so disheartening and frustrating, but at the same time can we really blame them? I would guess that many other children are feeling the same way as ours—burnt out, tired, apathetic, frustrated, bitter—the list could do on and on. We acknowledge that a few skills may have been lost or at least lessened during remote learning, so this summer we wanted to take an interACTIVE approach to keeping the learning alive.
What Does InterACTIVE Learning Look Like in the Summer?
As far as we are concerned, learning can be found in anything-from playing with friends in the puddles left by the afternoon rain, to hunting for tadpoles in the ditch, or by hiking hidden forest trails. We as parents believe though that there are times that if we don’t consciously make an effort to expose these moments are children will easily get lost in their choices of video games, TV shows and YouTube channels. Not that these things are bad, but we make an effort to keep our children the active participants in our day rather than passive participants.
When balancing our day, we often give the kids choice is our daily schedule and what types of things we are going to do. Regardless of the activity though, we try to keep a few principles in the forefront as we plan.
Inquiry: Many times in school students are just given information to process, memorize or curate with little time given for true investigation and inquiry. We like to find the things that interest our kids, just like we would our students, and then build in small ways they can investigate these things further.
Play: There is so much learning that comes through play. Just pure, unregulated, creative play. So much of our normal day is regulated and we work hard and encourage activities that revolve around play.
Collaboration: Collaborating with others is closely related to play, but really the idea here is finding activities and opportunities where our kids have to work together to be successful. It’s important to keep skills like listening, revising sharp, so when our kids do go back into the classroom they will be able to coexist with their classmates again.
Reflection: Being able to reflect and remember an experience is important to us. Sometimes there is learning to be found even after a fun activity or event though a simple, thoughtful conversation.
How to Create InterACTIVE Learning Activities
Choose your priorities: Do you want to be outside more? Maybe you want to try and reconnect with friend and family after this period of solitary. Perhaps you want to keep your kids actively reading or writing or working on other specific skills. Decide on what your priorities are and then create experiences that your children will inevitably get to do those things through.
Set aside time to be present: We can relate to this more than ever now that we have been working from home, but we try to be purposefully present with our kids during these learning moments and activities. It is true what they say about the quality of the time spent over the quantity of time given. We often find that at first our children may resist or be uninterested in a specific task or activity, but once they see us involved they quickly become committed to the task. This is the foundation of interACTIVE relationships—they are two way and reciprocal.
Tip: If you find it hard to separate your work time or are having trouble getting in a productive time for you, try building a time in to work when your kids are doing something less involved. For example, when our children get their time for video games or screens, we used this as a time to sit and read emails, work on presentations or take some quality time to read a book!
Keep it fresh: Our kids love going to the beach, but if we went every other day they would quickly lose the excitement of going and be less engaged with the adventures we had there. So we go often, sometimes changing the spot we visit, the time of day we go out, or who we go with. We try to rotate our favorite activities like swimming or bike riding and sprinkle in the newer and more unknown adventures in between.
InterACTIVE Summer Learning Ideas
Being teachers may help us a bit as we plan for our summer, but we also love learning from the unplanned, organic moments we spend with our kids. We did include though a few of the things we have done so far with our own kids that have been engaging and definitely educational. We also included some ideas that we hope to get to this summer as well.
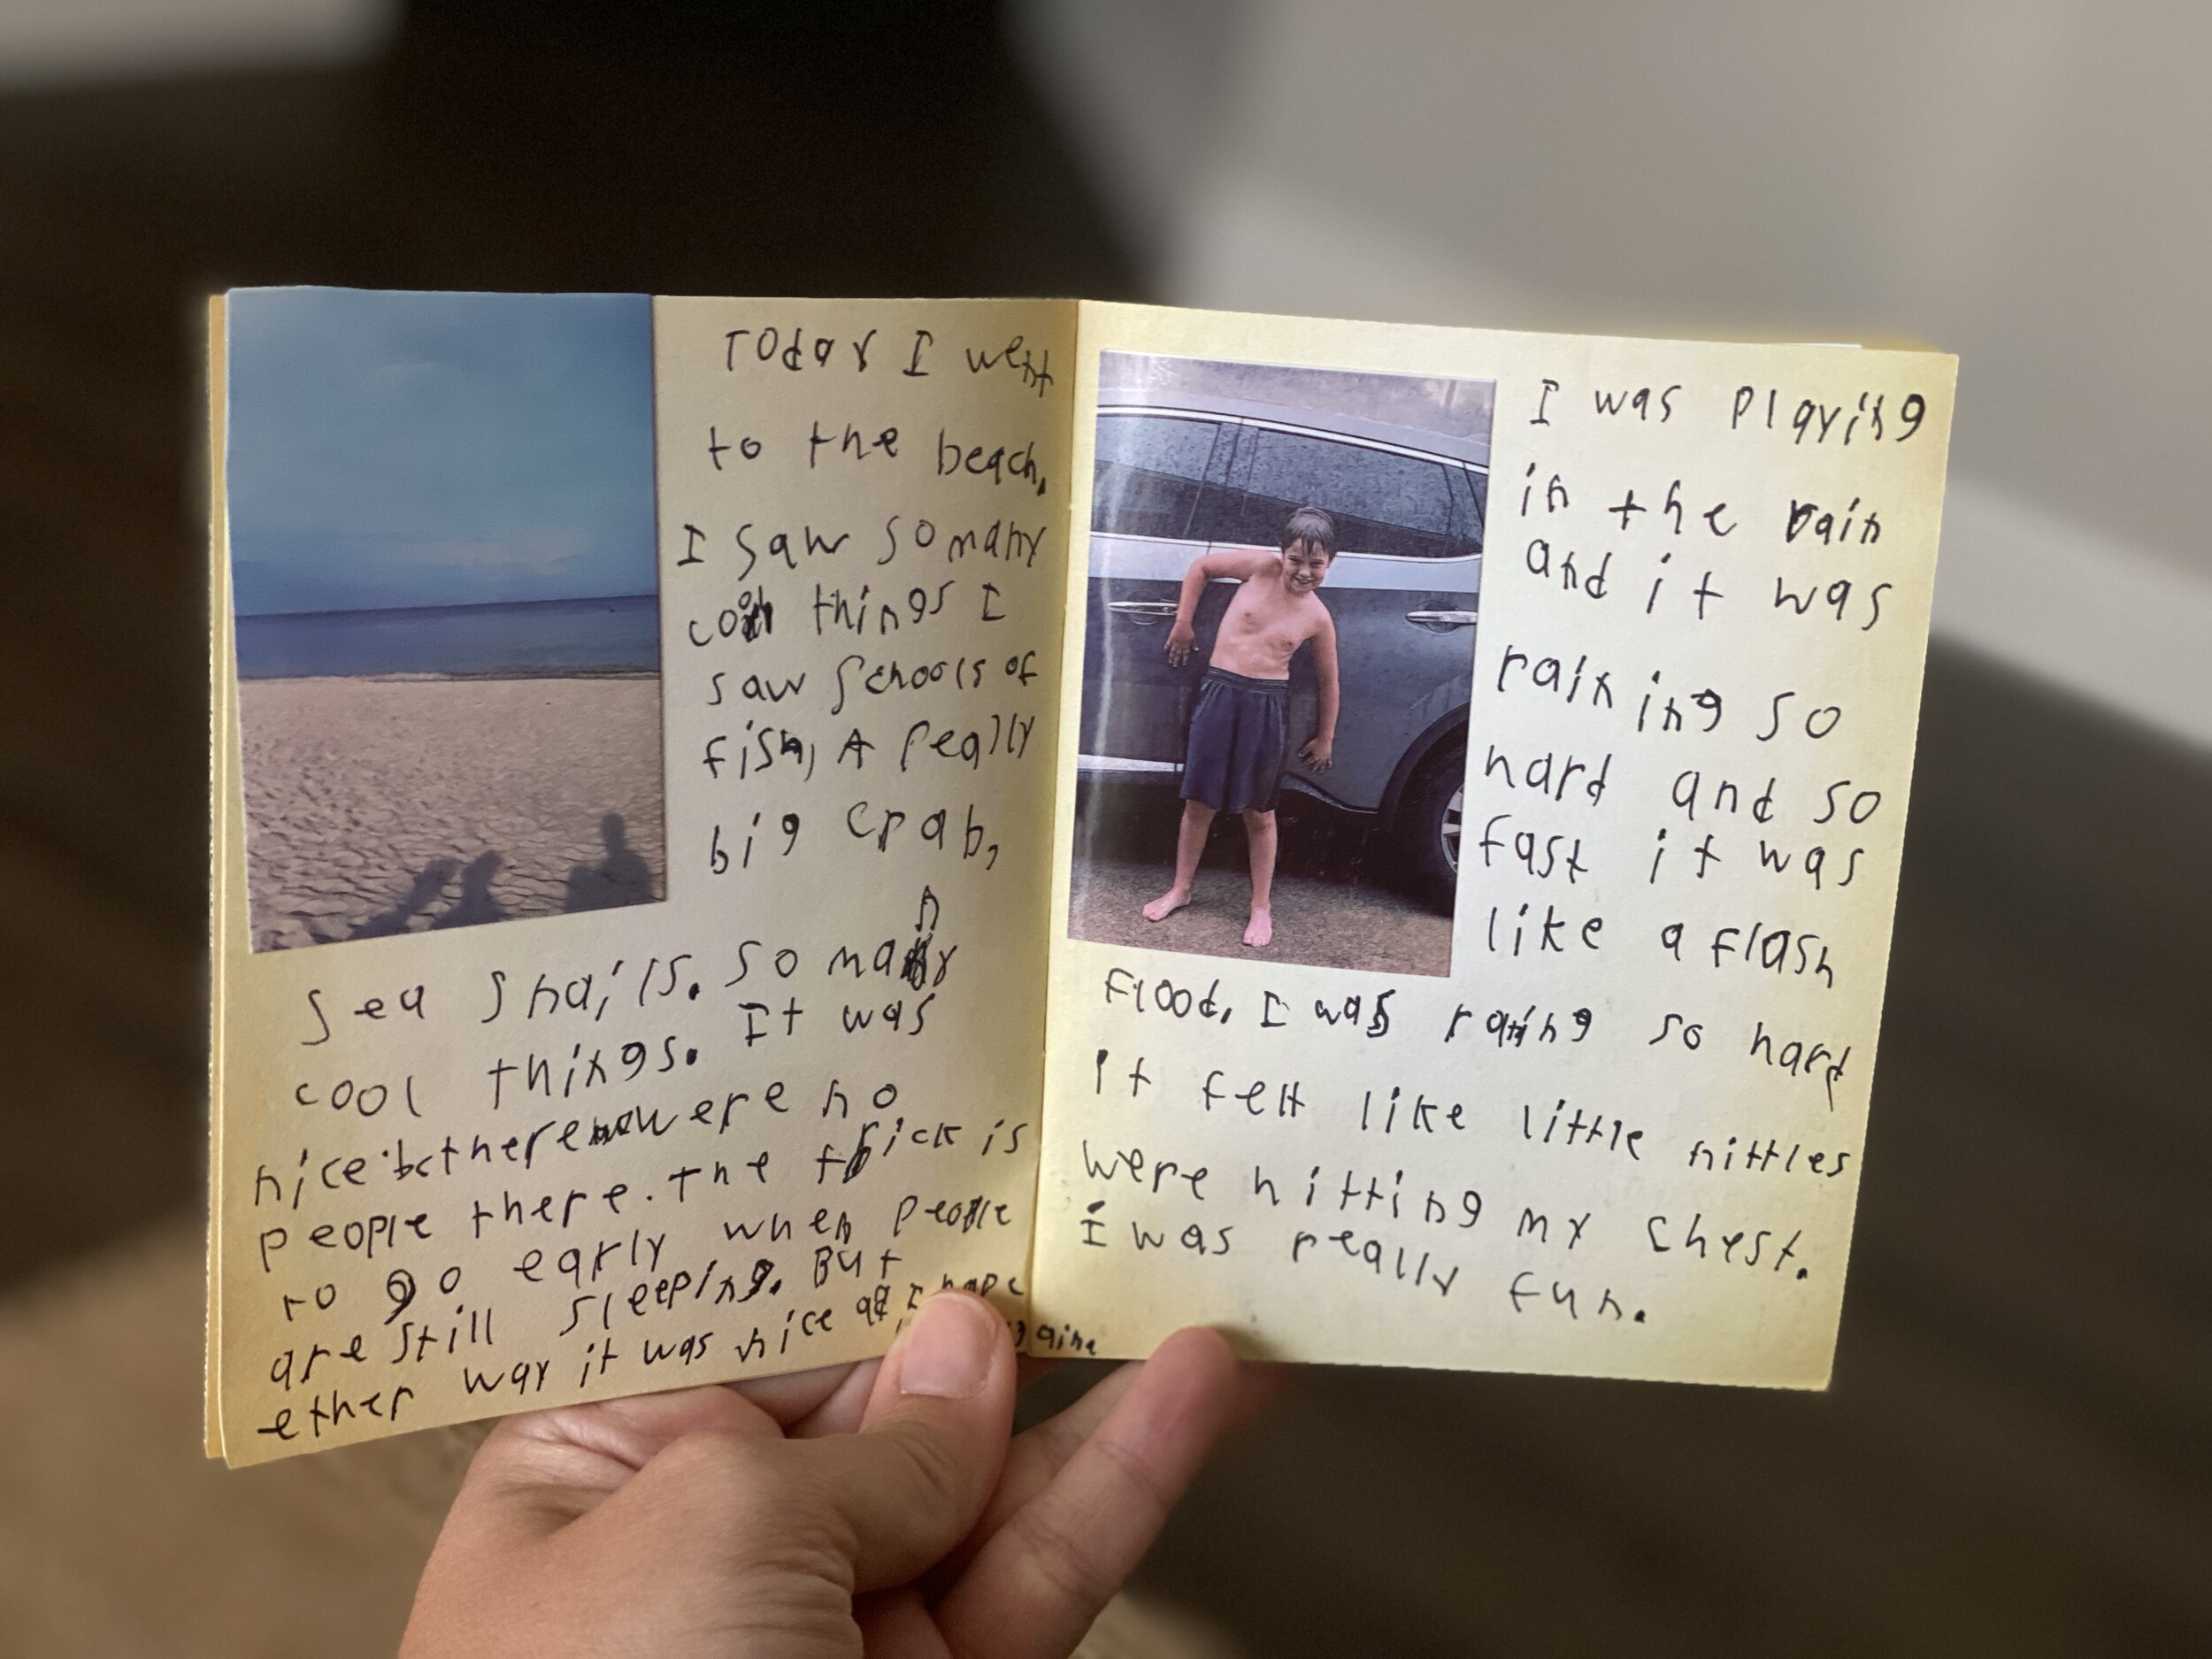
Another thing we have started this summer with our own kids are summer “adventure” journals. The original idea came from a local blogger named Kelli Hampton and essentially we keep track of all the small things we do and journal our memories. You could, as Kelli suggests, make the journal ahead of time as almost a bucket list of sorts, with challenges and things for you kids to do, but we keep ours more organic. Our pages stay blank and we just record whatever memories we wish to. Before summer started we purchased a pack of small, blank passports and are using one of Mrs. Merrill’s favorite classroom tools—her sprocket printer. A sprocket is a small, wireless, photo printer that allows you to print small, Polaroid-like photos straight from your phone. (And as of the day I wrote this blog, the printer linked here was $40 off which is the cheapest I’ve seen it!)


In today’s time we take the majority of photos on our phones and this printer allows the kids to print the photos we took documenting our activity or trip, peel off the sticky backing and plop the photos down in their adventure journals. They then write whatever they like to in regards to what we did, and this allows mom and dad to give a bit of writing review as we go. You could totally make these journals digitally too! We would recommend programs like Book Creator or Buncee for something like this.


What’s great is that the kids usually take the lead and will often ask us to take a photo so they will have it to write about in their adventure journals. They are taking the ownership of it which is always what you want when it comes to learning. The packet of books came with multiples, so if they fill up one book they can start another. Maybe even using one as a place for some narrative writing too! (A mom can hope, right?)
The beauty of interACTIVE learning is that it can happen anywhere! It doesn’t always have to use technology or be in a classroom full of students. Here’s to having a summer filled with memories and learning!
Stay interACTIVE!
~👗➕👓
For more information on how you can make learning in the classroom more #interACTIVE, check out our book The InterACTIVE Class!


@TheMerrillsEDU Summer Tour!
We had big summer plans…then things changed…Now, you can catch us “virtually” this summer at any of the INCREDIBLE events below! This summer doesn’t have to be a bummer!
We had big summer plans…then things changed…Now, you can catch us “virtually” this summer at any of the INCREDIBLE events below!

Wakelet Live!
First up for us this summer is Wakelet Live! Please join us on Wednesday, June 3rd at 11am EST as we discuss “How to Use Wakelet in the Classroom.” The presentation is free, but requires registration. Seats are filling up fast, so don’t wait!
The InterACTIVE Class Book Study!
You asked, and we listened! We’re starting an InterACTIVE Class book study! The party starts June 11th and wraps up on July 16th. As a group, we’ll share tips, tricks, and different ways to use apps. Join in on the fun by purchasing your copy of the book, then joining our Book Study Facebook Group!
Purchase the book by ⚡clicking here⚡
Join the Book Study by ⚡clicking here⚡


Great Plains Summit
Join us on July 16th & 17th for the Great Plains Summit! You’ll learn from topics such as Google, AR, and a presentation on Flipgrid, followed by a workshop from us! Many more details to come soon, but for now you can find info by visiting the Great Plains Summit website.
Indiana Connected Educators Conference
Our next stop is from July 20th - July 24th for the Indiana Connected Educators (virtual) Conference. This MASSIVE event is FREE and features 80+ Ed Tech Leaders. More information regarding our session and time TBA soon!


Teach With Tech Conference
Our last stop for the summer is the Teach With Tech Conference which kicks off July 27th! This virtual conference features 70+ sessions, and early bird tickets are available for $19.99.
Purchase our book, “The InterACTIVE Class!”


Remote Learning 101: Presented by The InterACTIVE Class
As more and more schools look towards the possibility of Remote Learning, we understand that you probably have lots of questions. We’re here for you.
As more and more schools look towards the possibility of Remote Learning, we understand that you probably have lots of questions. We’re here for you.
What is remote learning?
Remote Learning occurs when the learner and instructor, or source of information, are separated by time and distance and therefore cannot meet in a traditional classroom setting. This is also being referred to as “distant learning.”
I don’t know much about educational technology. How will I learn fast enough to teach remotely?
Remote learning will undoubtedly push many teachers into the realm of digital teaching and learning faster than they may have on their own. If you are one of those teachers who hasn’t used classroom specific applications, we would recommend starting with our book The InterACTIVE Class. It was not written specifically for remote learning, but it couldn’t be out at a more relevant time.

In it you you find two page explanations for applications like Flipgrid, Seesaw, Book Creator, Buncee and many more, followed by pages of lesson ideas that you can take and immediately implement into your remote learning environments. In addition to the book, you can join our InterACTIVE Class Community on Facebook where educators from around the world share and help each other in regards to integrating technology in meaningful and relevant ways.
Where do I start?
If you are tasked with teaching remotely, our advice is to keep it simple and routine. Do not use the event of remote learning to try something new or to introduce a new platform. That is stressful enough when in the classroom with your students. Deliver content through platforms or programs that your students have already used, and if you have not used much (or any) technology before, choose 1 platform and walk your parents and students through it as you go. This is where the importance of being routine comes in. If you have the opportunity or choice to decide how to deliver content and monitor learning while teaching remotely, do it using the same program(s) while out of the classroom. Also, if you can structure the format of how you deliver content it will help parents and students navigate the unknown world of remote learning. We suggest explaining content through teacher direct lessons or online material, giving the students time to explore and create baed on their new learning, and possible assess after if necessary. If you can do this in the same way through the same program(s) repeatedly it will help students and families efficiently get acclimated with remote learning.
Not all of my students have internet access. How can I reach them during this challenging time?
One way to help students with limited internet access is to think about how you are delivering content while out of the classroom. Is there a way you can front-load assignments—maybe give the week’s worth of assignments out at one time rather than going day by day. That way, students with limited access can see more at one time if their access is limited. Also, possibly reach out and look into how local community centers, libraries and other community outreach places could help families with limited access to resources. Finally, try to use applications that are smart phone friendly in addition to being web-based. This way, in the case that a student doesn’t have a computer at home or internet, they could still possibly access information through a parent’s smart phone.
Comcast has recently announced that new customers are able to receive 60 days of complimentary Internet Essentials service, which is normally available to all qualified low-income households for $9.95/month. They are also increasing Internet speeds for the Internet Essentials service from 15/2 Mbps to 25/3 Mbps for all new and existing customers, which will be the speed of the service going forward. For more information on this, please visit the website below and feel free to share with families and colleagues.

Comcast Internet Access
Click the button below to learn more about Comcast’s internet access.
Where do I get started as I prepare for remote learning?
When getting started, it is important to settle on the platform or programs you are going to utilize while out of the classroom. As mentioned before, we highly recommend choosing ones you have already used this year, but if you have not used much or are unsure if the programs you have used will work best, here are some tools we suggest considering for creating “learning hubs”, keeping students engage, allowing real-time collaboration and much more!
How can I create a safe and cohesive learning environment for students while away from the classroom?

Seesaw
Seesaw is a platform for empowering students to demonstrate and share their learning. Students use powerful tools in the Seesaw app to create, reflect and demonstrate learning. When students share their learning in their Seesaw portfolio, teachers and families gain valuable insights into what their students know and can better support their development. Think of it as a digital portfolio.
Pros: Available anywhere, on any device.

Microsoft Teams
Microsoft Teams is your hub for teamwork in Office 365. All your team conversations, files, meetings, and apps live together in a single shared workspace, and you can take it with you on your favorite mobile device.
Pros: Available anywhere on any device (with a free Office 365 account - sign up here).
I want my students to maintain the collaboration that they would normally have within the walls of the classroom. Which tool should we use?
Educators can pose questions / tasks and generate collaboration by using Flipgrid. Flipgrid is a social learning / web-based platform where educators ask a question (called “topics” in Flipgrid), and then students respond to the question in the form of a video. Students can get creative and add external links, drawings, music, and more to their responses. The video responses appear in a grid style display, where other students can then view and respond to. This generates a web of discussion, similar to that of a video message board. With Flipgrid, your students will still be able to support one another and share their thinking. They will also be able to critique and respectfully generate positive discussions based on your topic.

Flipgrid
Flipgrid is simple. Educators spark discussions by posting Topics to a classroom, school, professional learning community, or public Grid. Students record, upload, view, react, and respond to each other through short videos. Flipgrid is video the way students use video ... social, engaging and fun!
Where can I access high quality, digital materials for my students to use while learning online?
Taking print material and converting it to digital platforms can be time consuming and overwhelming. There are many companies stepping up to provide teachers with high quality, interest provoking content while you are out learning remotely.

Newsela
Newsela is committed to bringing authentic, engaging, diverse and accessible content to all learners. They believe the best lessons start with the best content. All teachers can now access Newsela ELA, Newsela Social Studies, Newsela Science, and the SEL Collection for free for the rest of the year.

Scholastic News
Scholastic known for publishing, selling, and distributing books and educational materials for schools, teachers, parents, and children. Their classroom magazines are found in many classrooms. Scholastic is creating 15 lessons for various age groups of students ranging from Pre-K to high school filled with quality nonfiction articles similar to the ones found in their magazines. Check out the curated articles for grades 3-5 here!
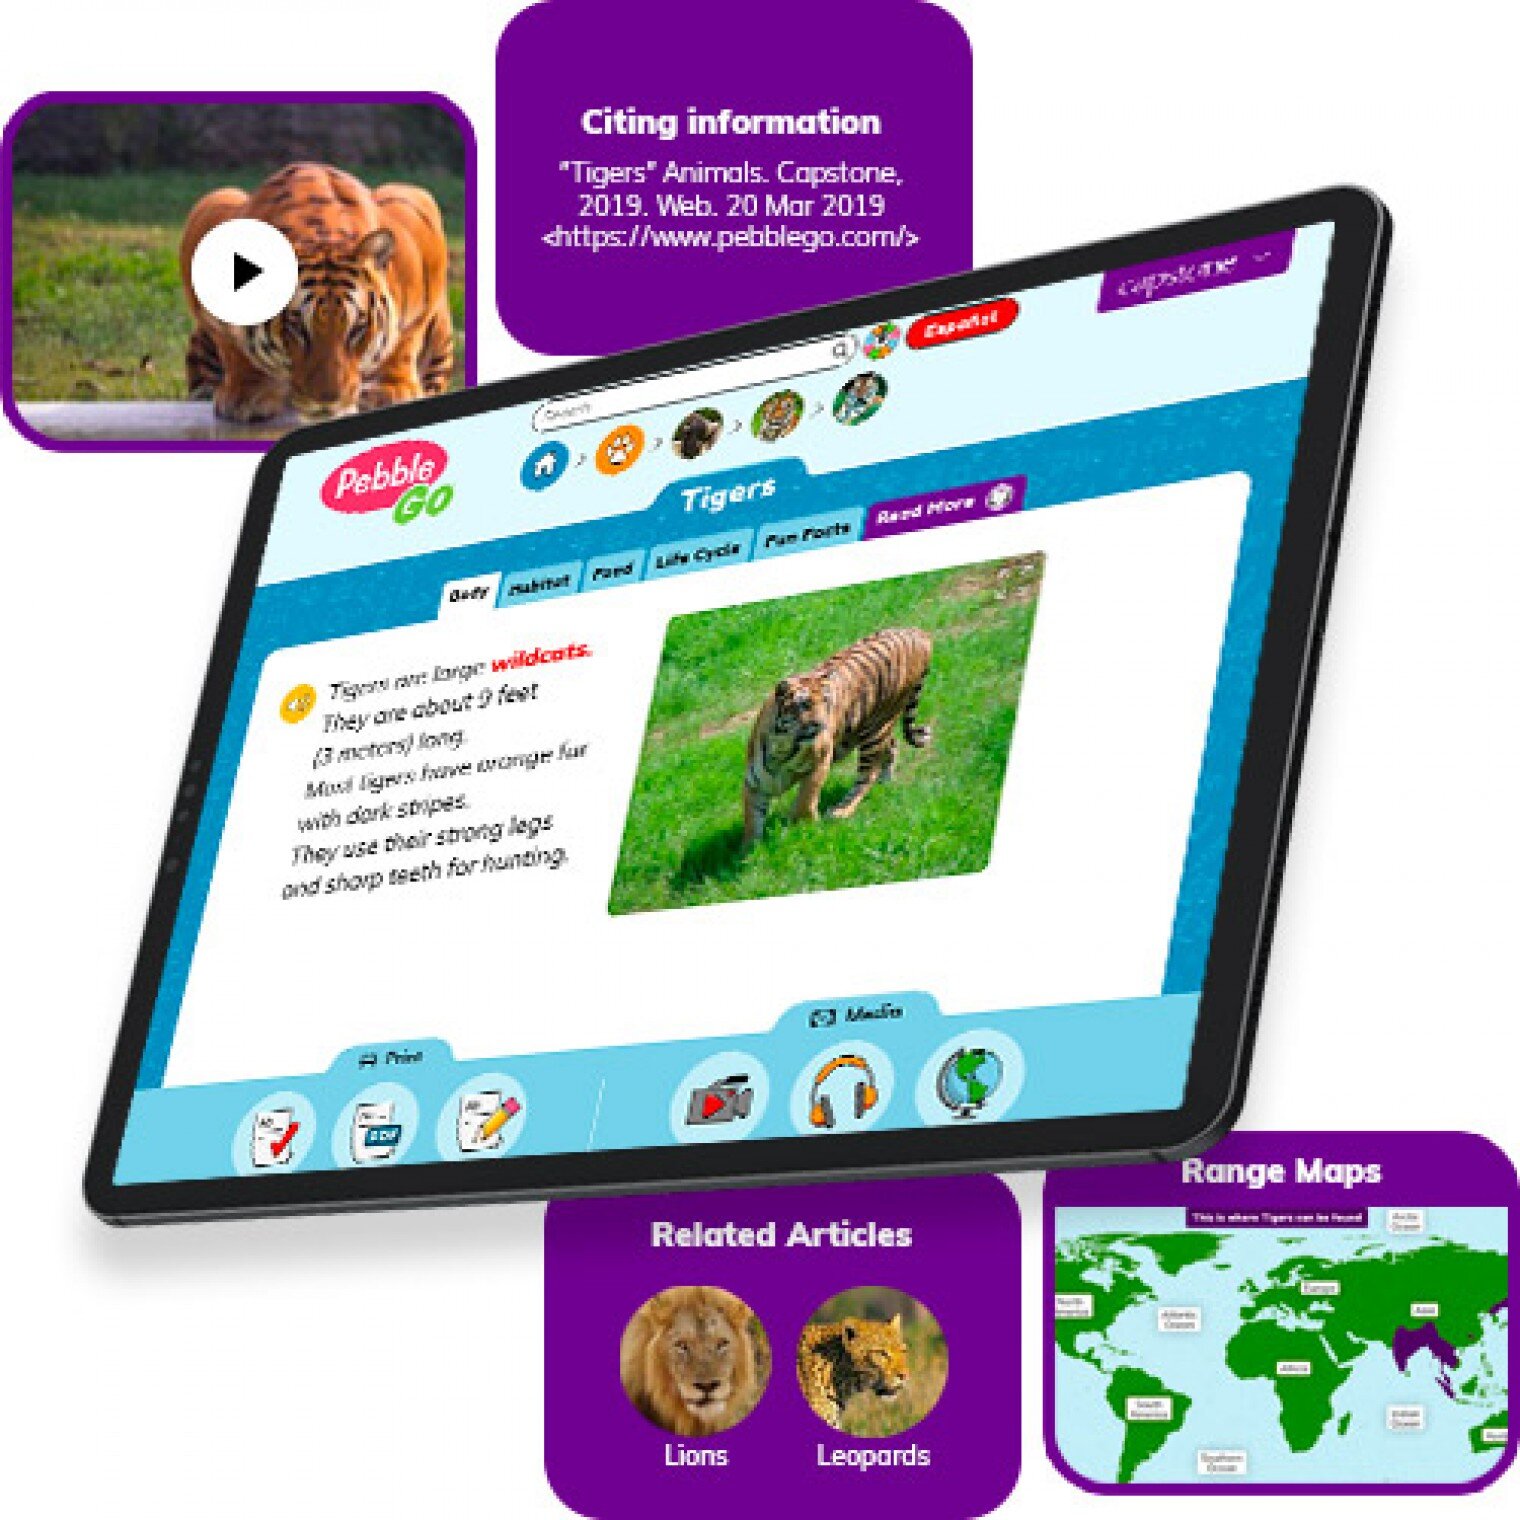
Pebble Go
PebbleGo is a curricular content hub specifically designed for K-3 students. Packed with informational articles, ready-made activities, and literacy supports for students of all abilities, it boosts engagement and fosters independent learning in core subject areas. To learn how you can gain free access during school closures, click on the learn more button below.
Compatibility: Web based only
What tools can my students use to keep the creativity going?
Just because your students are away from the classroom, doesn’t mean that they have to lose their creativity. The list of apps below are highly recommended platforms that will have your students creating rich and authentic content that you can tie directly to your standards. If you have any questions on how to implement these, please don’t hesitate to reach out to us.

Buncee
With Buncee’s assortment of media options, creating a virtual lesson is quick and easy. Teachers can include text, video, audio, or even links to additional resources. Record your lesson using the video feature, or create an activity template for your student to complete at home. The classroom dashboard can then be utilized to share and track assignments. Teachers could also create a Buncee Board, so students can access materials, share their work, interact with their classmates, and participate in class discussions no matter where they are. Students can also create and submit Buncees back to their teachers. For more information, click the learn more button below.
Compatibility: all devices

Adobe Creative Cloud
Adobe has announced that they are giving their higher education and K-12 institutional customers globally — who currently make Creative Cloud apps available to students who login through on-campus labs — the ability to request temporary “at-home” access for their students and educators. This will be granted through May 31, 2020 at no additional cost. To learn more, click the learn more button below.
Compatibility: all devices

Minecraft: Education Edition
To help teachers and students stay connected to the classroom, Minecraft: Education Edition is now available through June 2020 for all educators and learners who have a valid Office 365 Education account. Click on the learn more button below for more information.

Book Creator
Book Creator is a simple tool for creating awesome digital books. You can create your own teaching resources or have your students take the reins. Combine text, images, audio and video to create stories, portfolios, journals, comic adventures, science journals and much more! Book Creator is offering everyone the ability to collaborate together on books in real-time. This is a premium feature that is usually only available with a paid subscription, but they’re offering 90 days free use of this tool, to help keep students and teachers connected.
How can I make learning engaging and interACTIVE during remote learning?
Distance learning doesn’t need to equal dull learning. There are many apps that not only allow students to learn alongside one another in real time, but they also help the teacher facilitate information in unique and different ways.

GimKit
GimKit is a live gameshow for the classroom. Students answer questions on their own device at their own pace. Throughout a Kit, each student will get exposure to the questions multiple times to ensure mastery.
Compatibility: all devices

Nearpod
What if we told you that you could have your students log onto your presentations, and literally switch slides to all devices logged on at the same time. With Nearpod, you can do just that. Students log onto your presentation with a code. Educators can also add slides for collaboration, drawing, 360 images, and more. Check out the learn more button below fore more information.
Compatibility: all devices

Hyperdocs
HyperDocs are free digital lessons that are easy to edit for your eLearning students. They are all about hyperlinking your docs for amazing learning experiences for kids! With one shortened link, students can access a lesson that contains instructions, links, tasks, and many clever ways to get thinking. Hyperdocs focus on creating opportunities for choice, exploration, and ways for kids to apply their knowledge. Explore these docs plus more by clicking the learn more button below.
Compatibility: all devices

Brain Pop
From the very beginning, BrainPOP was built on the belief that curiosity through short animated movies can make complicated ideas simple and clear. Today, BrainPOP’s rigorous learning experiences go far beyond a movie and quiz, offering a rich array of resources and tools that meet each student’s interests and needs while developing their critical, computational, and creative thinking skills across the curriculum.
For more information on how to make learning more engaging and relevant by using technology, check out our book The InterACTIVE Class.


Here is a Wakelet of other platforms that we are updating daily as we come across new resources and offers.
We are happy to connect and discuss which tool would work best for your particular remote learning experience. This is an unprecedented situation, and leaning on one another is more important now than ever before. Please don’t hesitate to reach out.
👓👗💚
#BetterTogether #interACTIVEclass #remotelearning
Persisting and Pivoting in the Classroom
Troubleshooting. It’s something we get asked about quite often. How do we deal with that one student that doesn't want to learn or work?

Troubleshooting. It’s something we get asked about quite often. How do we deal with that one student that doesn't want to learn or work? What is your backup plan when the lesson doesn't go the way you intended? Do you ever have days where the technology isn't cooperating or the wifi is down?
Educators are always surprised when we reply with "we probably do the same things you do!" because believe it or not, all of these things happen to us too! Teaching and learning is full of speed bumps that slow us down temporarily but how we react to the problems is what determines the rest of the journey. Part of the interACTIVE framework is troubleshooting. It is important to remember that being responsive must incorporate a time to reflect--looking back on the lesson and the learning, often reflecting on what didn't go just right and troubleshooting how to go about fixing it.
There is definitely a frustration that accompanies a hiccup in a lesson but too often as educators we forget that there is even learning happening during a lesson or activity gone wrong. Even when a student misses the mark there is learning present. When a program doesn't work the way we expected or a lesson takes twice as long as planned--there is still learning present. We often avoid hard or unknown things because we are scared of the challenge they may pose forgetting that through the struggle there will be learning present.
Troubleshooting is the last of 5 steps of our interACTIVE framework which we outline in our book. We also explain the necessity of learning how to PIVOT when teaching students in your own interACTIVE environment.

If you haven't already, jump on board and start transforming your teaching and the learning in your classroom and join our interACTIVE family as we troubleshoot and help one another along the way! Grab your own copy of The InterACTIVE Class here and read through the five framework steps. Always remember- #bettertogether!
-K 👗

Opening the Window to the Classroom
To better understand a parent's perspective of education, think of someone who wears glasses--maybe even yourself! Your glasses help you see, or maybe you're completely dependent on them to function effectively. What happens when you take your glasses off? You view the word entirely differently.
Excerpt from The InterACTIVE Class, Chapter 6

To better understand a parent's perspective of education, think of someone who wears glasses--maybe even yourself! Your glasses help you see, or maybe you're completely dependent on them to function effectively. What happens when you take your glasses off? You view the word entirely differently. You have a sense of where things are located but you can't see clearly. Everything is blurred. You might be able to tell where people are located in a room by their movement or the sound of their voices, but you can't recognize them.
This is how parents often view your classroom. They know the basics of the school--when to drop off or pick up, how to register to volunteer or chaperone a field trip, the way grading is done, and when report cards come out. Depending on how you communicate with them, they may even know what standards and content you will cover in class during the week. Even so, most parents feel out of place and uncomfortable at school and around the classroom. They haven't been students in a long time, and they may be unfamiliar with the acronyms and red tape of the current educational system. They want to help their children, but they don't know how and often just try to stay out of the way. As a result, they have limited knowledge of what you are teaching and how their children are learning despite your most valiant efforts to communicate with them.
Over the past few years, we have developed a solution for this. We call it "opening the window to the classroom." When our firstborn started kindergarten, we started to shift our teaching. For the first time, we realized what our classroom parents experienced. After we sent our son to school for an entire day, we anxiously awaited the bell at dismissal, excited to talk to him about all the learning he did. But each afternoon, he returned with an anticlimactic "fine" or "good." He loved the kids in his class, his teacher was nice, and his daily routine was pleasant, but we weren't able to experience any of this with him. We longed to talk to him about what he had learned and share in the joy he clearly felt while at school, but his ability to remember parts to share with us was--well...we'll just say it "need improvement."
We realized we were not the only parents who felt this way; many others also wished to support and encourage their children's learning. Teachers have an army of parents willing to work with their children at home to enrich and extend what is taught at school. But the army needs communication from you. How are you opening your classroom window to let parents see inside? In what ways do you communicate with parents so they can support you at home?
These questions are answered as we share some of our favorite ways to get parents interACTIVE and involved in The InterACTIVE Class!
Grab The InterACTIVE Class today!

The InterACTIVE Class is now available for purchase and for a limited time we have some amazing gifts to give away with each and every purchase in the month of January! Send your receipt our way and we will send these limited resources to you!
Click here to share your purchase with us!
Order today and receive our special book bundle package!

Above was just a small excerpt from The InterACTIVE Class. We are so eager to share all that is written within these pages and we are excited to get the idea of #interACTIVE teaching and learning out into the world. Thank you for being part of our #interACTIVE family!

#interACTIVE Explanation
“The InterACTIVE Class” book is almost here! Learn more about what to expect!
After a year of hard work we are so excited to finally announce that The InterACTIVE Class will be out in January 2020! The book's release date is set for January 14th and preorders will be available soon.

What does it mean to be interACTIVE?
InterACTIVE teaching involves students by allowing them to become ACTIVE participants in their own learning while giving them both choice and voice with in the learning environment. InterACTIVE teachers shift their thinking from WHAT they teach to HOW they teach!

Why is interACTIVE teaching and learning important?
InterACTIVE learning excites and engages students thus giving them the drive to work through challenging tasks and assignments. Students today are growing up in an environment so much different than when we were growing up and thus need to learn in an environment adapted to their needs.

How can you become a more interACTIVE teacher?
Teachers can be interACTIVE not only in how they teach, but also in how they set up and run their classroom. Learn how to create an interACTIVE learning environment where students feel comfortable learning and taking chances. You will also read about how to create interACTIVE relationships with both students and parents.

We are so excited to share The InterACTIVE Class with you and we will be in touch VERY soon with news on pre orders. If you’d like to stay in the know with all things #interACTIVEclass simply head here! Thank you for being part of our #interACTIVE family!

Roll Your Way to More #interACTIVE Lessons
Creating an #interACTIVE learning environment is something that we strive to do as educators every day. But not every engaging activity has to be on a computer, involving song and dance or a costume change. Sometimes a simple die can go a long way!
Creating an #interACTIVE learning environment is something that we strive to do as educators every day. But not every engaging activity has to be on a computer, involving song and dance or a costume change. Sometimes a simple die can go a long way!
The first week of school is always a time where we spend time developing the culture of our classroom and focusing in our our school-wide initiatives. We read books with global lessons like kindness and respectfulness while review the expectations our school has for all students. One of my favorite activities to do is a simple rule review “Cranium style”.
The inspiration for this activity comes from the board game Cranium where players must make their way through the board by getting their team to guess glues through drawing, acting or sculpting out of clay. Although we didn’t have a game board, I used a simple blank dice template to create a fun team-building review activity. Students worked in groups to guess clues to rules we had just reviewed regarding kindness.
Every group of students had a drawing utensil (pencil, white board marker, etc.), a small tub of Play-Doh, and the teacher-made die and a pile of cut out rule cards.
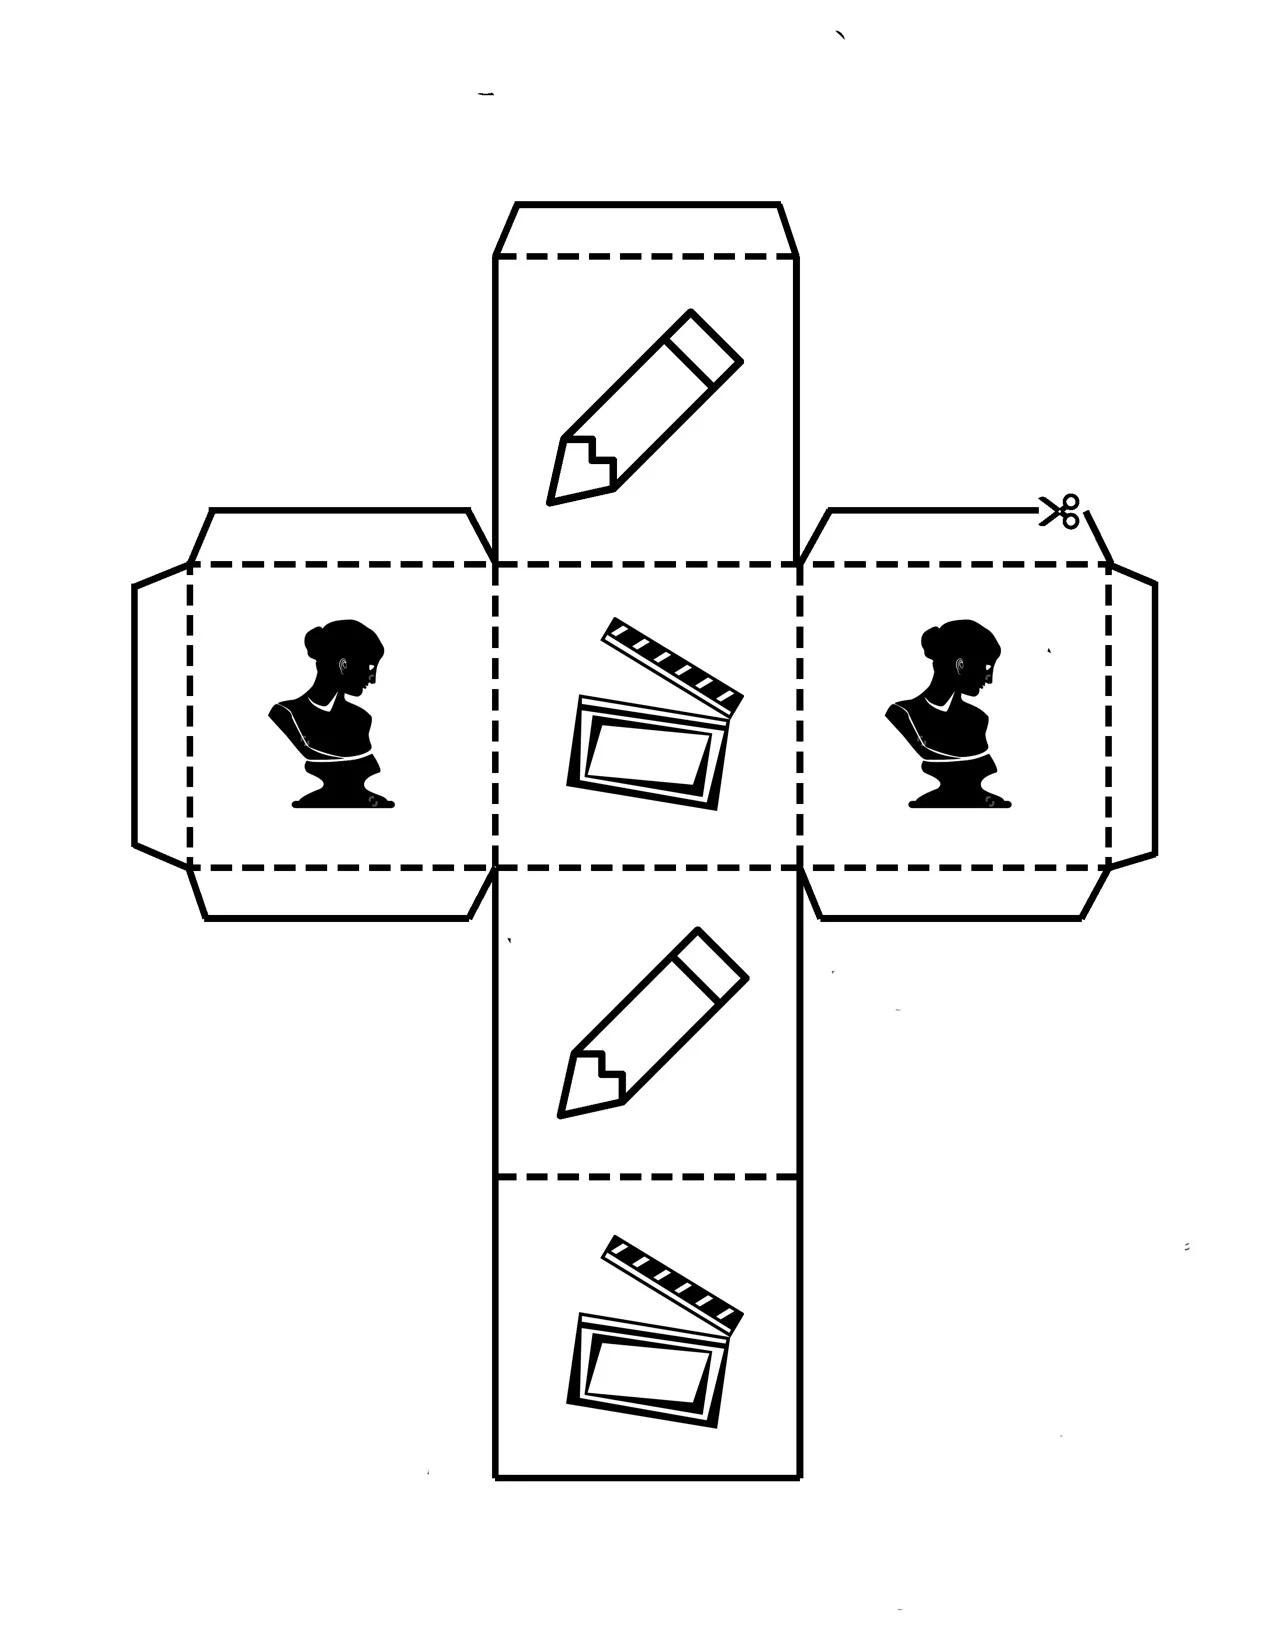
Each side of the die has an image representing the way the student will try to get their group to guess the rule—pencil means they draw, the bust means they sculpt and the clapperboard indicates they will in turn act out the clue. They roll the die, grab a clue card and then turn the timer for 30 seconds. (We used sand timers but you could monitor the time in many ways!)
This is always one of my favorite activities every year because it is a perfect way to match content with collaboration. Now in this lesson we used the dice to review school/class rules but the beauty of the Cranium-style actions is that they could be used with any content. Have lab procedures to review in science—do it in an #interACTIVE style! Maybe you want students to review the week list of vocabulary words—try it in this #interACTIVE way!
But maybe you don’t want to review something as route and routine as vocabulary words or class rules. We have also included a blank template for you to take and edit for your own #interACTIVEclass! Maybe you put literature group questions on each side, or math equations for students to solve. A simple edited die could create a fun vocabulary center as well. Roll to find the part of speech, a synonym/antonym or draw an illustration representing the word. The possibilities are endless!
If you have wound up in a position where you are solely teaching students virtually, no worries! Try using a live dice video to create the same experience for students. Direct students to the video or embed directly into your LMS, and have them pause and unpause as needed to “roll” their way through any planned activity. The example below is just one of many free resources available.
As the new school year rolls out, just remember that #interACTIVE lessons don’t always have to take a long time to plan or use lots of external resources. Simple and sweet is often the best way to get students engaging with content while collaborating and creating with each other.
-K 👗
For more interACTIVE ideas on making teaching and learning more relevant and engaging, check out our book The InterACTIVE Class!


"The #interACTIVE Class - A Flipgrid Feature!"
ICYMI: Back in October, our sat down with our friends over at Flipgrid to share some of our successes for the world premier of the first “Flipgrid Feature.” Now, you can see the entire webinar!
ICYMI: Back in October, we sat down with our friends over at Flipgrid to share some of our successes for the world premier of the first “Flipgrid Feature.” Now, you can see the entire webinar below! Here’s some info from Flipgrid:
“For the world premier of our first Flipgrid Feature, join Student Voice Ambassadors Kristin and Joe Merrill as they share their creative blueprint for infusing your classroom with mind-boggling, jaw-dropping, double-take activities that spark your students' joy, laughter, and curiosity!
From "Flipgrid TV" to "Teacher Caught in a Video Game" to "Choose Your Own Adventure," Joe and Kristin are constantly upping the game when it comes to #StudentVoice!”

Pretty vs. Pedagogy
Pretty things glitter, sparkle and are appealing to the eyes. They attract us and lead us towards them, but often what happens is that once we get a hold of them we lose sight of what’s surrounding us.

Pretty things glitter, sparkle and are appealing to the eyes. They attract us and lead us towards them, but often what happens is that once we get a hold of them we lose sight of what’s surrounding us.
It seems to me that these pretty things are popping up more and more as I walk through this world we call education. It masquerades itself as purposeful and meaningful learning, but when you look past the shininess of the glitter and sparkle, the pedagogy behind these lessons and materials is very weak or sometimes, non existent.
From neon colored card stock, flashing lights, to songs and dances, these practices that are becoming more and more popular are fading farther and farther away from the tried and true pedagogy we should be using to guide our way. Students should be creating and designing in classes, not putting together crafts created by the teacher. Students should be communicating their ideas amongst each other and sharing their own thoughts rather than writing them down on paper. Students should be asking questions and inquiring about their learning material, not answering teacher-made questions on a worksheet. Regardless of how cute the font or borders look! (If you want a great read on worksheets, take a look at Jennifer Gonzalez’s blog post “Frick’n Packets”.
I know it is easy to go to a website, search for a topic or standard that aligns with what you are teaching and use a lesson created by someone else. And believe me—there has been a time or two when I have done the same. But when you get stressed, busy or just plain overwhelmed, remember that true teaching and learning doesn’t always need to be pretty and flashy—it can often occur with very little. 💎