Going ⚡LIVE ⚡on Flipgrid with YouTube!
#RemoteLearning just got a whole lot easier with this Flipgrid hack!
We’ve been embedding YouTube videos into some of our remote learning Flipgrid lessons. The easy integration is a simple cut and paste. So, that got us thinking…Could you embed a YouTube Live stream?
The short answer is yes! When you launch a YouTube Live stream, you are provided a URL that can be shared. By copying and pasting this code into the Flipgrid integration, you YouTube Live stream will allow you to deliver content in real time to you students while watching their replies. For example, let’s say that you are teaching a math strategy. The educator can model what that might look like, then in real-time ask the class to solve a problem on their own. As the class submits responses, the educator can view the responses and provide real-time feedback. Mr. Merrill finds this extremely beneficial with K-2 students.
“If you’re hosting a live video conferencing “event,” you have to teach the digital citizenship of what is appropriate and what is not. That means you have to teach your students how to do things like mute themselves. For a K-2 student, this could be challenging. This provides an opportunity to deliver the same content in an efficient manner.”
Interested in learning more? See the video above, or follow the steps below.
Requirements: You’ll need a Google and Flipgrid account
Steps:

Start on YouTube.com and make sure that you’re signed into your Google account. Locate the camera with the “+” sign (on the top right side of the window), located just to the left of your profile pic. Click it!

A drop down menu will show up once you click the camera. From here, click “Go live.” Don’t worry - you won’t be live on air just yet. 😜

On the following screen, change your video’s title to match your lesson. Then, click the down arrow to change your video from “Public” to “Unlisted.”
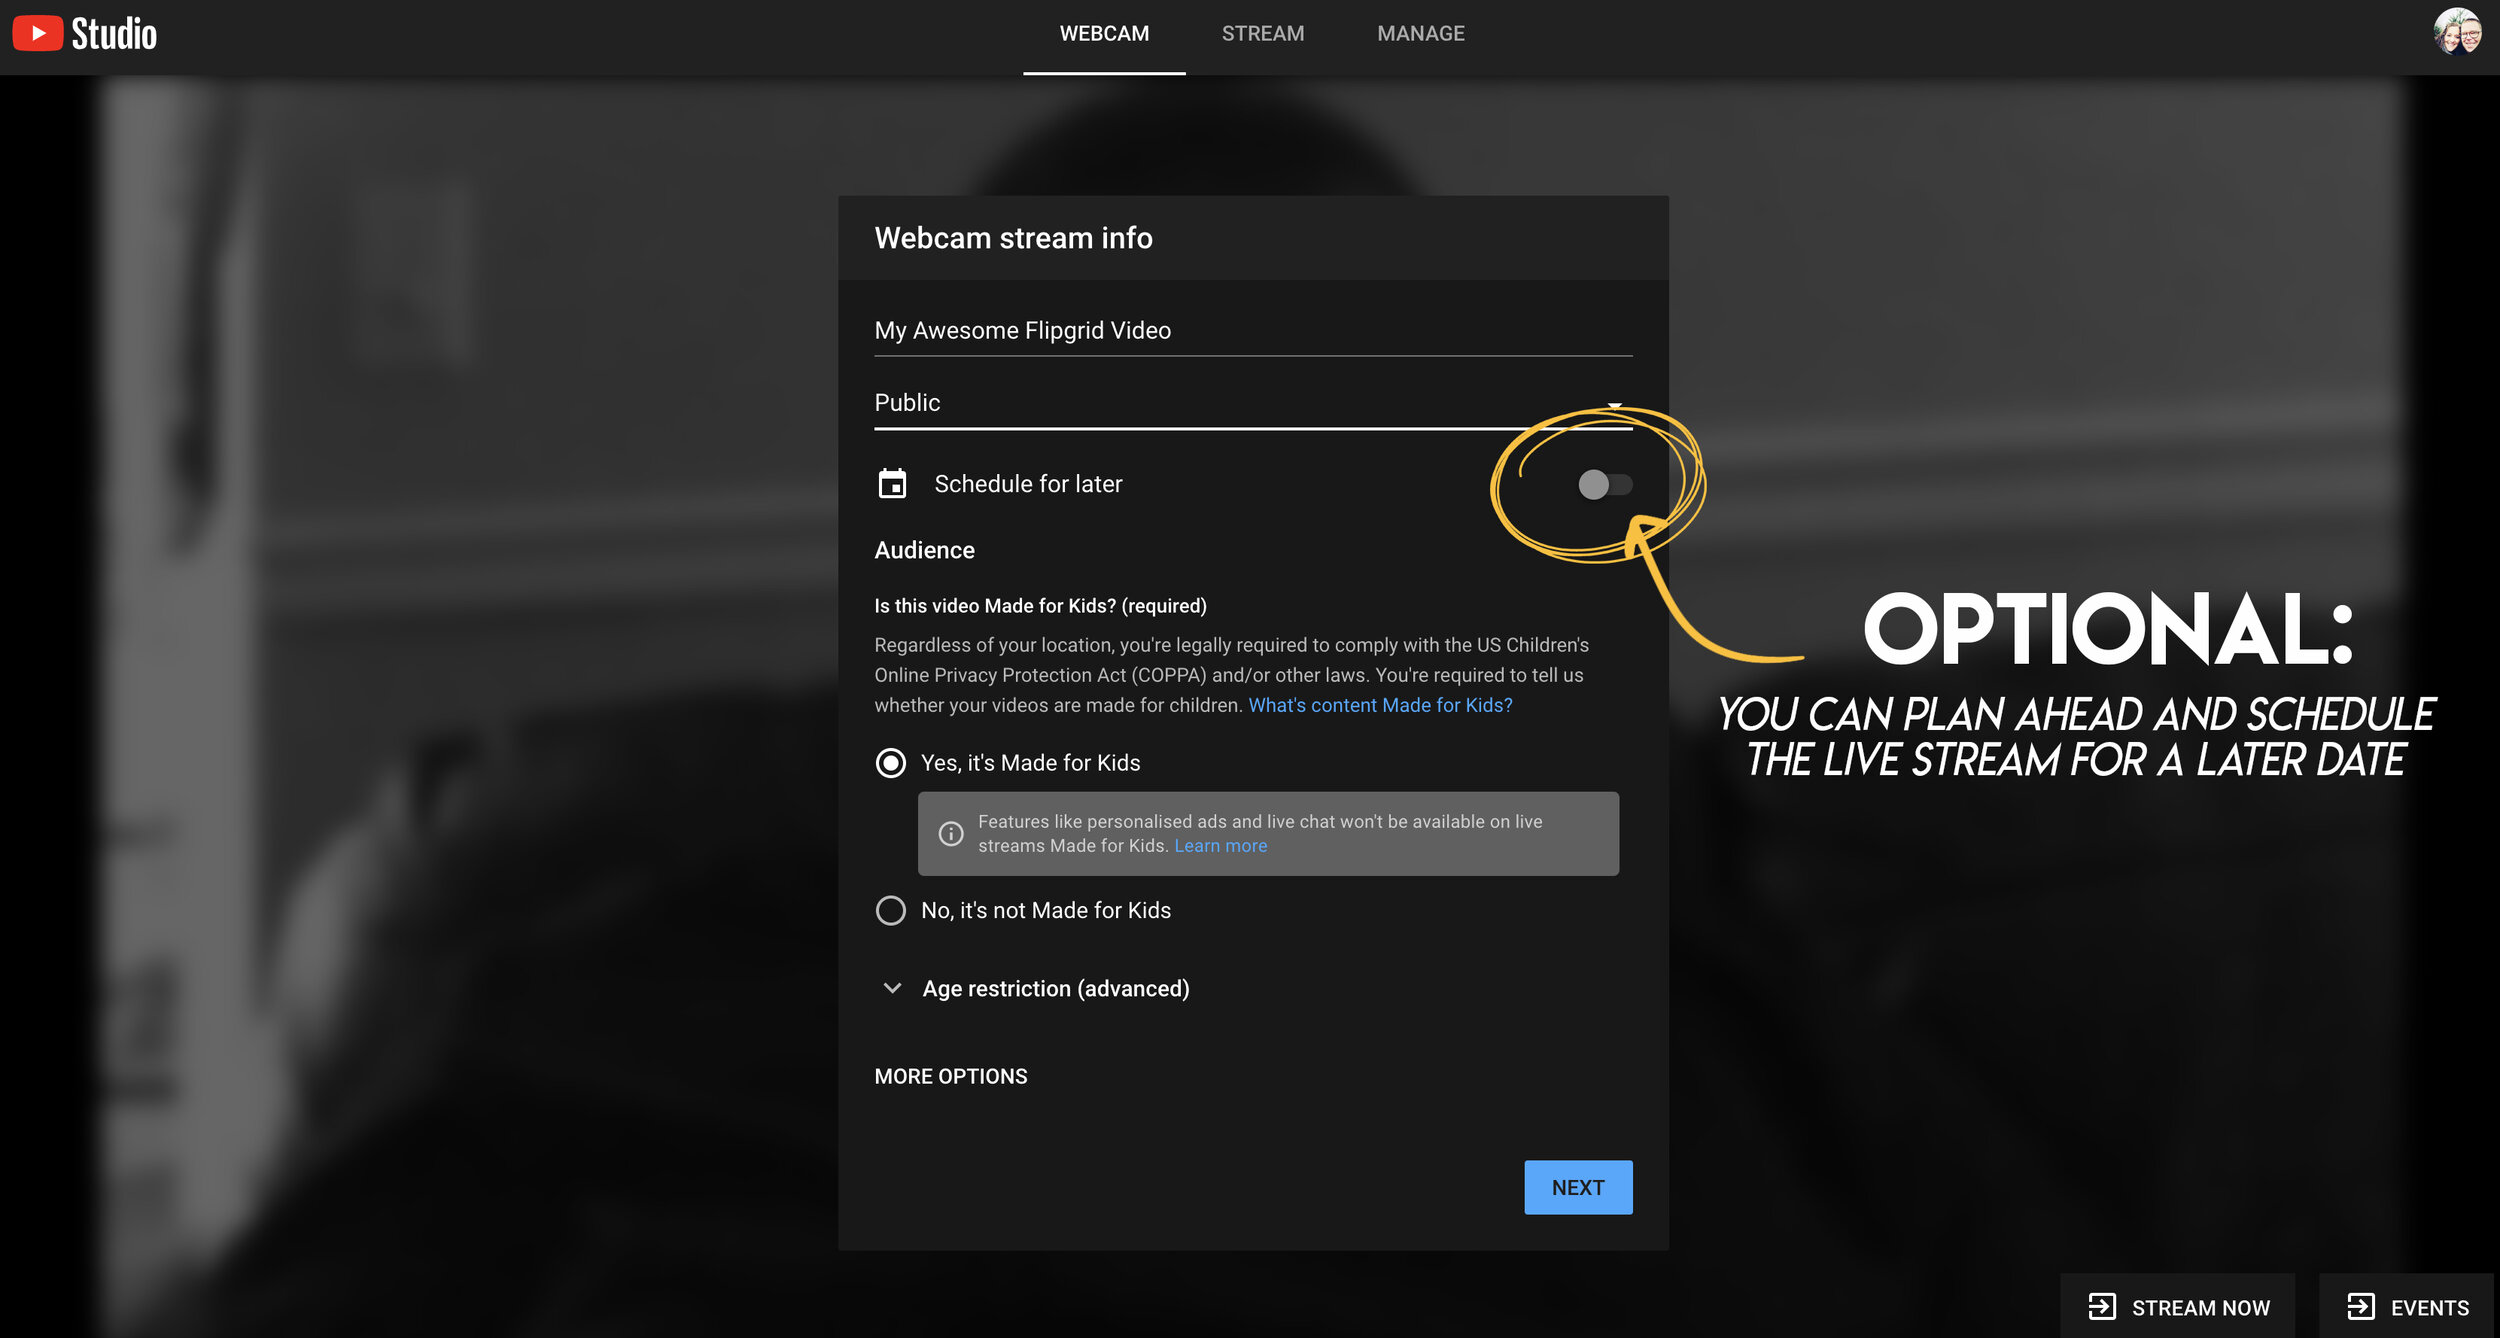
Optional step: You can schedule your live video ahead of time - that way it will be ready to go when you arrange a time to meet with your students.

We recommend saying “yes, it’s made for kids.” This will prohibit inappropriate ads from displaying.

Once you have all info filled out, click next. Note: You will be quickly prompted to take a selfie that will be used for the video’s thumbnail!

Take your selfie for the video’s thumbnail!
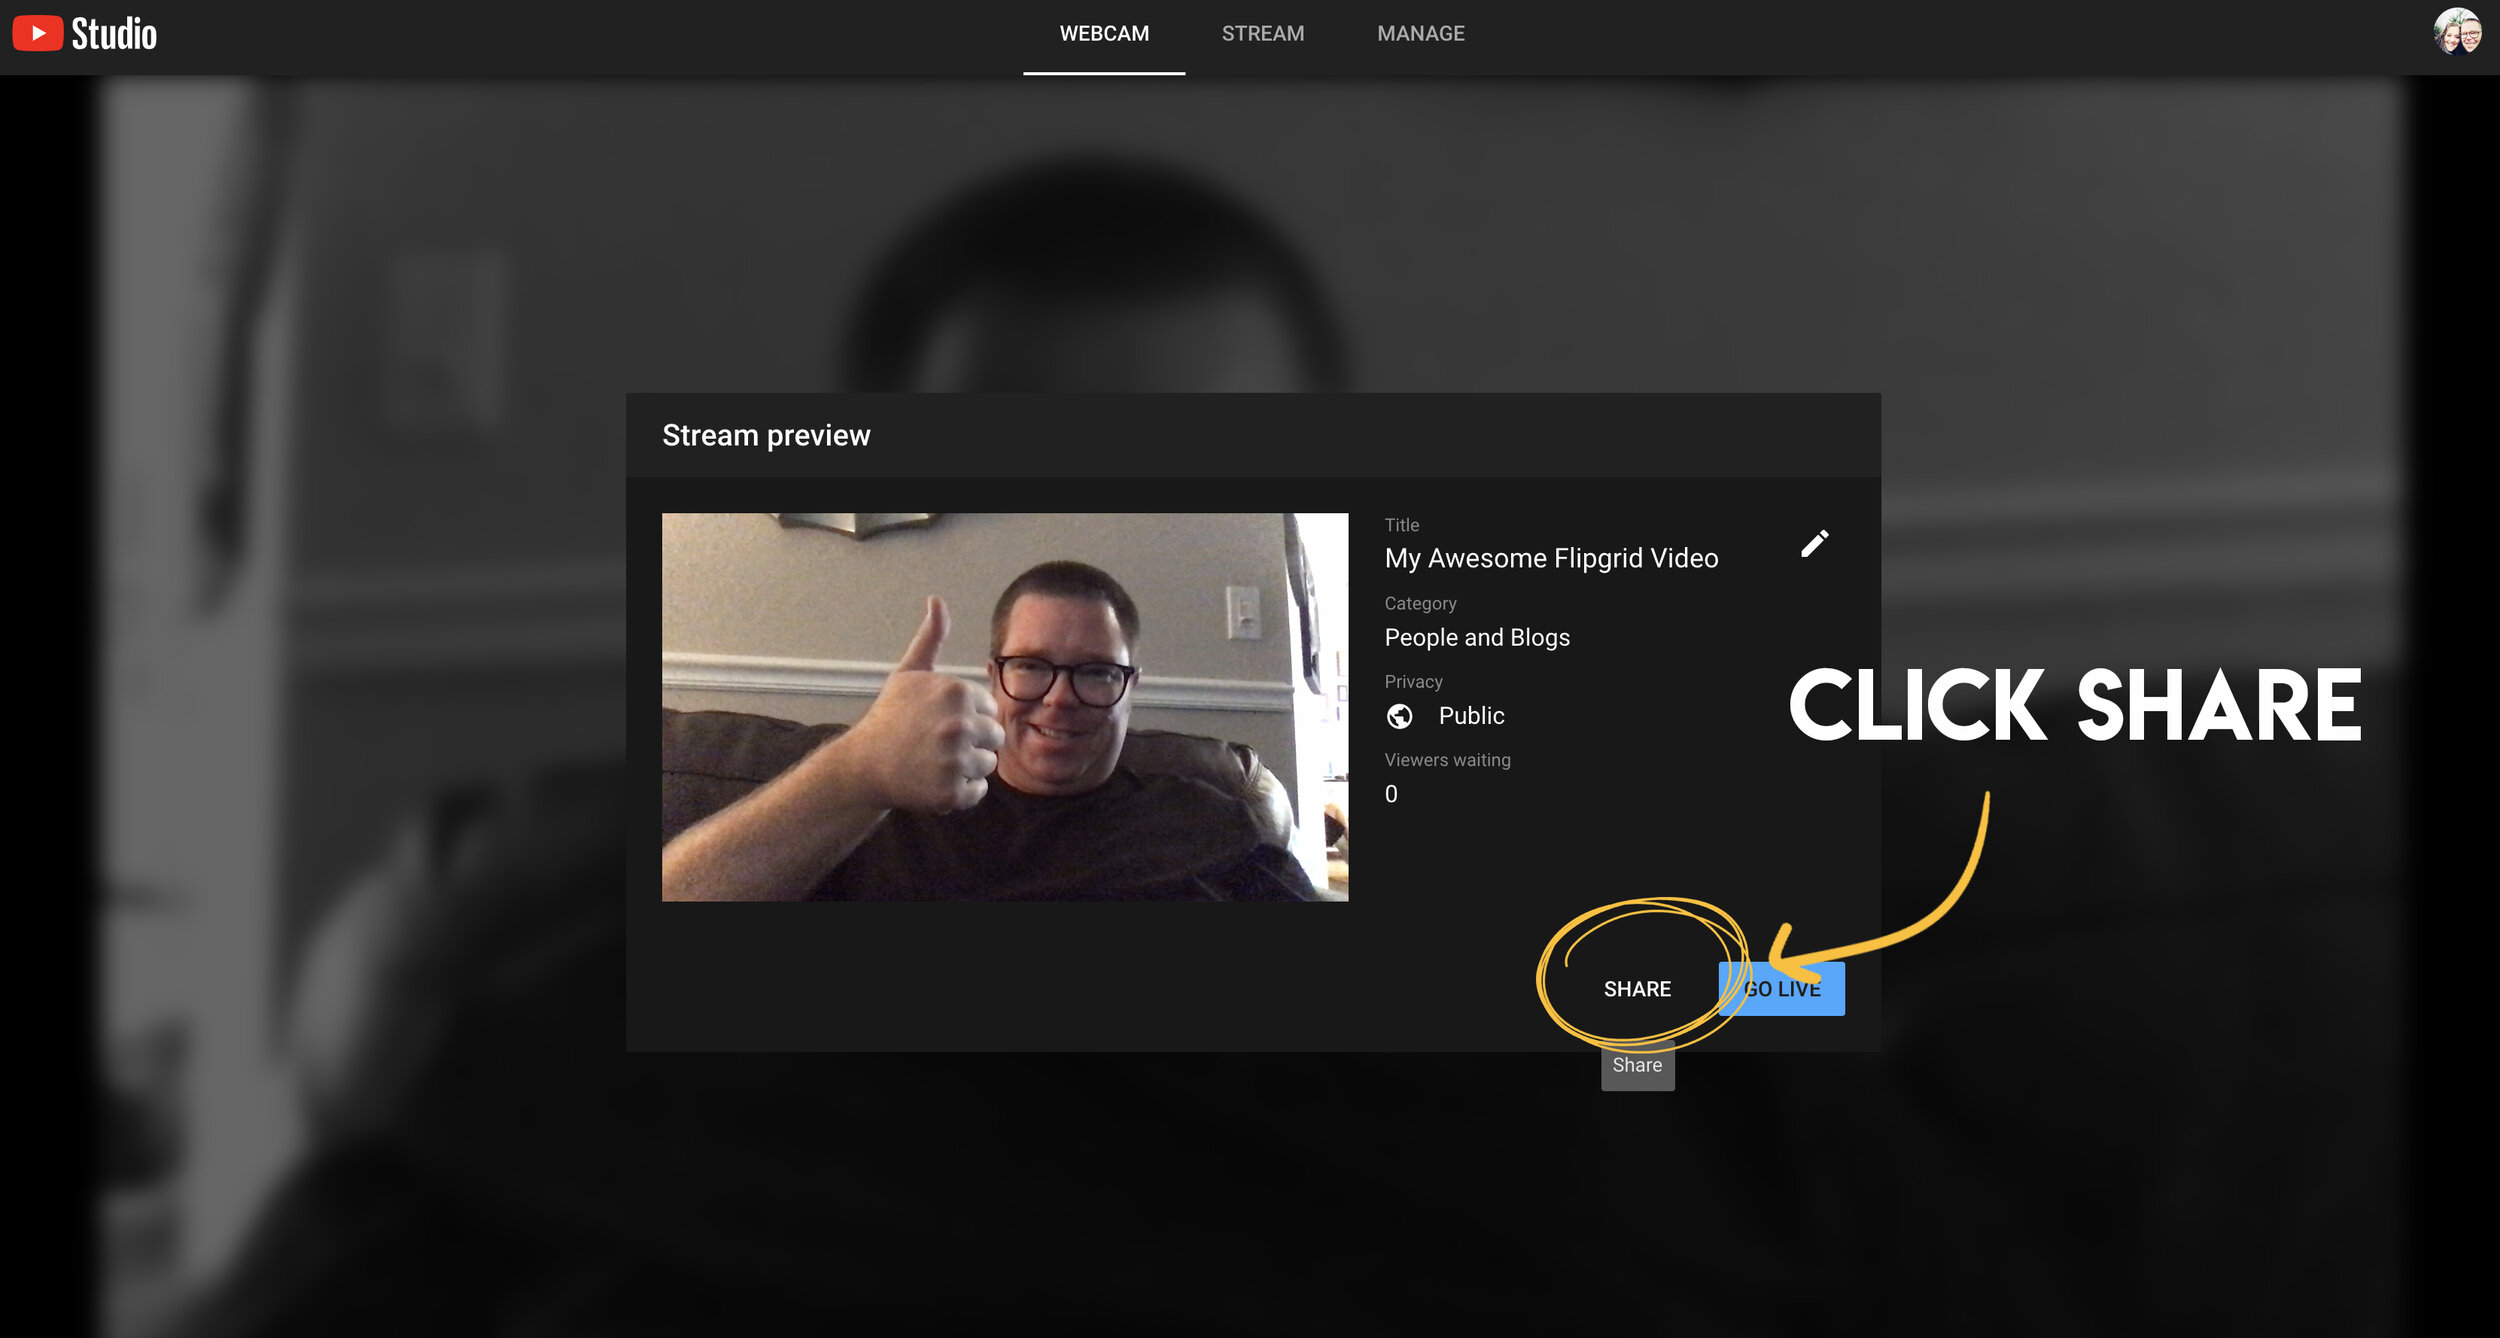
The next step is to click “share.” This will generate your live video stream’s URL.

Once the URL is generated, click “copy” to copy the URL to your computer’s clipboard.

Now you’re ready to head to Flipgrid. Open a new tab and log into your Flipgrid account. Then click on your preferred grid. From there, click on “Add New Topic.”

In your new topic, add a lesson title. You’ll also want to explain the task that you’ll be discussing with the students in the prompt. Lastly, click on the YouTube / Vimeo resource button.

This will open a pop up that asks you for your YouTube URL. Here’s where you will paste the URL code you copied from YouTube. Once you paste it, click “next.”

Your YouTube live stream will appear (although nothing is playing yet, because you haven’t started the live stream - that’s coming up). Just click “add” to embed the video into your Flipgrid topic.

Now you can see your YouTube video embedded on Flipgrid. Click “create topic” to launch the topic on Flipgrid.

This is your confirmation screen. If this pops up, you have done everything correctly! Click “all set” to move on!

When you’re in your newly created topic, your screen should look like this. Notice, the YouTube Live video says it’s “Waiting…”That’s because we haven’t started it yet. You’ll want to make sure your students are logged on and ready to go before your proceed to the next step.
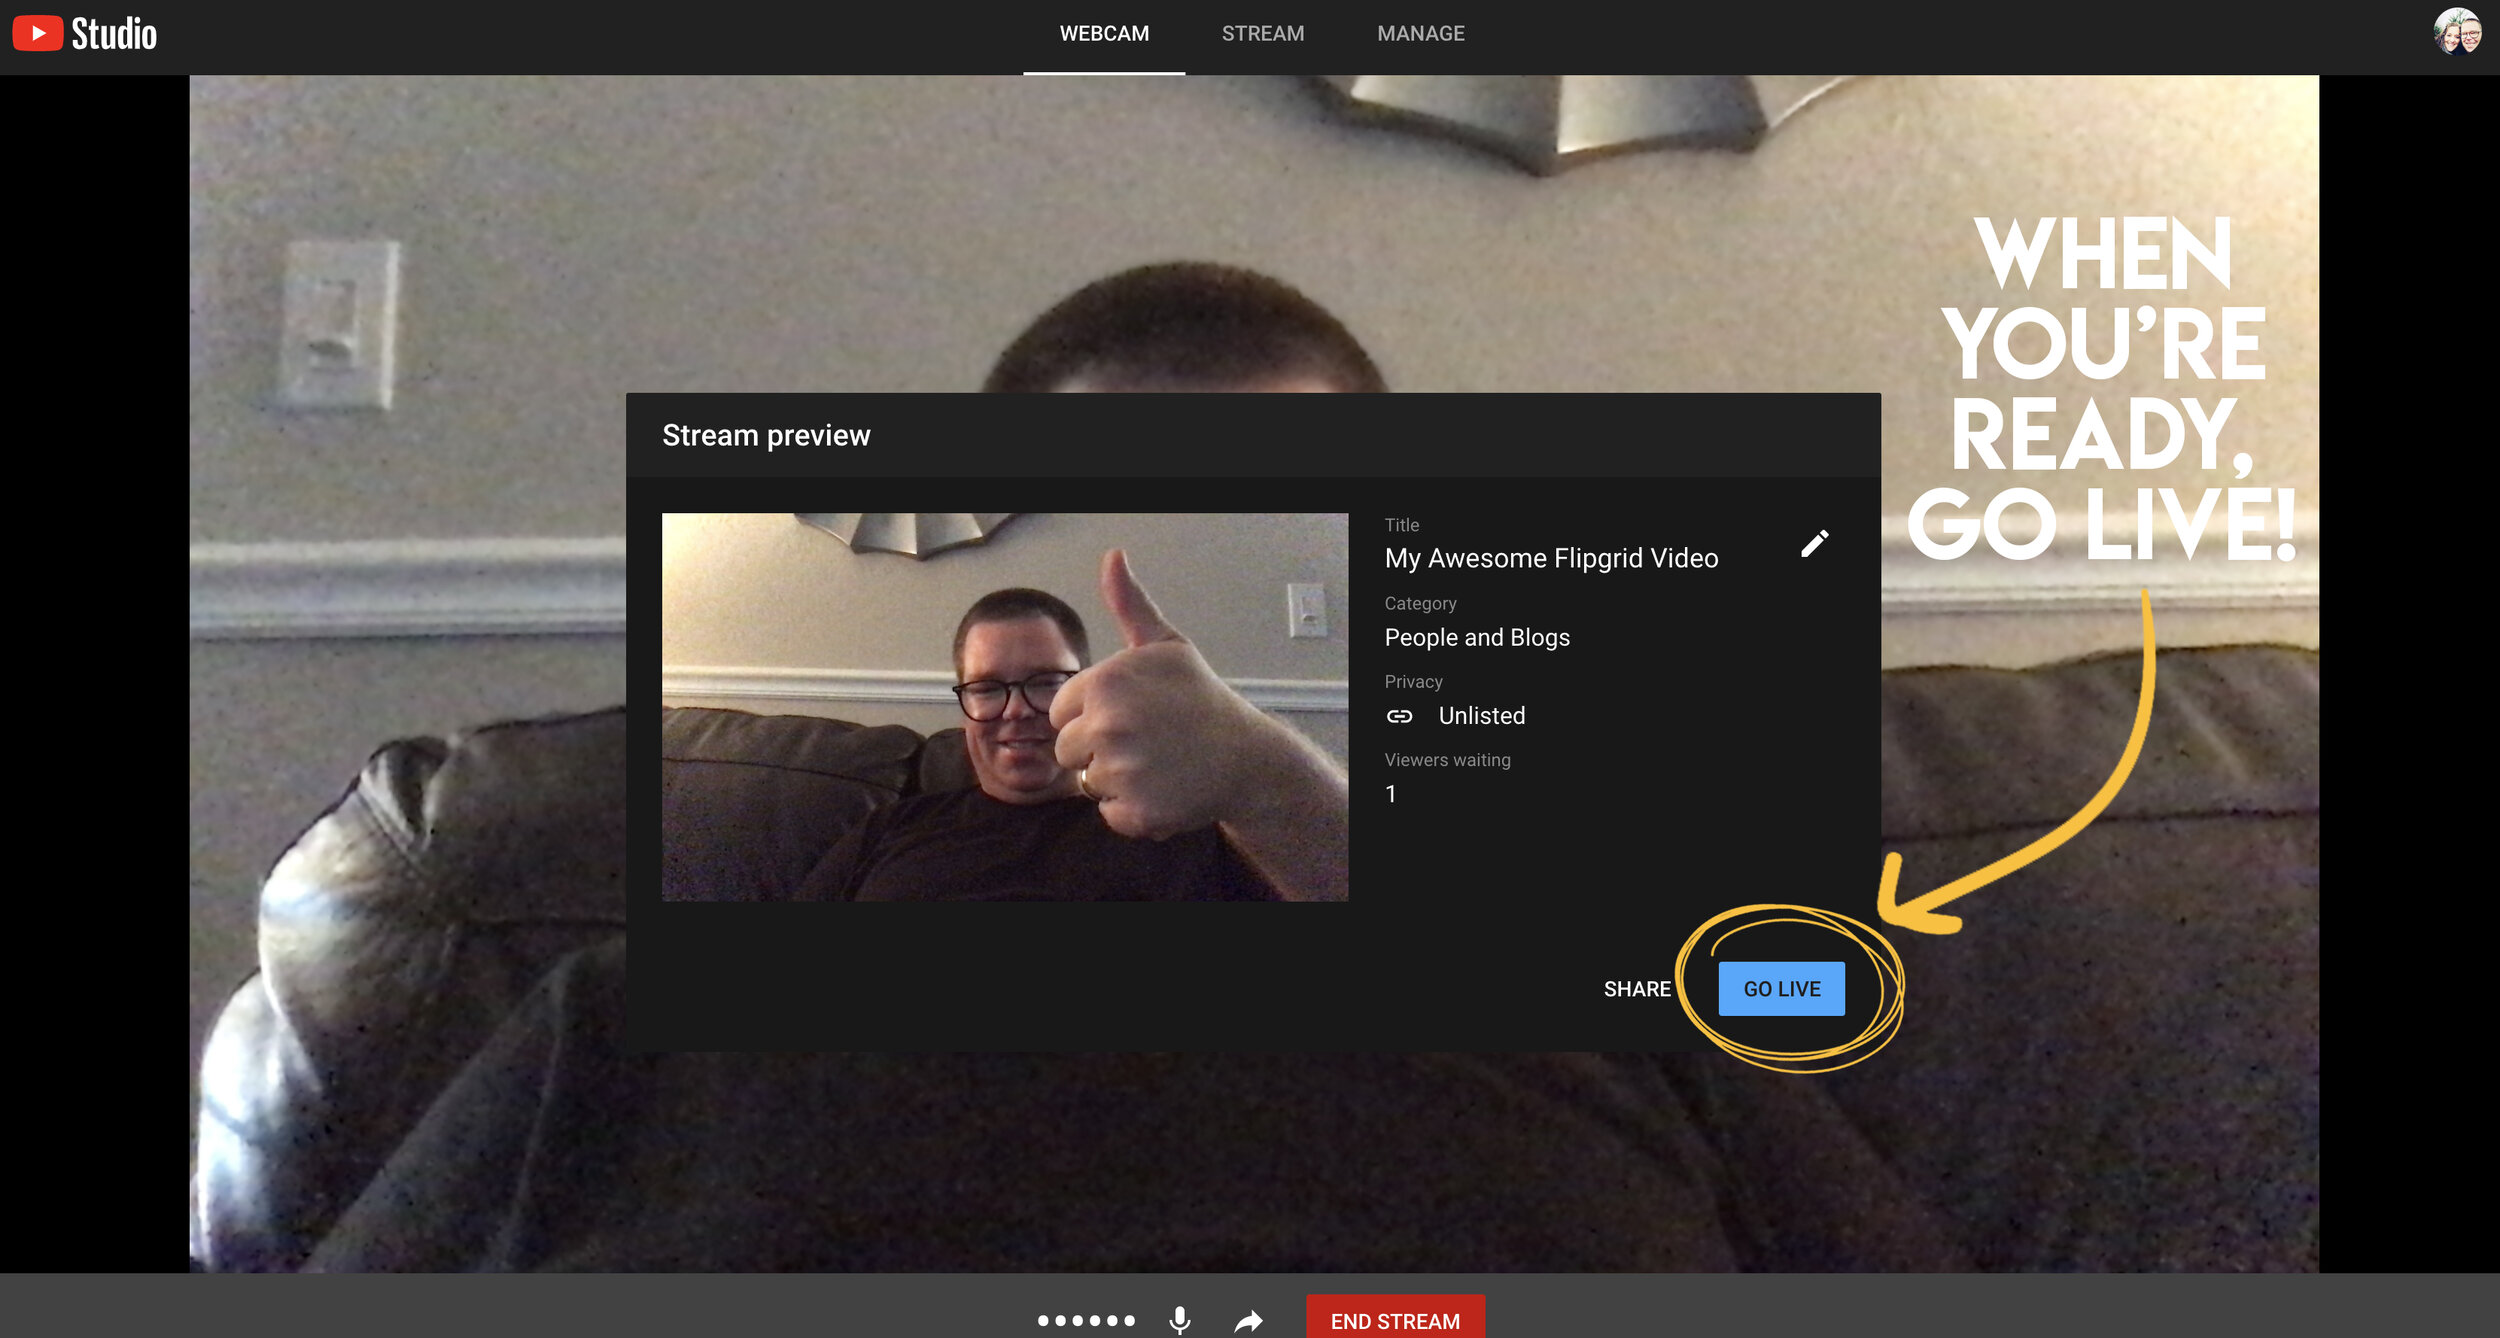
Click on the tab that you left open for YouTube. Click on the blue “Go Live” button to launch your live stream. Now, when your students are on Flipgrid, they can click the play button to watch you live - in real time. Note: if you have students leave responses during your live stream, they will need to click on the YouTube video again to restart the playback (it won’t automatically start again).

Once you are finished with your instruction, click “end stream” on YouTube. You’ll be asked if you are sure that you want to end it. Click “end.” Your live stream has now concluded - but if students were unable to log in during your presentation time, they can always go back and watch the replay of the video!
We hope this hack comes in handy and that you are able to remotely connect with your students! If you have any questions, please don’t hesitate to reach out!
👓 & 👗
💚💚💚
For more #interACTIVE lesson ideas using Flipgrid, check out our book The InterACTIVE Class on Amazon!