

Creating Digital Anchor Charts in Flipgrid
Flipgrid is by far one of our favorite educational apps to use both in the classroom and even more now during this period of remote learning. It has many useful features for teachers to use when creating lessons, one of these being the photo sticker tool.
Flipgrid is by far one of our favorite educational apps to use both in the classroom and even more now during this period of remote learning. It has many useful features for teachers to use when creating lessons, one of these being the photo sticker tool.

Using the Photo Sticker Tool to Create Anchor Charts
To create a virtual lesson on Flipgrid with an “anchor char” start by heading to the top bar in the educator dashboard and click on the Shorts tab.

You can use the Flipgrid features in any recording screen in Topics, when recording a response and a reply, but we suggest using the standalone Shorts camera option so all your teaching videos are saved and stored in the same place. To begin recording a video, simply click on the orange-pink button in the top, right hand corner labeled Record a Short.

Once in the Shorts recording window, begin by clicking on the photo sticker tool icon. This is the icon on the far right of the tool bar—the one that looks like a framed photo.

It will ask you to drop in or upload a photo from your device in either PNG or JPG format. Once your photo has been uploaded, it will become a free floating image on top of the recording screen. To create your anchor chart, simple size the image as large as you can so you still have enough room to be in the screen beside it. Now you are ready to record!
While recording your lesson with your anchor chart, try using some of the other Flipgrid tools simultaneously:
Pause feature: Once recording has begun, the record button turns into a pause button. Use this to switch between various anchor charts in the same lesson. You can also use the pause feature to add multiple images at once.


Draw tool: Use the draw tool to live ink on an anchor chart to highlight a specific part of the chart or you can draw attention by circling text evidence. You can even use it to match two things together on the “page” or to take notes off to the side.
Text tool: Try using the text tool to “write” directly on top of your anchor chart. This is a great way for teachers to model their thinking for students and to work through problems “together”.
Looking for more resources on creating anchor charts? Watch our live tutorial here!

Flipgrid is such a versatile tool and one that we use daily during our own remote learning instruction. Interested in learning more about Flipgrid?
Click here to learn more about Using the Draw Tool in Flipgrid
Click here to learn more about Going Live on Flipgrid
Click here to learn more about Using Flipgrid for Inquiry
Click here to learn more about Creating Student Podcasts in Flipgrid
For more #interACTIVE lesson ideas using Flipgrid, check out our book The InterACTIVE Class on Amazon!


Going ⚡LIVE ⚡on Flipgrid with YouTube!
Did you know that you can use YouTube LIVE to launch a live stream discussion into Flipgrid? Check out this hack that’s perfect for #RemoteLearning!
#RemoteLearning just got a whole lot easier with this Flipgrid hack!
We’ve been embedding YouTube videos into some of our remote learning Flipgrid lessons. The easy integration is a simple cut and paste. So, that got us thinking…Could you embed a YouTube Live stream?
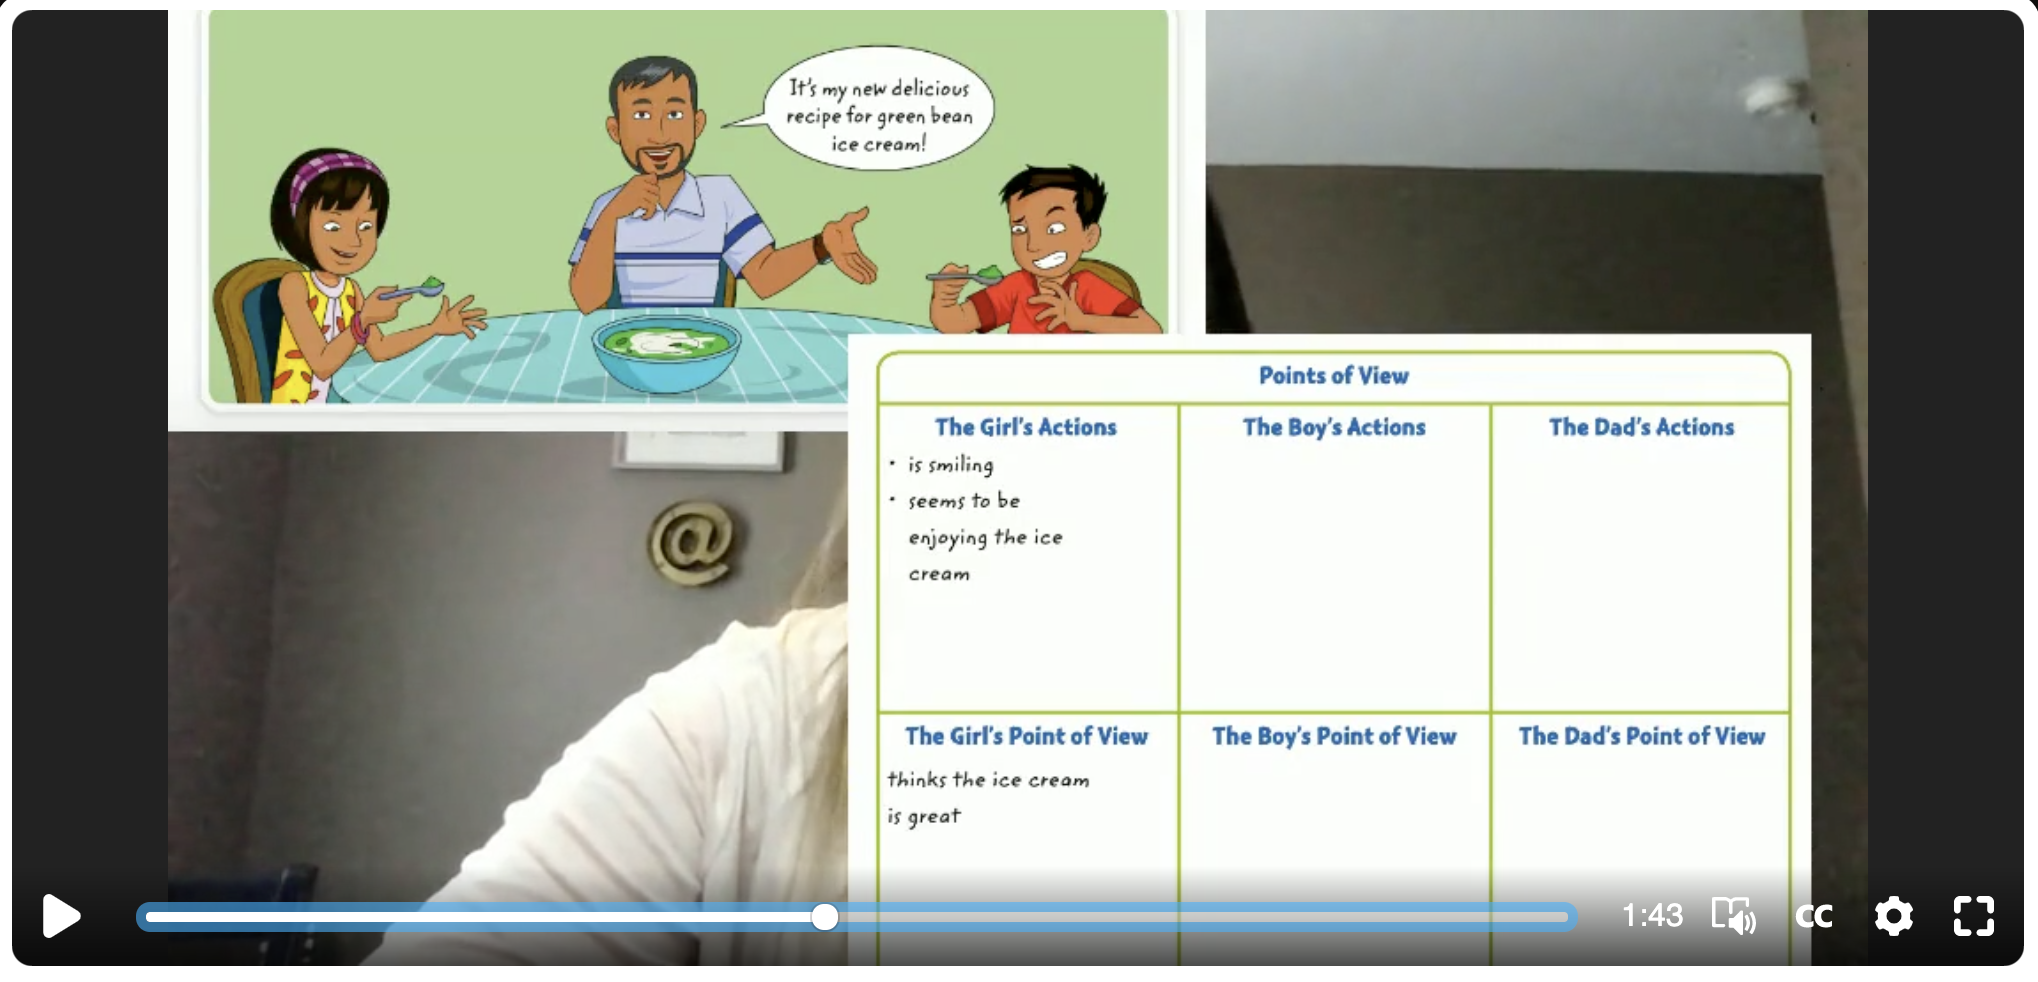
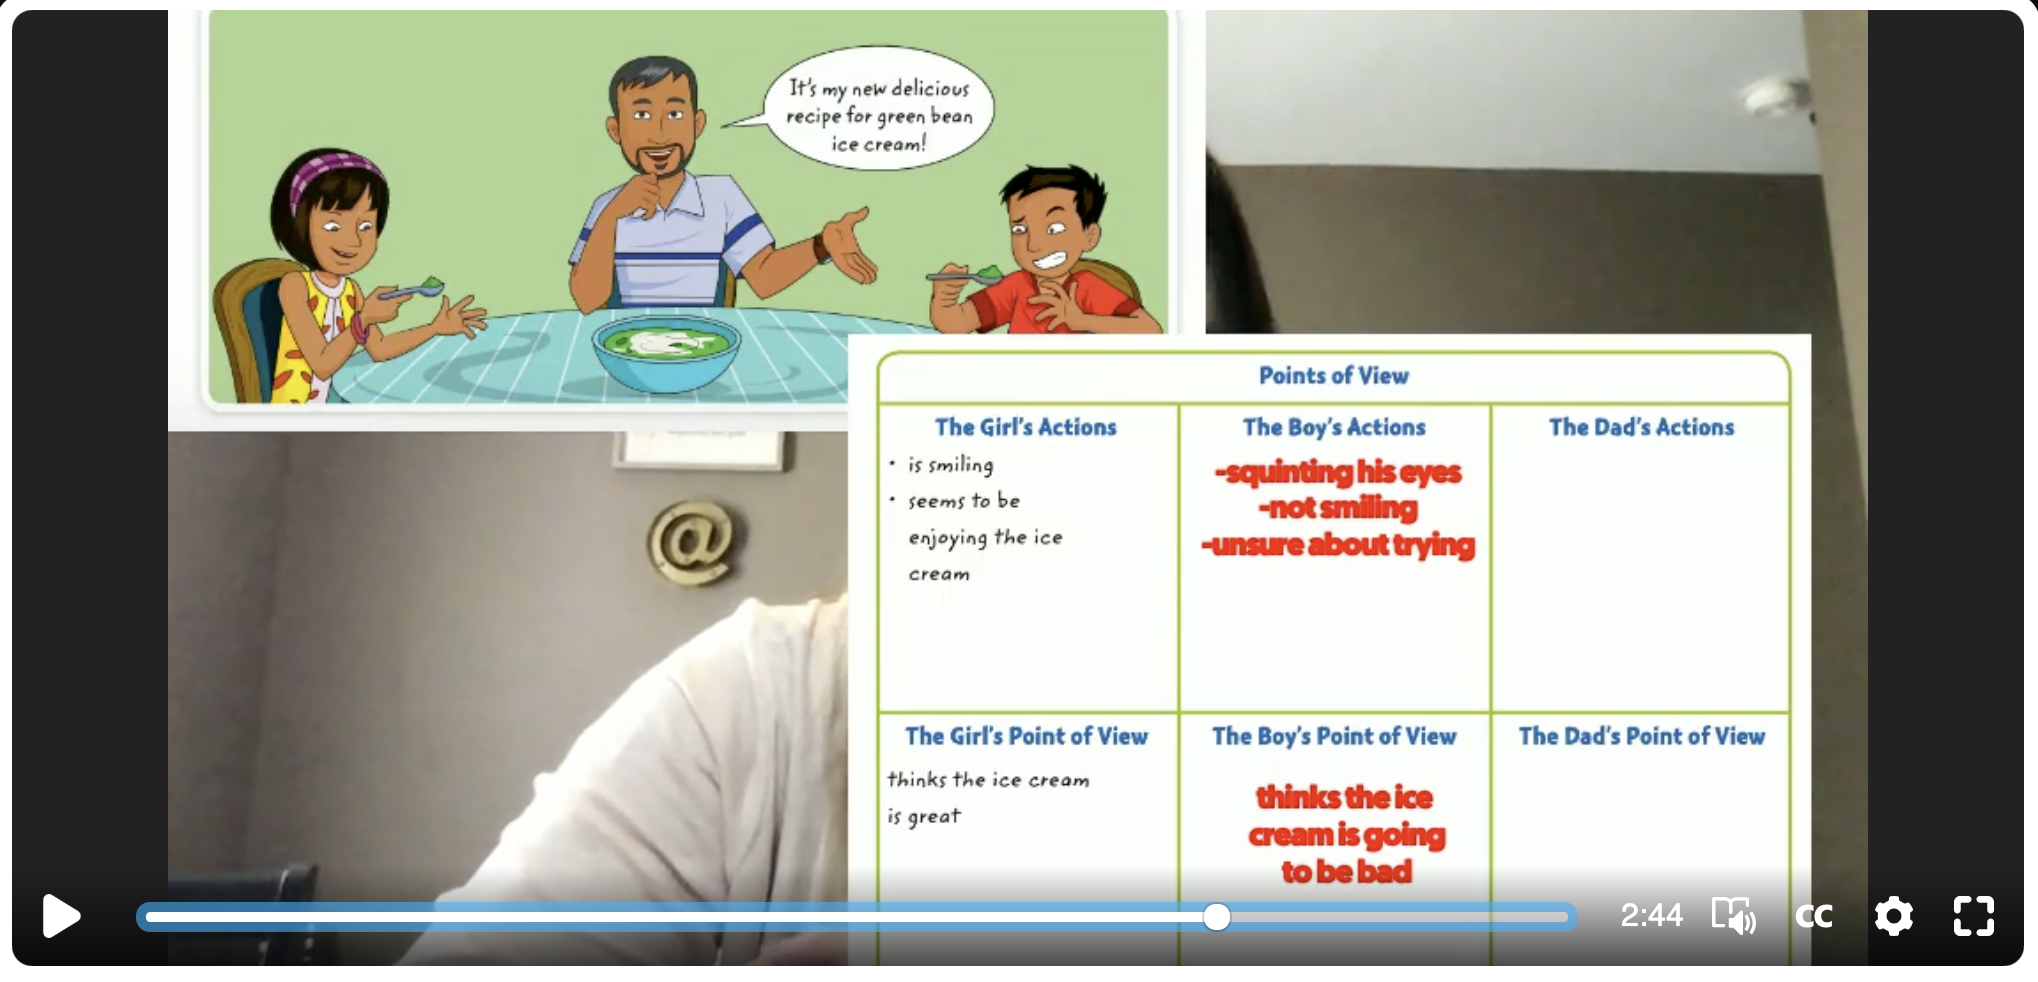
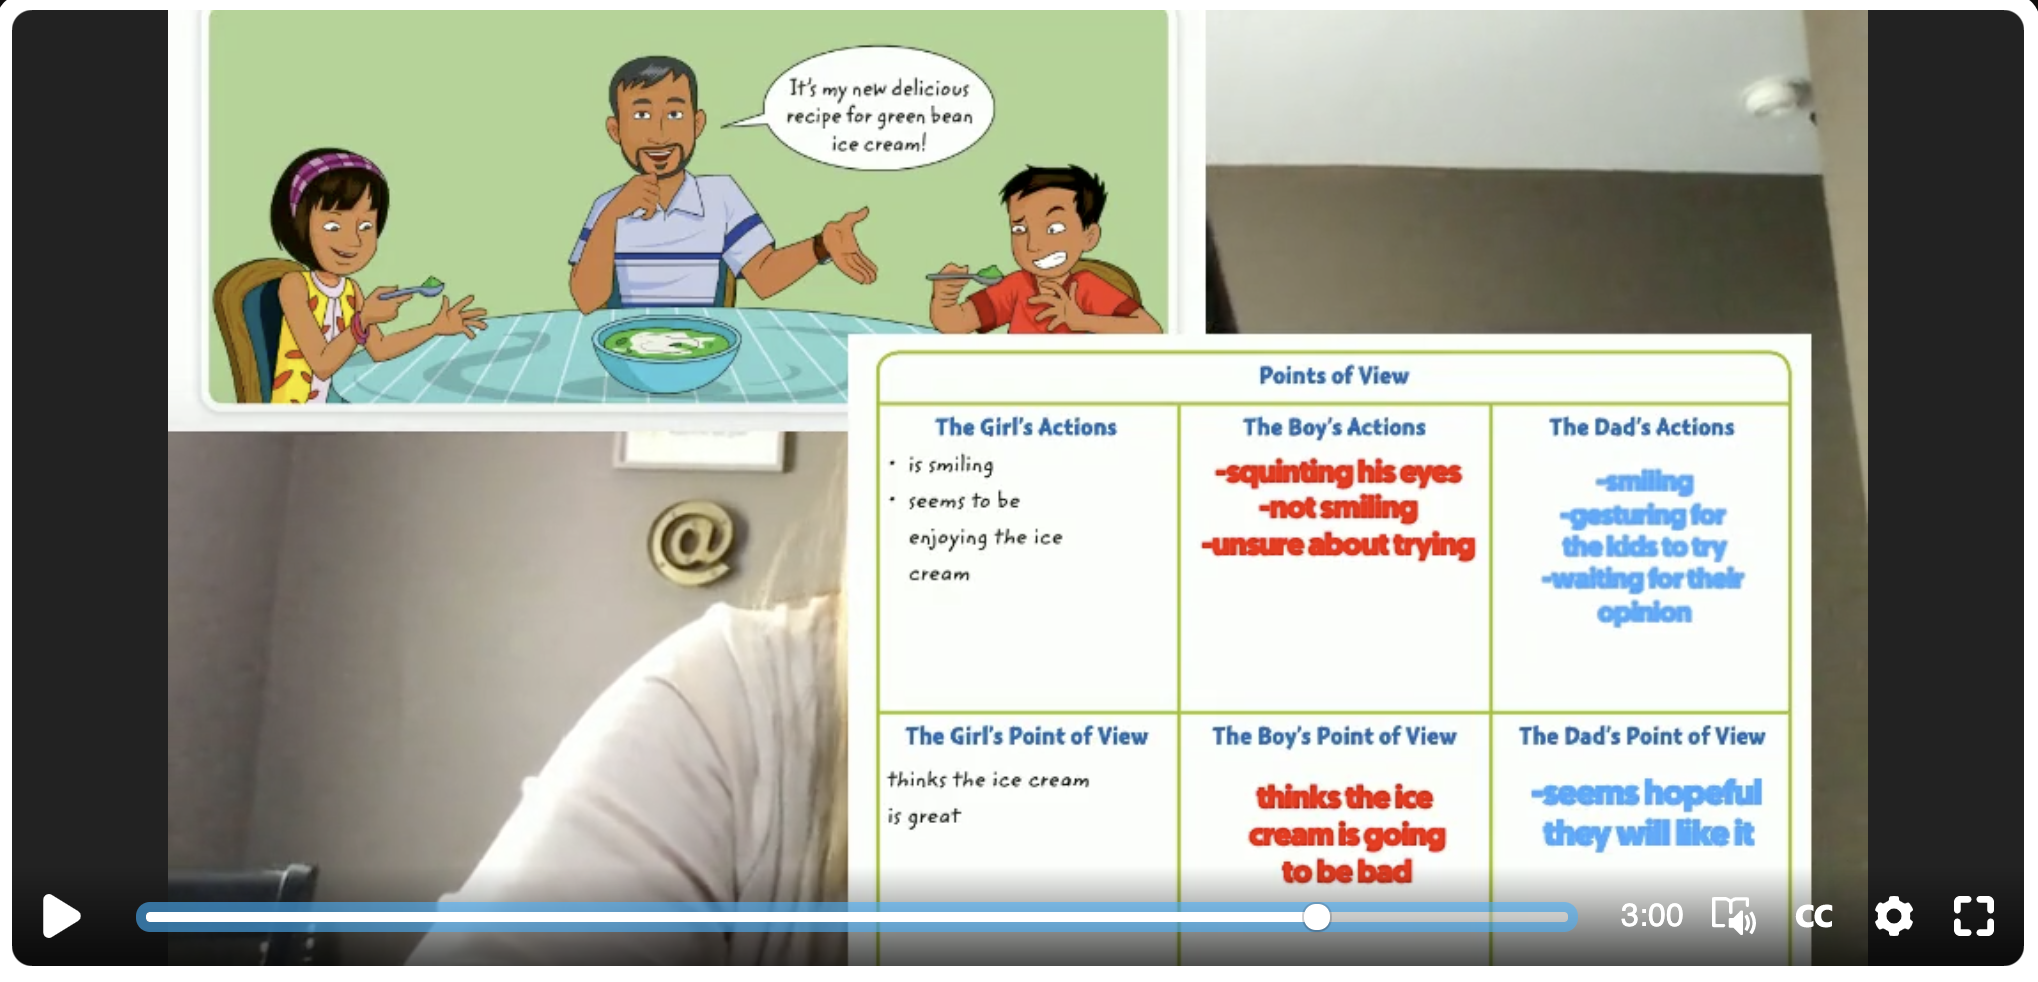
The short answer is yes! When you launch a YouTube Live stream, you are provided a URL that can be shared. By copying and pasting this code into the Flipgrid integration, you YouTube Live stream will allow you to deliver content in real time to you students while watching their replies. For example, let’s say that you are teaching a math strategy. The educator can model what that might look like, then in real-time ask the class to solve a problem on their own. As the class submits responses, the educator can view the responses and provide real-time feedback. Mr. Merrill finds this extremely beneficial with K-2 students.
“If you’re hosting a live video conferencing “event,” you have to teach the digital citizenship of what is appropriate and what is not. That means you have to teach your students how to do things like mute themselves. For a K-2 student, this could be challenging. This provides an opportunity to deliver the same content in an efficient manner.”
Interested in learning more? See the video above, or follow the steps below.
Requirements: You’ll need a Google and Flipgrid account
Steps:

Start on YouTube.com and make sure that you’re signed into your Google account. Locate the camera with the “+” sign (on the top right side of the window), located just to the left of your profile pic. Click it!

A drop down menu will show up once you click the camera. From here, click “Go live.” Don’t worry - you won’t be live on air just yet. 😜

On the following screen, change your video’s title to match your lesson. Then, click the down arrow to change your video from “Public” to “Unlisted.”
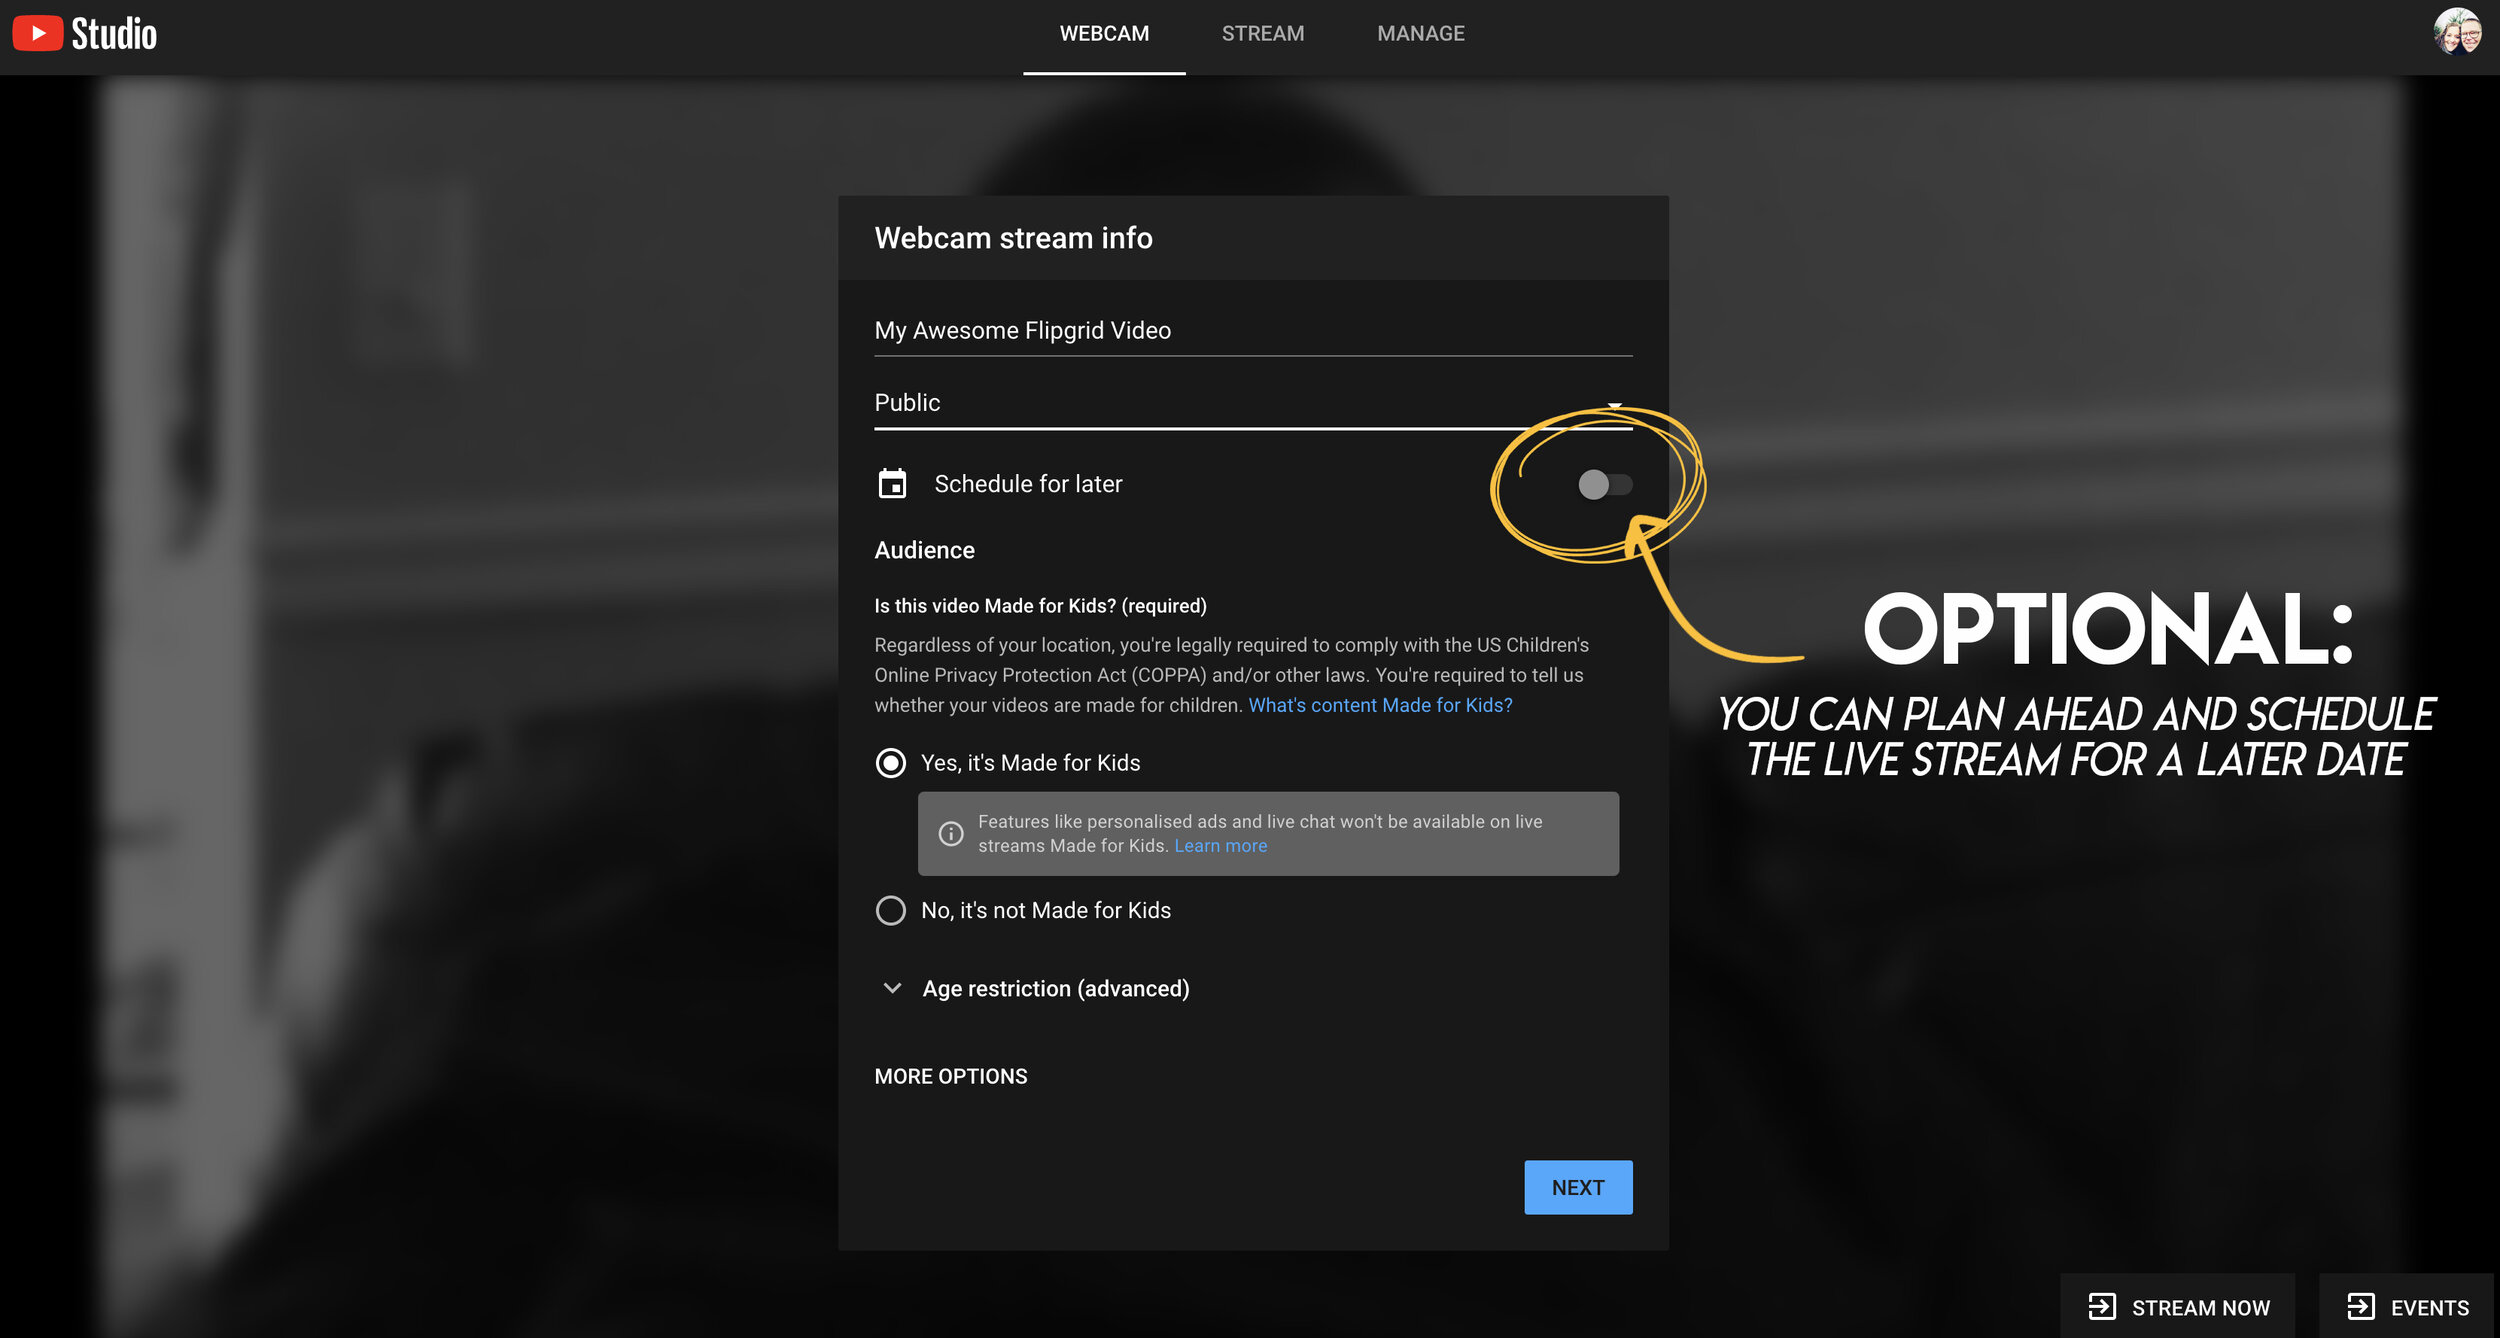
Optional step: You can schedule your live video ahead of time - that way it will be ready to go when you arrange a time to meet with your students.

We recommend saying “yes, it’s made for kids.” This will prohibit inappropriate ads from displaying.

Once you have all info filled out, click next. Note: You will be quickly prompted to take a selfie that will be used for the video’s thumbnail!

Take your selfie for the video’s thumbnail!
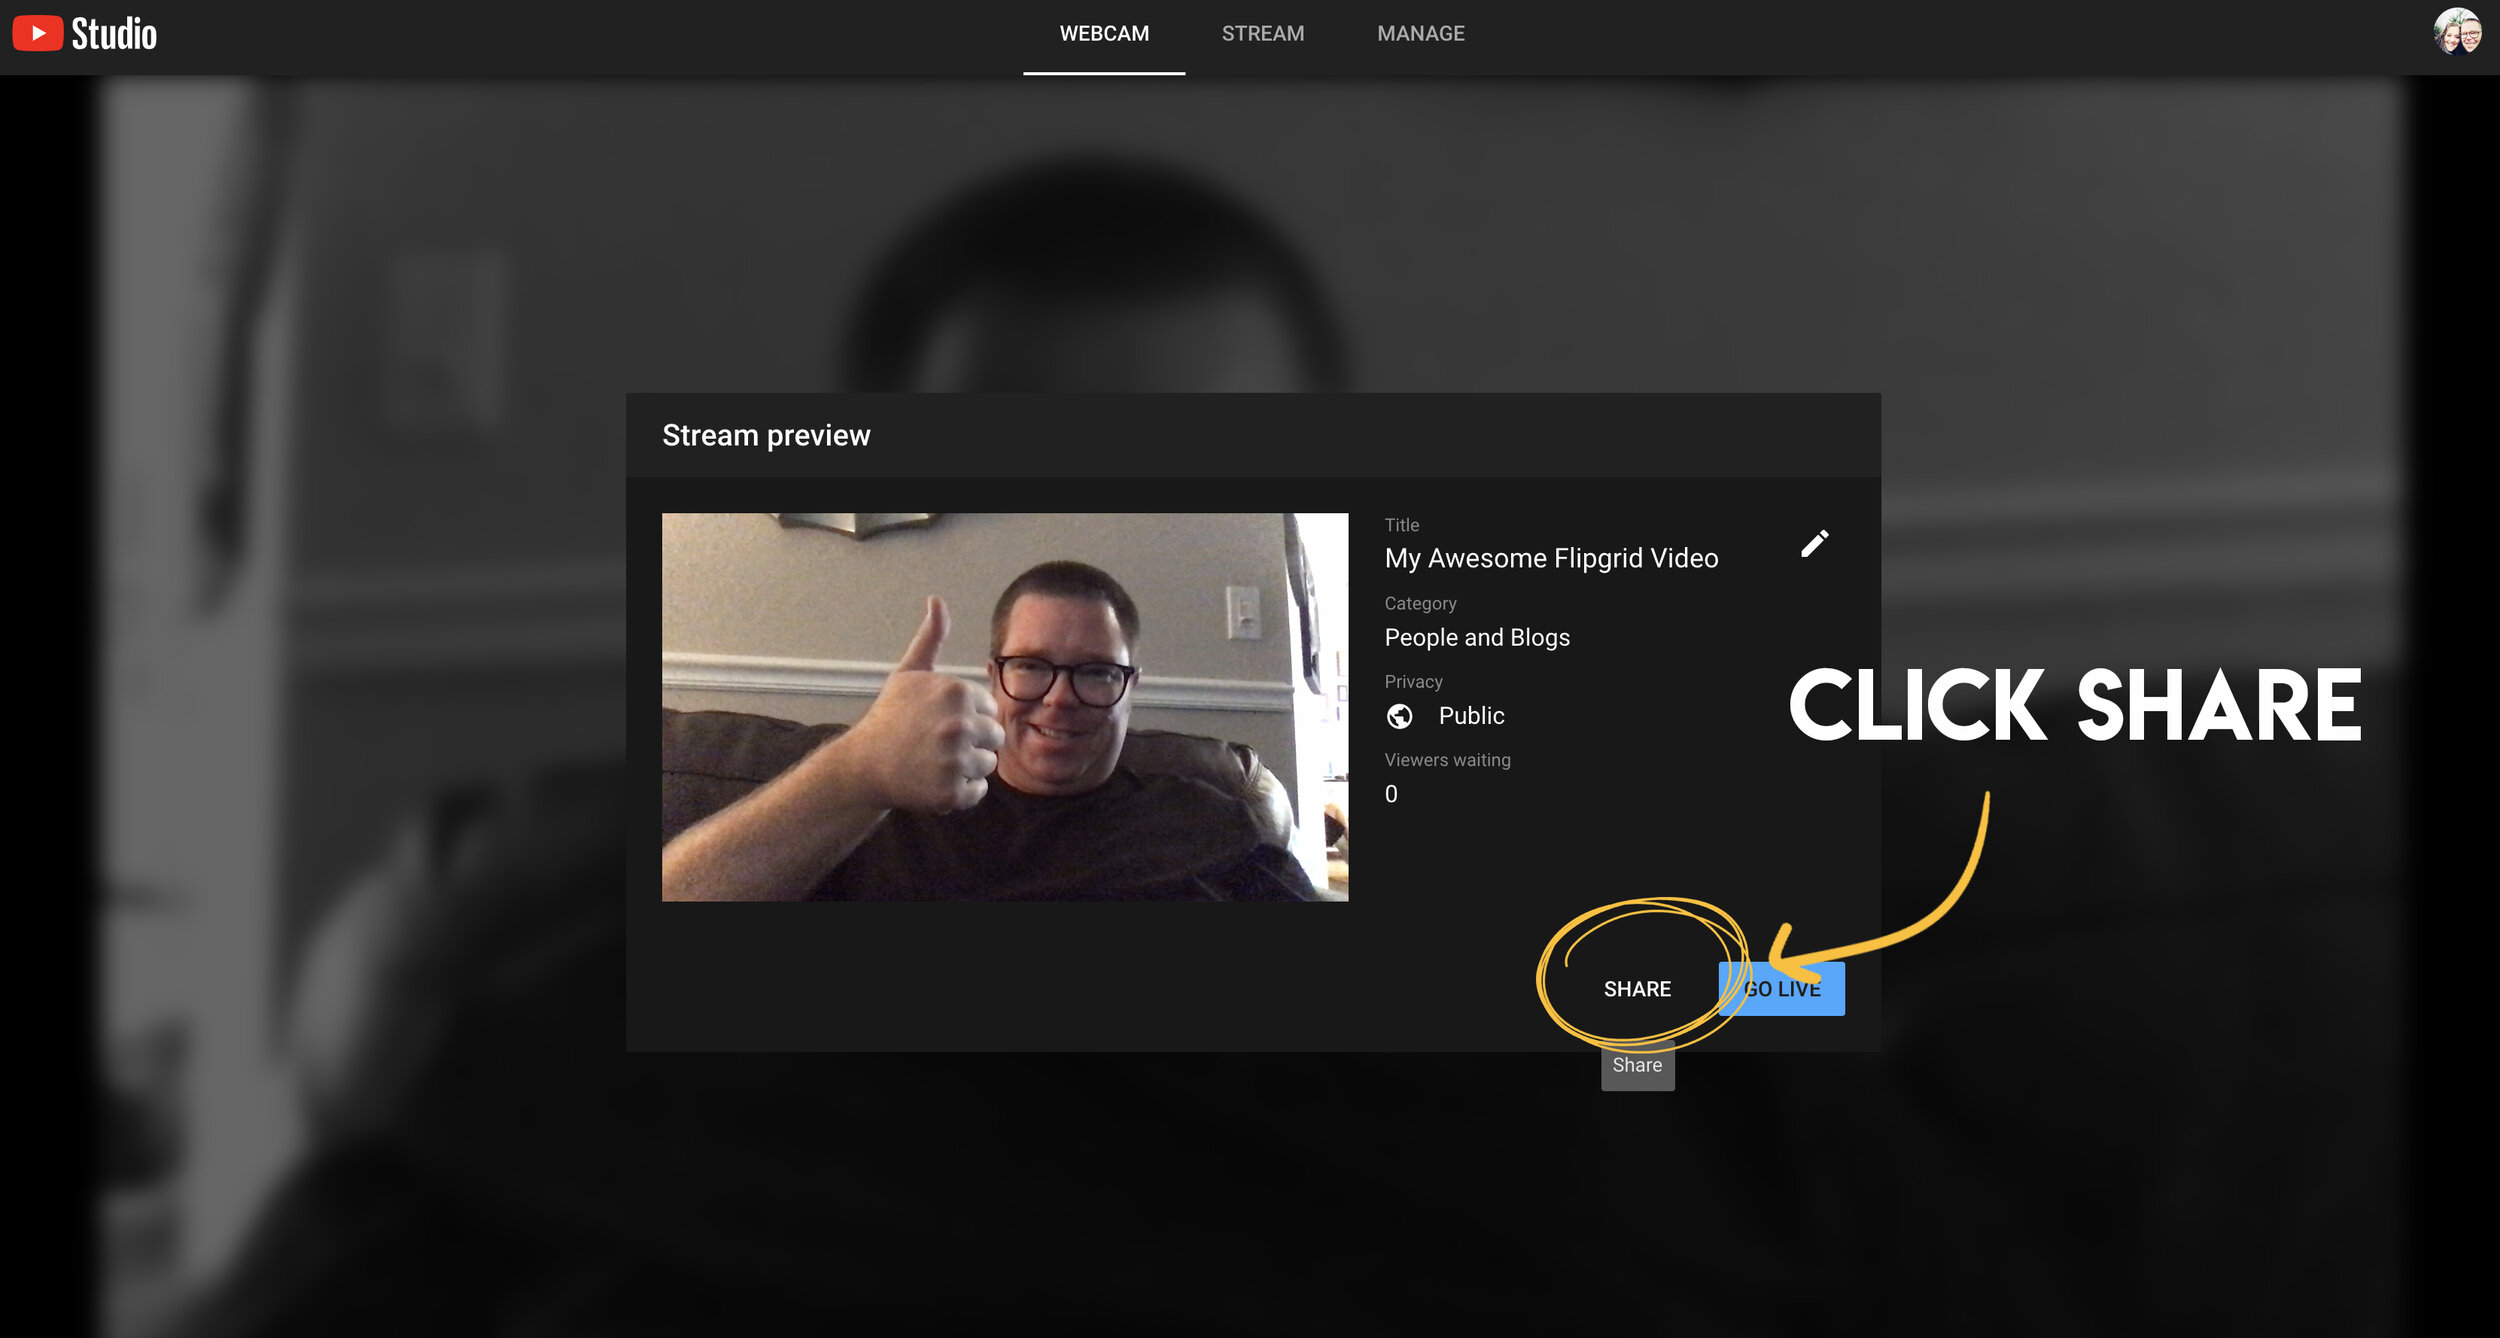
The next step is to click “share.” This will generate your live video stream’s URL.

Once the URL is generated, click “copy” to copy the URL to your computer’s clipboard.

Now you’re ready to head to Flipgrid. Open a new tab and log into your Flipgrid account. Then click on your preferred grid. From there, click on “Add New Topic.”

In your new topic, add a lesson title. You’ll also want to explain the task that you’ll be discussing with the students in the prompt. Lastly, click on the YouTube / Vimeo resource button.

This will open a pop up that asks you for your YouTube URL. Here’s where you will paste the URL code you copied from YouTube. Once you paste it, click “next.”

Your YouTube live stream will appear (although nothing is playing yet, because you haven’t started the live stream - that’s coming up). Just click “add” to embed the video into your Flipgrid topic.

Now you can see your YouTube video embedded on Flipgrid. Click “create topic” to launch the topic on Flipgrid.

This is your confirmation screen. If this pops up, you have done everything correctly! Click “all set” to move on!

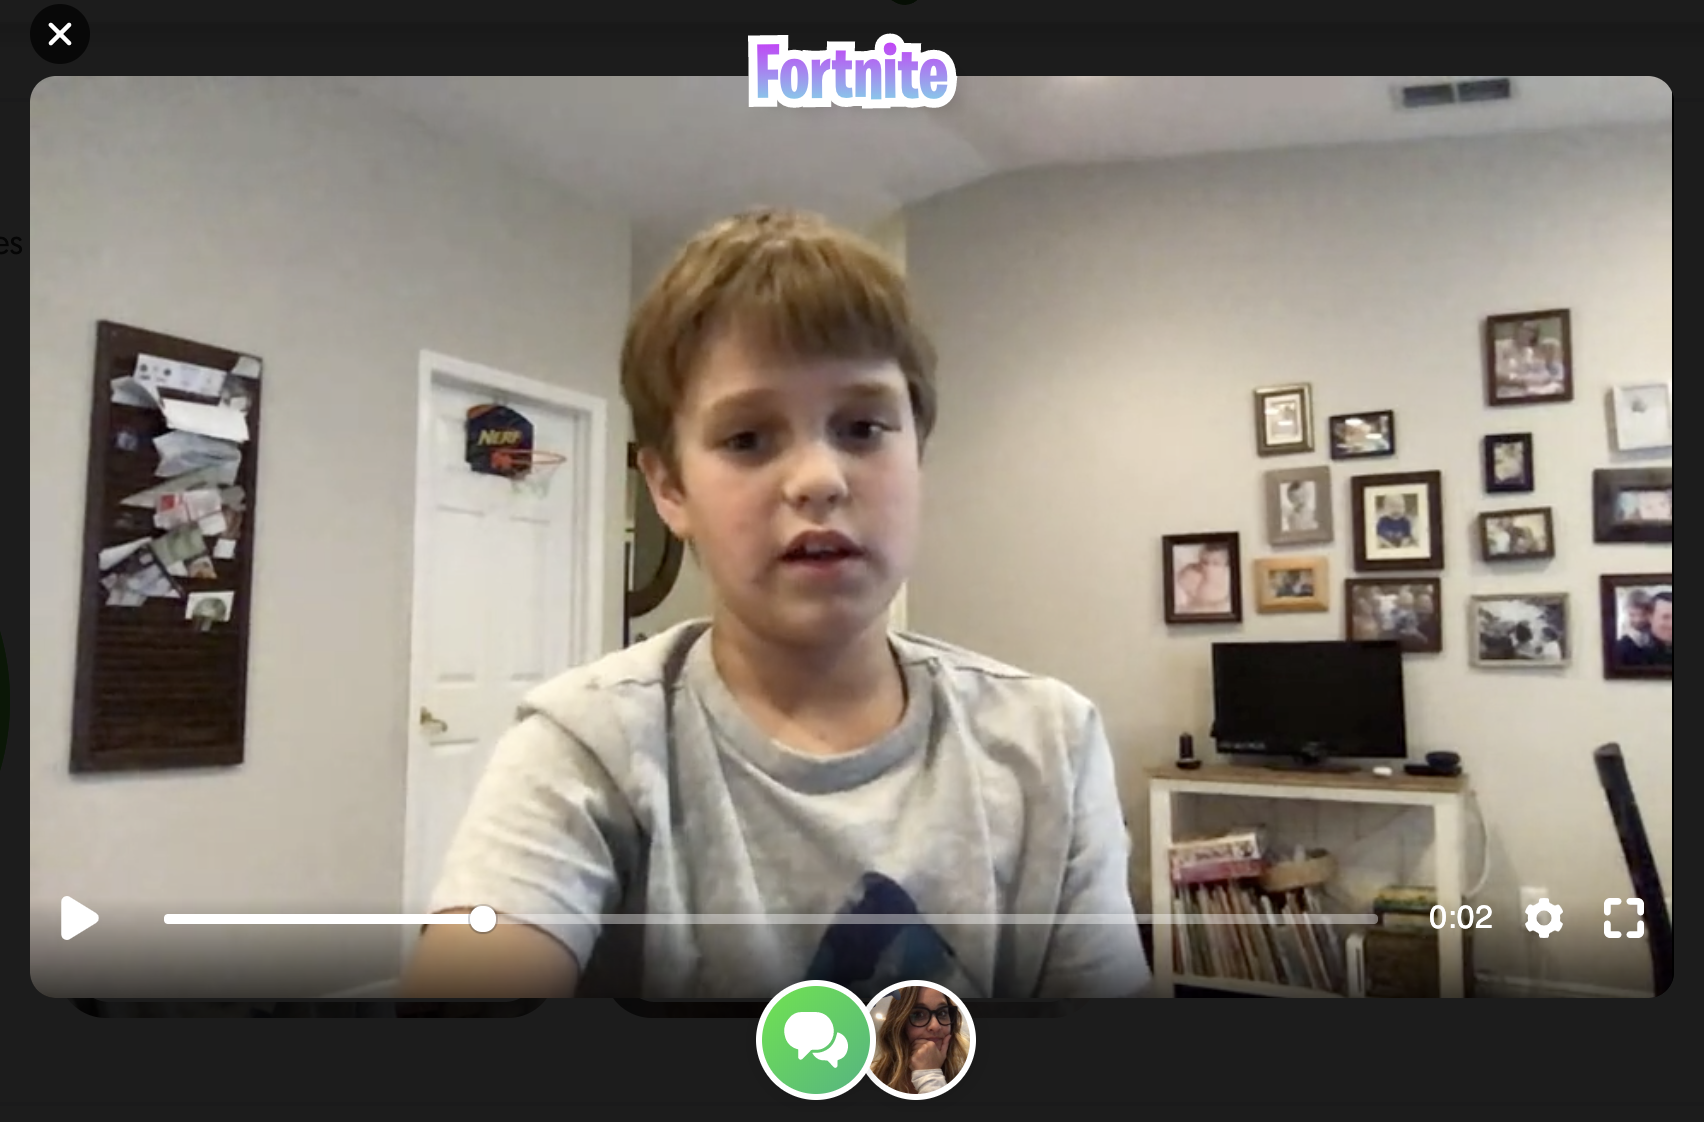
When you’re in your newly created topic, your screen should look like this. Notice, the YouTube Live video says it’s “Waiting…”That’s because we haven’t started it yet. You’ll want to make sure your students are logged on and ready to go before your proceed to the next step.
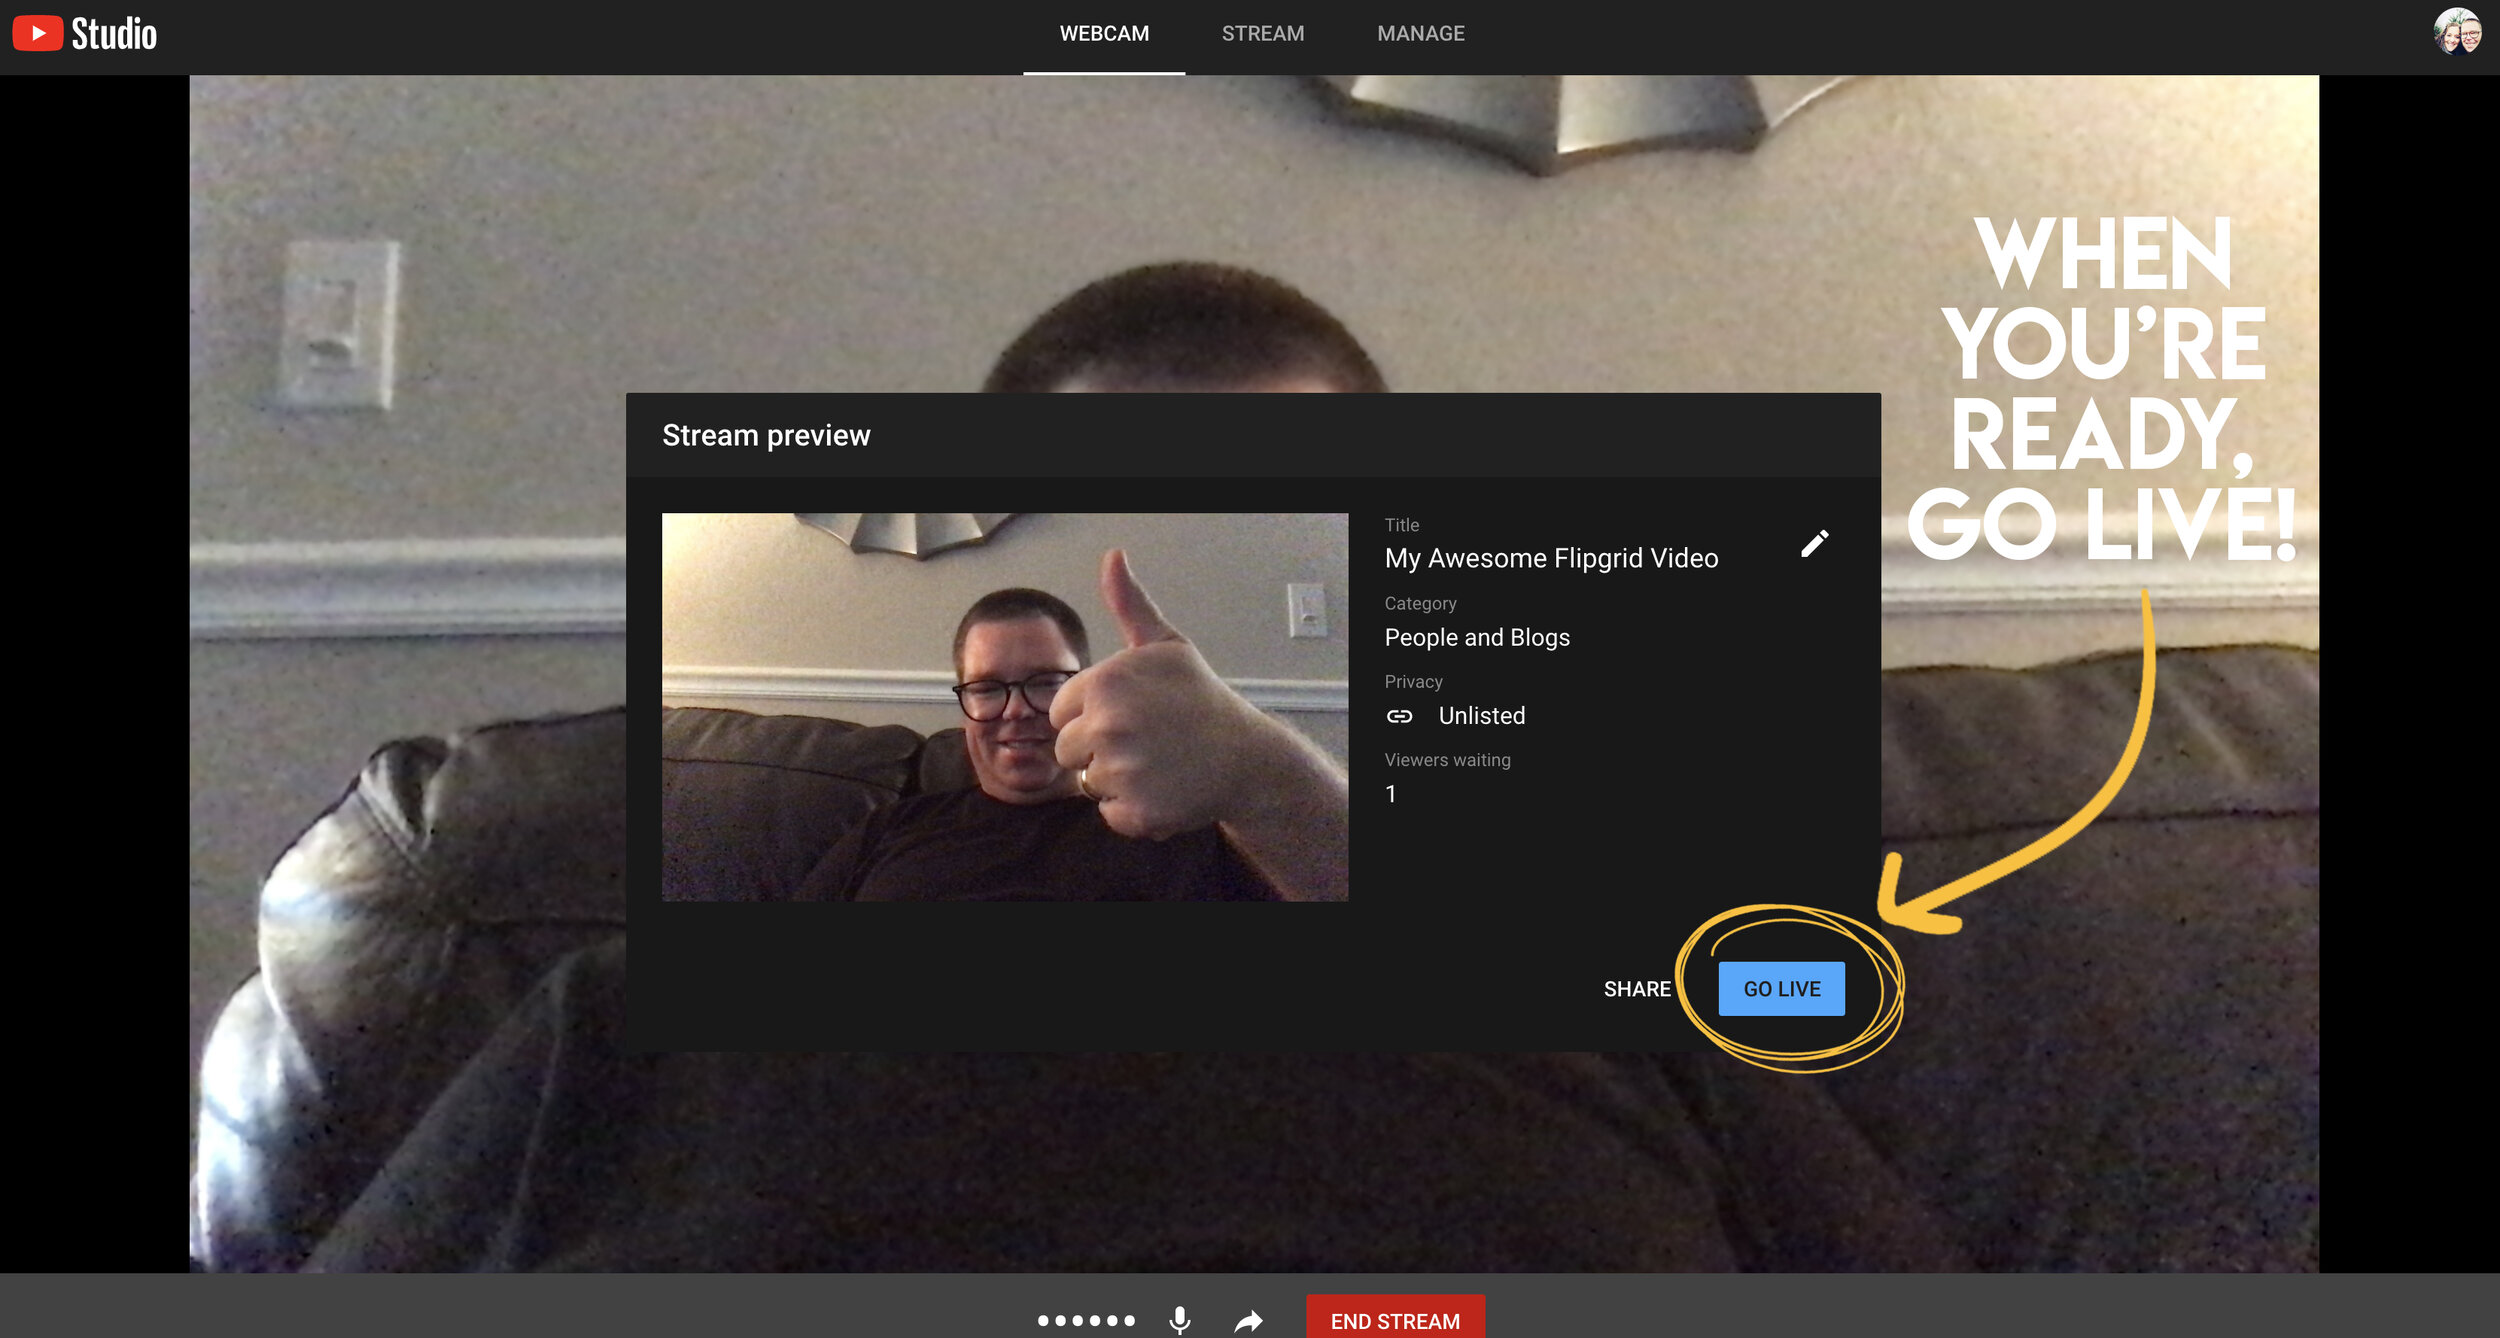
Click on the tab that you left open for YouTube. Click on the blue “Go Live” button to launch your live stream. Now, when your students are on Flipgrid, they can click the play button to watch you live - in real time. Note: if you have students leave responses during your live stream, they will need to click on the YouTube video again to restart the playback (it won’t automatically start again).

Once you are finished with your instruction, click “end stream” on YouTube. You’ll be asked if you are sure that you want to end it. Click “end.” Your live stream has now concluded - but if students were unable to log in during your presentation time, they can always go back and watch the replay of the video!
We hope this hack comes in handy and that you are able to remotely connect with your students! If you have any questions, please don’t hesitate to reach out!
👓 & 👗
💚💚💚
For more #interACTIVE lesson ideas using Flipgrid, check out our book The InterACTIVE Class on Amazon!


Using Flipgrid For Inquiry
Many try to incorporate Genius Hour, 20% time, Passion Projects, or other named activities all dedicated to student inquiry. For those with limited time or resources, try using Flipgrid! Combine the tool designed for student voice with basic inquiry to create a simple step toward student inquiry.
Giving students time for inquiry can be challenging for many teachers. It can be tough to find time to give students to learn about things they are interested in when you already have a long list of required texts or expected standards to cover. Many try to incorporate Genius Hour, 20% time, Passion Projects, or other named activities all dedicated to student inquiry. For those with limited time or resources, try using Flipgrid! Combine the tool designed for student voice with basic inquiry to create a simple step toward student inquiry.
First you begin by giving students a chance to share something they are interested in. Give students a chance to speak and share what they want to learn more about simply by having them reply to the topic. You could organize topics by week or month or just keep one long topic running all year. When the student records, have them also put their topic of interest in the title line before uploading so that their inquiry will appear on their thumbnail along with their selfie picture.
Then the teacher goes in and adds a vibe to student video showing what topic the student chose. This way other students interested in the same topics could view multiple.

Then the teacher responds and during the response adds an attachment to their reply. This attachment can be anything that can be share with a link. When the teacher responds, the attached link will appear in the top right corner and the student can easily click on it while watching the response video.

Students then can go and learn more using what the teacher provided. The teacher could leave more than one response with various links if they wished. The student can also “report back” with new information learned, or even a project they created attached. Some great programs that integrate with Flipgrid via links are Buncee, Adobe Spark, Microsoft PowerPoint, and Google Slides. Students could also create using something like PicCollage and share back what they have learned through images as stickers.
Are you familiar with adding links? Many are surprised to hear about this simple, yet powerful Flipgrid feature. Links can be attached to a topic video, in addition to being attached to a video response or video reply. When attaching a link to a topic, you would do it when you create the topic as seen below.

If you wish to add a link to a video response or reply, you do this on the LAST screen before submitting the video. As shown below, you can also add a title for the video and change the name of the user on this screen as well.

With all of the new updates being released the ways to use Flipgrid in the classroom really are limitless. The ability to add links and share attachments makes this a really powerful tool to continue the empowerment of student voice and promote student choice in the classroom.
For a visual tutorial on how to create enriching lessons by attaching links, check out our video tutorial here on the Flipgrid YouTube channel.
If you are looking for other lesson ideas using Flipgrid, make sure to check out our book The InterACTIVE Class! You can read more about it here!
Stay #interACTIVE!
-K 👗