Top Five (FREE) Apps of 2020!
2020 was a wild year - especially for educators. We experienced the world’s greatest PD event, but which apps / websites proved to be the most resourceful? We’ll walk you through five of the ones that we find ourselves using the most in our own classrooms.
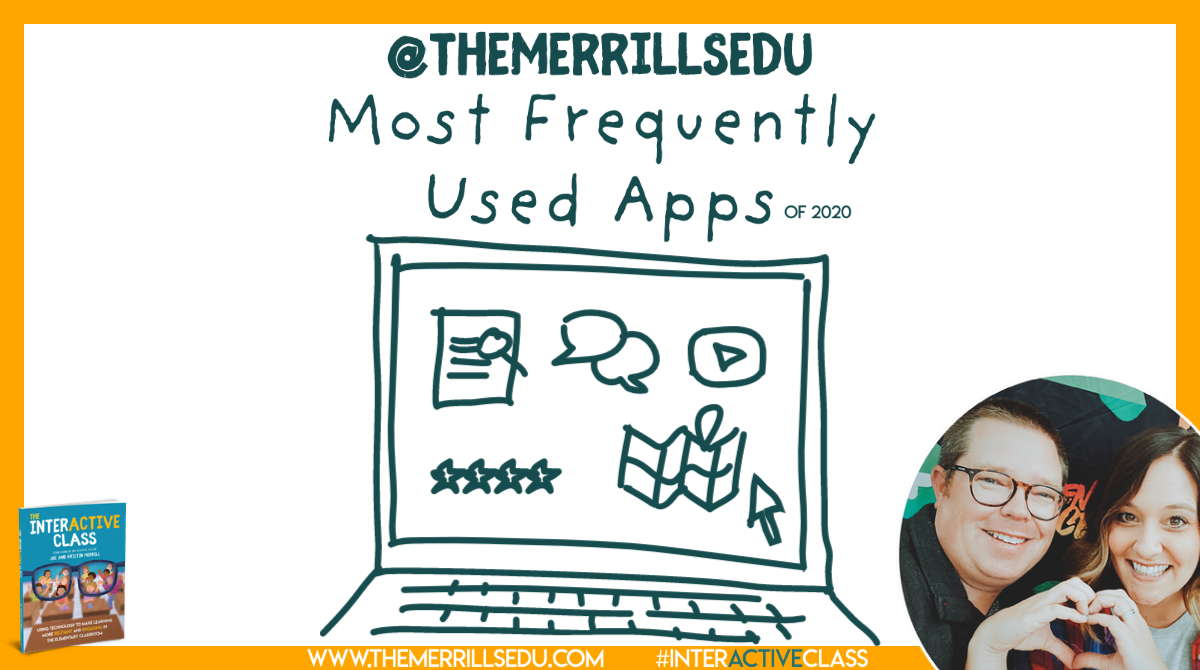
Teaching in 2020 was like brushing your teeth while eating Oreos. It was like shoveling snow while it’s still snowing. Or maybe it was like being a chameleon stuck inside a bag of skittles. But educators are resilient and before we threw up our hands and said that it’s “forget this o’clock,” we tapered down for the world’s largest PD event. We became familiar with websites and apps that we had never heard of. We quickly realized the importance of the “mute” button, and that most of our “staff meetings” really could be sent out in an email. But, now that we’ve had almost a year of this under our belt, we can confidently say that some apps have proven to be essential throughout remote learning and our gradual return back into the classroom. So, without further-ado, these are our top five (FREE) most commonly used apps of 2020. These apps are compatible on any device. Click on any subheading to learn more about the app and how we have been using it in our classrooms.
5. Gimkit (Gamification in the Classroom)
4. Classkick (Instant Feedback / Monitoring)
3. Nearpod (Classroom Management / Content Delivery)
2. Seesaw (Student Portfolios / Where Everything “Lives”)
1. Flipgrid (Student Creation / Social Learning)

5. Gimkit
Gamification in the classroom
Link 👉 http://www.gimkit.com
Gimkit is a live quiz learning platform where students answer questions and can earn “money” for power-ups. It was developed by a high school student who built a game that he wanted to play in class. The free version allows educators to create and edit content as much as they need. However, games can only be hosted with 5 players or fewer and new assignments cannot be created while on Gimkit Basic. We highly recommend upgrading!
How To Use it in the Classroom:
Have your students develop their own questions in the “Collab” mode. Then launch the kit and see how they perform!
Math fluency review
Use Gimkit as a way for students to go back into a text and find the answers to the questions
TIP: The more questions that you have in each “kit,” the better!

4. Classkick
Instant Feedback and Monitoring
Link 👉 https://classkick.com/
Classkick is a free app that students work on and get help instantly from their teacher and peers. Students may receive assistance from teachers (and peers) instantly. Teachers create assignments, see all their students’ work in real-time, and give LOTS of student feedback. Best of all, students can help each other anonymously.


How to Use Classkick in the Classroom:
Create assignments that students can work home regardless of where they are
Save your Powerpoint files as JPEG’s, then upload them to a new Classkick assignment
Use Classkick for Number Talks / Number of the Day
TIP: Create an assignment titled, “White Boards,” and use them as daily digital white boards. Students can erase the white boards after daily use, and return to the same link / code the next day.

3. Nearpod
Classroom Management and Content Delivery
Link 👉 http://www.nearpod.com
Nearpod is a student engagement platform built to make teaching with technology easy. With Nearpod you can control what your students see and get feedback in real-time. With a free account, you have the ability to share assignments with your students and then transition what they see from slide-to-slide. For example, if you upload an assignment from Google Slides or PowerPoint, Nearpod will convert it into an assignment. Teachers have control of the assignment, and when they move to the next slide, it will automatically change on all devices logged onto that presentation.
How to Use Nearpod in the Classroom:
Upload an assignment from Google Slides or PowerPoint, then add a virtual reality field trip! (Click: Add slide > Virtual Field Trip)
Add an activity for your students to complete while in the lesson. Activities include: Draw It, Quiz, Poll, Collaboration Board, and more!
Differentiate by duplicating assignments and adjusting as necessary. Share the appropriate login codes with the assigned students.
You may also like:
How to Integrate Flipgrid into Nearpod
How to Embed Nearpod Presentations into Microsoft Teams

2. Seesaw
Student Portfolios and Where all of Your Content Can “Live”
Link 👉 http://seesaw.me
Seesaw is a platform where students share their learning in their Seesaw portfolio, giving teachers and families valuable insights into what the students know. Assignments can be easily created, differentiated, and shared - think of it as a “house” for all of your content. The best part of all: every time a student adds an artifact to their portfolio, it notifies their connected family member(s) so that they may be kept in the loop with their child’s learning.


How to Use Seesaw in the Classroom:
Create assignments and select the students that you would like to complete them (easy differentiation)
Allow students to add content on their own (let them take a photo, then annotate over the photo)
Keep families at home in the loop with what is happening in class
You may also like:
What’s New in Seesaw (2020)
Flipgrid
Student Creation and Social Learning Platform
Link 👉 http://www.flipgrid.comFlipgrid is a video based social learning platform. Educators pose a question or assignment, then students respond in the form of a video. Once the conversation starts, other classmates may view their friends’ videos and respond to them. This creates a web of discussion, which automatically elevates the overall curricular level of the classroom.
How to Use Flipgrid in the Classroom:
Allow students to explain their thinking by holding up a whiteboard or their writing
Sequence the events of a text or historical time period
Use the Flipgrid Camera to record your own lessons - even create digital anchor charts
You may also like:
How to Play Among Us on Flipgrid
Using the Draw Tool on Flipgrid
Creating Student Podcasts on Flipgrid

Stay #interACTIVE!
-👗➕🕶️
For more tips, tricks and lesson ideas for making learning more interACTIVE, check out our book The InterACTIVE Class on Amazon!


Using Wonderopolis for Remote Learning
Remote learning has definitely posed some. new challenges for teachers looking to finish the year virtually. One of these is the ability to monitor, differentiate and provide scaffolding for student learners. Wonderopolis is a great resource for teachers looking to provide meaningful content to students to use for learning, while also being sensitive to the various learning situations student have at home.
Remote learning has definitely posed some. new challenges for teachers looking to finish the year virtually. One of these is the ability to monitor, differentiate and provide scaffolding for student learners. Wonderopolis is a great resource for teachers looking to provide meaningful content to students to use for learning, while also being sensitive to the various learning situations student have at home.
How Can Wonderopolis Be Used in Remote Learning?
Wonderopolis is a great resource to use during remote learning because it is founded on children’s’ innate curiosity and during this time of distance learning it is more important than ever to keep our instruction and content as relevant and responsive as possible. Learning, discovery, and curiosity, as well as the concept of sharing the experience with family members, are strongly encouraged throughout the site and with students learning while at home the more involved the family can be the better.
Remote Learning Features of Wonderopolis
There are many features already built in to Wonderopolis that are very useful for teachers and students to take advantage of during remote learning. These are features that have always been a part of the Wonderopolis platform, but now with teachers having to teach the remainder of the year remotely, they are great to add to distance learning lessons.
Wonder Lengths
The articles, referred to as “wonders” remind me of the fairy tale Goldilocks and the 3 Bears—they aren’t too long, they aren’t too short—they are just right! Every Wonder is numbered making them easy to find, and they are a reasonable length for students who may be working independently.
Immersive Reader
Speaking of working independently, another feature found in every Wonder article is Microsoft’s Immersive Reader. Immersive Reader is an embedded tool that will benefit students in two ways. First, it will read aloud all the text found on the page. This is great for primary students who may be more accustomed to having text read aloud to them, benefits students who may be doing more of their work independently without adult help available, and for students who may read below the reading level of the selected text. The second benefit of Immersive Reader is its ability to translate the text on the page. Students can choose over 50+ different languages to have the Wonder article translated to. This can be a great advantage for our learners of other languages.
Vocabulary Assistance
When reading through the Wonder article, students will find various words highlighted. These are words pre-identified as words the readers may not know, and when you hover over them, a short kid-friendly definition will pop up. Wonderopolis doesn’t offer Wonder articles in various reading levels, so a feature like this, paired with Immersive Reader, helps students who may be reading at a lower level than that of the Wonder article.
Try it Out
At the end of each Wonder article is the Try It Out section. This is a great resources for teachers and often lists various activities or projects to try related to the Wonder. These suggestions range from discussion questions, STEM activities, creative writing prompts and much more!
Flipgrid Partnership
In addition to all the features Wonderopolis offers on its website, it has an amazing partnership with Flipgrid. Wonderopolis is one of the many featured partners that can be found in the Disco Library. The Flipgrid Disco Library is full of already made Flipgrid topics that educators can take and use right away with their students.

Simply click on the Wonderopolis icon and search through the already created Flipgrid topics. Students will be able to read the article on Wonderopolis and then participate in a class discussion with one another on Flipgrid.


Building a Bitmoji Classroom
The Bitmoji craze is taking over the remote learning world as a fun, interactive way for teachers to engage their students when teaching remotely. Now obviously, it is important to note that once your Bitmoji classroom is built, you need to make sure that it is easy for students to navigate, not overwhelming and that the lessons linked to it are structured in solid pedagogy. But for the sake of this post, we are going to just have fun decorating and building a Bitmoji classroom.
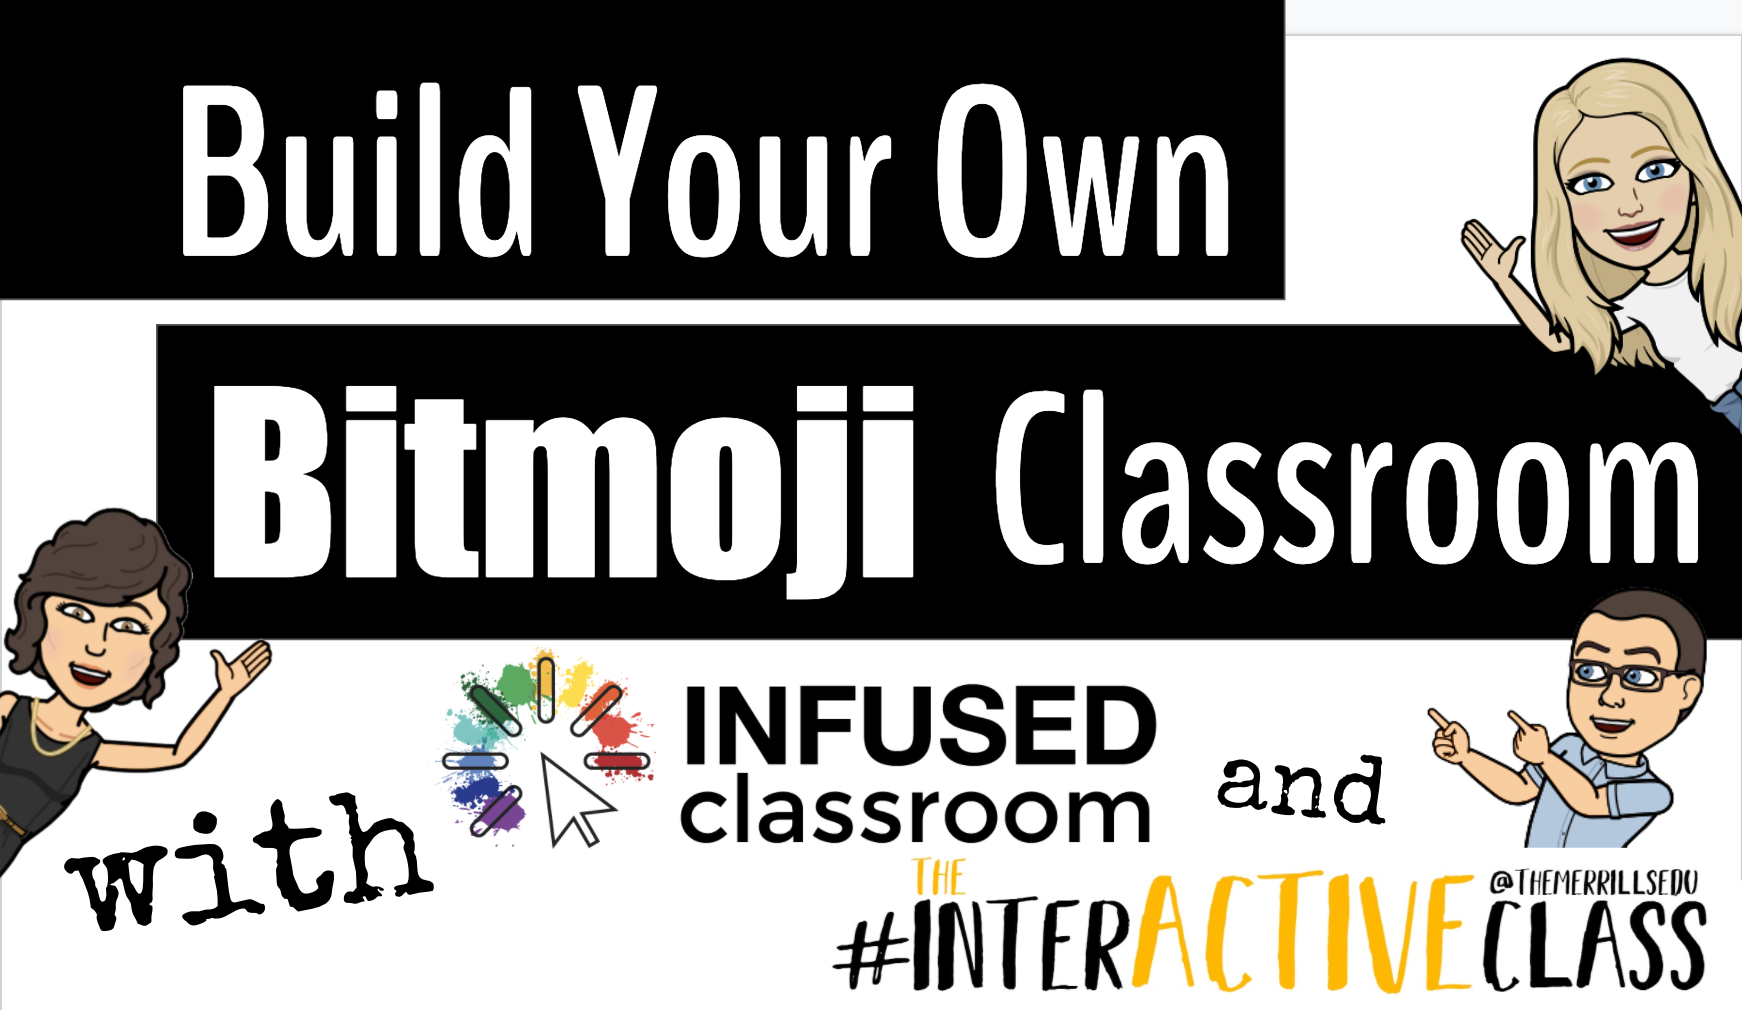
The Bitmoji craze is taking over the remote learning world as a fun, interactive way for teachers to engage their students when teaching remotely. Now obviously, it is important to note that once your Bitmoji classroom is built, you need to make sure that it is easy for students to navigate, not overwhelming and that the lessons linked to it are structured in solid pedagogy. But for the sake of this post, we are going to just have fun decorating and building a Bitmoji classroom. Here’s what you’ll learn about:
(Click on any subheading to jump to that section)
Beginning a Bitmoji Classroom
Bitmoji classrooms can be built in PowerPoint or Google Slides and the process is the same for both. To begin building a Bitmoji Classroom, you need to start with a nice, calm background. You want the background to have as few objects in it as possible so that you can add in the personalized items you wish to have in your own room. Once you have found the background image you like, you want to save the image to your desktop and then add it to the background of your slide. That way it cannot be moved or layered among other smaller items.
Tip: When looking for backgrounds you can make your own with a few images and icons, or you can try searching for classroom/office images on google. Using the word screen savers or background helps!
Once you have chosen your background you can begin by finding the items you wish to add into it. The key is that the items need to be transparent—this means they have a clear background instead of the normal solid white of a jpeg image. You can do this in Google by typing the item you wish to look for into the search bar, and then clicking IMAGES under the bar.

Once you have clicked images, then hit TOOLS —> COLOUR —> TRANSPARENT. Once you find the image you’d like you simply copy it, and then paste it into your Bitmoji classroom.

Tip: Try adding your Bitmoji in first to get an idea of how large you would like the other items sized.
Bitmoji Classroom Resources
We know how hard it can be to build a Bitmoji classroom from scratch, so we partnered with our dear educational guru Holly Clark from the Infused Classroom, to give your somewhere to start. Simply click here and grab the entire deck of backgrounds and images to use as you get started. Please remember that this resource is to be used in the classroom, and not as something that will later be sold to other educators.
There are a lot of great websites to use when working on a Bitmoji Classroom and creating lessons for students working in a remote environment. We have so many applications we could recommend, but below are some of our favorite FREE applications that would fit into a Bitmoji classroom and accompany a virtual teaching environment nicely.
Flipgrid: A social learning platform where students engage with the teacher and peers through videos and demonstrate their knowledge by pressing record!
Wonderopolis: This online informational site that asks and answers interesting questions about the world. Every day, a new "Wonders of the Day" question is posted, and each is designed to get kids and families to think, talk, and find learning moments together in everyday life. With the integration of Immersive Reader, students can have articles read aloud to them making this a great remote learning website!
Wakelet: allows users to curate customizable content. It is also a great tool for keeping research projects interactive and social. Use it much like a virtual pin-board for class discussions, or group students and have them collaborate on an activity together.
Branching Bitmoji Classrooms
Once you get the hang of building a classroom setting, have fun leveling it up and linking one room to another. Try creating a sort of “homeroom” class where maybe students start off the day, but have it linked to a science lab, a math room and maybe a reading corner. This would allow you to have more resources available for students without cluttering one single slide up.
You can do this in two ways. You can create the slides in one deck and just link them together, or you can create a new deck for each “classroom”, where when students click it takes them out to that new room where all they can see is the new classroom slide.
If you are looking for more ideas about Bitmoji classrooms, check out our other related posts:
Creating a Virtual Classroom with Buncee (Free resource!)
How to Animate Yourself in a Bitmoji Classroom
Bitmoji Keychain Keepsakes
If you are looking for other ideas on how to make teaching and learning relevant and engaging through the use of technology, check out our book The InterACTIVE Class!


How to Add Yourself Into a Virtual Classroom!
Adding “yourself” to your virtual classroom doesn’t mean you need a green screen. You can do it using this simple “background remover.” In this post, you’ll learn how it all works!

Adding “yourself” to your virtual classroom doesn’t mean you need a green screen. In this post, we’ll cover a simple and easy method to get the job done. You’ll learn how to:
(Click on any subheading to skip directly to that section.)
How to Remove a Background From a Video / Gif
How to Download the Transparent Gif
How to Upload the Transparent Gif File Into a Virtual Classroom
(If you’d like a tutorial on how to create a Bitmoji Virtual Classroom, click here.)
How to Remove a Background From a Video / Gif
First, record a quick video that you would like to upload to your virtual classroom.
Note, when you remove the background you will lose all audio and the clip will only be approximately 5 seconds. So, make it something fun like dancing or a silly face. It also helps to use solid color backgrounds and lots of lighting.
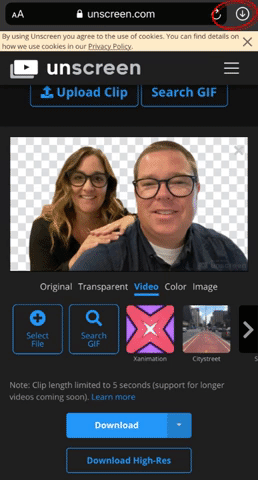
Once you have your video ready, head to Unscreen.com by clicking here or the image to the left.
Next, click on “Upload Clip” and select your video file.

How to Download the
Transparent Gif

After you have selected your video, Unscreen will work to remove the background automatically.
There are a few options that can be added as a replacement background, but in order to get the file into a virtual classroom, you’ll want to be sure to bypass selecting these.
Once the file has uploaded and the background is transparent, it’s time to download the file.
Click the blue “download” button. A drop down menu will appear. In order to maintain the movement in the video and upload to your virtual classroom, you’ll need to select “GIF.” After the file encodes, then click “download.”
If you’re using a mobile device, you’ll need to follow these steps to make sure you’ve saved the file:
Locate the download arrow, typically located to the right of the URL bar. The image to the right shows where to find it if you’re using an iPhone.
Once you have found the download arrow, click it. A new drop down will appear. This will show you where you can find your downloaded file. Tap the new drop down and select your file. This will save it onto your device.
Now, you’re ready to upload the file into your virtual classroom!
How to Upload the Transparent Gif File Into a Virtual Classroom
To upload your file into your classroom, follow these steps:
Buncee:
If you’re using Buncee to create your virtual classroom, here’ what you’ll need to do (all steps are displayed in the video tutorial to the right, too):
Open the Buncee
Tap the “+” sign to add a new item
Click “Uploads",” then select (or click and drag) your file to upload into the Buncee.
Move and reposition the image as you see fit, then click “Share!”
Google Slides:
If you’re using Google Slides to create your virtual classroom, here’ what you’ll need to do (all steps are displayed in the video tutorial to the right, too):
Open your Virtual Classroom on Google Slides
Click on “Insert” from the menu bar
Click on “Image,” then “Upload from computer.”
Select your file
Move and resize as you see fit. Click “Share” to share with your students!
PowerPoint:
If you’re using PowerPoint to create your virtual classroom, here’ what you’ll need to do (all steps are displayed in the video tutorial to the right, too):
Open your Virtual Classroom on PowerPoint
Click on “Insert” from the menu bar
Click on “Pictures,” then “Picture from File”
Select your file
Move and resize as you see fit. Click “Share” to share with your students!
Help! I’m looking for instructions on how to make a Bitmoji Virtual Classroom!
No worries! You’re (almost) in the right place. Click here, and we’ll get you over to a step-by-step tutorial. 🙌

For more #interACTIVE lesson ideas, check out our books The InterACTIVE Class and Flipgrid in the InterACTIVE Class on Amazon!


How to Embed Nearpod Presentations Into Microsoft Teams
Nearpod and Microsoft Teams have partnered up to provide a complete game changer - especially when it comes to remote learning. Now, you can “go live” with your Nearpod Lessons in Microsoft Teams!
Nearpod and Microsoft Teams have partnered up to provide a complete game changer - especially when it comes to remote learning. Now, you can “go live” with your Nearpod Lessons in Microsoft Teams! You’ll learn:
💥 How to embed a Nearpod presentation into Teams
💥 How to start a meeting in Teams
💥 How to launch your Nearpod presentation while you’re LIVE in a TEAMS meeting!
💥 HOW TO EMBED A NEARPOD PRESENTATION INTO TEAMS 💥

You’ll need to make sure that you are logged into your Microsoft Teams account, and that you have already created an account on Nearpod. From your preferred Teams “General” channel, click the “+” sign on the top right of the tabs bar.
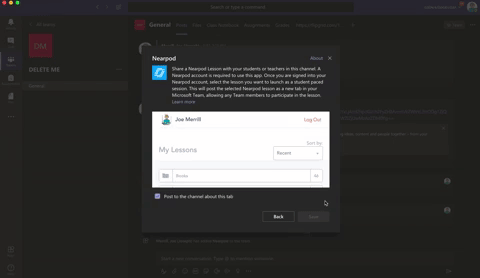
Once you click on the “+” sign, you’ll be asked what type of tab you would like to add. If Nearpod doesn’t show up in the first few images, you can do a quick search for it. Once it pops up, go ahead and click the Nearpod image.


Now you’ll be asked to log into your Nearpod educators account. Enter your username and password, then click the blue “Log In” button. Tip: At first glance, it looks like you won’t have any options to log in. Make sure you scroll down a bit (the window is small), and you should see the required fields.
Once you’re logged into your Nearpod account, you’ll have the option to select the (predesigned) presentation that you would like the class to complete. Pick out the presentation, then you’ll be asked which type of lesson you prefer: Live Lesson (where students complete the presentation together in real time), or Student Paced (where students complete the presentation on their own time). For our example today, we’ll pick “Live Lesson.”

Once you’ve selected your preferred lesson type, the presentation will automatically embed directly into your Teams channel. It will appear in the conversation, and also at on the top tab bar. Congratulations! You’ve successfully embedded your Nearpod presentation into Teams!
💥 HOW TO START A LIVE CLASS MEET IN MICROSOFT TEAMS! 💥
To start a live class meet in Microsoft Teams, click on the “camera” icon located in the bottom of the tools bar. If you’re unsure if which icon to click, try hovering over them until you find the one that says “Meet Now.” Click it, then click the purple “Meet Now” button. Once you do, you’re LIVE!

💥 HOW TO LAUNCH YOUR NEARPOD PRESENTATION WHILE YOU’RE LIVE IN A TEAMS MEETING!💥


Now that you’re LIVE, you’ll need to wait for your students to log on to the meeting. You can check a meeting’s attendance by clicking on the “Participants” icon (that looks like two people). Once everyone has arrived, explain to your students that you will work on a Nearpod presentation together. Reveal that they will need to click the back button on their Teams Meet window to return to the conversation tab. Explain that they can access the Nearpod presentation from either the post in the chat, or from the tab located at the top. Once they select Nearpod, they will be asked to log in using their name. This is all they will need to enter the presentation. Once everyone has logged in, you may begin your live instruction!
Check out this video for a step-by-step explanation, and a side-by-side comparison of what educators see and what students see.


Creating "Virtual” Room Transformations Using Microsoft Teams
Even though we’re out of our classrooms, that doesn’t mean we can’t have a “Virtual Room Transformation!”
Transforming the classroom was one of my favorite ways to engage my learners. It was a way to get them excited about the learning that would be taking place that day and it created learning memories that lasted well beyond our calendar year. Now that we are entering this season of remote learning, personal touches like rooms transformations are something I miss dearly. But thanks to the newly released update on Microsoft Teams, I might not be able to change my physical classroom around but at least I can disguise and transform my virtual one through live meetings!
Getting Started
To transform the background of a video chat you need for first open up Microsoft Teams and start a new meeting. Once inside the Teams meeting, click on the three dots to reveal the menu of options. Click on “show background effects”.


Choose from a variety of background images or add in one of your own. You can preview backgrounds, and then click apply when ready to use in the meeting.


Creative Transformations
Once your background is chosen you can use throughout the call, take down or change as needed. Try using this feature in an #interACTIVE way during video calls! Play a version of “Where in the World Is…” by placing yourself in various places and having your kids ask yes or no questions to try and figure out where you are. Or may be you could use the background images as “virtual” room transformations. Use a mad scientists lab for your live science experiment or a library background for a class read aloud.

Another great feature of Microsoft Teams live meetings is that they can be recorded—so have fun recording yourself in your newly transformed learning environment. Try teaching your daily mini lesson in a new and unexpected place and download to share with students. InterACTIVE teaching and learning is all about engaging students and this is one of my new favorite #interACTIVE learning tools for distance learning.
Stay #interACTIVE!
-👗➕👓
For more information on how to make learning more engaging and relevant by using technology, check out our book The InterACTIVE Class.