
Depending on how your district technology runs, you have several options when introducing your students to Flipgrid. In this post, you’ll learn (click on any subheading to jump to that section):
How to Set Up Your Class on Flipgrid
If you’re new to Flipgrid, it’s important to understand the verb-age. The two key terms that you’re immediately introduced to are: Groups and Topics. Groups are where Topics (or questions) are stored. If you were a high-school teacher, you may want to create a group for each of your periods (unless you want the students in different periods collaborating with one another). For example, you could create a group for Period #1, Period #2, etc. Topics are the question prompts you ask your students to complete. When you create a question / task for your students, you would create a Topic on Flipgrid for them. Students log onto the Topic and complete the assignment. When creating your class, we recommend staying organized from the get-go, as it will save you trouble later on.

Follow these steps to start setting up your class:
From the educator’s dashboard, click on the blue “Create a Group” button.
Give your new Group a name
Optional: Customize the Group’s join code. We recommend doing this because this personalizes how your students log onto Flipgrid. Try changing the join code to your last name, or something memorable.
Choosing How Your Students Will Log On:
Flipgrid offers several ways for your students to access assignments. When building your class, it’s important to make decision here, so let’s discuss what each of the permissions mean. If your students have access to email addresses, you can set up your class to where they use them to log in. You would set your class up as “Student Email” (note: this requires a Google or Microsoft email account). If your students don’t have access to email addresses, then they will need to log on using a Student ID. This can be a lunch number, birthdate, or something familiar to the student.
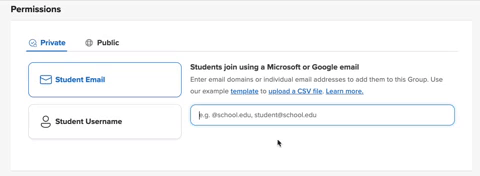
How to Set Up a Student Email Group:
Be sure that you have the Student Email option selected when creating your new Group.
Add the domain of your school’s email addresses (example: @school.com)
How to Set Up a Student Username Group:
Be sure that you have the Student Email option selected when creating your new Group.
Enter in the first name, last name, and student ID of your students. Note: If you have access to a CSV file of your class list, you can upload the entire class list at once.

Once you have selected how your students will log on, you can add a personal touch selecting or uploading an image for the Group cover. After you’re satisfied, click the blue “Create Group” button. Now you’re ready to start adding Topics into the Group.

How to Create a Topic in Flipgrid
Now that you have your Group set up, it will be easy to keep things organized from here on out. To add a Topic (or question that you would like your students to answer) to a Group, start in the Flipgrid Educator’s Dashboard. Click on the Group that you wish to assign the Topic to. Next, click the blue “Add Topic” button. On the next screen, enter a Topic title and prompt (or directions). You also have the option to add additional media to your Topic, such as: a video, image, GIF, YouTube, etc. This will place the media into the Topic so that your students will be able to see it once they log on. Just underneath the Media section is an area where you can adjust the Permissions and Essentials (adjust recording length, moderate the responses, toggle on/off video and text comments and include captions on videos). Once you’re happy, click the blue “Create Topic” button to launch the Topic.

How Students Log Onto Flipgrid
Depending on how you have set up your Group, your students will log onto Flipgrid using either their email address or student ID. Here’s what it will look like from a student’s perspective.

If Students Log on Using Email Addresses:
If your students are logging on using email addresses, they will go to: http://www.flipgrid.com or open the Flipgrid app. They will need to enter your Group Join Code (remember how we recommended customizing it? This is why!), then they will be prompted to log in using their Google or Microsoft email accounts. Once they do this, they will be logged into your class Flipgrid Group.
If Students Log on Using a Student ID:
If your students are logging on a student ID, they will go to: http://www.flipgrid.com or open the Flipgrid app. They will need to enter your Group Join Code (remember how we recommended customizing it? This is why!), then they will be prompted to log in using their student ID. Once they do this, they will be logged into your class Flipgrid Group.

Ideas for Introducing Your Students to Flipgrid
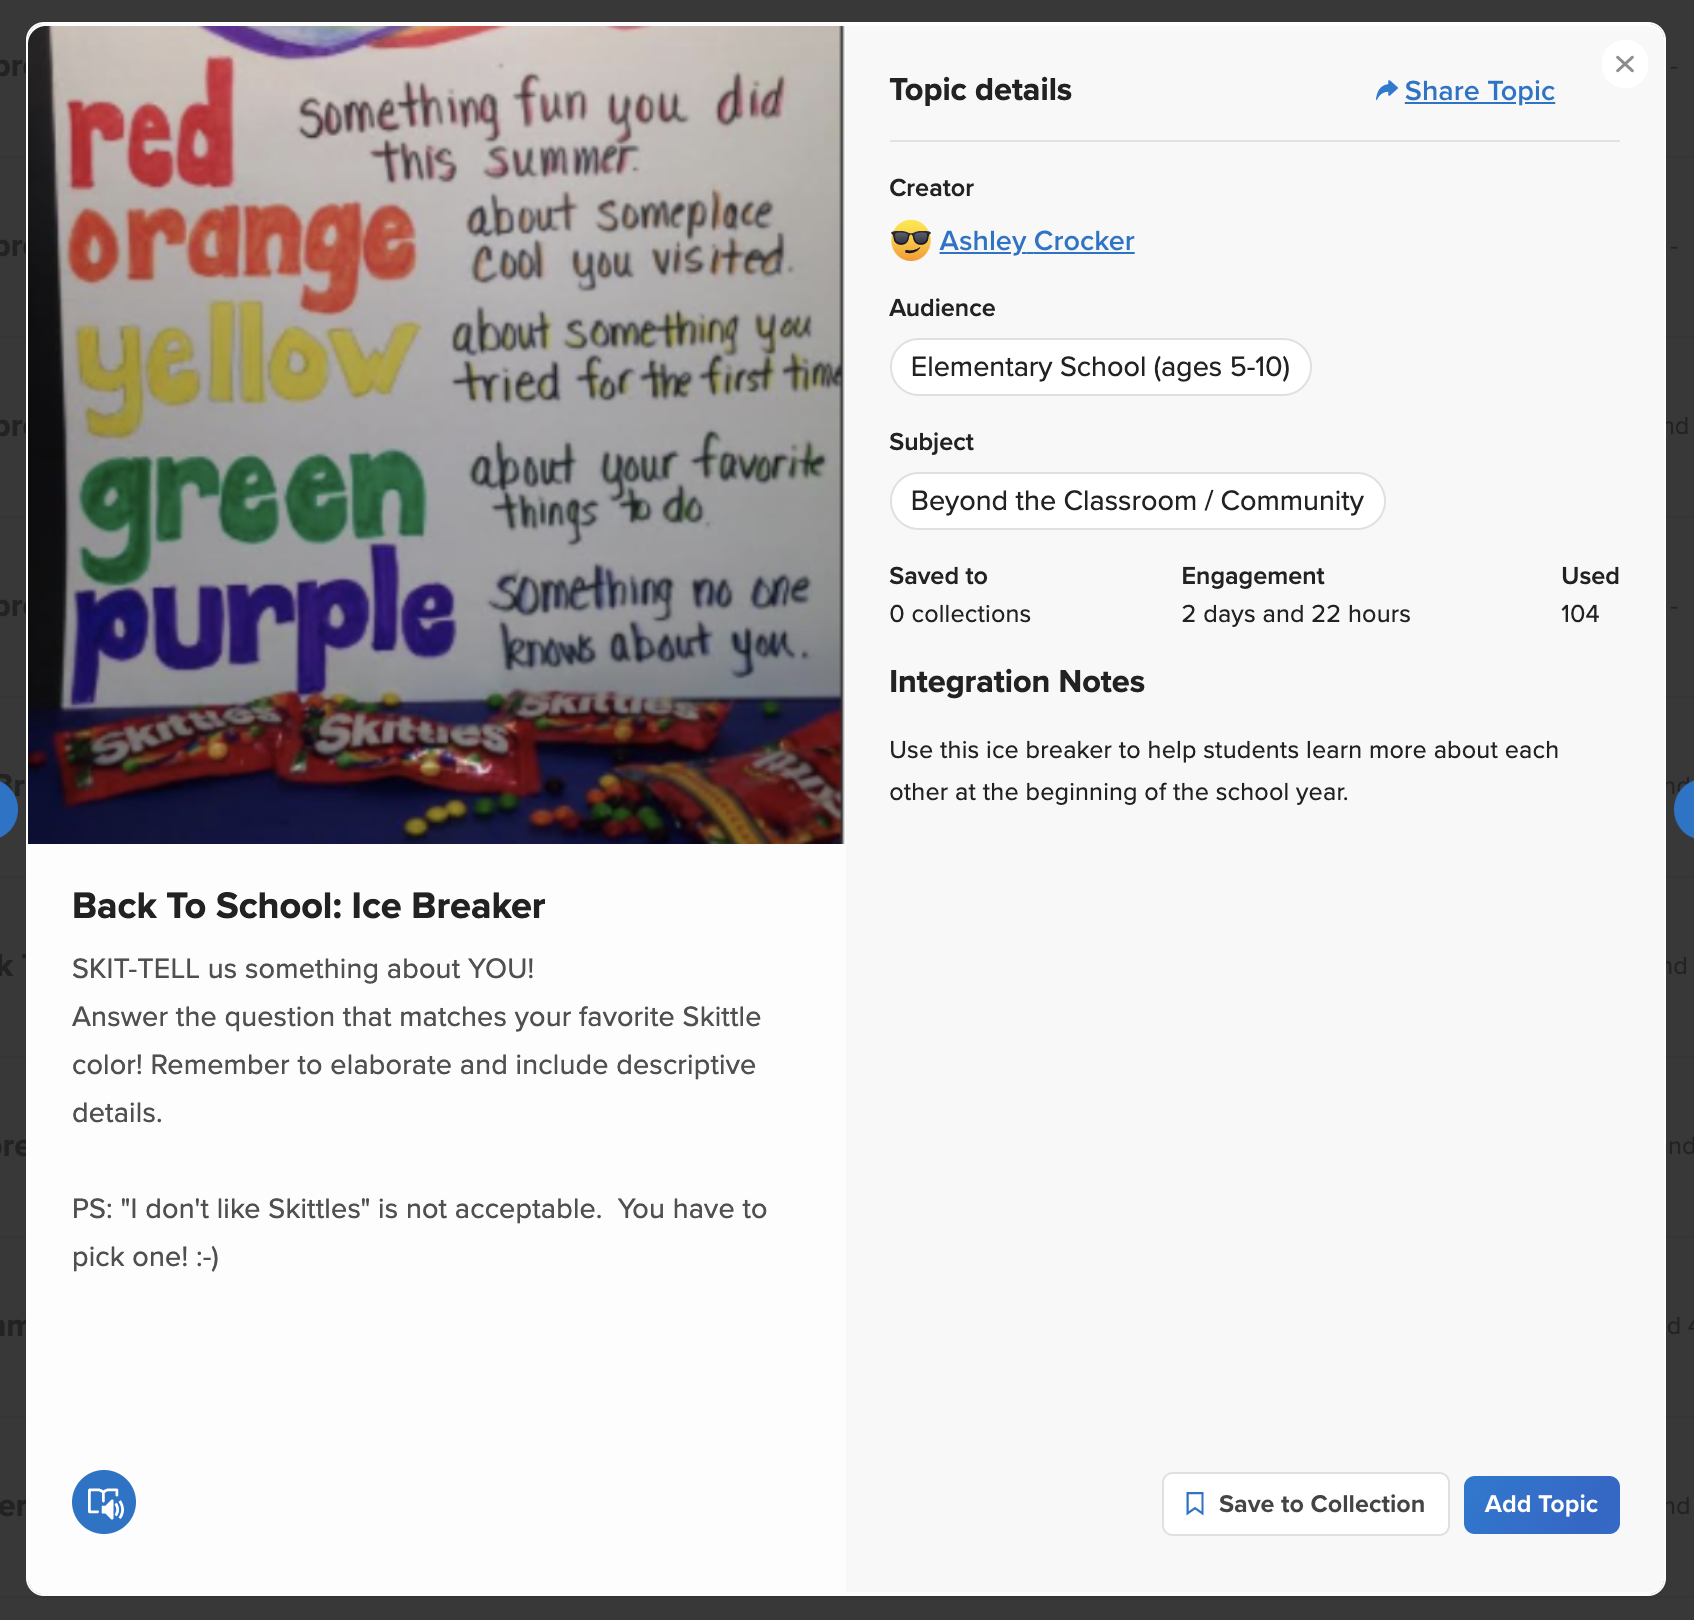
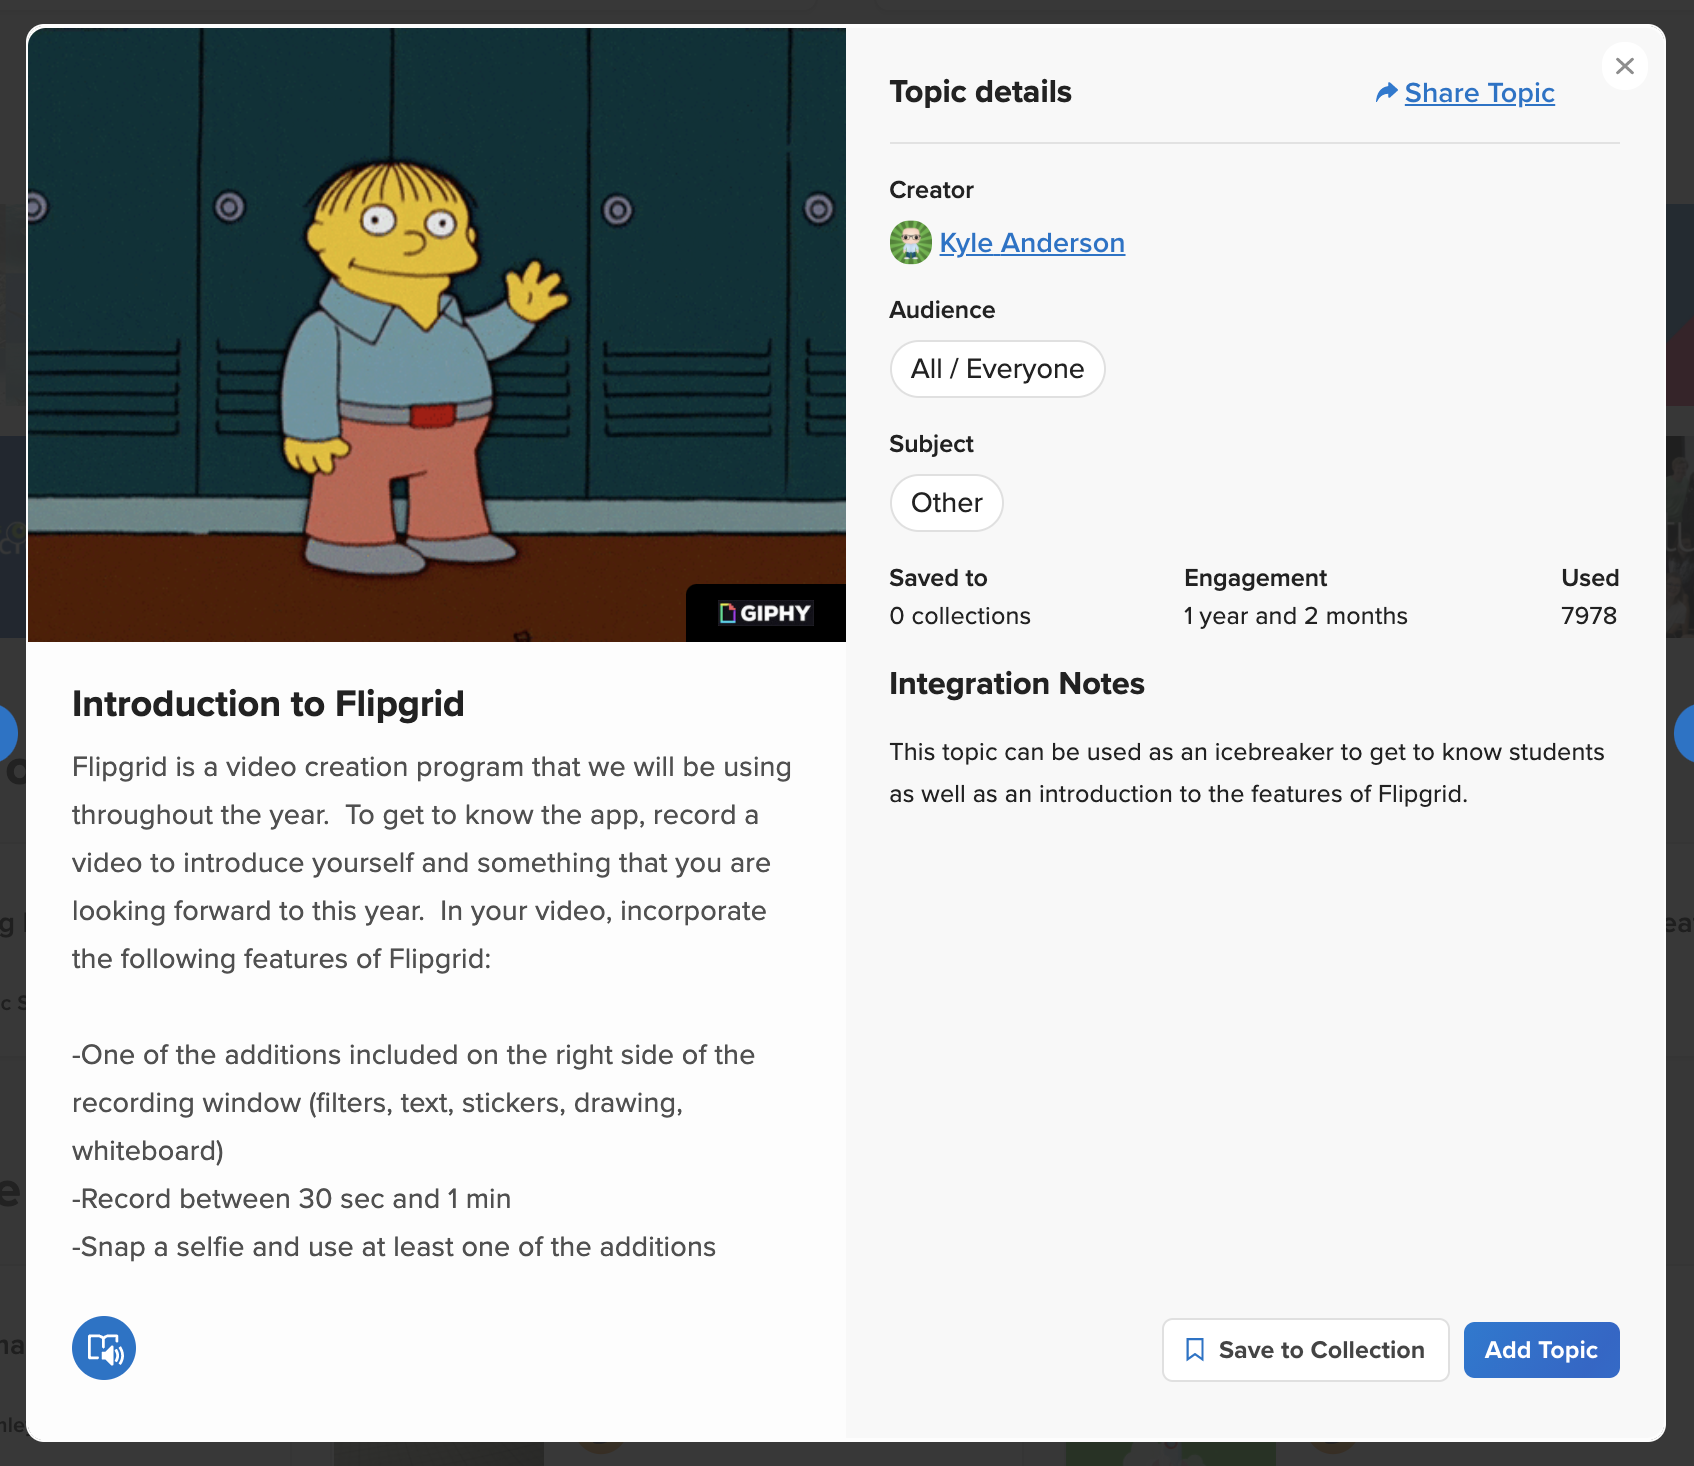
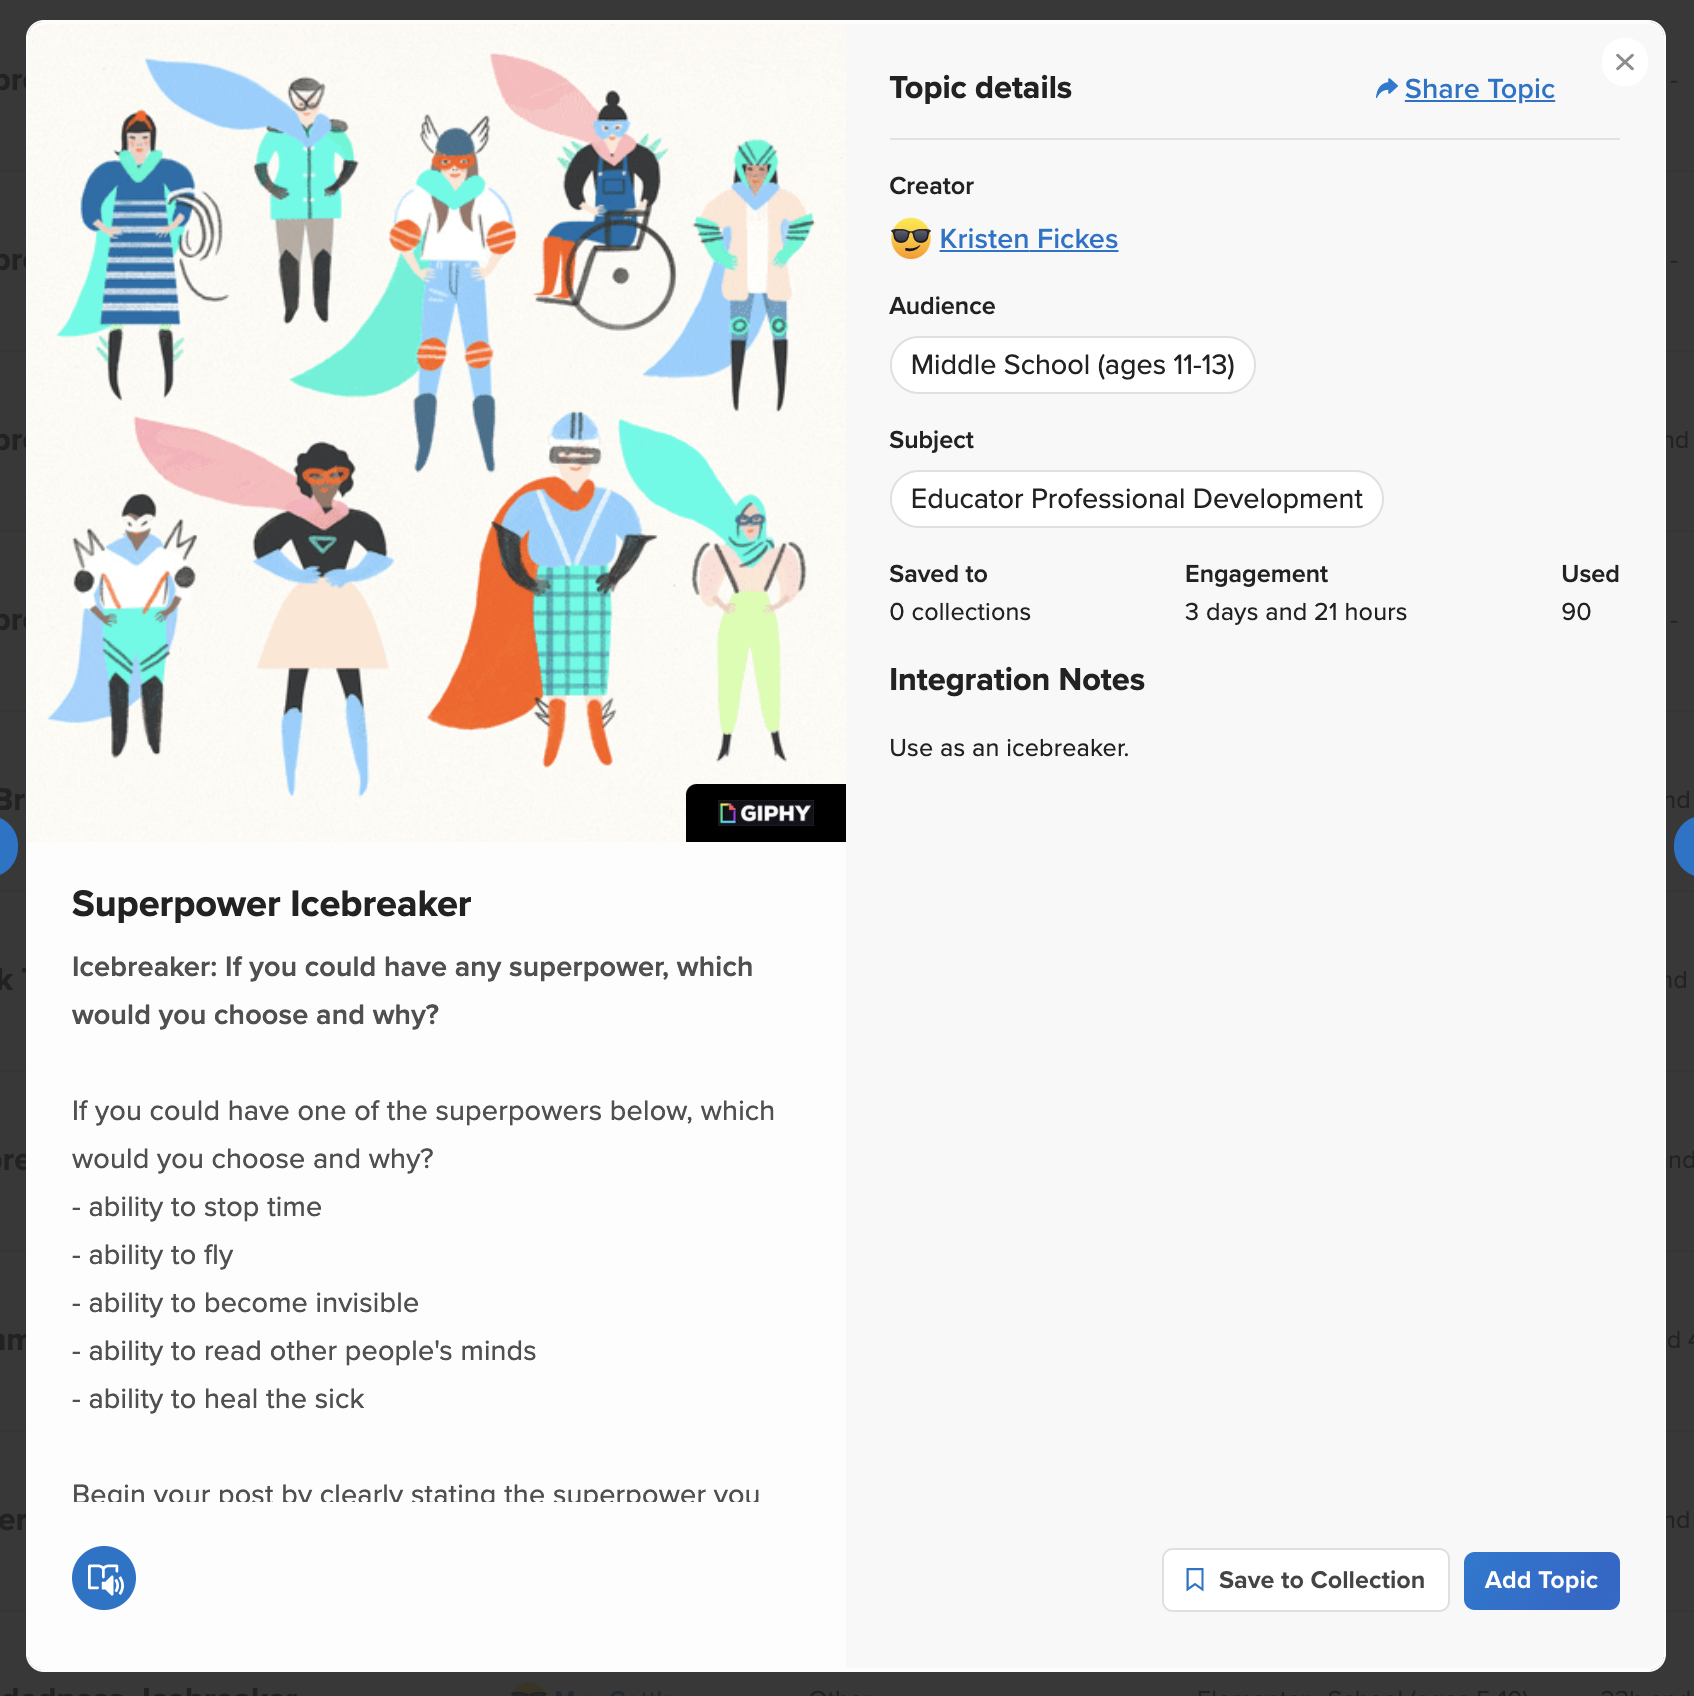
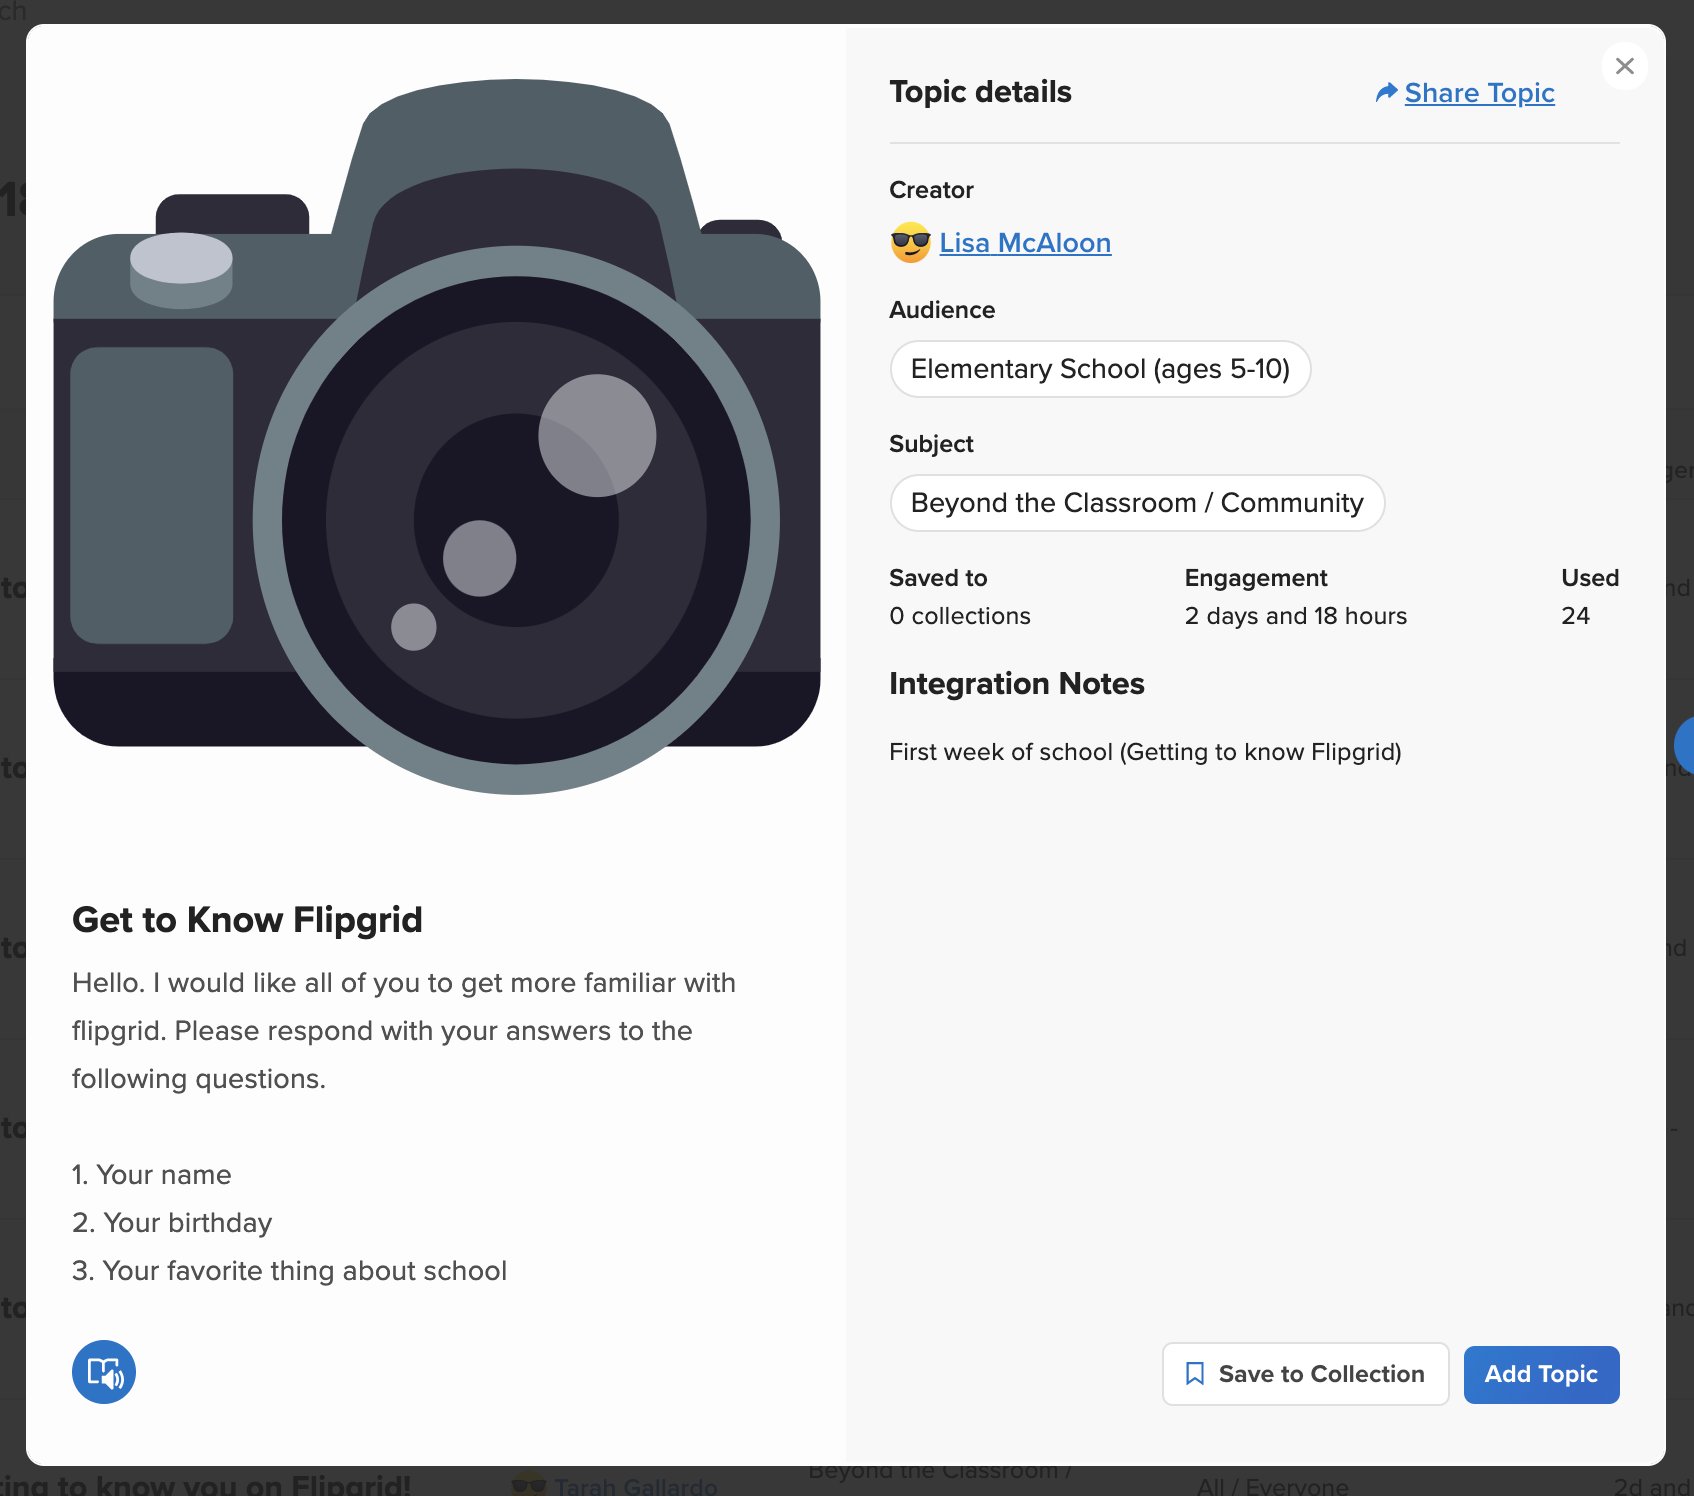
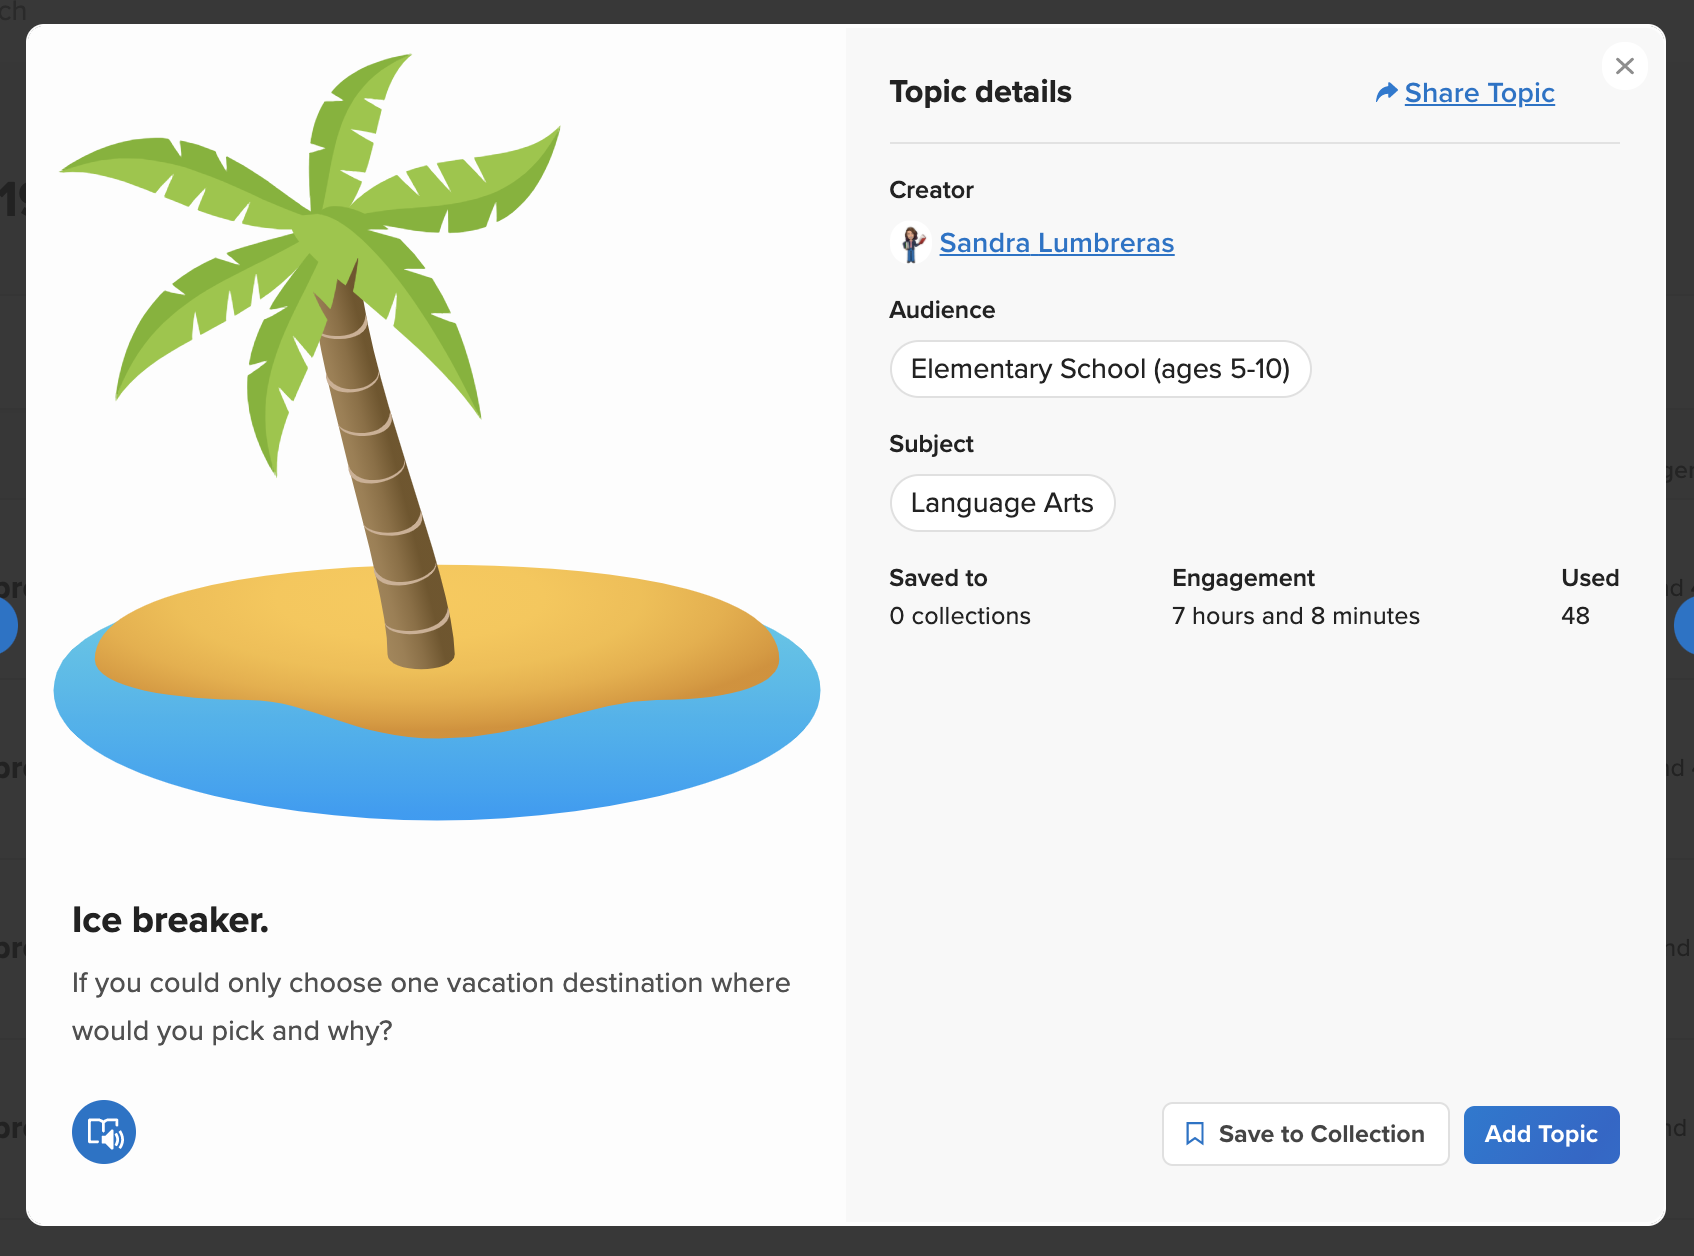
When first introducing Flipgrid to your students, we recommend starting off with something simple - like an ice breaker. This gets your students familiar with how the platform works, and once they’re comfortable - then you can things to the next level. Here are a few ideas from the Flipgrid Discovery Library to help you (and your students) get started. Click on any image to open and save it to your Flipgrid collection!

Video Tutorial
Still not quite sure how it all works? Mrs. Merrill has you covered! Check out her video on how to get started below!
Stay #interACTIVE!
-👗➕🕶️
For more tips, tricks and lesson ideas for making learning more interACTIVE, check out our books The InterACTIVE Class and Flipgrid in the InterACTIVE Class on Amazon!

