


20 Ways for Students to Use Adobe Express in the Classroom
Discover 20 creative and engaging ways students can use Adobe Express in the classroom! From animating book characters to designing logos, crafting timelines, and inventing gadgets, this post highlights versatile projects that enhance learning across subjects. Perfect for fostering creativity, collaboration, and critical thinking, these ideas bring lessons to life with Adobe Express!

Adobe Express is a game-changer for classrooms! It’s packed with tools to help teachers and students create stunning designs, from videos to posters, all while making learning interactive, creative, and fun. This tool is 100% free for all teachers and students. To sign up for your free account, click here. Now, let’s check out some ways that students can use it in the classroom.
Please note: This blog post was hand-crafted and was not created using AI.
(click on any subheading to jump to that section)


Animate Characters in Adobe Express
Remember the app Chatterpix? Well, now Adobe has integrated similar technology right within their platform. Students select a character and then record their voice. Adobe uses the recording to animate the mouth of the character, making it look like the character is doing the speaking. Here’s how it works:
Log onto Adobe Express.
Click on the + button on the top right, then select Video.
Under Media, click Animate characters.
Select your character, background, and size.
Click Record to start capturing your voice (Tip: if you are in a noisy environment, try toggling the Enhance Speech feature on).
Once the video processes, you can download and share it on your preferred platform.


From Page to Stage: Animate Any Character or Figure in Adobe Express
If you enjoyed the activity above, but wish that you could use the feature on a custom figure - this idea is for you! In this lesson, students will animate a figure by adding a mouth over the top of an image. Check out our video tutorial or below to see how it all works:
Log onto Adobe Express.
Click on the + button on the top right, then select Video.
Under Media, click Animate characters.
Under the Character tab, find a mouth that you think will work best.
Next, under the Background tab, click transparent (this removes the background)
Under Size, select your preferred size.
Now, click Record to start capturing your voice (Tip: if you are in a noisy environment, try toggling the Enhance Speech feature on).
Once the video processes, it will appear in the video editor.
Upload a custom image of the character or figure you are trying to animate.
Make sure that your mouth is layered on top of the uploaded image. Your layers can be found on the top right side (the squares). If necessary, rearrange them so that the mouth is on top.
Resize the mouth to make it look as real as possible.
When you’re finished, download and save the file to share on your preferred platform.

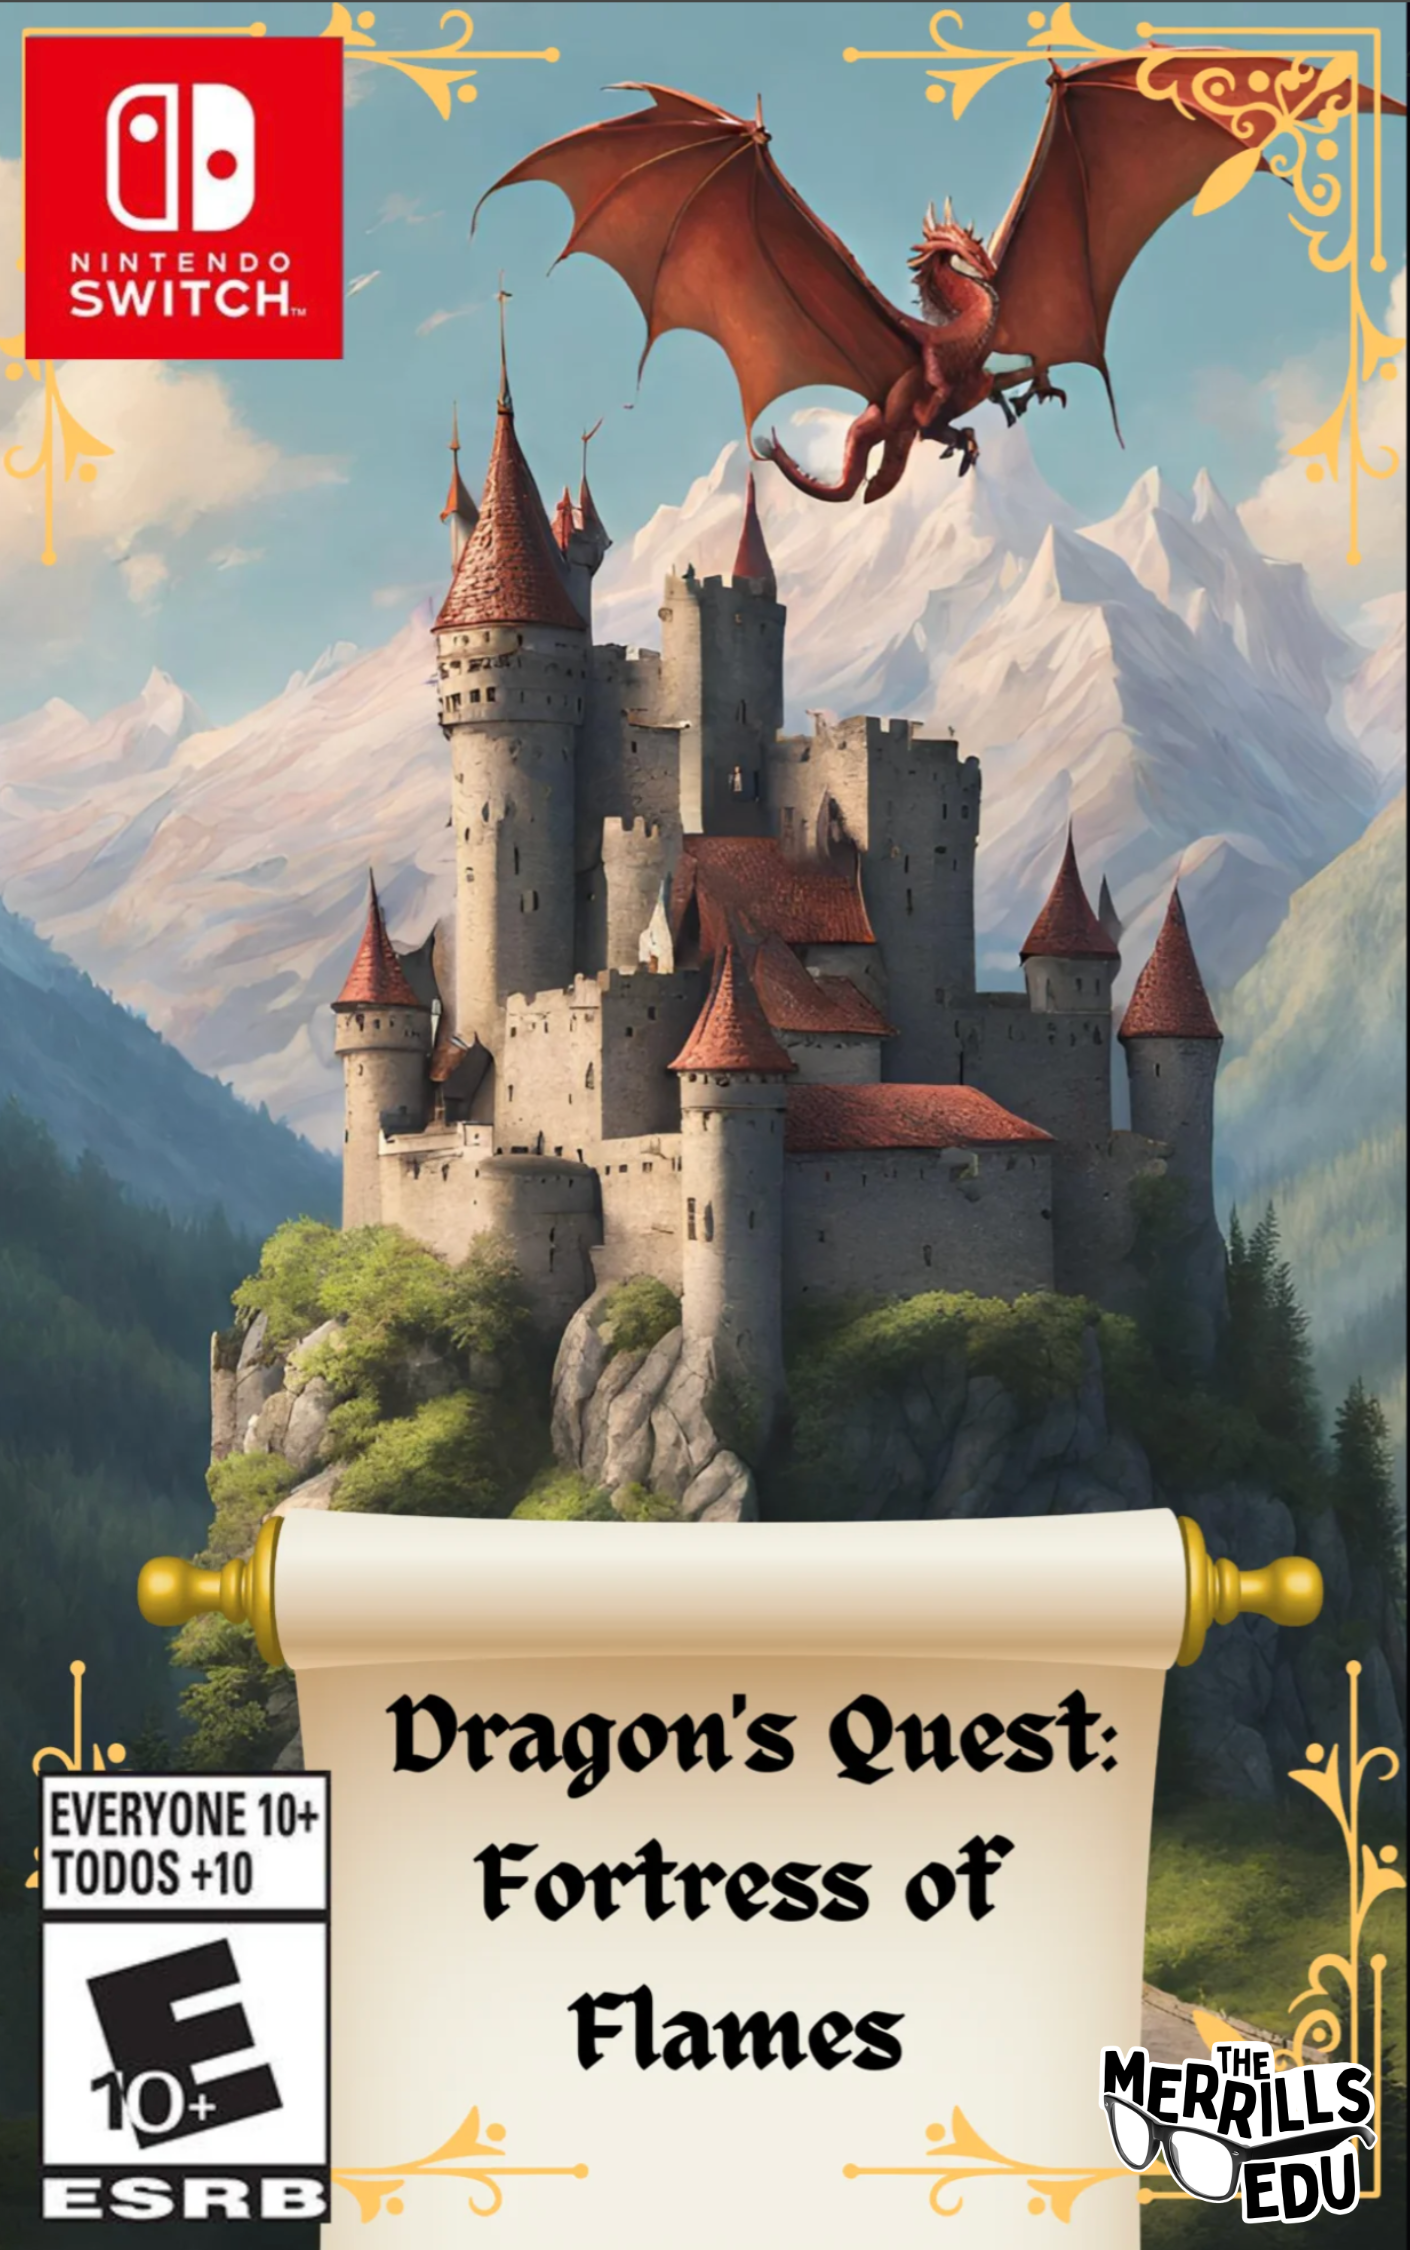
Action Figures in Adobe Express
Action figures may seem like they are a thing of the past, but these AI generated models are sure to engage today’s learners. This activity can be used to describe characters or figures, express their strengths, or share their accomplishments. The best part of all - Adobe Express has this activity in their Guided Activities library. So, students can watch a tutorial demonstrating each step of the way. Here’s how it all works:
Log oto Adobe Express, then click here to launch the template.
With the template open, click on the text layers to edit them as needed. Colors can also be changed.
Click on the original action figure image and move it to the trash.
Click on Generate image, and then choose Square for the size.
Enter the prompt of what you are trying to create. Tip, if you have an original image, upload this as the Composition. Doing so, will generate an image that uses the composition of the original image.
Generate the image and then resize and crop it as needed.
When you’re finished, download the image and share it on your preferred platform.


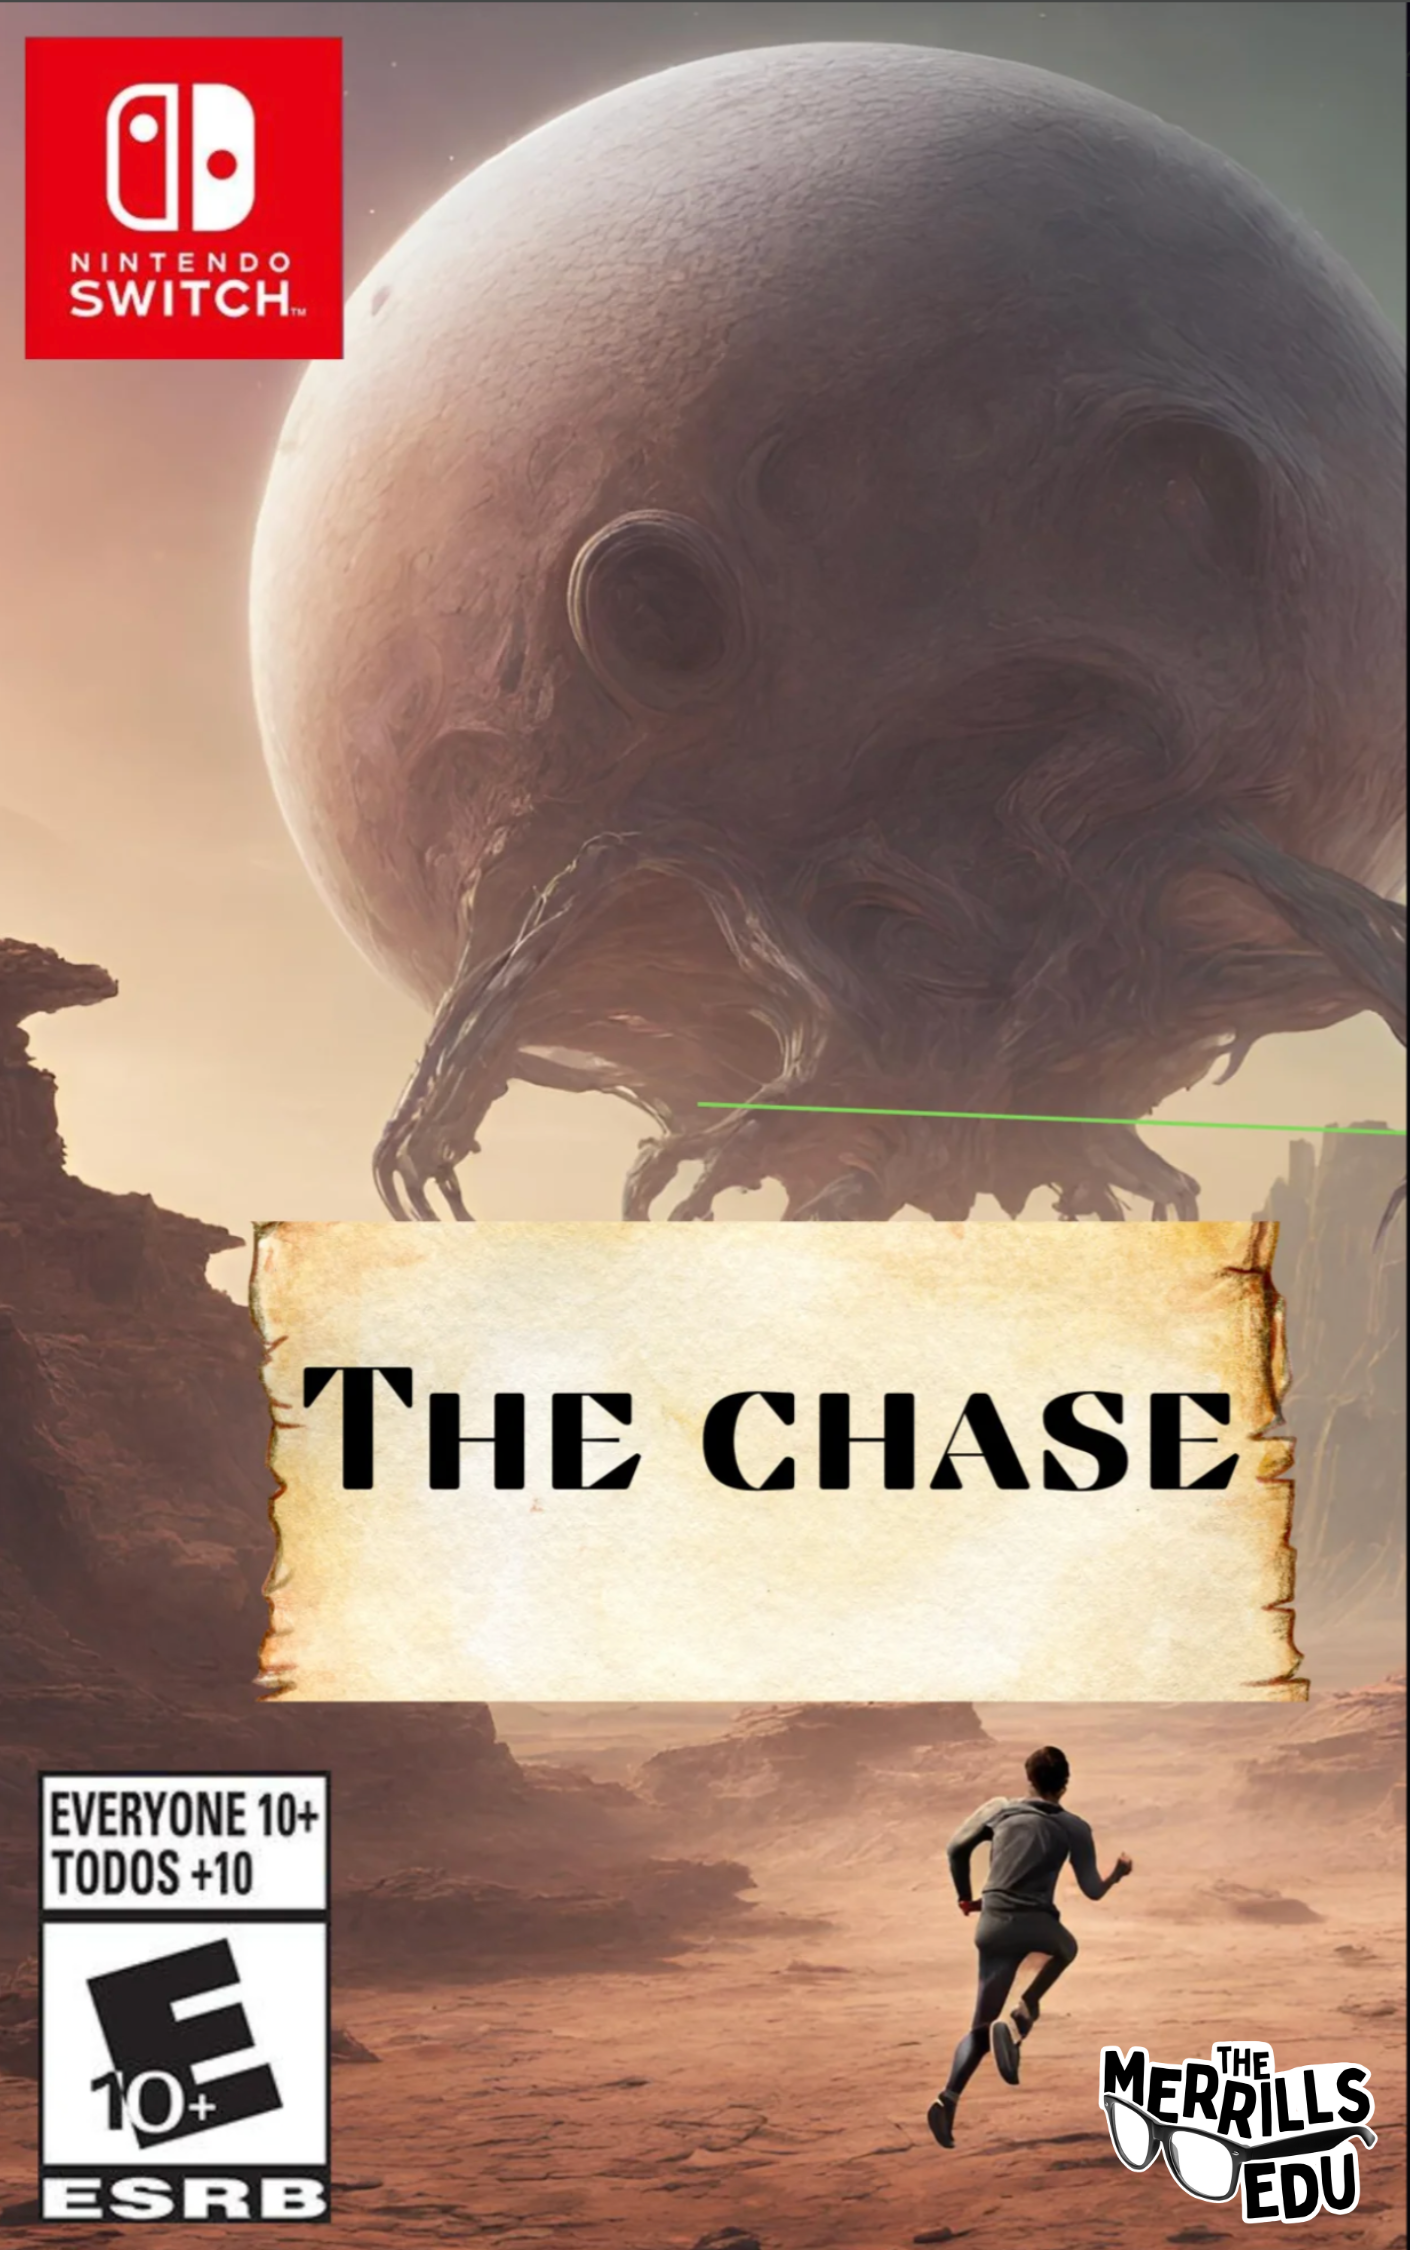
AI Generated Hidden Story Creatures
These AI generated creatures can be used as a hidden creature in a story. The creature can can act as an invisible character who is always watching what is happening. The lessons learned from the test / story can be featured in the project. See our example below, and find this lesson in the Guided Activity library by clicking here. Let’s check out how it all works:
Log onto Adobe Express, then click here to launch the template.
With the template open, click on the text layers to edit them as needed. Colors can also be changed.
With the text and colors now edited, click on the creature and then click on the Generate image icon.
Edit the prompt with the details you prefer, and then click Generate.
When you’re finished, download the image and share it on your preferred platform.


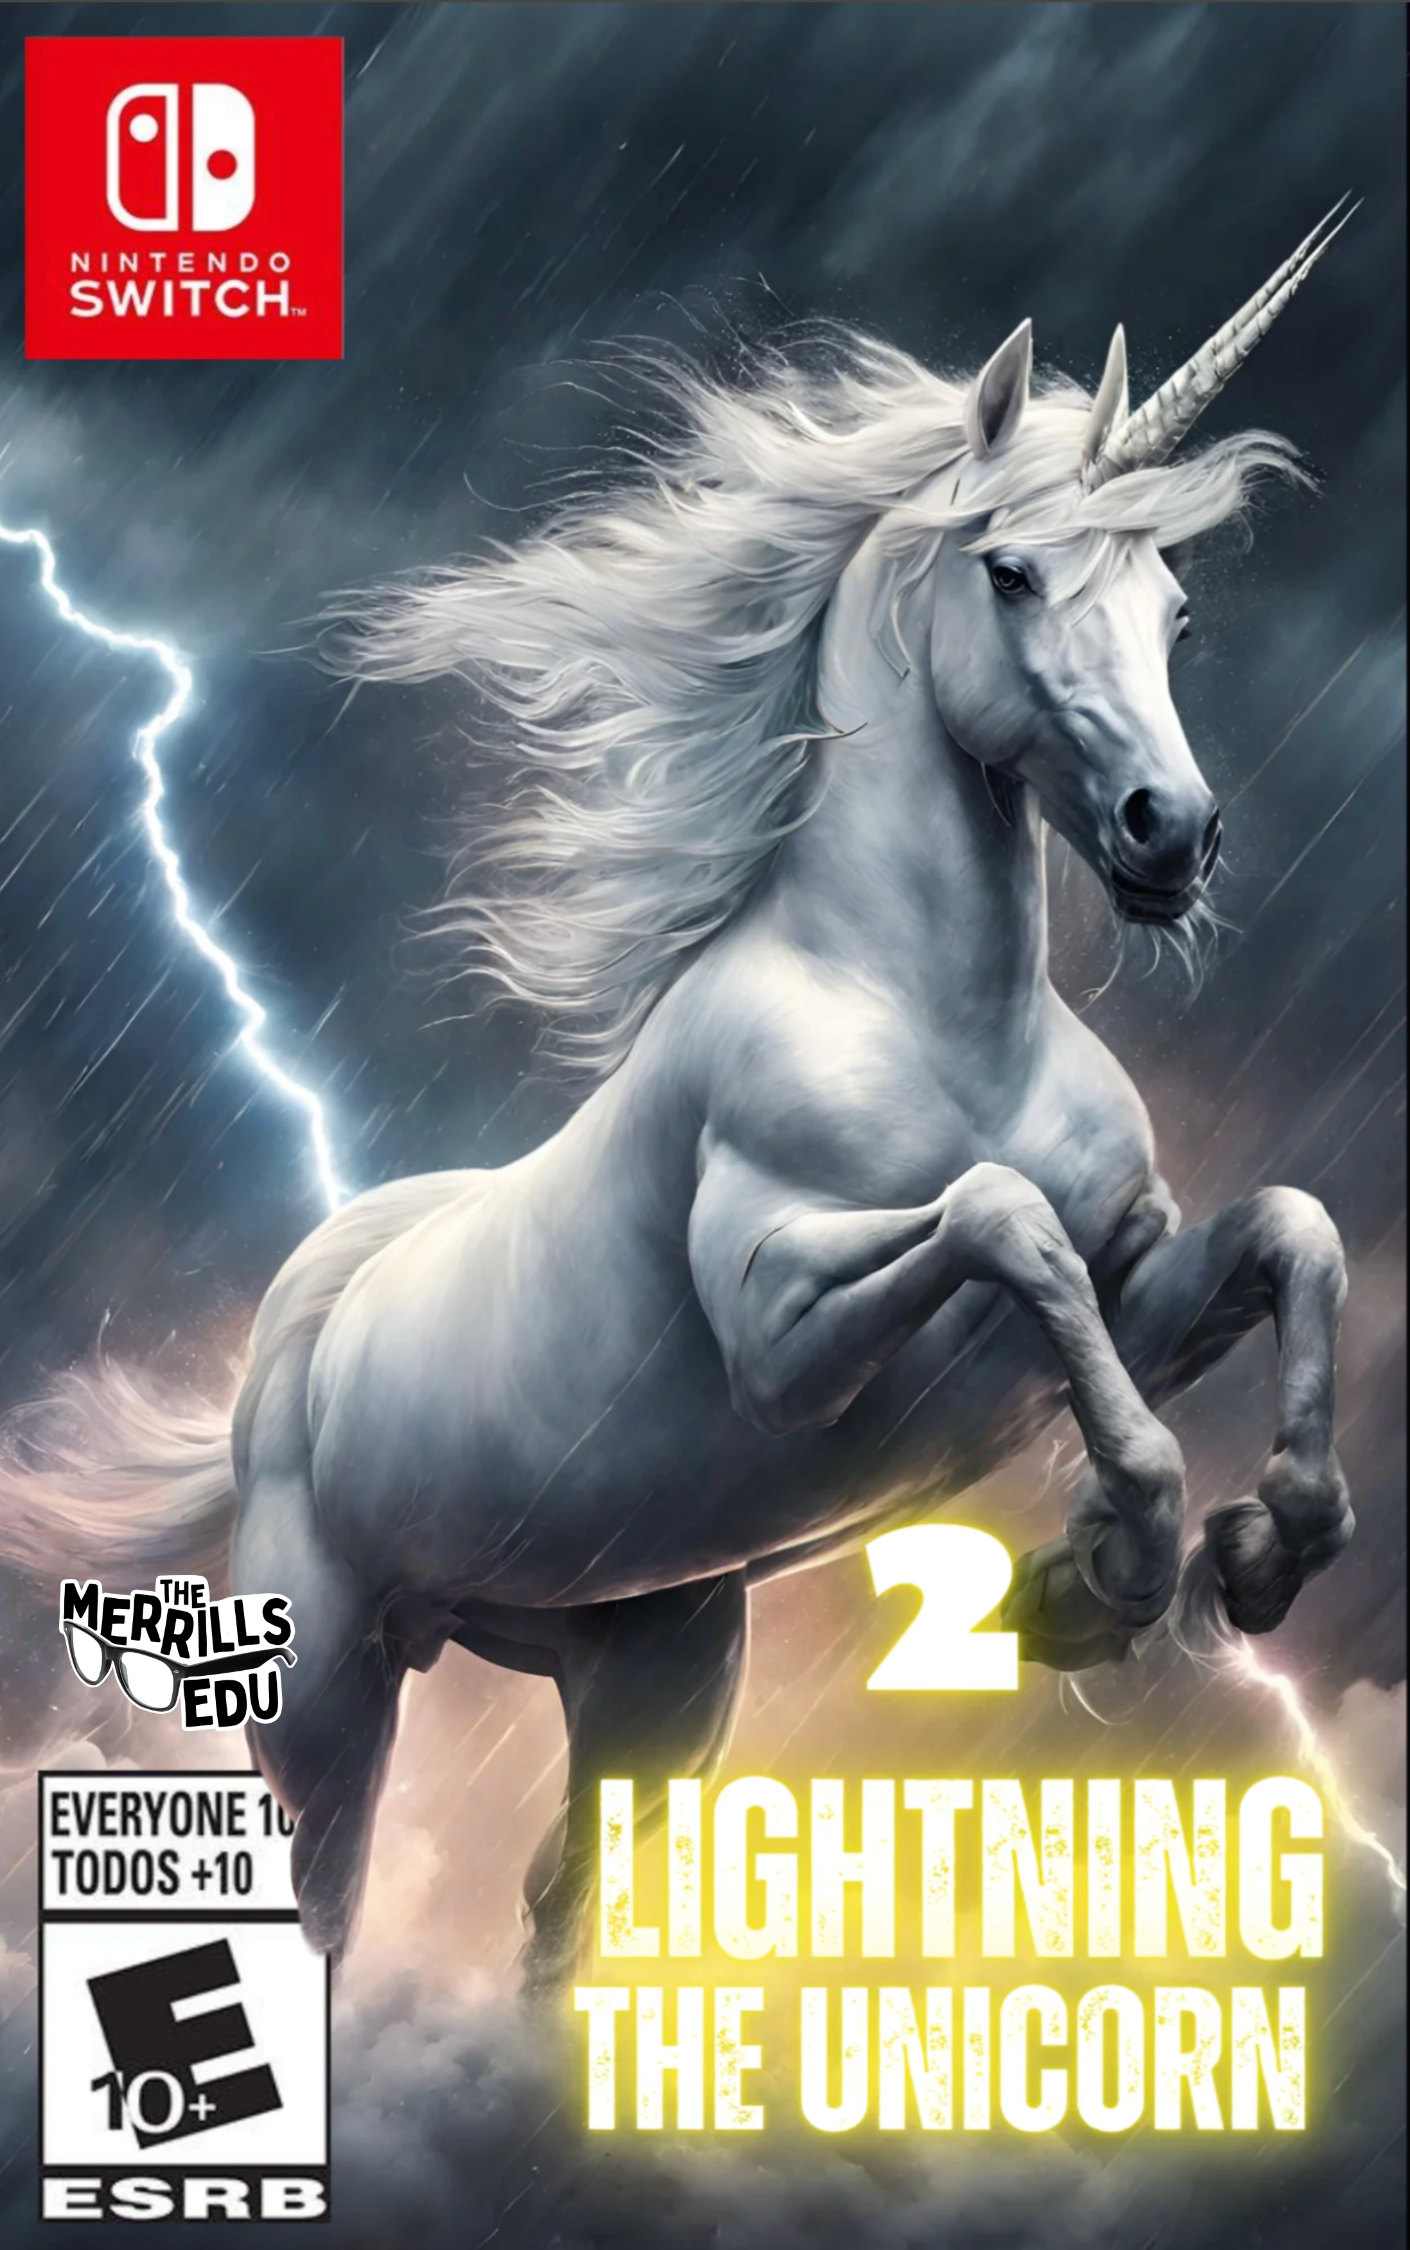
Solar System Selfies
This lesson is out of this world! Here, students use Adobe’s AI to generate an image of an astronaut standing on a planet or the moon. Then, the students use the Insert Object tool to add planets behind the astronaut. The planets can be labeled and used as an assessment piece. Here’s how it all works:
Log onto Adobe Express and click on the + symbol.
Click on Landscape 16:9 to launch a new project.
With the new project open, click on Media.
Now, click on Generate image and then click Widescreen 16:9.
Enter your prompt (the one we used in the example was: An astronaut standing on the moon taking a selfie), and then change the Content Type to Photo.
Click Generate, and then select your preferred image. If necessary, resize your generated image to take up the entire screen.
Click the X in the Generate image window (left side panel) to close the sidebar.
Next, click on Insert object and enter the information in the prompt (we used the planet names for ours). Use the brush to draw over the area where you would like the object to be inserted.
Click Generate to create the object, then click Keep to add it to your design. Repeat this for the other planets.
Now, click on the Text tool (located on the left hand side) and add a text box to label each planet.
When you’re finished, download the image and share it on your preferred platform.


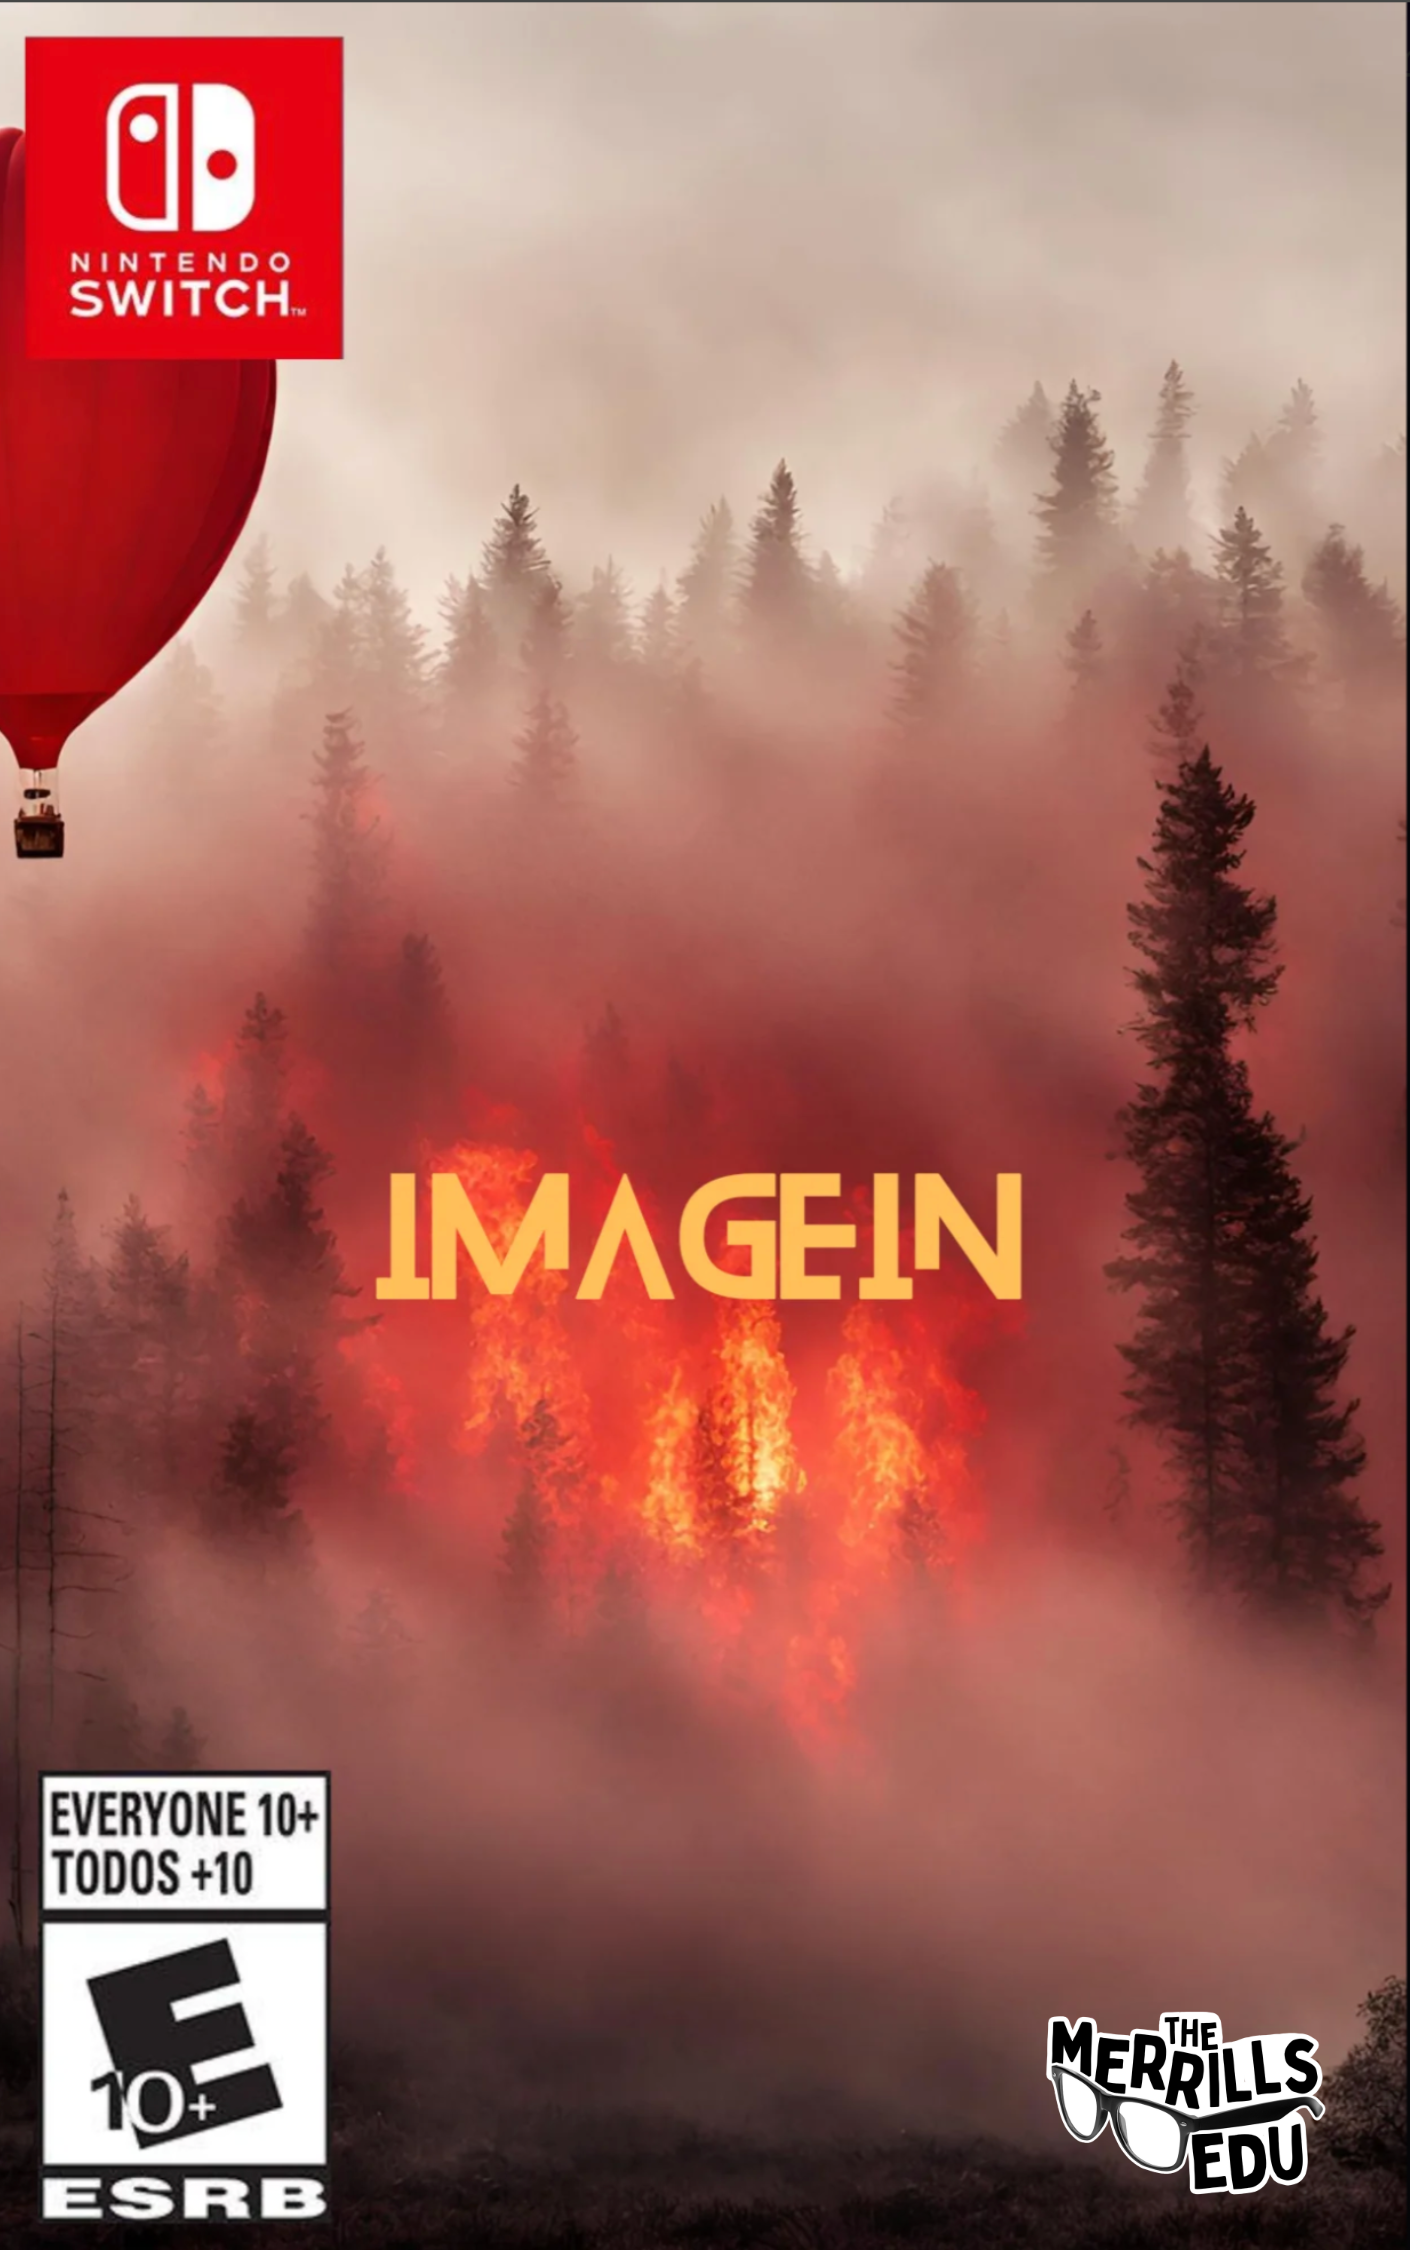
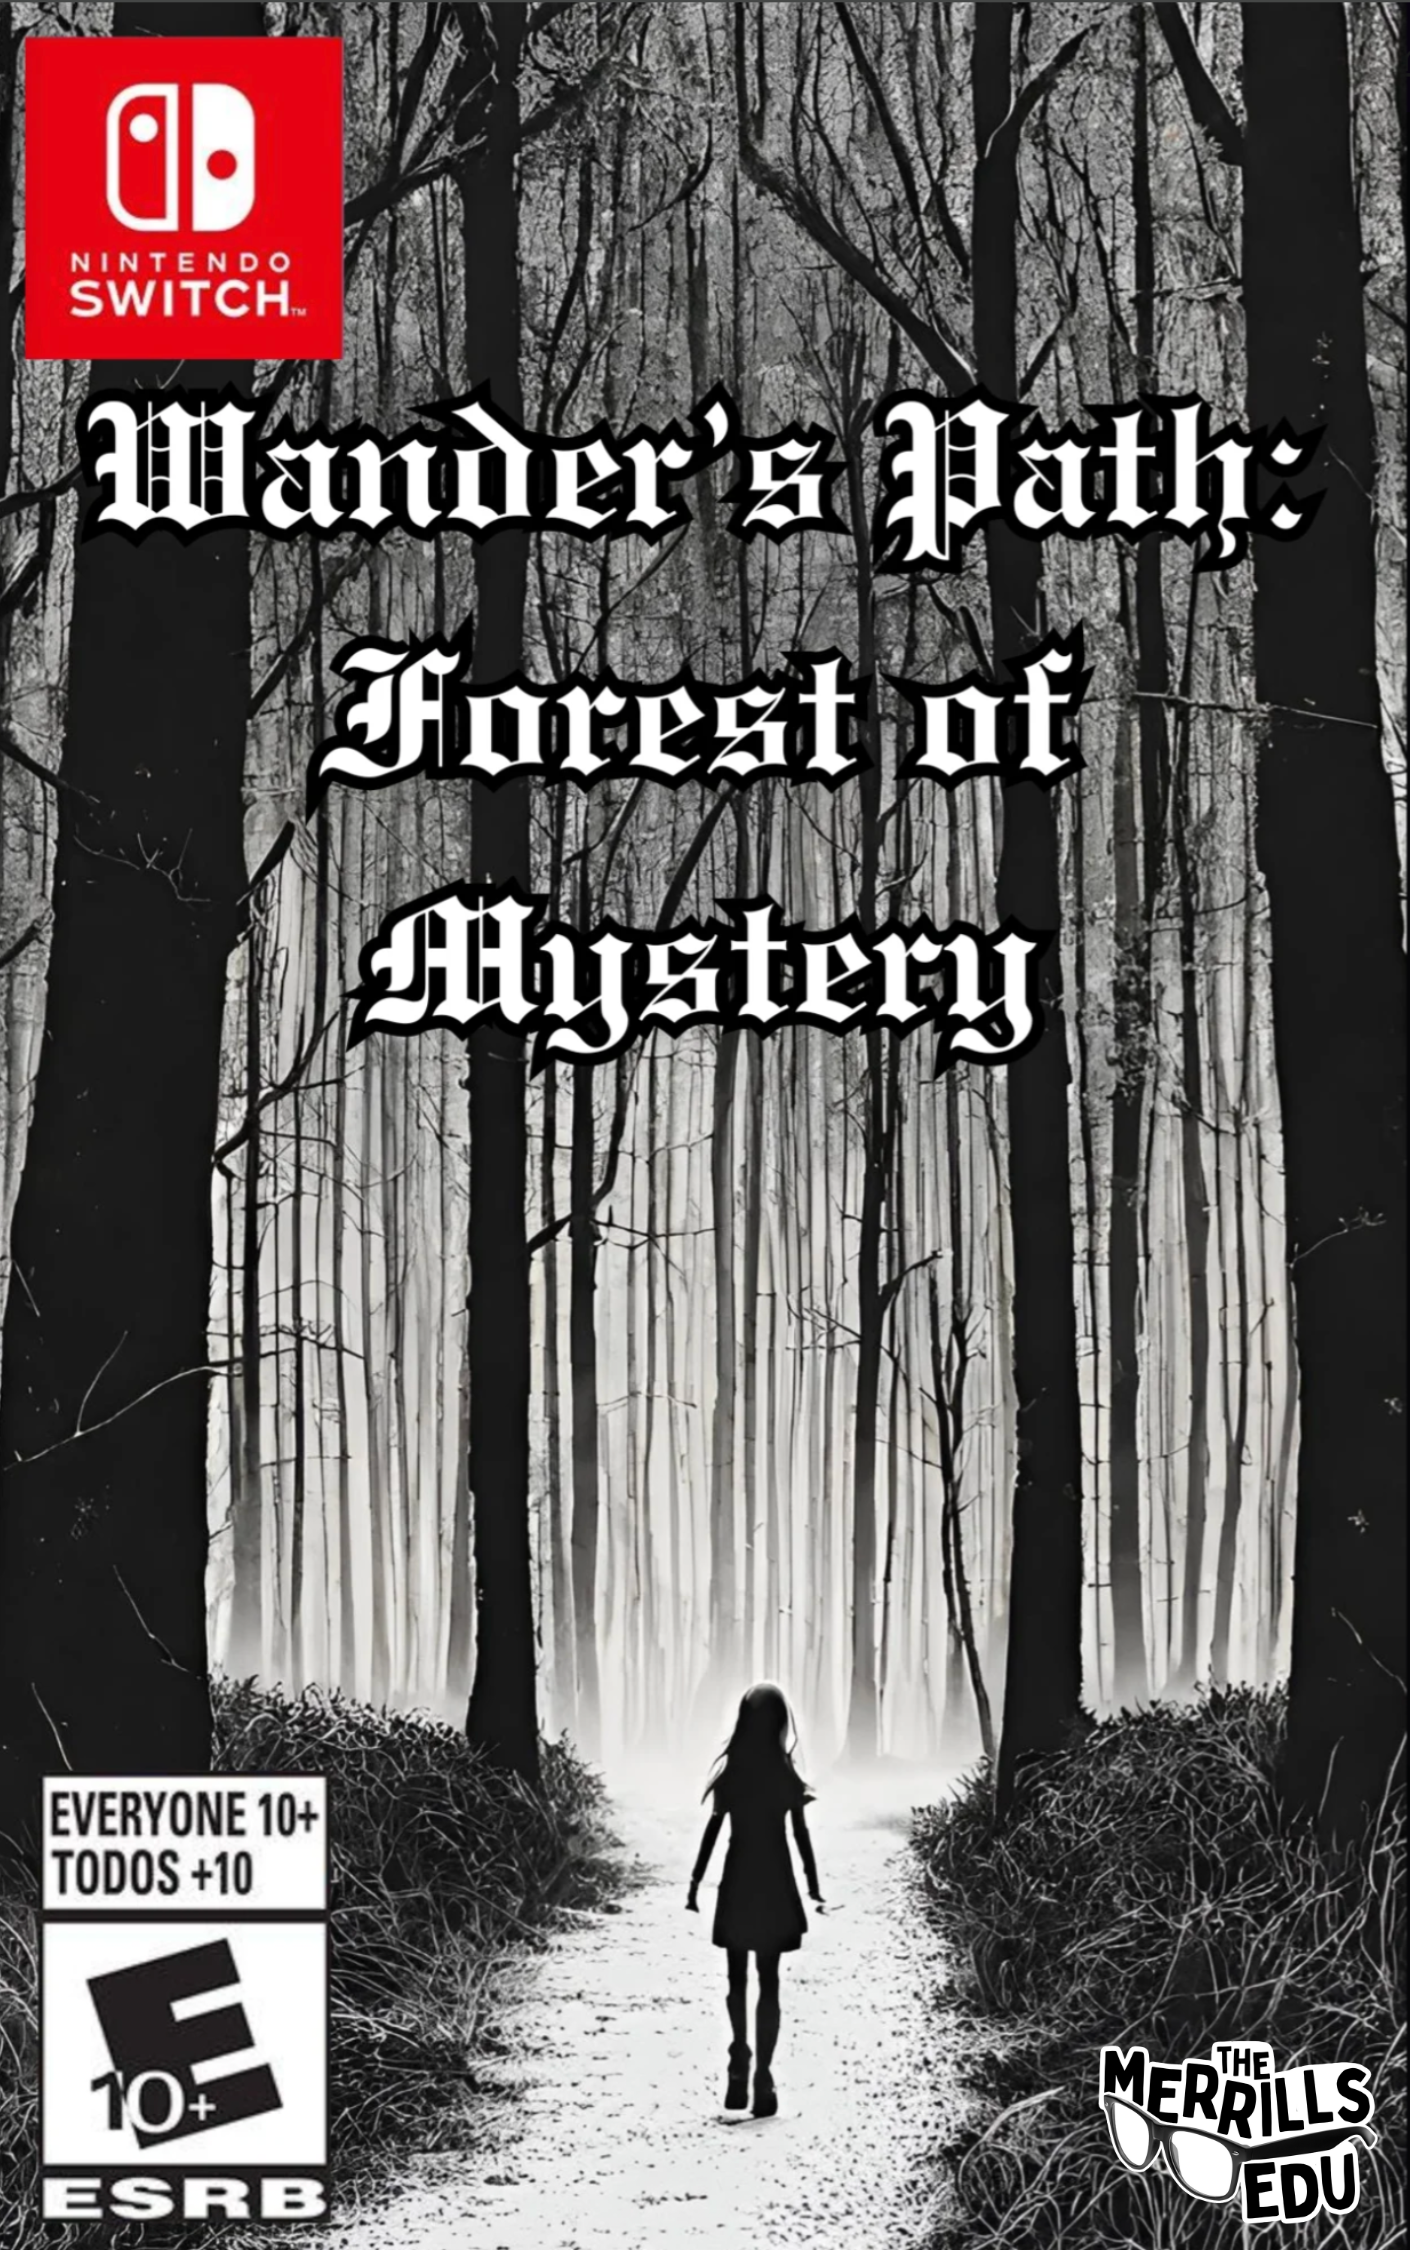
Hidden Text: Finding the Theme in Adobe Express
In this project, we’re going to use Text Effects to explore the theme of a story. Students first read or create a short story, and then identify its theme – the main idea or message. Once they know what the theme is, they’ll use Adobe Express to choose an image that represents the setting of the story. Then, they can add the theme to the image using text effects. The goal is for the text to blend seamlessly into the scene, so it feels like a natural part of the setting. This will help students connect the theme with the visual elements of the story, making it easier to see how they work together! Check out the steps below:
Log onto Adobe Express and click on the + symbol.
Click on Landscape 16:9 to launch a new project.
With the new project open, click on Media.
Now, click on Generate image and then click Widescreen 16:9.
Enter a prompt that best describes the setting, then click Generate.
Select an image, then make sure that it is resized to fill the background.
Next, click on Text (on the left side panel) followed by Generate text effects (located at the bottom of that same panel).
Select one of the styles (it doesn’t matter which one you choose - we’ll change it on the next step), and then enter the prompt of what you are looking for (in our example, we used the prompt: red wood).
Now, click on the text in the text box to edit it. Resize and reposition the text box so that it blends in with the setting’s environment.
When you’re finished, download the image and share it on your preferred platform.


Logo Maker in Adobe Express
With Logo Maker, students can create custom branded logos for individuals, businesses, and more. In our example, our middle school students were learning about Katherine Johnson, one of many African American women who performed critical calculations for NASA in the 1960s. The students were tasked to create a logo for her using Adobe Express. Here’s how they did it and be sure to check out an example below!
Log onto Adobe Express and scroll down until you see Suggested quick actions.
Scroll to the right until you see Logo Maker. Click on Logo Maker so that it launches.
Enter the information and then click Next.
Next, select a style and click Next.
On the next screen, click a logo to customize and then add an icon. Click next to move on.
The AI will generate the logo automatically. If needed, you can always select Edit more to add on finishing touches (like in our example below).
When you’re finished, download the image and share it on your preferred platform.


Character Alter Egos in Adobe Express
Creating a figure’s alter-ego is definitely a higher level thinking skill. The thought that goes into the process is naturally creative, and Adobe Express now has a way for students to show their thinking. Alter Egos can be found as a Guided Lesson in the activity library by clicking here. Let’s check out an example below.
Log onto Adobe Express, then click here to launch the template.
With the template open, click on the text layers to edit them as needed. Colors can also be changed.
With the text and colors now edited, click on the main image and then click on the Generate image icon.
Edit the prompt with the details you prefer, and then click Generate.
When you’re finished, download the image and share it on your preferred platform.


All About Me Projects in Adobe Express
All About Me activities don’t always need to be about a person. We’ve used this idea a bit more broadly when learning about different types of habitats. Students can list key components of a habitat including plants and animals that live there, temperatures, and how it may impact life on Earth. Check out our second grade example below! If you’d like to give it a try, this Guided Activity can be found in the Adobe Express Library by clicking here.
Log onto Adobe Express, then click here to launch the template.
You can change out the main image by clicking on it and deleting it.
Click Media and search for an image that relates to the project.
Add your selected image to the design and resize it so that it takes up the entire background.
Now, click on the text layers to edit them as needed. Colors can also be changed.
When you’re finished, download the image and share it on your preferred platform.


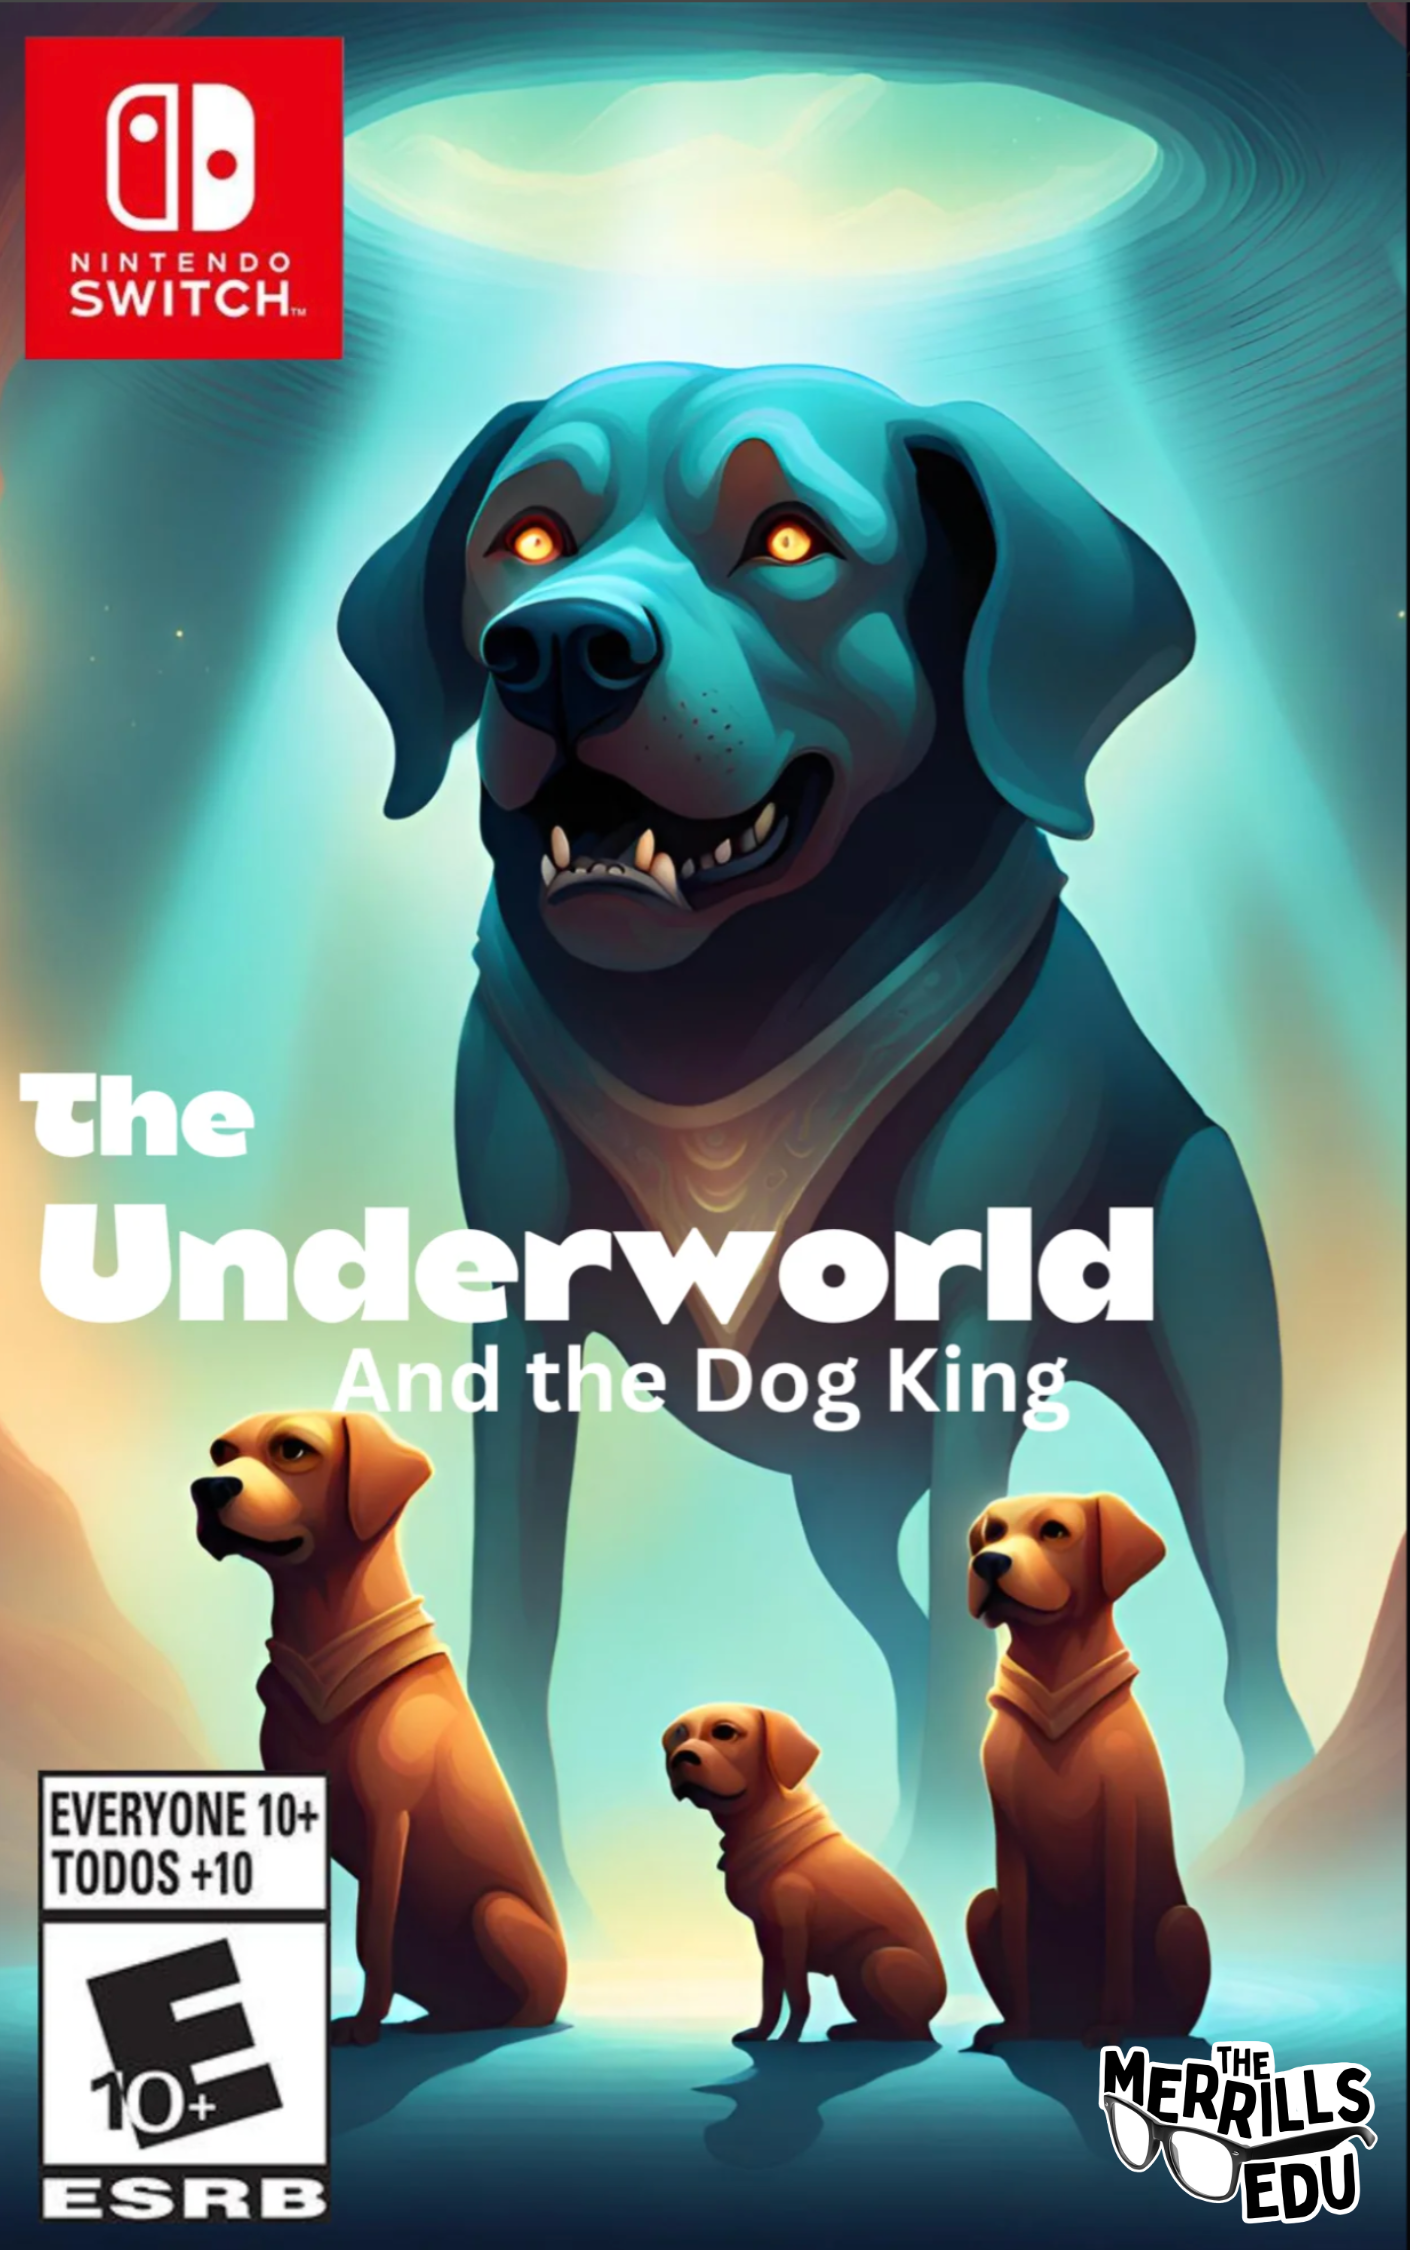
AI Generated Book Covers in Adobe Express
This activity can be used as an extension of the writing process, a way to summarize a chapter, or create a potential book about a particular figure. Using the AI in Adobe Express, students can generate images and construct what looks like a book cover. This activity can be found in the Guided Activities library by clicking here, but there also plenty of templates available by searching for “Book Cover.” Here are the steps, and be sure to check out our first grade example below!
Log onto Adobe Express, then click here if you wish to use the guided activity template. For our example, we’ll start from scratch.
Search for Book Cover in the search bar at the top of the login screen.
Click on a template that you think will work best, and then click Customize template in the pop-up window.
You can edit the background by removing it and searching for a new image. Click on Media to search for a new image or generate one using AI.
If your image is blocking out your text boxes, check to make sure that it’s layered behind all of your other elements - or add the image as a background by clicking on it and then clicking on Set image as background (located on the image panel on the left side of the screen). This will make sure that all other elements are placed on top of the image.
Edit the text layers with the necessary information.
When you’re finished, download the image and share it on your preferred platform.


AI Generated Animated Characters in Adobe Express
This lesson idea is perfect for describing characters, or creating characters in a narrative writing piece. Here, the students create a graphic and learn how to refine generative AI prompts using Generate image. What we love about this activity is that it teaches the importance of AI prompting. There’s even a section to share the prompt that the students use. This is valuable, as even the slightest changes and edits can generate totally different outcomes. Check out the activity in the Guided Activities library by clicking here, and see how it works below!
Log onto Adobe Express, then click here to launch the template.
With the template open, click on the text layers to edit them as needed. Colors can also be changed.
With the text and colors now edited, click on the main image and then click on the Generate image icon.
Edit the prompt with the details you prefer, and then click Generate.
Select an image that you think represents your thinking.
Once you have an image picked, be sure to copy the prompt that you used. Paste the text into the bottom right corner to share what you used to generate the image.
When you’re finished, download the image and share it on your preferred platform.

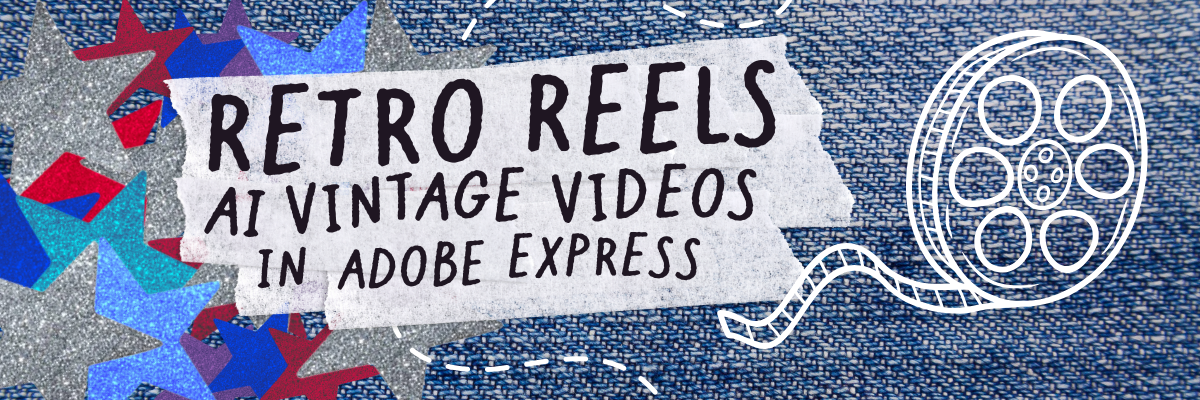
Retro Reels: AI Vintage Videos in Adobe Express
This activity can be used to retell historical events, recall events from a story that happened in the past, or even a historical figure’s history. Students can add a vintage feel to the project, and use text boxes to do all the talking. We especially love this for our students who may be shy or reluctant to record a video of themselves or using their voice. This provides a comfortable creative outlet for them, capturing their thinking. We’ve created a free template which you can grab by clicking here, and see how it works below! (Tip: we recommend modeling how to use layers in Adobe Express before introducing this idea!)

Log onto Adobe Express, then click here to open the template.
Click Remix on the top right corner.
The first two scenes of the video can be left alone and act as an introduction bumper. Click on the third scene.
Locate the layer squares on the right side of the screen. Move the image layer on top of the rectangle. With the image now on the top layer, click Generate image (alternatively, you can also find images in the Media section).
Type in what you are looking for to generate the image. Then, select an image to add to the scene (you can delete the original image from the template).
Be sure to resize the image to take up the entire size of the canvas, or set it as the background.
Next, reorganize the layers so that the image you generated is now on the bottom layer (this preserves the “vintage” effect we used in the template - it must be on the top layer to work).
Move onto the fourth scene (the first scene with a text box). Rearrange the layers so that the text layer is now on the top. This will allow you to edit and see the text box.
Add your text in the box, then rearrange the layers back so that the text layer is on the bottom.
Repeat these steps as needed. Note: the image and text layers can be duplicated, so if you have more than three images or text slides, you can easily add them.
Lastly, add your name to the final credit scene. Move the text layer to the top, edit it, and then move it back to the bottom.
When you’re finished, download the image and share it on your preferred platform.


Dreams to Devices: Create an Invention in
Adobe Express
Students better get the creative juices flowing for this idea! Here, they have to create an invention and also think of how to prompt the AI to create the look of their invention. This involves thinking critically about the prompt being entered, and most likely revising it in order to arrive at the proper outcome. Check out the activity in the Guided Activities library by clicking here, and see how it works below!
Log onto Adobe Express, then click here to launch the template.
With the template open, click on the text layers to edit them as needed. Colors can also be changed.
With the text and colors now edited, click on the main image and then click on the Generate image icon.
Edit the prompt with the details you prefer, and then click Generate.
Select an image that you think represents your thinking.
Once you have an image picked, be sure to copy the prompt that you used. Paste the text on the bottom to share what you used to generate the image.
Click Media, then click Audio.
Click Record voiceover, and record your thinking. This will add your voice as a voiceover to the work.
When you’re finished, download the image and share it on your preferred platform.


AI Generated Geometry Gardens in Adobe Express
Geometry may not come naturally to younger students. But, when you have them pause and take a look at their surroundings, they notice that their environment iis surrounded by shapes. This idea takes AI generated images and creates scenes full of shapes for students to locate. These images can be shared with the rest of the class, and students can challenge each other to hunt down every shape. Check out the activity in the Guided Activities library by clicking here, and see how it works below!
Log onto Adobe Express, then click here to launch the template.
With the template open, click on the text layers to edit them as needed. Colors can also be changed.
With the text and colors now edited, click on the main image and then click on the Generate image icon.
Edit the prompt with the details you prefer, and then click Generate.
When you’re finished, download the image and share it on your preferred platform.


Fortunes in a Fold: Where Writing Takes Shape
(Digital Fortune Tellers in Adobe Express)
Paper fortune tellers were one of those hyped trends that never really died. From time-to-time, we still see students cheerfully playing with them in the hallways. So, that got us thinking…How can we find an academic way to integrate these into the classroom? After a bit of brainstorming, we came up with this idea: Fortunes in a Fold: Where Writing Takes Shape! Students develop 4 characters, 8 adjectives (2 adjectives to describe each character), and 8 different settings or plot twists. Students can use our template to edit the text, or start with the blank version (on page 2 of our template). Iif you’re thinking to yourself…I have no ideea how to fold one of those things! Weell, we have you covered! Check out the tutorial above. You can also download our template by clicking here, and learn more about how this activity works below.
Download our template by clicking here. Students can edit the text version (Page 1), or start with a blank version to add images (Page 2).
If students are using page 1, they can edit the text with the appropriate content. If they’re using page 2, they can use images from Media, or generate their own.
After the students have created the four characters, they need to come up with two adjectives to describe each character (8 in total). These adjectives get places right underneath the character slots.
Next, students need to create 2 settings or plot twists for each character (8 in total). These will be placed directly underneath the adjective slots.
When the fortune teller is completed, they may be printed and then used in the writing process to help create a narrative piece.


Redact and React: What's the Big Idea?
This activity features an editable template where you can add an article or brief passage and redact information. For example, perhaps the main idea is redacted and the article just lists the supporting details. We have also used it with author’s purpose to have the students try and understand the relationship between purpose and structure. This template is fully editable. Just drop your own passage onto it and move / duplicate / delete the redaction marks as necessary. We’ve included the steps and template below!
Log onto Adobe Express, then click here to launch the template.
Delete / edit the text that is already on the template by pasting your own text.
Move / resize the black redation lines to fit your own passage.
Download the design by clicking on the Download button, then selecting PDF or PNG (this will flatten all the layers so that when the students gain access, they cannot move the redactions out of the way to see the answer(s).
Start a new Adobe Express project by clicking on the + sign.
Type Worksheet in the search bar, then select Worksheet.
Upload your downloaded file by dragging it into the new Worksheet design.
Share the new Worksheet design as a template by clicking on Share.
Under the Share menu, Click View only link under Posts.
Toggle on Allow others to use this. This generate a new hyperlink that can be shared with your students to access the assignment.
Paste the hyperlink on your LMS and now your students will be able to voiceover the design.


Reel Lives, Real Stories
This lesson takes a bio about a figure and transforms it into a video in Adobe Express. We highly recommend using School AI to launch the lesson, and then have your students create the video in Adobe Express with the information they have curated. There’s even a Guided Activity for this lesson in Adobe library. Click here to launch the template and check out our example below!


Websites in Adobe for Education
Creating a website sounds like a difficult task. But, with Adobe Express, even your youngest learners can get in on the fun. Whether it’s a website documenting the steps of a science experiment, recalling an era of time, or acting as a student portfolio, Adobe’s website templates can get students creating quickly. There are lots of templates to help you get started, but check out a few of our favorites below and click on them to remix them for yourself!


Timeline Tales: Charting Your Story in Style
Adobe has an awesome selection of infographics and timelines available right within their templates. We love using these for history projects, sequencing the events of a story, and detailing the lifetime of a figure or character. Check out our example below, and be sure to search for Timeline in the templates.


Book Bumper Stickers
This activity sounds easier than it actually is…Have your students consider the theme of a story and then challenge them to think about how to relay the message in just one sentence. But, the one sentence has to be catchy and maybe even a bit humorous. Check out our student example below, and if you need a bumper sticker-sized template, click here!

-- Please follow us on social media and tag us with how you’re using these Padlet ideas in your classroom! 👓👗
For more tips, tricks and lesson ideas for making learning more interACTIVE, check out our books The InterACTIVE Class on Amazon!


20 Ways for Students to Use Padlet in the Classroom
Unlock endless creativity and collaboration in your classroom with these 20 exciting ways to use Padlet! From sharing and collaborating on engaging videos and interactive maps to creating drawings and using Padlet's collaborative whiteboard, watch your students connect and get excited about their learning!

Padlet has recently put a lot of effort and focus into education. The tool that we all loved many years ago has stepped up after apps like Microsoft Flip and Google’s Jamboard have closed their doors. Now, Padlet has similar features within the platform to help fill the loss of these apps. But, the fun just starts there. In this blog post, we’ll share 20 ways for students to use Padlet in the classroom.
Please note: This blog post was hand-crafted and was not created using AI.
(click on any subheading to jump to that section)


Video Recording and Commenting in Padlet
When Microsoft Flip announced that it was closing down, it left educators looking for a substitute to help fill the gap. While nothing can replace our beloved Microsoft Flip, Padlet has stepped up providing familiar features that students have grown to love. To enable video recording and comments, follow these steps:
Log onto Padlet as a teacher and create the board.
In the settings, under Engagement, be sure to toggle on comments (you can also turn on reactions, such as “likes” here).
Click the share icon to copy the link to your clipboard, or click Embed in your blog or website to copy / paste the board into your LMS (like Canvas or Schoology).
From here, students click + sign on the Padlet board to start a new post.
Below the Subject, students will need to click on More attachment types (all the way to the right).
A new menu will open up. In the new menu, students click Video Recorder.
After allowing the camera and microphone, the camera will launch and students can begin to record. They have 2 minutes of recording time (with the free plan), or 15 minutes of recording time (with a paid plan).
After recording, it’s important to remind students to use the Subject area to enter their name. Now, students click Publish to post their video onto the Padlet board.
Students can watch their friends’ videos back and comment on their responses. Similar to Flip, they can reply with (but are not limited to) a video, text, or audio recording. To add a comment, we recommend teaching the students to click on the original video, which will open it in a new window.
After watching the original video, students can click on the Comments icon located at the top right. This will open a sidebar to the right.
Next to Add Comment, students click the plus sign. Then they select Video Recorder (or they can just enter a text comment).
Students can follow the prompts to record their video. One important note here: just like in Flip, when a student adds to reply to the original post, they will need to also click on the pink “Comment” button. Failure to do so will lose the reply.
Now that the reply has been posted, Padlet will provide an organized and threaded conversation, making it easy for students to communicate with one another.


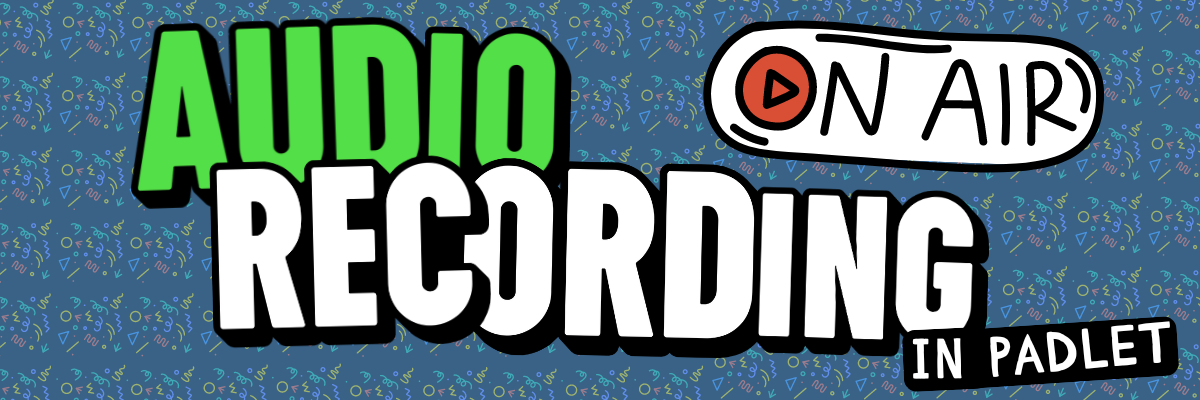
Audio Recording in Padlet
Student voice is important in an interACTIVE class, so we seek to provide as many creative outlets for our students as we can. However, sometimes students are shy or reluctant to be on camera. Don’t mistake their uncomfortableness with the desire to be noncompliant. These types of students still want to be heard, and this Padlet feature can help. Here’s how students can add an Audio Recording onto a Padlet board.

In a Padlet board, students click the + sign to add a response.
Below the Subject, students will need to click on More attachment types (all the way to the right).
A new menu will open up. In the new menu, students click Audio Recorder.
The Audio Recorder will launch. Student have 5 minutes of recording time on a free plan, or 30 minutes on a paid plan.
After recording, it’s important to remind students to use the Subject area to enter their name. Now, students click Publish to post their audio recordings onto the Padlet board.
Audio recordings can be added as a new post or as a comment to other posts.


The Draw Tool in Padlet
Padlet’s Draw Tool can be used to create a new post or as a comment to other posts. In the beginning of the year, we like to assign this activity to get the students familiar with using the trackpad. If they have a mouse or touchscreen, it will be even easier for them to create better illustrations. However, the focus here is not on creating a perfect drawing, but rather the soft skills of how to appropriately use the mouse. Here’s how to launch the Draw Tool.
In a Padlet board, students click the + sign to add a response.
Below the Subject, students will need to click on More attachment types (all the way to the right).
A new menu will open up. In the new menu, students click Draw. This will launch a canvas where the students can illustrate. They can enable the eraser by clicking on it in the lower right, or click Undo to correct mistakes. (Note: if students click on the eraser, they will need to click on the pen tool to draw again).
After drawing, it’s important to remind students to use the Subject area to enter their name. Now, students click Publish to post their drawings onto the Padlet board.
Drawings can be added as a new post or as a comment to other posts.


I Can’t Draw
Sometimes, an idea hits you and you know exactly what it should look like. But, some of us are artistically-challenged 😂. Maybe your students are shy about their artwork, or too picky and spend too long creating it. Padlet’s I Can’t Draw tool can help! This is an AI feature built into the platform, and uses written prompts to generate an image. Here’s how it works:

In a Padlet board, students click the + sign to add a response.
Below the Subject, students will need to click on More attachment types (all the way to the right).
A new menu will open up. In the new menu, students click I Can’t Draw. This will launch new window where students can enter what they would like the AI to draw.
After the image has generated, it’s important to remind students to use the Subject area to enter their name. Now, students click Publish to post their image onto the Padlet board.
I Can’t Draw images can be added as a new post or as a comment to other posts.


The Padlet Camera

Padlet’s camera is a quick and efficient way to share student work. With a few clicks, students can capture a photo of their whiteboard, writing, and more. Sharing it with the class helps elevate the critical thinking level, especially when the educator has enabled comments. Here’s how students can launch Padlet’s camera:
In a Padlet board, students click the + sign to add a response.
Below the Subject, students will need to click on the Camera icon.
The Camera will ask the students for permission, then launch and will be ready for use.
After snapping their photo, the students can add a black & white or sepia filter., or just keep it normal. Click Save to add the photo to the Padlet post.
Remind students to enter their name in the Subject, then click Publish to share the photo.

Uploading Files to Padlet
There’s a lot users can do right within Padlet, but there are also times that it’s useful to havee the ability to upload files from external platforms. Our favorite way to use this feature is with Adobe Express or Canva. Students can download their creations, then upload them to Padlet for the rest of the class to see. Here’s how users can upload onto Padlet:
Students will need to download the file or files that they would like to add to the Padlet board.
Once they’re in the Padlet board, students click the + sign to add a response.
There are two ways to upload files: Method #1 - Below the Subject, students will need to click on the Upload icon, or Method #2 - they can click on Downloads in their web browser and drag the file(s) in.
This will add the file(s) to the post. Remind students to enter their name in the Subject, then click Publish to share the file(s).


Screen Recording in Padlet
The Screen Recording feature in Padlet requires users to install the Padlet Chrome Browser. Once installed, it allows users to capture what their doing on their screen, producing a video recording of what is viewed and said. This can come in handy when explaining a strategy, explaining what they learned, or focusing on a particular topic. Here’s how to launch the Padlet Screen Recorder:
Students will need to install the Padlet Chrome browser extension to use Screen Recording in Padlet.
Once they’re in the Padlet board, students click the + sign to add a response.
Click on More attachment types, then click Screen Recorder.
Students can click on the red record button to start recording.
This will add the file to the post. Remind students to enter their name in the Subject, then click Publish to share the file(s).


Talk for Me
If students are nervous about recording video or audio, Padlet’s Talk for Me is their solution. With this feature, students enter text that they would like Padlet to dictate. Using AI, padlet will take the text and create a spoken version. There’s a lot of opportunity for level ups, here. For example, try using this feature as a narrator in a story, and then attach audio recordings of other characters (or students) playing different roles. Here’s how to launch the Talk for Me feature:
In a Padlet board, students click the + sign to add a response.
Below the Subject, students will need to click on More attachment types (all the way to the right).
A new menu will open up. In the new menu, students click Talk for Me. This will launch new window where students can enter what they would like the AI to say. Now click Next.
After the audio has generated, it’s important to remind students to use the Subject area to enter their name. Now, students click Publish to post their image onto the Padlet board.
The audio file is now added as a new post. Students can also use this feature when adding a comment to other posts.


Hyperlinking in Padlet
Hyperlinking in Padlet is an easy-to-use feature, but a powerful one. Students can use this feature when sharing a website, or even a link to a Canva project. You can level up this feature by having students create their own website on Adobe Express, or they can share a template for their classmates to edit. We also love this feature for sharing books created in Book Creator. Here’s how to use Padlet’s hyperlinking feature:
Students will need to copy the URL of the hyperlink they are looking to share.
Once they’re in the Padlet board, students click the + sign to add a response.
In the pop up window, students click on the Link icon.
In the next window, students can paste the copied URL into the top bar, then press enter.
This will add the hjyperlink to the post. Remind students to enter their name in the Subject, then click Publish to share the link.


Reactions & Commenting in Padlet
Commenting in Padlet provides ways for students to interact with each others content. Most times, students learn best from each other’s feedback. So, it’s important to provide outlets where students can use these skills. Reactions in Padlet include (but are not limited to) likes and ratings. One thing to note here, students can only “like” or “rate” a response once. So, they can’t spam the likes to try and get a higher number. Clicking the “like” will add a like, but when the same user clicks it again, it takes the like away. To enable commenting and reactions, follow these steps:
Educators log onto Padlet and click on the board that they want to enable for comments and / or reactions.
On the right hand side, click on the Settings, or gear, icon.
In the pop-up window, click on Engagement at the top.
Then toggle on comments, and / or enable reactions.
Now, students will be able to add a comment or reaction to a Padlet post.


Padlet’s Sandbox
Padlet’s Sandbox is a collaborative digital canvas / whiteboard with tools for drawing, writing and adding media. Unlike most digital whiteboards, a Sandbox is NOT an infinite canvas. Instead, users have the area of the rectangle to work in, but they CAN add additional pages to the Sandbox project. This is the perfect option for Google’s Jamboard users who are looking for a new tool to use.
Within a Sandbox project, students can work collaboratively to drag-and-drop content onto the canvas. Students can include hyperlinks, sticky notes, text, images, videos, links, documents, and more. These elements can be easily resized and turned to fit onto the canvas. When all the content has been added, the Sandbox can be shared by clicking on “Play” located on the top of the screen. One thing to note here is that other Padlet boards can be added in and out of the Sandbox. So, with a little bit of clever hyperlinking, you could have differentiated groups working together and then bring the Sandbox content back into another Padlet board. Here’s how to launch a Sandbox project in Padlet:
Log onto Padlet, then click on +Make.
Locate Sandbox, then click on it.
This will launch the Sandbox for your students to access. Share the URL with them to begin!
Check out a math example of how students can use Sandbox below!


Padlet’s Blog Board
Padlet's "Blog" activity is an interACTIVE tool designed to facilitate collaborative blogging within a shared online space. This activity allows users to create and share posts that appear in a blog-style format, making it ideal for creating a character blog, historical figure blog, or group projects. This activity has already been set up as a template within Padlet, but you can find it by clicking here. To find it on your own, follow this path:
Log onto Padlet, then click on Gallery.
Scroll down until you find Blog, then click on it.
In the new window, click Create. This will launch the template for your students to access. Share the URL with them to begin!
Check out an example of a Padlet blog below!


Collaborative Storytelling in Padlet
Padlet’s Collaborative Storytelling template can be used to help groups (or the entire class) create stories. Students can build upon each part of the story to reflect what happens first, next and last. The key is to encourage the students to read the previous post to maintain coherence in the story line. You can also level this activity up by allowing students to add audio recordings, posts with higher ratings (click here to revisit how to enable reactions), or by using I Can’t Draw to generate visuals for the story. Here’s how to launch a Collaborative Storytelling project on Padlet:
Log onto Padlet, then click on Gallery.
Scroll down until you find Collaborative Storytelling, then click on it.
In the new window, click Create. This will launch the template for your students to access. Share the URL with them to begin!


Cause and Effect Chains on Padlet
Padlet’s Cause and Effect Chains template allows students to visualize the relationship between events by connecting posts with arrows. Students can post the cause, then link the posts by clicking the three-dots icon on the post and then selecting "Connect to a post". This will form an arrow from the original post to the second one. This can be leveled up by using this template for collaborative storytelling (as opposed to the one above). For example, students post parts of the story and then rate each post. The post with the highest rating can be selected to become the next part of the story by connecting the posts. Repeat these steps as necessary! Here’s how to launch the Padlet Cause and Effect Chain template:
Log onto Padlet, then click on Gallery.
Scroll down until you find Cause and Effect Chains, then click on it.
In the new window, click Create. This will launch the template for your students to access. Share the URL with them to begin!


Concept Maps on Padlet
Similar to the Cause and Effect Chain template, the Concept Map template allows students to imagine and then connect ideas in a structured diagram. Teachers can use the Concept Map template to help students understand complex subjects by breaking them down into smaller, interconnected ideas. Collaborative groups can use the concept map to brainstorm ideas for projects or problem-solving solutions. Or, students can use this template as the foundation for building a story. Here’s how to launch Padlet’s Concept Map template:
Log onto Padlet, then click on Gallery.
Scroll down until you find Concept Map, then click on it.
In the new window, click Create. This will launch the template for your students to access. Share the URL with them to begin!


Four Corners on Padlet
This template falls under Padlet’s Sandbox (or digital whiteboard) category. In Four Corners, students are posed with a question. After thinking about the question, the students respond by placing content onto the area of the four corners that their opinion aligns with. Students can respond using (but not limited to) a sticky note, text box, shapes and more. This is great activity provoke higher levels of thinking where there could be multiple correct answers. Think of the old “In or Out” game frequently used to launch math lessons! Here’s how to launch Padlet’s Four Corners template:
Log onto Padlet, then click on Gallery.
Scroll down until you find Four Corners, then click on it.
In the new window, click Create. This will launch the template for your students to access. Share the URL with them to begin!


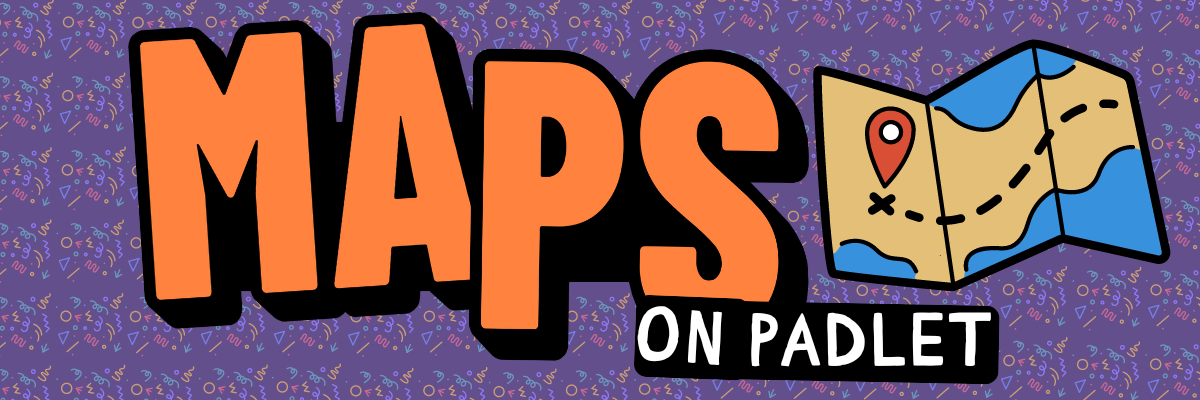
Maps on Padlet
Padlet's Map template is a specialized tool designed to help students visually organize and share information with geographical context. It allows students to pin content to specific locations on an interactive map, making it ideal for activities related to geography, travel, history, and more. These highlighted points of interest can include images, video, text and more. We love using this activity when teaching social studies and reviewing where events occurred. Here’s how to launch a map on Padlet:
Log onto Padlet, then click on Gallery.
Scroll down until you find Map, then click on it.
In the new window, click Create. This will launch the template for your students to access. Share the URL with them to begin!


Storyboards on Padlet
Padlet’s Storyboard template allows students to post individual moments from a storyline with image, video, or text attachments. The students can drag and drop the content to rearrange it and fit the perfect the narrative. We like using this activity after reading chapters from a book and then have the students use Padlet’s I Can’t Draw (AI image generator) as a way to describe what has either happened in the text or the tone of the story. Here’s how to launch the Storyboard template:
Log onto Padlet, then click on Gallery.
Scroll down until you find Storyboard, then click on it.
In the new window, click Create. This will launch the template for your students to access. Share the URL with them to begin!


Read and Respond in Padlet
In this activity, the educator assigns a reading assignment and then gives the students a space to discuss their thoughts. The question remains pinned at the top of the board, while the responses curate below the question. Students can add (but are not limited to) text-based content, making it ideal for a class discussion, analysis, or a comprehension check. Here’s how to launch the Read and Respond template in Padlet:
Log onto Padlet, then click on Gallery.
Scroll down until you find Read and Respond, then click on it.
In the new window, click Create. This will launch the template for your students to access. Share the URL with them to begin!


Photo Gallery in Padlet
Padlet’s Photo Gallery template allows students to share images or photos in a collaborative gallery. We love using this activity to predict what the setting of the story might be before reading it. You can also level up this template by having students share images or photos relevant to certain geographical locations, or by using Padlet’s I Can’t Draw (AI image generator) to add images of what places might look like in the future. Here’s how to launch Padlet’s Photo Gallery:
Log onto Padlet, then click on Gallery.
Scroll down until you find Photo Gallery, then click on it.
In the new window, click Create. This will launch the template for your students to access. Share the URL with them to begin!

-- Please follow us on social media and tag us with how you’re using these Padlet ideas in your classroom! 👓👗
For more tips, tricks and lesson ideas for making learning more interACTIVE, check out our books The InterACTIVE Class on Amazon!


Top Tools to Use Now That Flip is Gone
Discover top alternatives to Microsoft Flip for creating engaging video content in education. Explore tools like Adobe Express, Canva, and other innovative platforms that enhance student learning, creativity, collaboration and critical thinking. Find the perfect tool for your classroom today!

Over the summer of 2024, Microsoft announced that it would be shutting down beloved ed tech app, Flip (aka Flipgrid). The absence of such an innovative app leaves a hole in many of our classrooms. So, now that Flip is no more, where do we go from here? We want to be very clear, these apps and suggestions are NOT a replacement for Flip. These platforms contain similar features or integrations that may be used as a way to replicate what you were doing with Microsoft Flip.
THIS BLOG POST IS HAND CRAFTED AND WAS NOT GENERATED USING AI.
IT HAS BEEN UPDATED ON: November 2025
(click on any subheading to jump to that section)


Video Creation Platforms


Adobe Express
Price: Free for both students and educators
Compatibility: Web based, iOS, Android
Similarities to Flip: Students can create and download videos
Differences from Flip: Students do not have a collected space to share their videos, but they can collaborate on the creation of a video.
Sign up: https://www.adobeforeducation.com/k-12/express-for-education/
Adobe Express, formerly known as Adobe Spark, is an excellent tool that can help students create and edit videos easily. Although Adobe Express is more focused on graphic design, it does have features that can be utilized for video creation and editing. Check out what it offers for students in terms of recording and editing videos in the image below.


Canva
Price: Free for both students and educators
Compatibility: Web based, iOS, Android
Similarities to Flip: Students can create and download videos
Differences from Flip: Students do not have a collected space to share their videos, but they can collaborate on the creation of a video.
Sign up: https://www.canva.com/education/
Canva offers a range of features that can help students with recording and editing videos, making it a valuable tool for various educational purposes. Canva also places an emphasis on graphic design, and many of it’s features can be utilized while creating videos. Check out the image below for a breakdown of some of our favorites!


Seesaw
Price: Free and paid options
Compatibility: Web based, iOS, Android
Similarities to Flip: Students can create and download videos and use the screen as a white board.
Differences from Flip: Educators are able to enable the ability for students to view each other’s work, but students do not have a way to comment (with a video) back-and-forth.
Sign up: https://seesaw.com/
Seesaw is an educational platform designed to engage students in learning by allowing them to create, reflect, share, and collaborate on various types of content. When it comes to recording videos, Seesaw offers several features that can be beneficial for students. The image below shares a few of our favorites!

Any of these apps can be used to create videos, and all of them do it exceptionally well. However, if you’ve ever seen us speak, or read our books, you know that we have a passion for providing students with an outlet to share their creativity to broader audiences. While the apps above will permit students to create content, they do not provide a space for students to be able to view and provide feedback to their classmates (as we mentioned above - Seesaw does have a feature where students can view each other’s work, but it doesn’t have the same feel as Flip did). So, let’s take a look at some other apps that might provide a way for students to both record, share, and comment back and forth.

Platforms That Allow for Video Creation, Sharing, Reflection and Commenting


Snorkl
Price: Free and paid options
Compatibility: Web based
Similarities to Flip: Students can record whiteboard-styled annotated videos and submit them for other student’s to view and comment on.
Differences from Flip: Videos are whiteboard-style only. AI is integrated within the platform, which will assess the student work and provide feedback.
Sign up: https://snorkl.app/
Snorkl is an educational app designed to help students record and explain their thinking visually and verbally. It provides tools for students to record their voice while using a digital whiteboard to represent their ideas. The app’s AI offers instant feedback on these recordings, helping students deepen their understanding and improve their explanations. This is a step above where Flip left off - providing a way for students to receive instant coaching on their submissions. On the educator side, teachers can use AI-powered analytics to monitor student progress and gain insights into their thinking. Check out some of our favorite features below!

Let’s take a look at Snorkl’s platform. On the educator side, teachers create a class. Then, you can add assignments to the class (or classes). When assigning an activity, you can choose from Snorkl’s library (Grades 3 and up), or create your own. If you’re starting your own activity, you can use the Snorkl whiteboard to provide a template for your students to work on top of. Setting up the AI feedback is optional, but can be easily generated with Snorkl’s autofill. Educator’s have full control, and can choose to auto-approve or teacher-approve the AI feedback. Check out our walkthrough below!


On the student side, students log on with an email address. Assigned activities will appear when they log in. The whiteboard is the same as the one on the educator side (where you can add your own template for students to work on top of). Check out our deep dive of the tools the students have access to within the app below.


MirrorTalk
Price: Free and paid options
Compatibility: Web based, iOS and Google Play
Similarities to Flip: Students reflect on the assignment, sharing their thinking.
Differences from Flip: Videos are not seen by classmates, but are visible to the educator.
Sign up: https://mirrortalk.ai/
MirrorTalk is an educational app designed to help students and teachers build reflective thinking skills. Educators create a class, then set up a topic that they would like the students to reflect on. MirrorTalk provides several options for how students log in. If the educator selects “Login,” the students will need to enter an email address which will create an account for them. The benefit here is that with a student account, students have access to the entire dashboard: start a new reflection, view past reflections, and access AI-driven insights. If the educator selects “Session” under the Access menu, this will provide a unique link where students will only need to enter their name to add a reflection. They will not see the dashboard, and only be able to respond to the prompted question. This method is highly recommended if you are a K-2 educator, as the reflections can be hyperlinked on your LMS for quick and easy access. In “Open” access, students do not need to enter a name. After clicking on the reflection link, they are immediately prompted with the question.


When a student launches a reflection, they are prompted to answer questions. Their responses are recorded and then analyzed using AI. The AI then prompts the students to explain in more detail, analyzing the response. The app then provides educators with AI-driven insights to identify learning gaps, develop understanding, and manage mindsets. Here’s what we love about MirrorTalk!


Book Creator
Price: Free and paid options (collaboration requires a paid version)
Compatibility: Web based, iOS and Google Play
Similarities to Flip: Students can record videos and comment on classmates work with either text or video.
Differences from Flip: The camera does not contain additional add-ons and is strictly meant to capture raw video (no filters, effects, etc.) and comments appear off to the right side of the book.
Sign up: https://bookcreator.com/
Don’t let the name fool you! Book Creator is an amazing tool to create books, but it’s capabilities go far beyond what the name suggests. With a paid version of Book Creator, a teacher can turn collaboration on, providing ways for students to work together on the same assignment. As cool as this is, one of our favorite features in Book Creator is the commenting feature (and it comes with the free version). Clicking on the comment icon in the lower right panel opens up an area for students to record a video, audio message, or leave a GIF / emoji. We like to encourage the student who’s project is being viewed to record a video explaining their thinking alongside their book. Then, their classmates can read the book and add comments below the original message. We love how the comments stay in a thread, making it easy and accessible.


This feature can be used similarly to Flip by allowing students to comment on each other’s work. This builds constructive and critical thinking, all while providing a creative outlet for your students. The best part of all: books can be shared with families in just several clicks! Check out what we love about Book Creator below!


Padlet
Price: Free and paid options
Compatibility: Web based, iOS and Google Play
Similarities to Flip: Students can record videos and comment on classmates work with either text or video.
Differences from Flip: The camera does not contain additional add-ons and is strictly meant to capture raw video (no filters, effects, etc.).
Sign up: https://padlet.com/
For those who have been around ed tech for some time, you most likely have used Padlet at some point in your career. While nothing can fully replace Flip, Padlet’s work into video integration within their platform definitely feels familiar for Flip users. Educators create a Padlet board and share the link with the students. The students click on the + symbol, followed by “More attachment types.” In the pop up menu, students click “Video Recorder” to launch the camera. Unlike Flip’s camera, there are no flashy add-ons, filters, or effects. We actually prefer this to the last version of Flip’s camera. This keeps the attention on the objective, but Padlet also offers the option to upload video (so you can always use a different app to create the video and then smash it with Padlet). Students have up to 2 minutes of recording time, and the recording can be paused at any time during the process. Also like Flip, students have the ability to watch their videos back before submitting their response.

After submitting a video response, the video thumbnail will appear on the Padlet board. Clicking on a video’s thumbnail will open a familiar view to Flip users. Here, the students can view the original video and all other comments made to the video. Just like on Flip, the content is threaded and organized, making it easy for students to interact with.

Padlet also stepped up and created a Flip importer tool to bring all previous content in Flip into Padlet. Click this link to learn more and transfer your videos. The attention to detail is impressive, and as we have mentioned before - nothing will replace the Flip(grid) that we all knew and loved. But, Padlet’s efforts are definitely recognized and appreciated. This gives it our highly recommended rating, and if you are desperately looking for a replacement option, start with Padlet.

-- Please follow us on social media and tag us with how you’re using these apps in your classroom! 👓👗
For more tips, tricks and lesson ideas for making learning more interACTIVE, check out our books The InterACTIVE Class and Flipgrid in the InterACTIVE Class on Amazon!


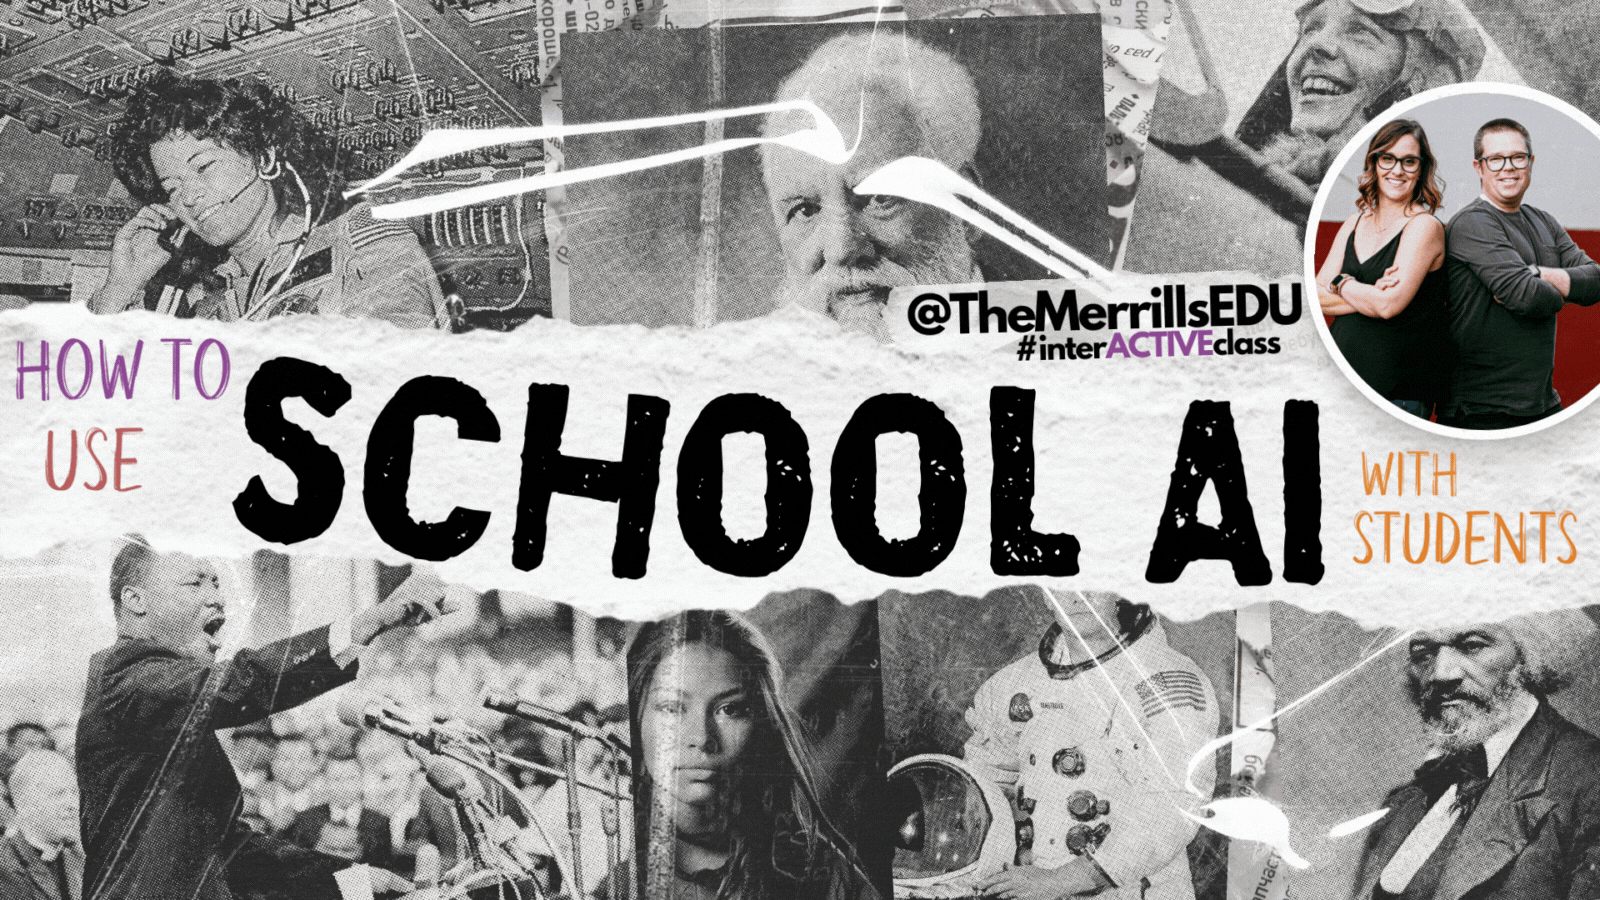
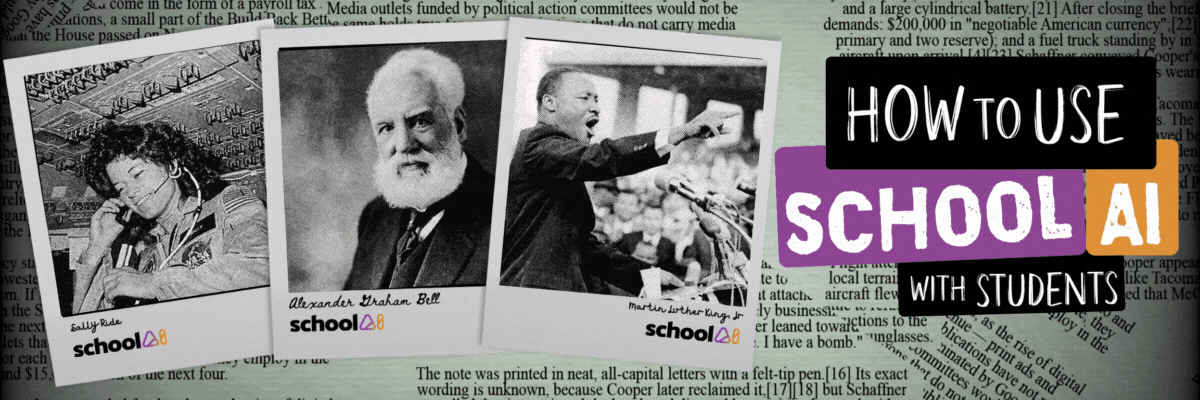
How to Use School AI with Students
@TheMerrillsEDU share how the app School AI can be used with students. Learn how School AI works, how to use AI to chat with a historical figure or book character, how to customize your own AI chatbot, and much more!

(Edited: Nov. 27, 2025)
School AI, an innovative AI educational app, has become a popular choice for students in our classrooms. Its intelligent features empower students to enhance their learning experience and streamline their academic journey. In this blog post, we’ll explore five creative ways students can use School AI in the classroom.
Please note: This blog post was hand-crafted and was not created using AI.
(click on any subheading to jump to that section)


What is School AI?
AI isn’t just about answers; it’s about unlocking curiosity, fostering critical thinking, and shaping lifelong learners. There are many tools out there, but only a handful are truly dedicating themselves to providing opportunities for student learning. If you’re looking for an innovative approach for your students to learn, meet School AI. School AI is an all-in-one AI-powered educational platform designed for K-12 students. Teachers can create custom Spaces, or chatbots, where students can interact with specific areas of content. For example, they can initiate a conversation with a character from a book, historical figure, and much more. But what makes School AI stand out from other AI platforms? We love it’s accessibility features. School AI has deliberately placed features like Speak, which allows students to listen back to what has been generated, along with a microphone enabled for dictation. This gives the youngest learners equal access to the tool.

Another great feature is on the educator side. Teachers always have the ability to check in on the conversations between the students and AI. Additionally, educators have the ability to pause conversations and even end a conversation for one or more students.
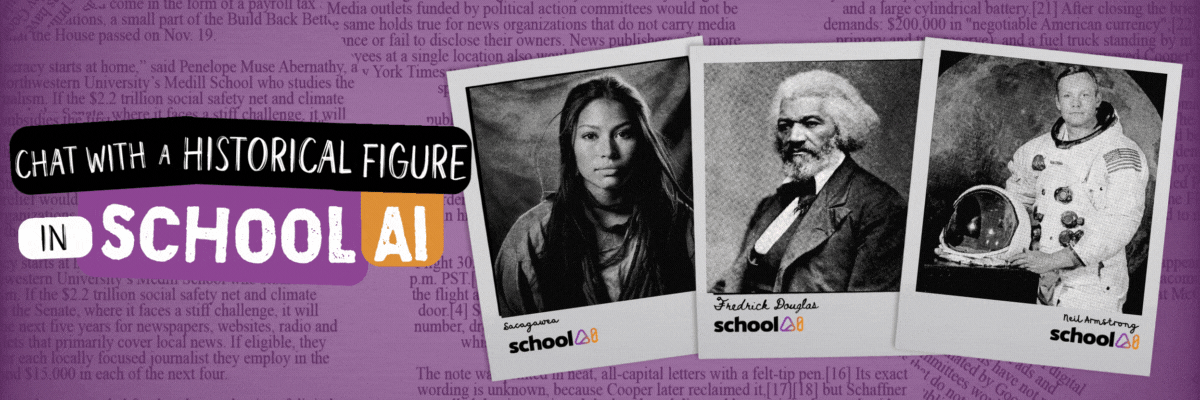
Chat With a Historical Figure in School AI
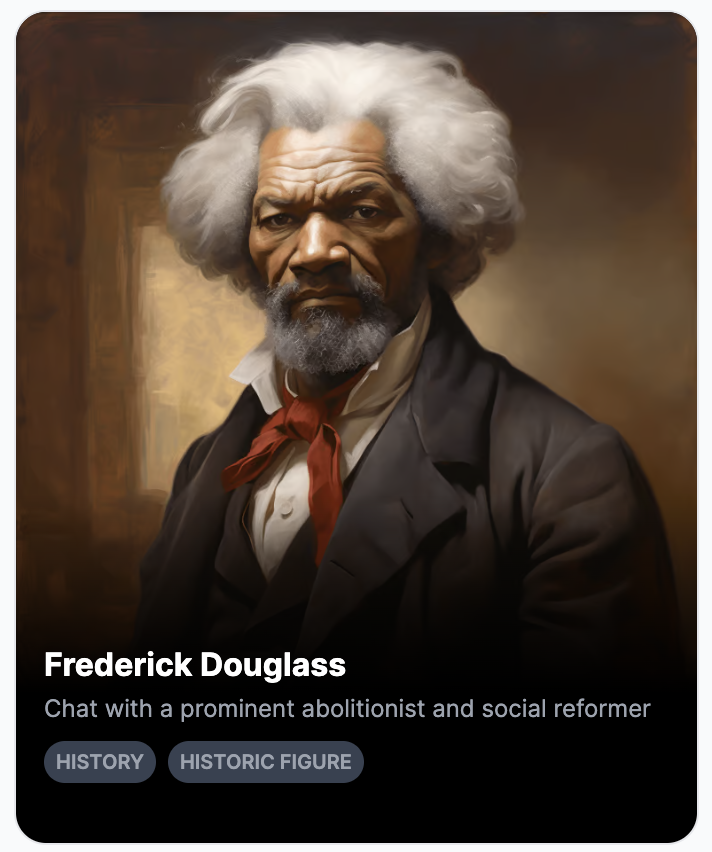
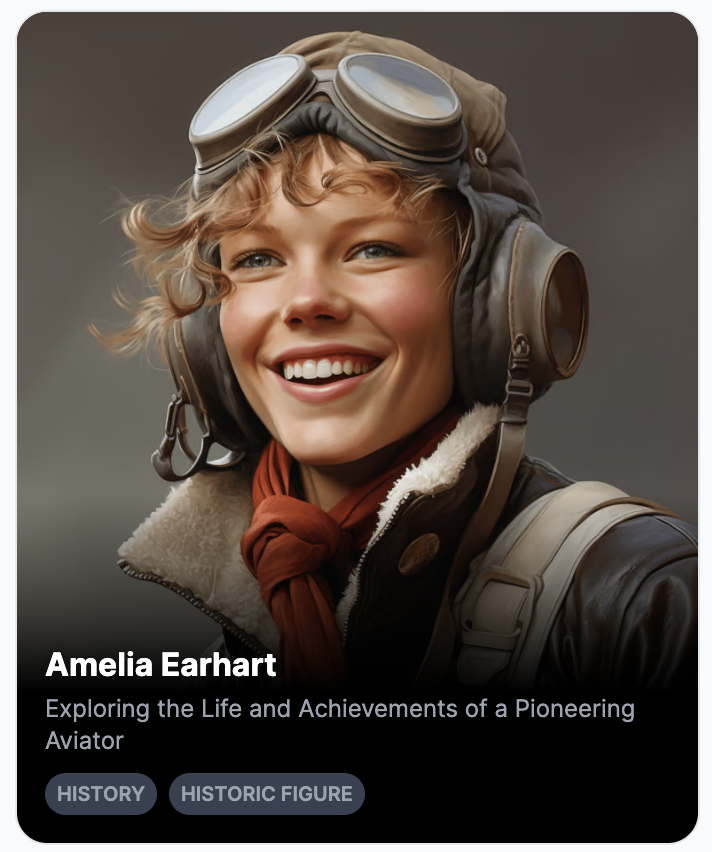
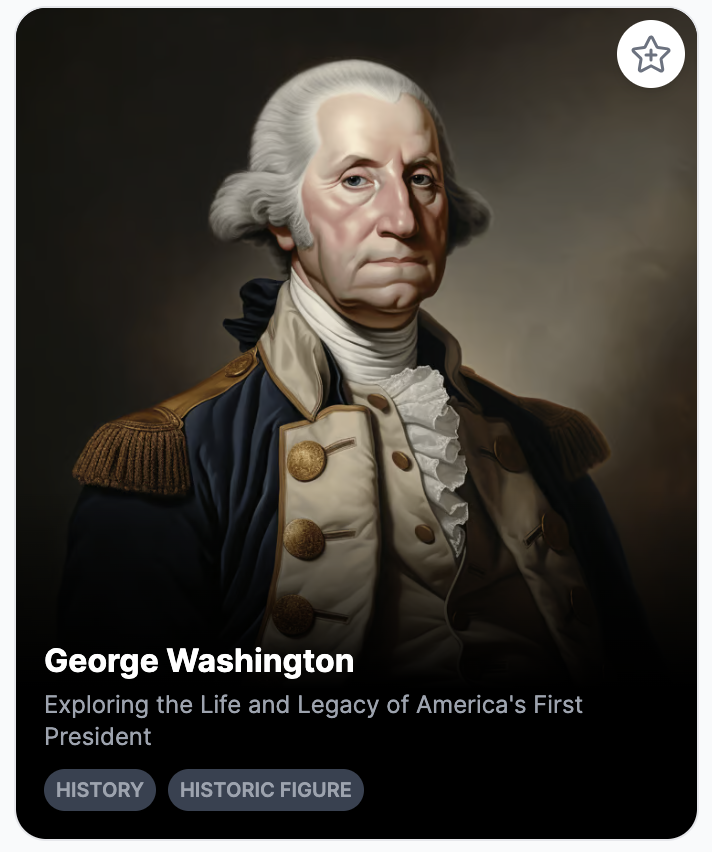
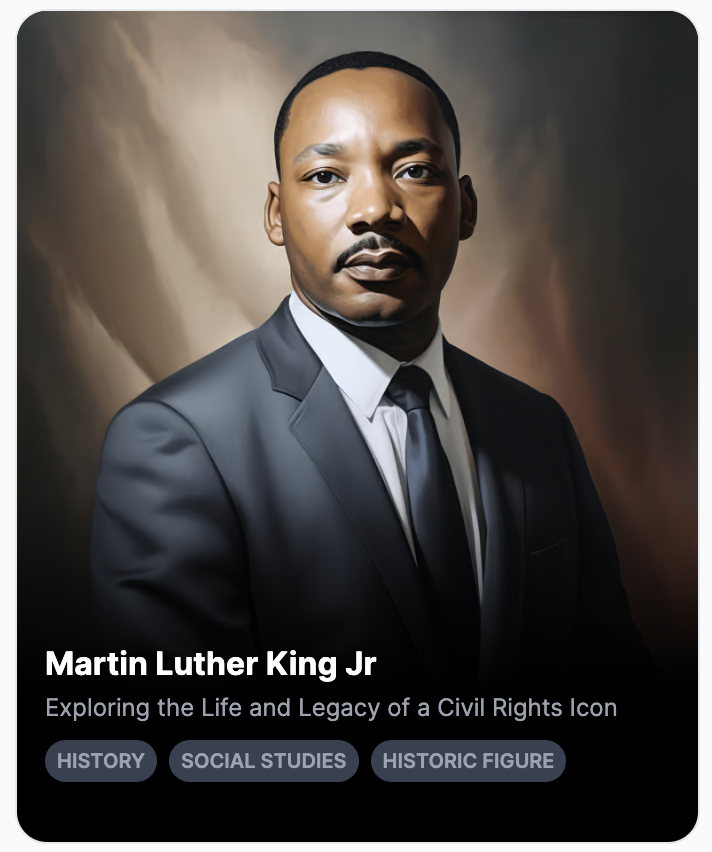
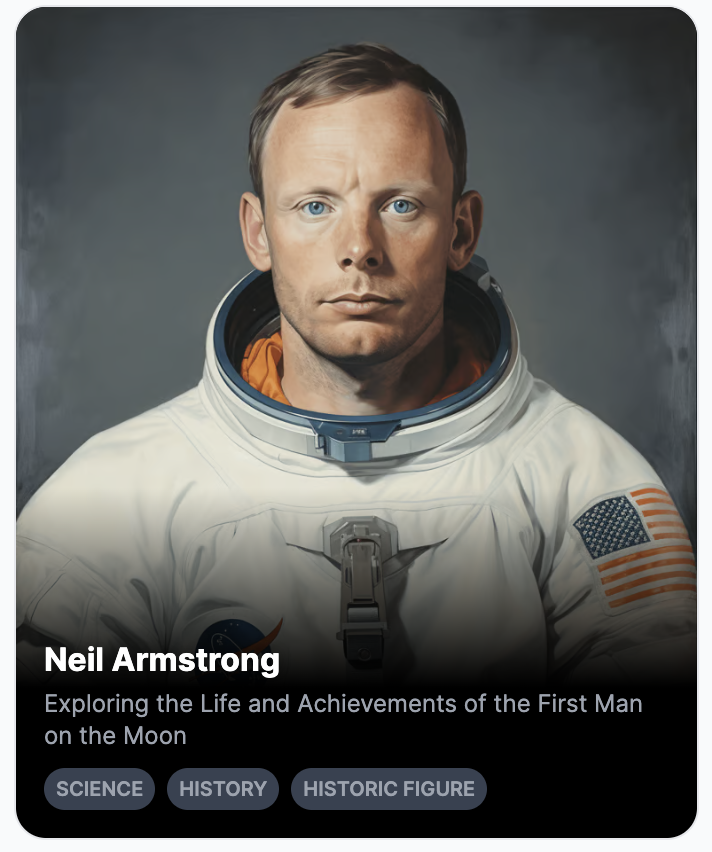
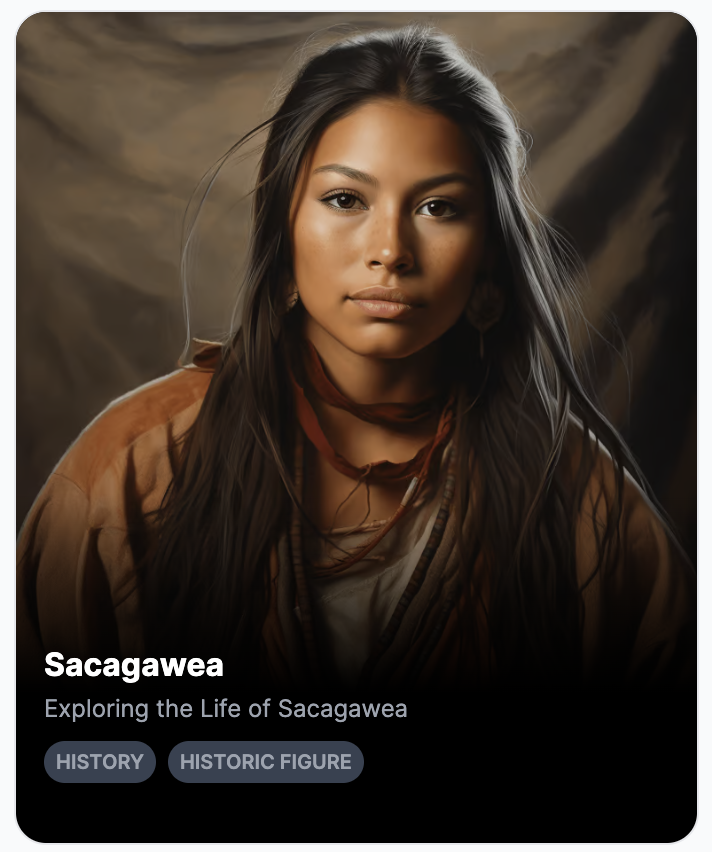
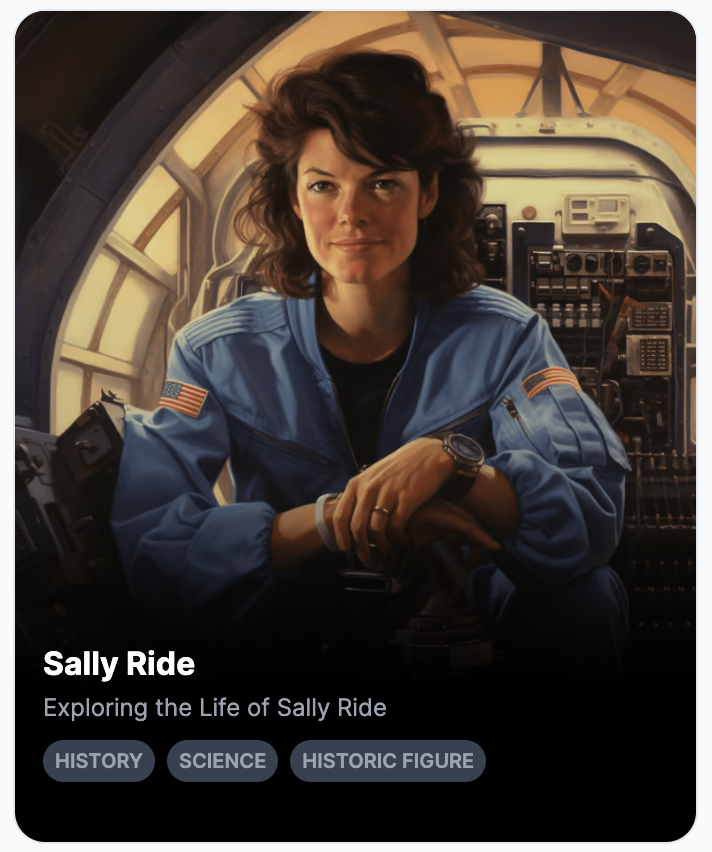
Let’s face it…history can sometimes be hard to relate to, especially with today’s modern learners. Without a feeling of relevancy, students have a hard time connecting with those from our past. School AI is where these two meet. We appreciate how School AI uses the similar look and feel as a text message to generate discussions between users and the historical figures. This connects with today’s learners immediately, and provides them with an outlet to hear and learn of the history in a whole new light. There are chatbots already created (you can find them by clicking here or the images to the right), but if you can’t find the historical figure that you’re looking for - you have the ability to create a new chatbot to represent that figure. Click here to learn how that process works!


Career Exploration in School AI
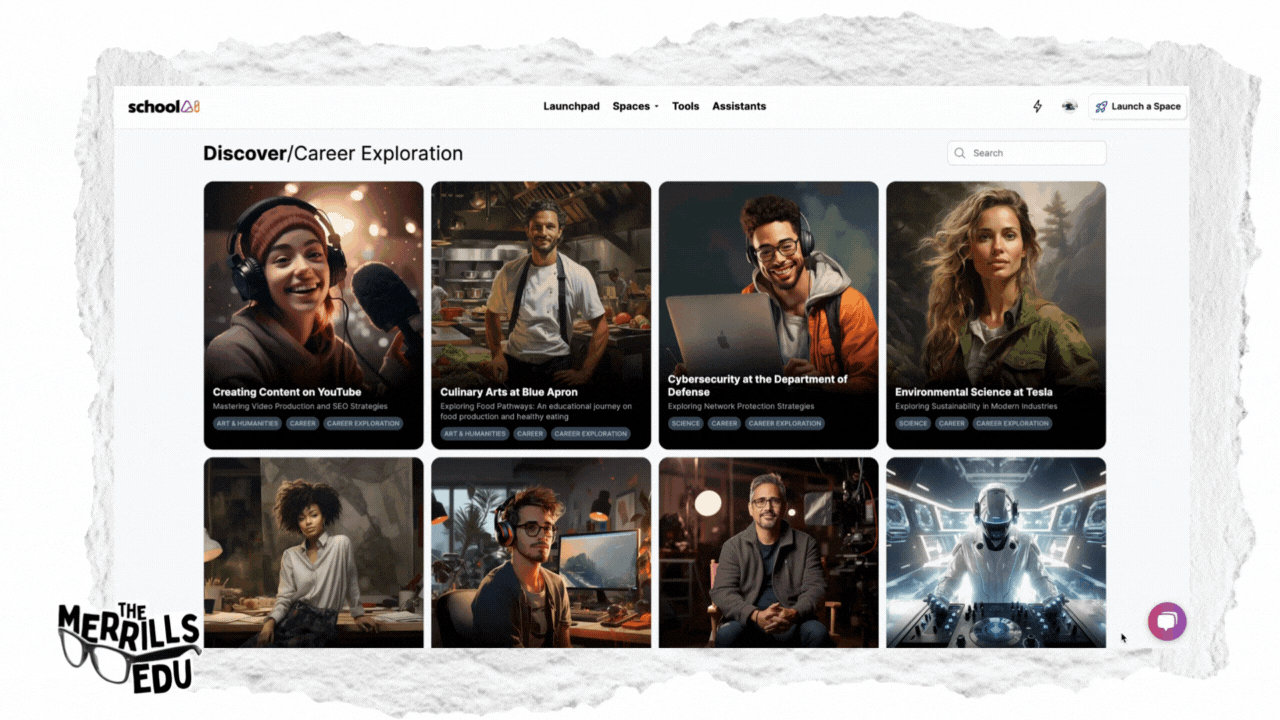
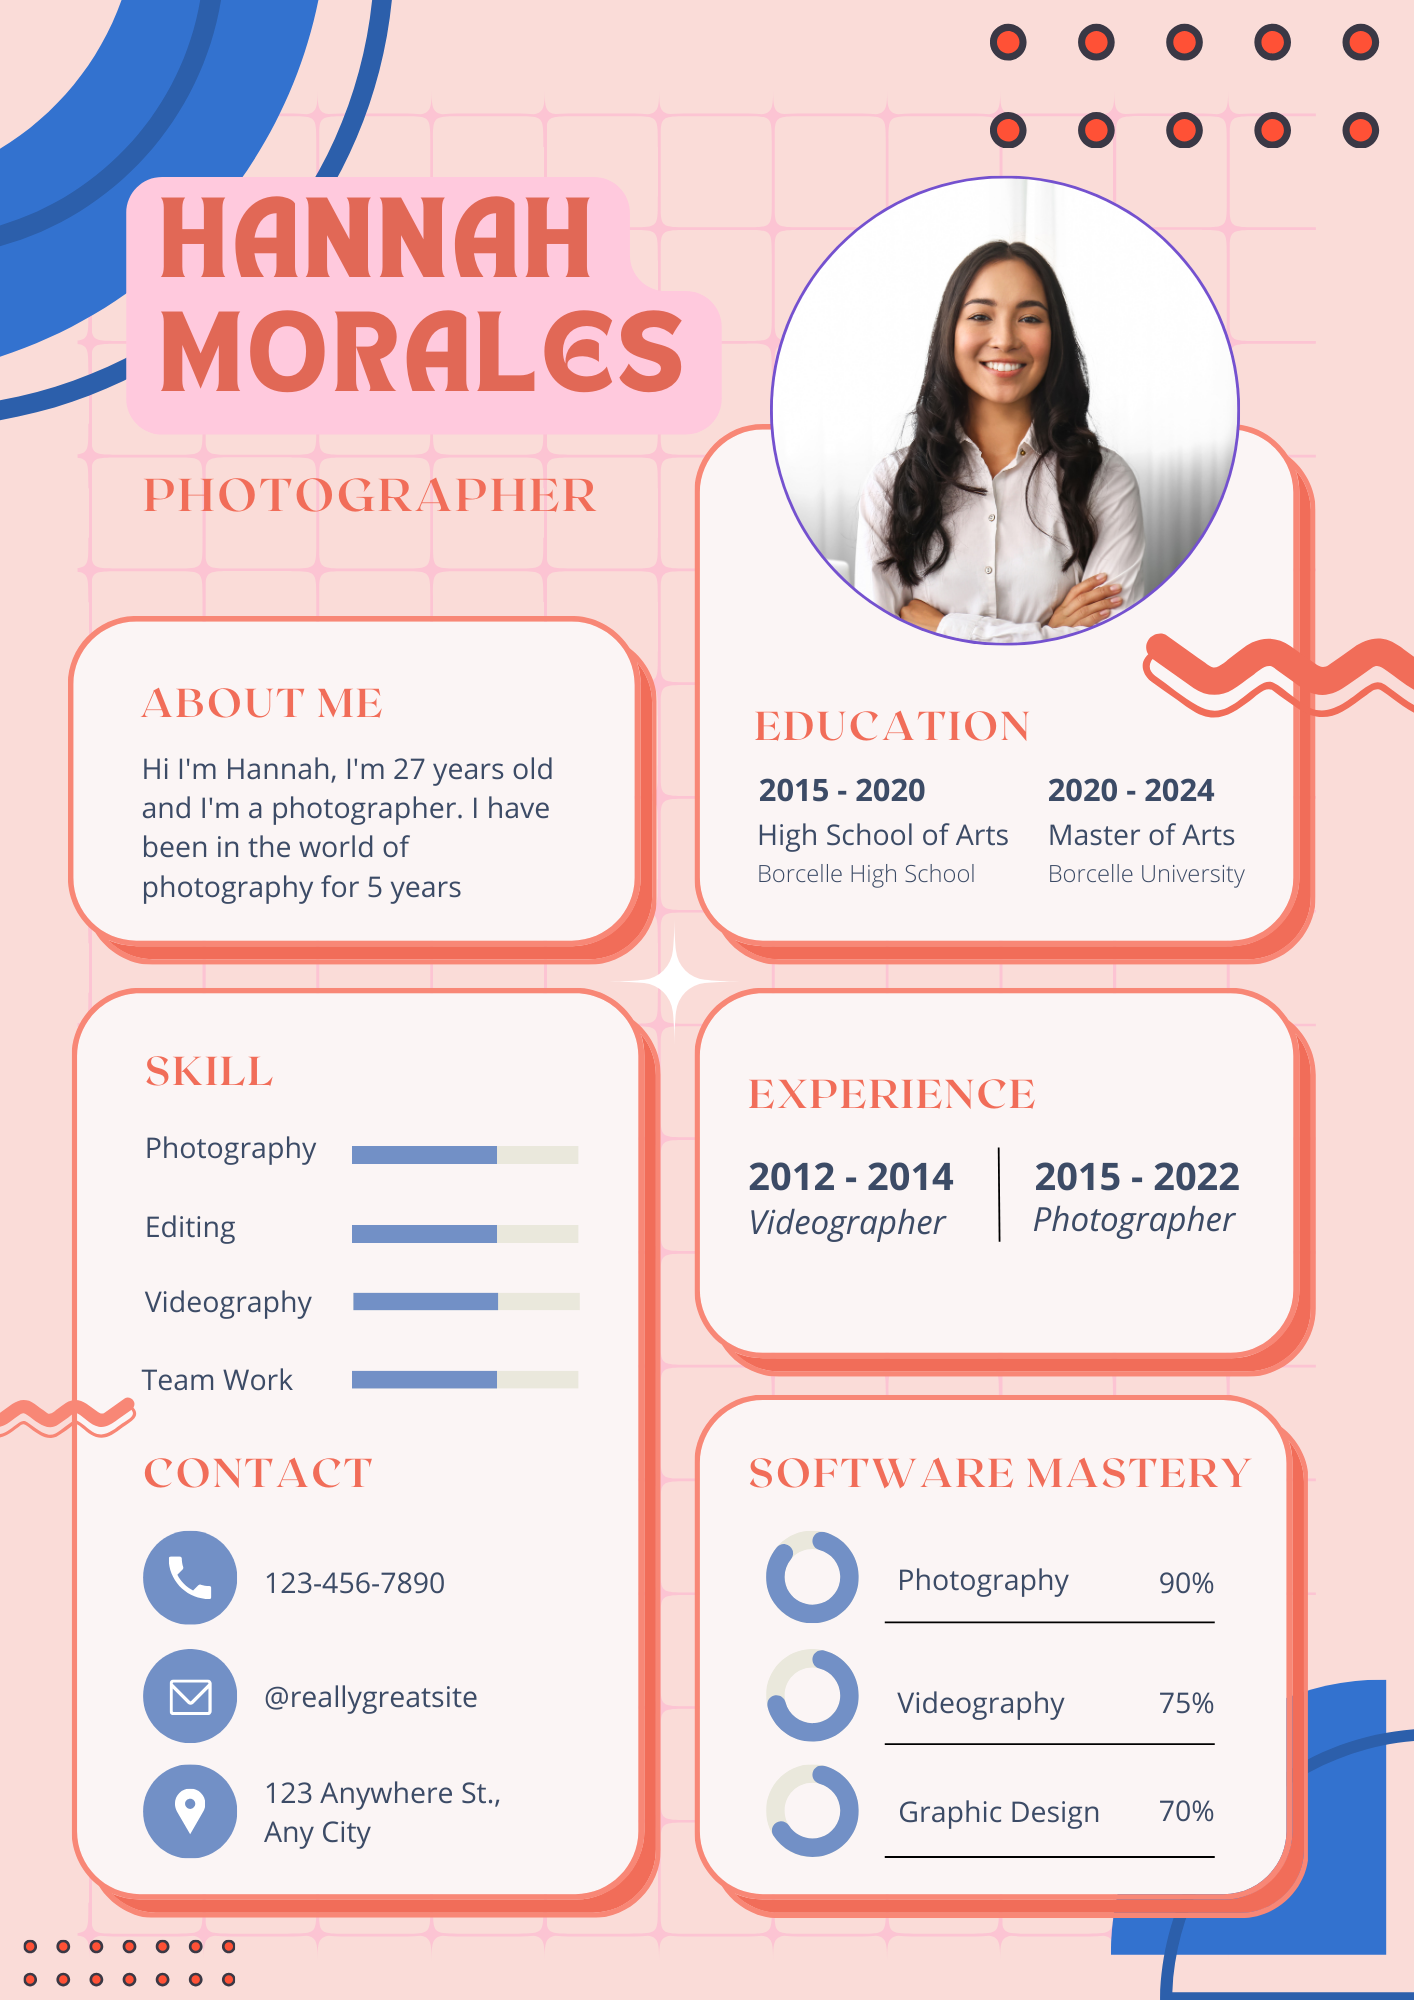
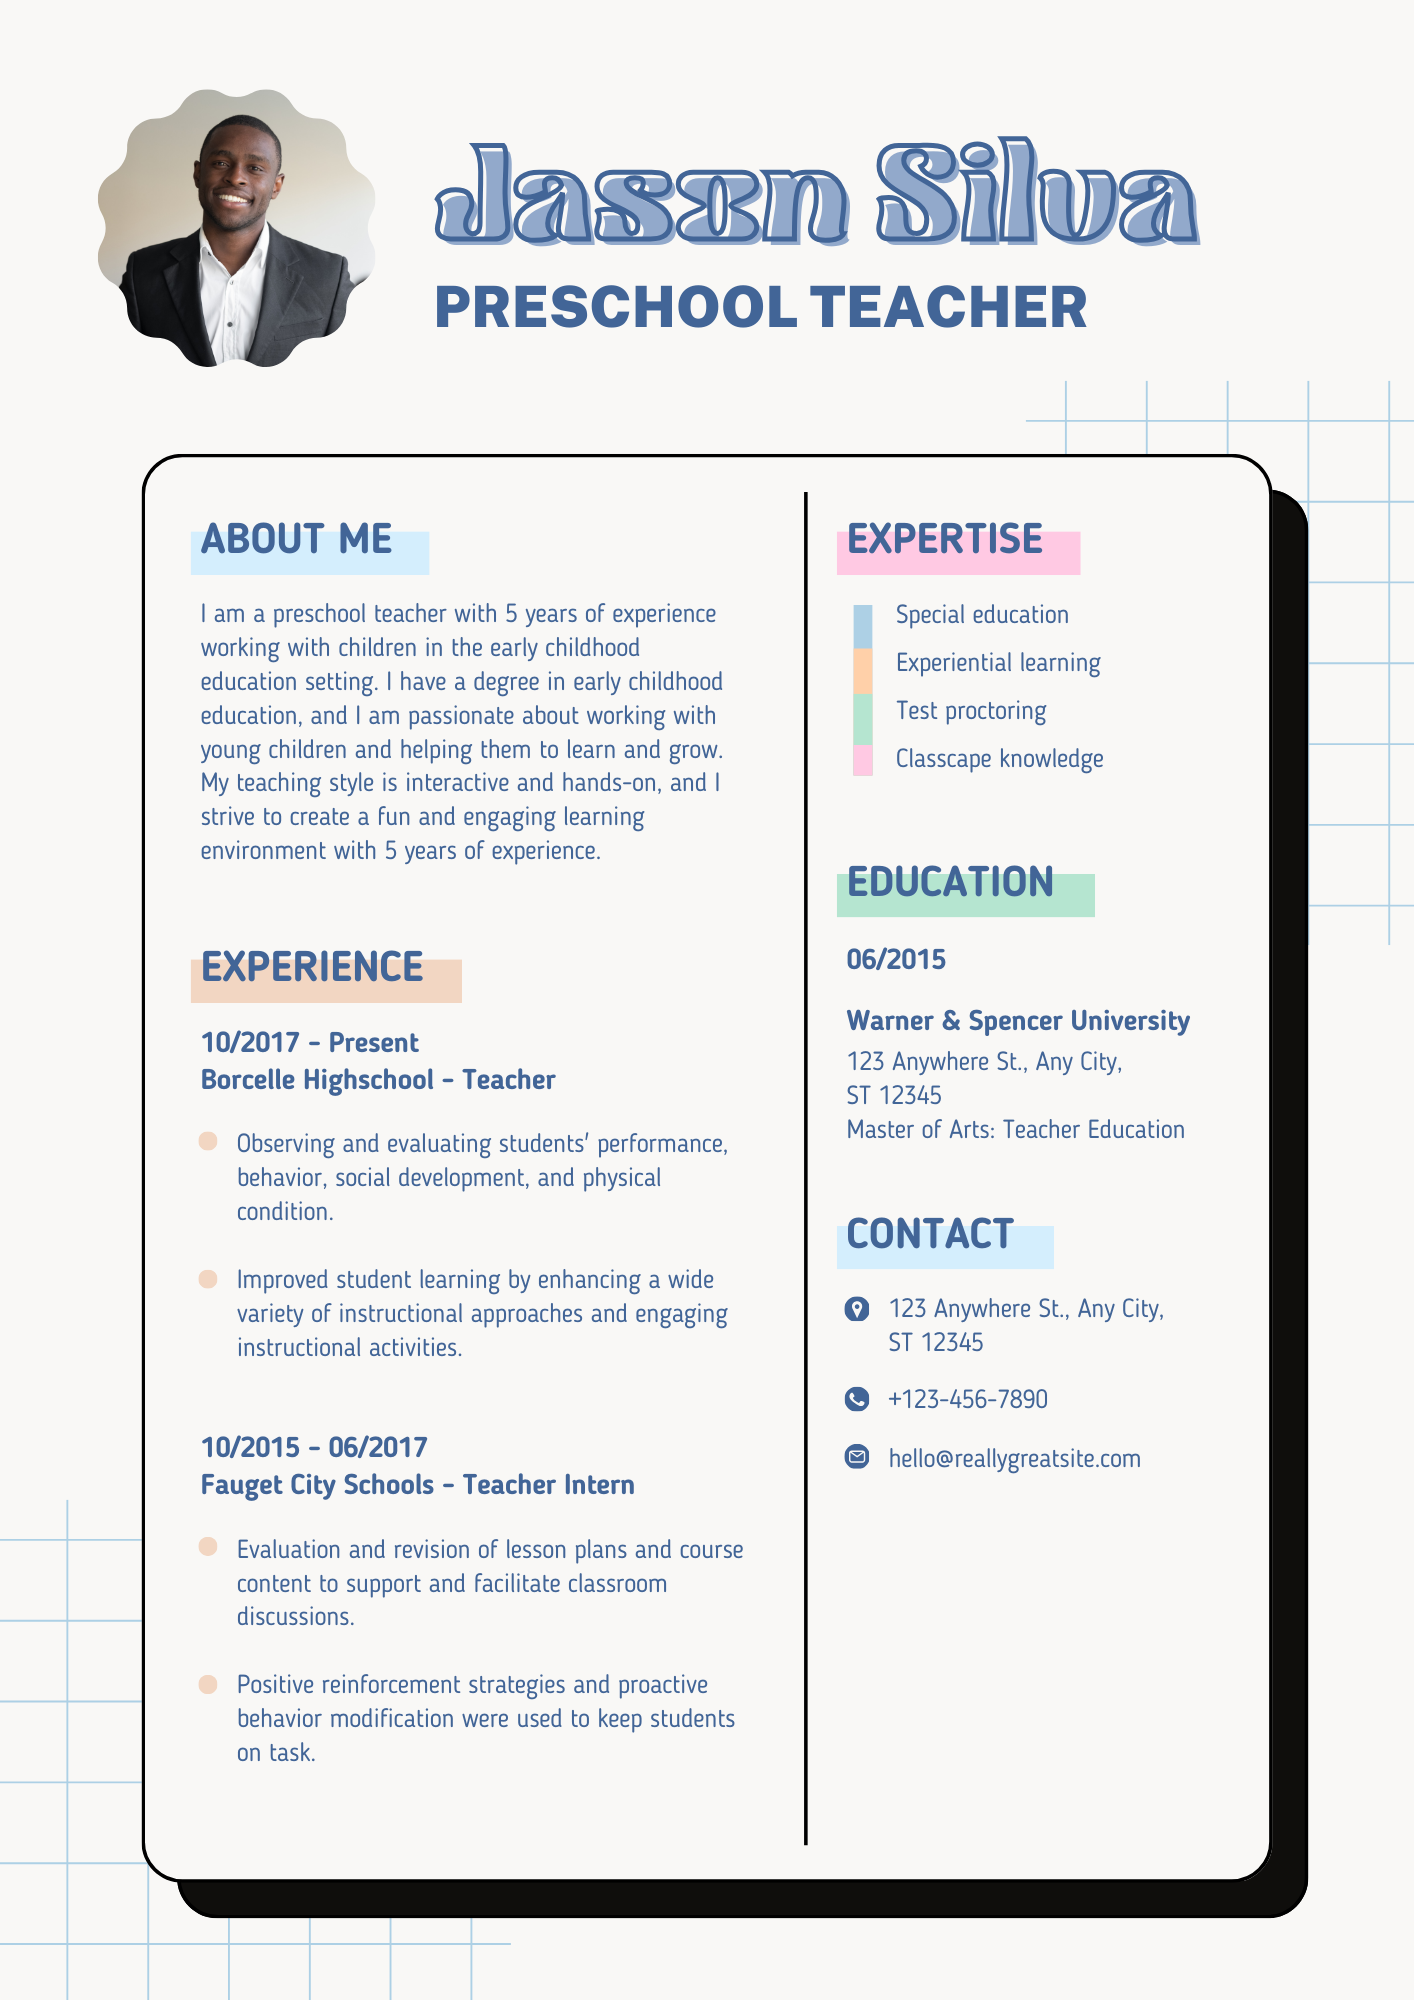
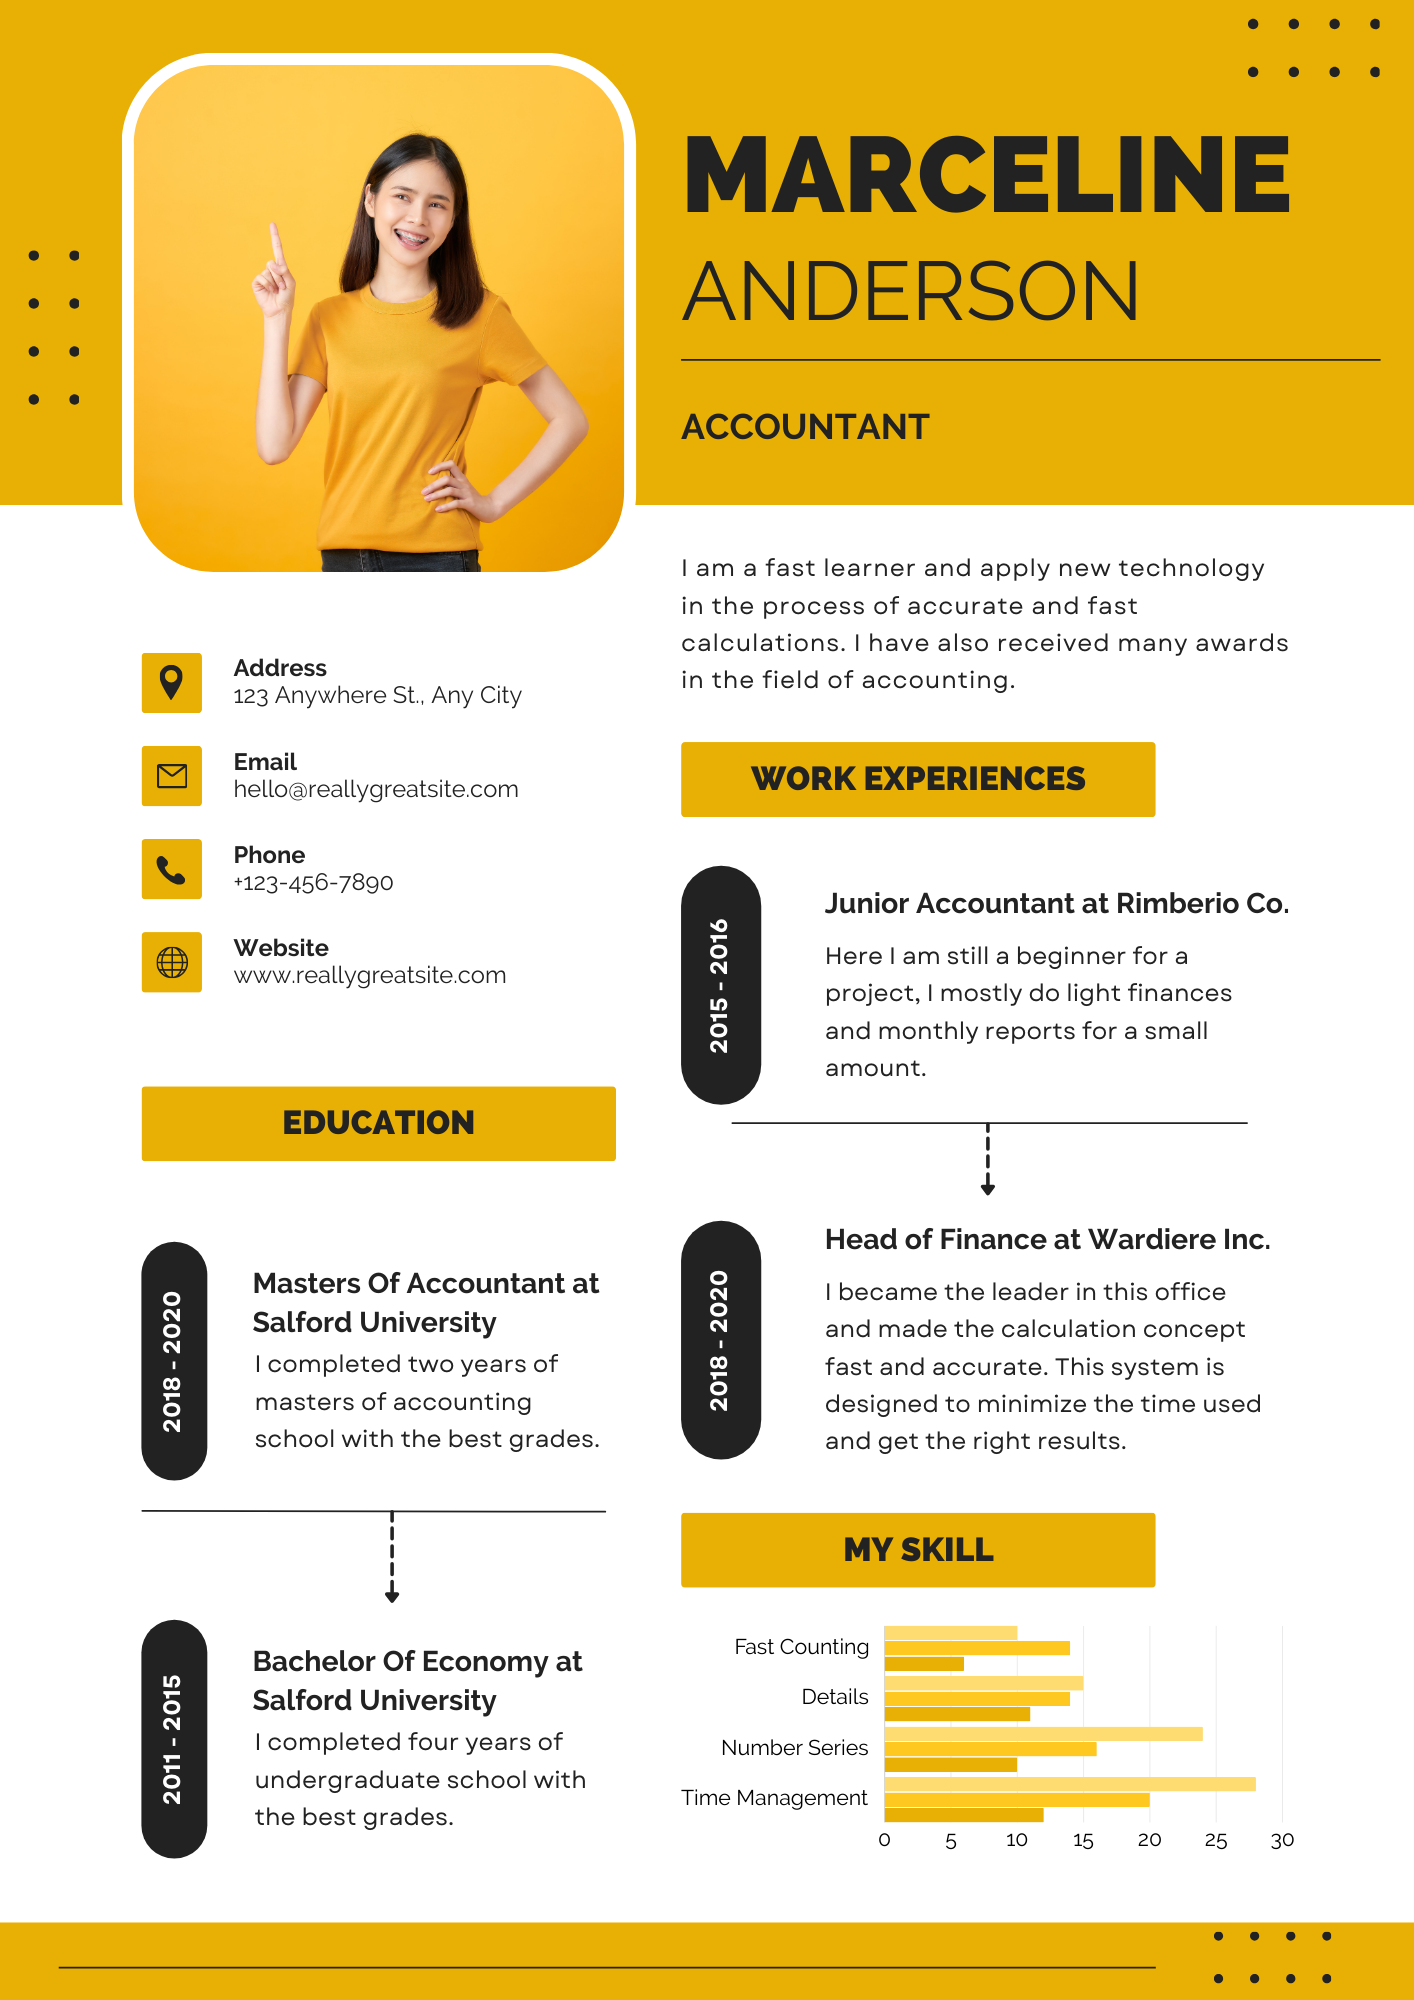
As teachers, we’re preparing our students for jobs that haven’t even been developed as of yet. But, that doesn’t mean that our students aren’t interested in what’s already going on in the workplace. School AI provides an opportunity to use AI as a chatbot to learn more from jobs such as: a Netflix Film Director, Creating Content on YouTube, Video Game Design at Epic Games, Producing Music at Spotify and more. Students can use these chatbots to learn more about those particular job fields. Click here to find the Career Exploration spaces.
One of our favorite activities to do with this is for our students to log onto their preferred job / character and begin a conversation with them. The students then take notes on the things that they learned from the conversation. Next, they use Canva to create a fake job resume that uses the information learned from the School AI conversation. The students complete the job resume in a way where they would try to be hired for the same job that they learned about. Check out our example below and be sure to download the template for free!


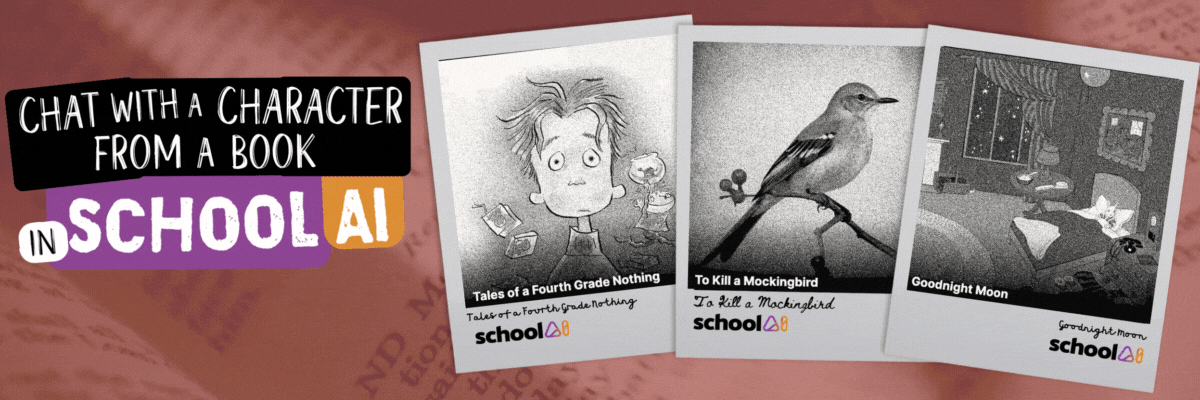
Chat With a Character From a Book With School AI
Imagine this with us: Your students just finished reading a book and they’re left asking some great questions. Usually this generates a creative classroom conversation, but then we’re left to use our imagination to connect the dots. But, with School AI’s Book Explorer, your students can use AI to take their imagination to a whole new level. School AI will use AI to generate a conversation where students can talk directly to the characters from a book. You can find books from School AI’s Book Explorer library by clicking here, but if you can’t find the book you’re reading, click here to learn how to create your own.


One of our favorite activities to do with this is to have students create a text message thread between themselves and the story book character. The kids complete the template above, then explain what they learned from the discussion in a Microsoft Flip video. Check out our example above and download our template for free!

How to Create a Customized Chatbot in School AI
So you’ve checked out what School AI has to offer and you’re excited to get started, only to find that the content you’re looking for isn’t there (yet). It’s all good! School AI allows you to create your own customized chatbot, called Spaces, that can be shared with your students. A Space refers to an exciting realm of AI-powered learning activities designed specifically for K-12 students. These Spaces captivate young minds, making education engaging and personalized. Here’s how to create one:
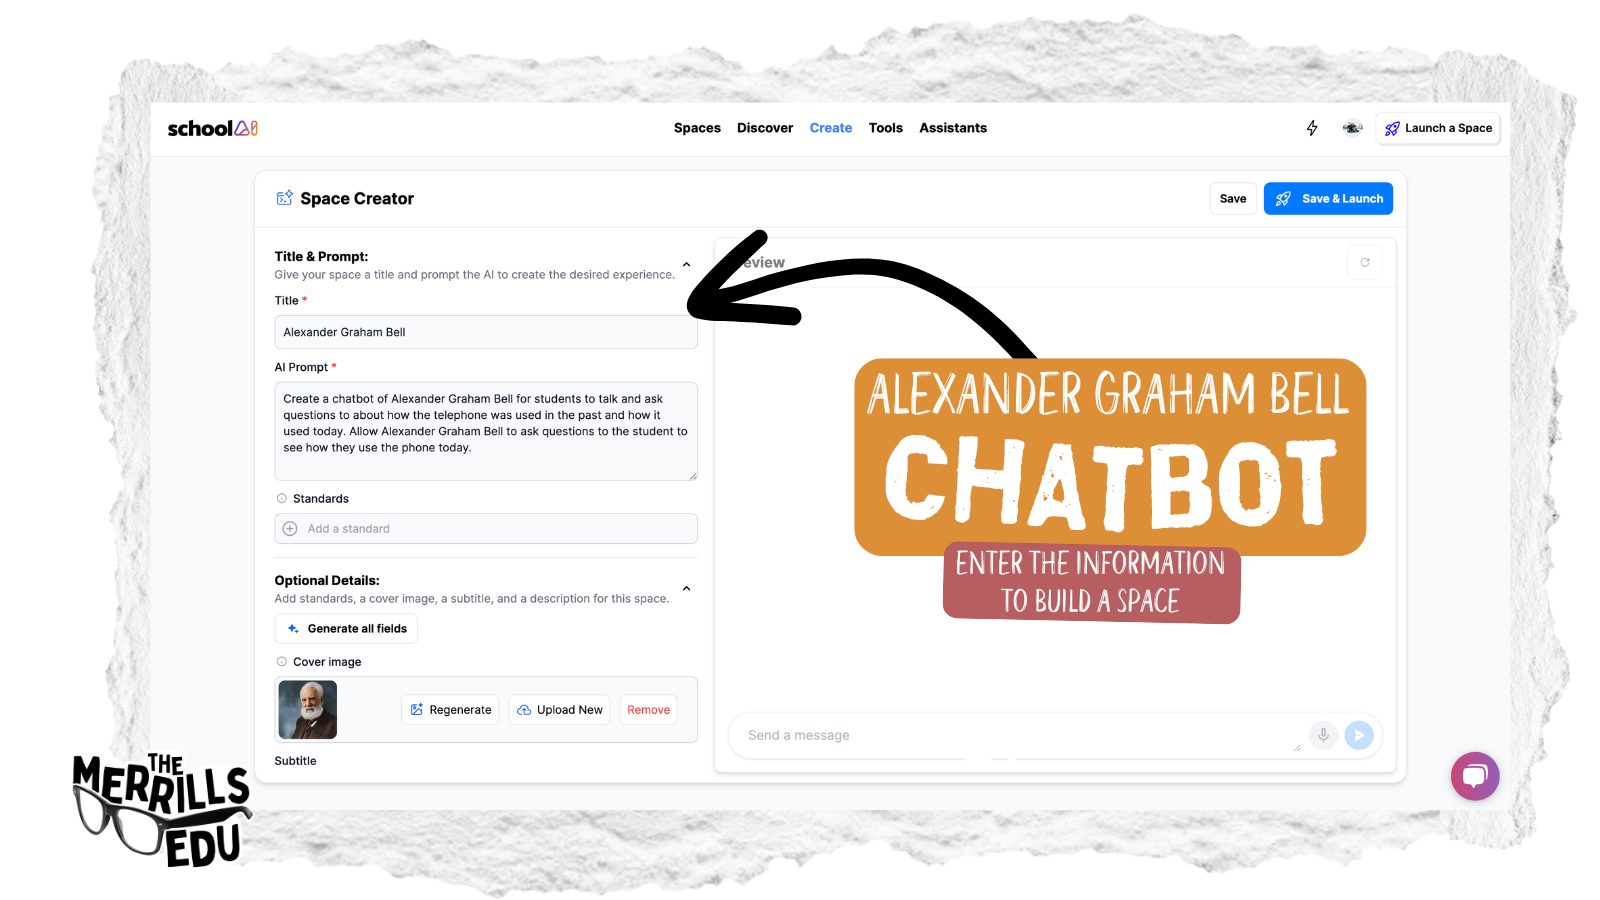
Log onto School AI, then click “Create” along the top toolbar.
Click “Create” to start a new Space.
Fill out the information on the left side with your desired content.
Click Save, or click Save and Launch to star the conversation immediately.
Check out our custom Alexander Graham Bell chatbot where students discuss life in the past and now. The kids use the AI to learn how the telephone has changed throughout history.

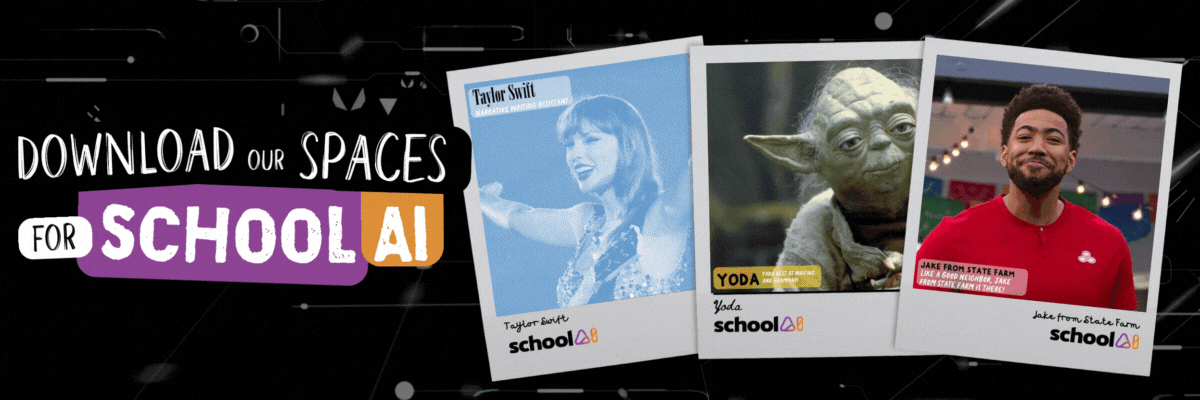
You can find this Space and our other custom created Spaces below. We’ve created a Taylor Swift inspired narrative writing assistant, an Alexander Graham Bell / Life in the Past and Life Now space, a Yoda inspired grammar and writing assistant, a Jake from State Farm chatbot that “insures” you’re thinking critically, and a MrBeast inspired chatbot that challenges student thinking by asking “Who? What? When?” etc. Click here or below to add them to your collection and launch them for your own students!

What Else Can School AI Do for My Students?
Here are some other ways that School AI can help benefit your students:
Personalized Study Plans: School AI analyzes individual learning patterns and tailors study plans accordingly. Whether it’s adaptive quizzes, targeted practice exercises, or customized content recommendations, students can optimize their study time effectively.
Instant Assistance: Stuck on a math problem or need clarification on a historical event? School AI provides real-time answers and explanations. Simply snap a photo of the question, and let the app guide you through the solution.
Language Learning Made Fun: School AI offers interactive language modules. From pronunciation practice to vocabulary building, students can immerse themselves in a new language with engaging exercises and quizzes.
Automated Essay Feedback: Writing assignments can be daunting, but School AI simplifies the process. Upload your essay, and the app provides constructive feedback on grammar, coherence, and style. It’s like having a virtual writing tutor!
Study Group Collaboration: School AI facilitates collaborative learning. Students can create virtual study groups, share notes, and discuss topics. The app even schedules group study sessions based on everyone’s availability.

Download our Spaces for School AI
We love creating unique Spaces for our students to interact with on School AI. But, we’d also love to share them with you! Here’s a list of a few that we have used:

Taylor Swift Writing Assistant: Storytelling Blank Spaces: Crafting Your Narrative Journey
The purpose of this space is to help inspire students with a Taylor Swift influence when working on their narrative writing.


YODA Master of Grammar and Writing
The purpose of this space is to assist students in learning grammar and sentence structure by rephrasing their sentences in the style of Yoda's unique speech pattern.


Jake from State Farm: Like a Good Neighbor, Jake is There!
Question the Answer: Jake doesn’t settle for surface-level explanations. When he provides an answer, he follows it up with a thought-provoking question. Brace yourself for inquiries like, “Why do you think that’s true?” or “What if there’s another angle?” Just like a good neighbor, he's looking out for your and your thinking!


MrBeast: Get BeastED!
BeastED challenges student thinking with thought-provoking questions. For every answer, it asks, “Why? How? What if?”


Alexander Graham Bell: Life in the Past and Now with Alexander Graham Bell
BeastED challenges student thinking with thought-provoking questions. For every answer, it asks, “Why? How? What if?”


Duke Kahanamoku: The Father of Modern Surfing
Talk to an AI version of Duke Kahanamoku, known as the father of surfing! Duke was a native Hawaiian and also a competition swimmer!


-- Please follow us on social media and tag us with how you’re using School AI in your classroom! 👓👗
For more tips, tricks and lesson ideas for making learning more interACTIVE, check out our books The InterACTIVE Class and Flipgrid in the InterACTIVE Class on Amazon!


How to Use AI in Canva (for Teachers and Students)!
In this post, we’ll share where to find AI apps in Canva, how students can use the AI in Canva, and how Teachers can use the AI in Canva - all while maintaining an innovative level of creativity!
When we think of AI in Canva, we imagine a place where artistry meets innovation. In this blog post, we're diving headfirst into the magical realm of Canva's AI features, tailored to empower both educators and students alike. From spicing up lesson plans to adding flair to presentations, Canva's AI tools are here to sprinkle a touch of magic on your design endeavors.
(click on any subheading or button to jump to that section)


What are the Different Types of AI That Can
Be Found in Canva?
There are lots of different types of AI that can be found in Canva. These Apps can be found on the left side of the main screen in your dashboard by clicking Apps. To enable them, all you have to do is grant permission by opening the desired app and choosing to use it in an existing design or new design. Below are some of our favorite apps, along with descriptions for each. Check out our video to see how some of these work. To find a complete list of AI powered apps within Canva, click here or the image.

Magic Media: Generate
images & video
Canva’s Magic Media app turns creative ideas into images or video. Enter a few words or a sentence about what you would like to generate and then sit back and let the AI do the work! (This app is for ages 13+, unless supervised.)


Dall*E: Generate Realistic Images
Dall*E allows users to quickly generate realistic images or art using AI. Users enter in a few words to describe what they want to generate and then the AI creates it! (This app is for ages 13+, unless supervised.)

Image Upscaler: Elevate Picture Resolution
a1d.ai’s Image Upscaler takes blurry or old photos and applies AI to sharpen them. This allows users to refine their images, ensuring that they stand out in your Canva designs.


Magic Morph: Turn Elements Into Something Extraordinary
Canva’s Magic Morph allows users to transform words and shapes with a simple prompt. It can be used to enhance text or shapes, quickly create graphics or textures, and much more.

Murf AI: Add Audio
Voices to Designs
Murf.AI allows users to add natural sounding voices to designs. Just type out the script and Murf.AI will create the audio to embed into your design.


Soundraw: AI Music Generator
Soundraw takes the time out of searching for the perfect song. Now, with Soundraw, simply choose the mood, theme and length of song you want. The AI will generate the track for you to embed into your design! Note: This app requires a Soundraw account to use. There is a fee to use this app, but the first 14 days are a trial.

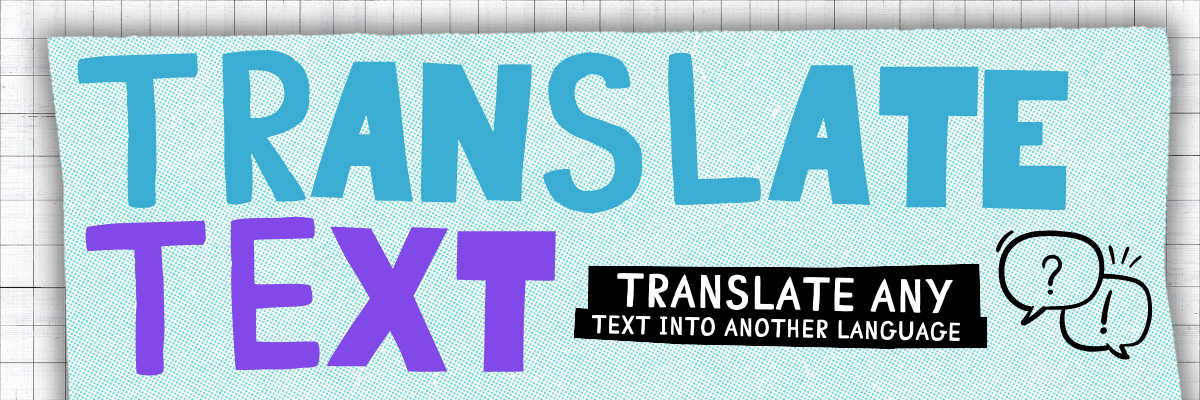
Translate Text: Translate Any Text to Another Language
Canva’s built in translator tool can translate text in your designs to 1,000’s of different languages. To access it, right click a text box and then scroll down to Translate Text. Complete the prompts to translate the text!


Colorify: Add Color to
Black & White Photos
Colorify is an app that restores color to black & white photos, making them look vibrant and lively again. This is great for researching historical figures from the past!

Transcribe Audio: Add
Captions to your Designs
SRB’s Transcribe Audio app allows users to generate a transcription text from an uploaded audio file. This is perfect for subtitles or captions! You can transcribe from these file types: mp3, wav, m4a, and ogg files.


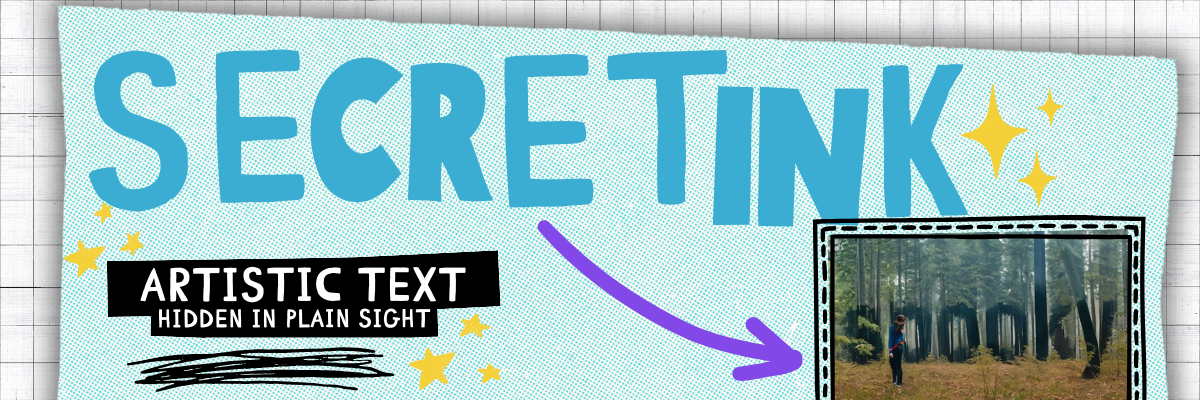
SecretInk: Artistic Text
Hidden in Plain Sight
SecretInk allows users to blend text into any image background, creating an artistic illusion. If it’s unclear, try zooming in or out to see the magic! But be on the lookout! You might see things in unexpected places!
How Can Students Use the AI in Canva?
As creatives, we believe that there is a fine line between using AI to generate ideas and generate inspiration. Teachers and students can use AI to generate content - and there is definitely a place for that. However, as innovative educators we believe that the AI should be used to inspire ideas. For example, students can get creative with the prompt they use to generate the content. So, let’s look over some ways that students from our own classrooms have used the AI in Canva.


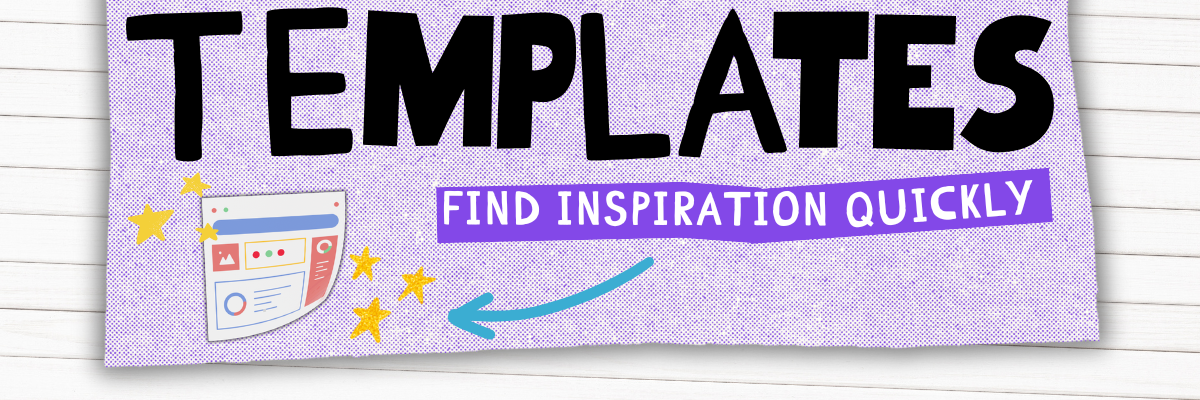
Templates: Find Inspiration Quickly
Canva has tons of ready-to-use templates in it’s library. These are a great starting point for students to ignite their creativity. In the example below, students were breaking down the chapters of a book by creating a magazine cover for each chapter. What started off as a template was quickly edited and altered to include the specific details from the book. To view the magazine cover templates on Canva, click here.


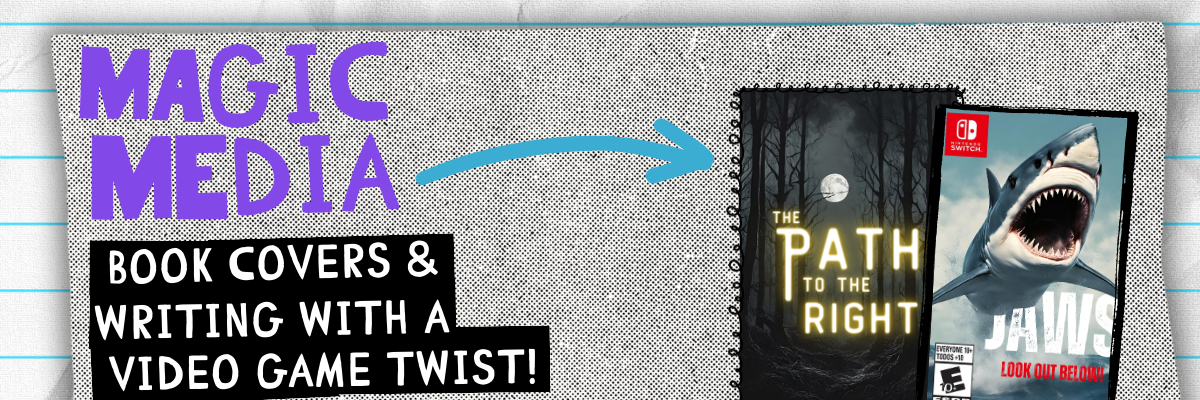
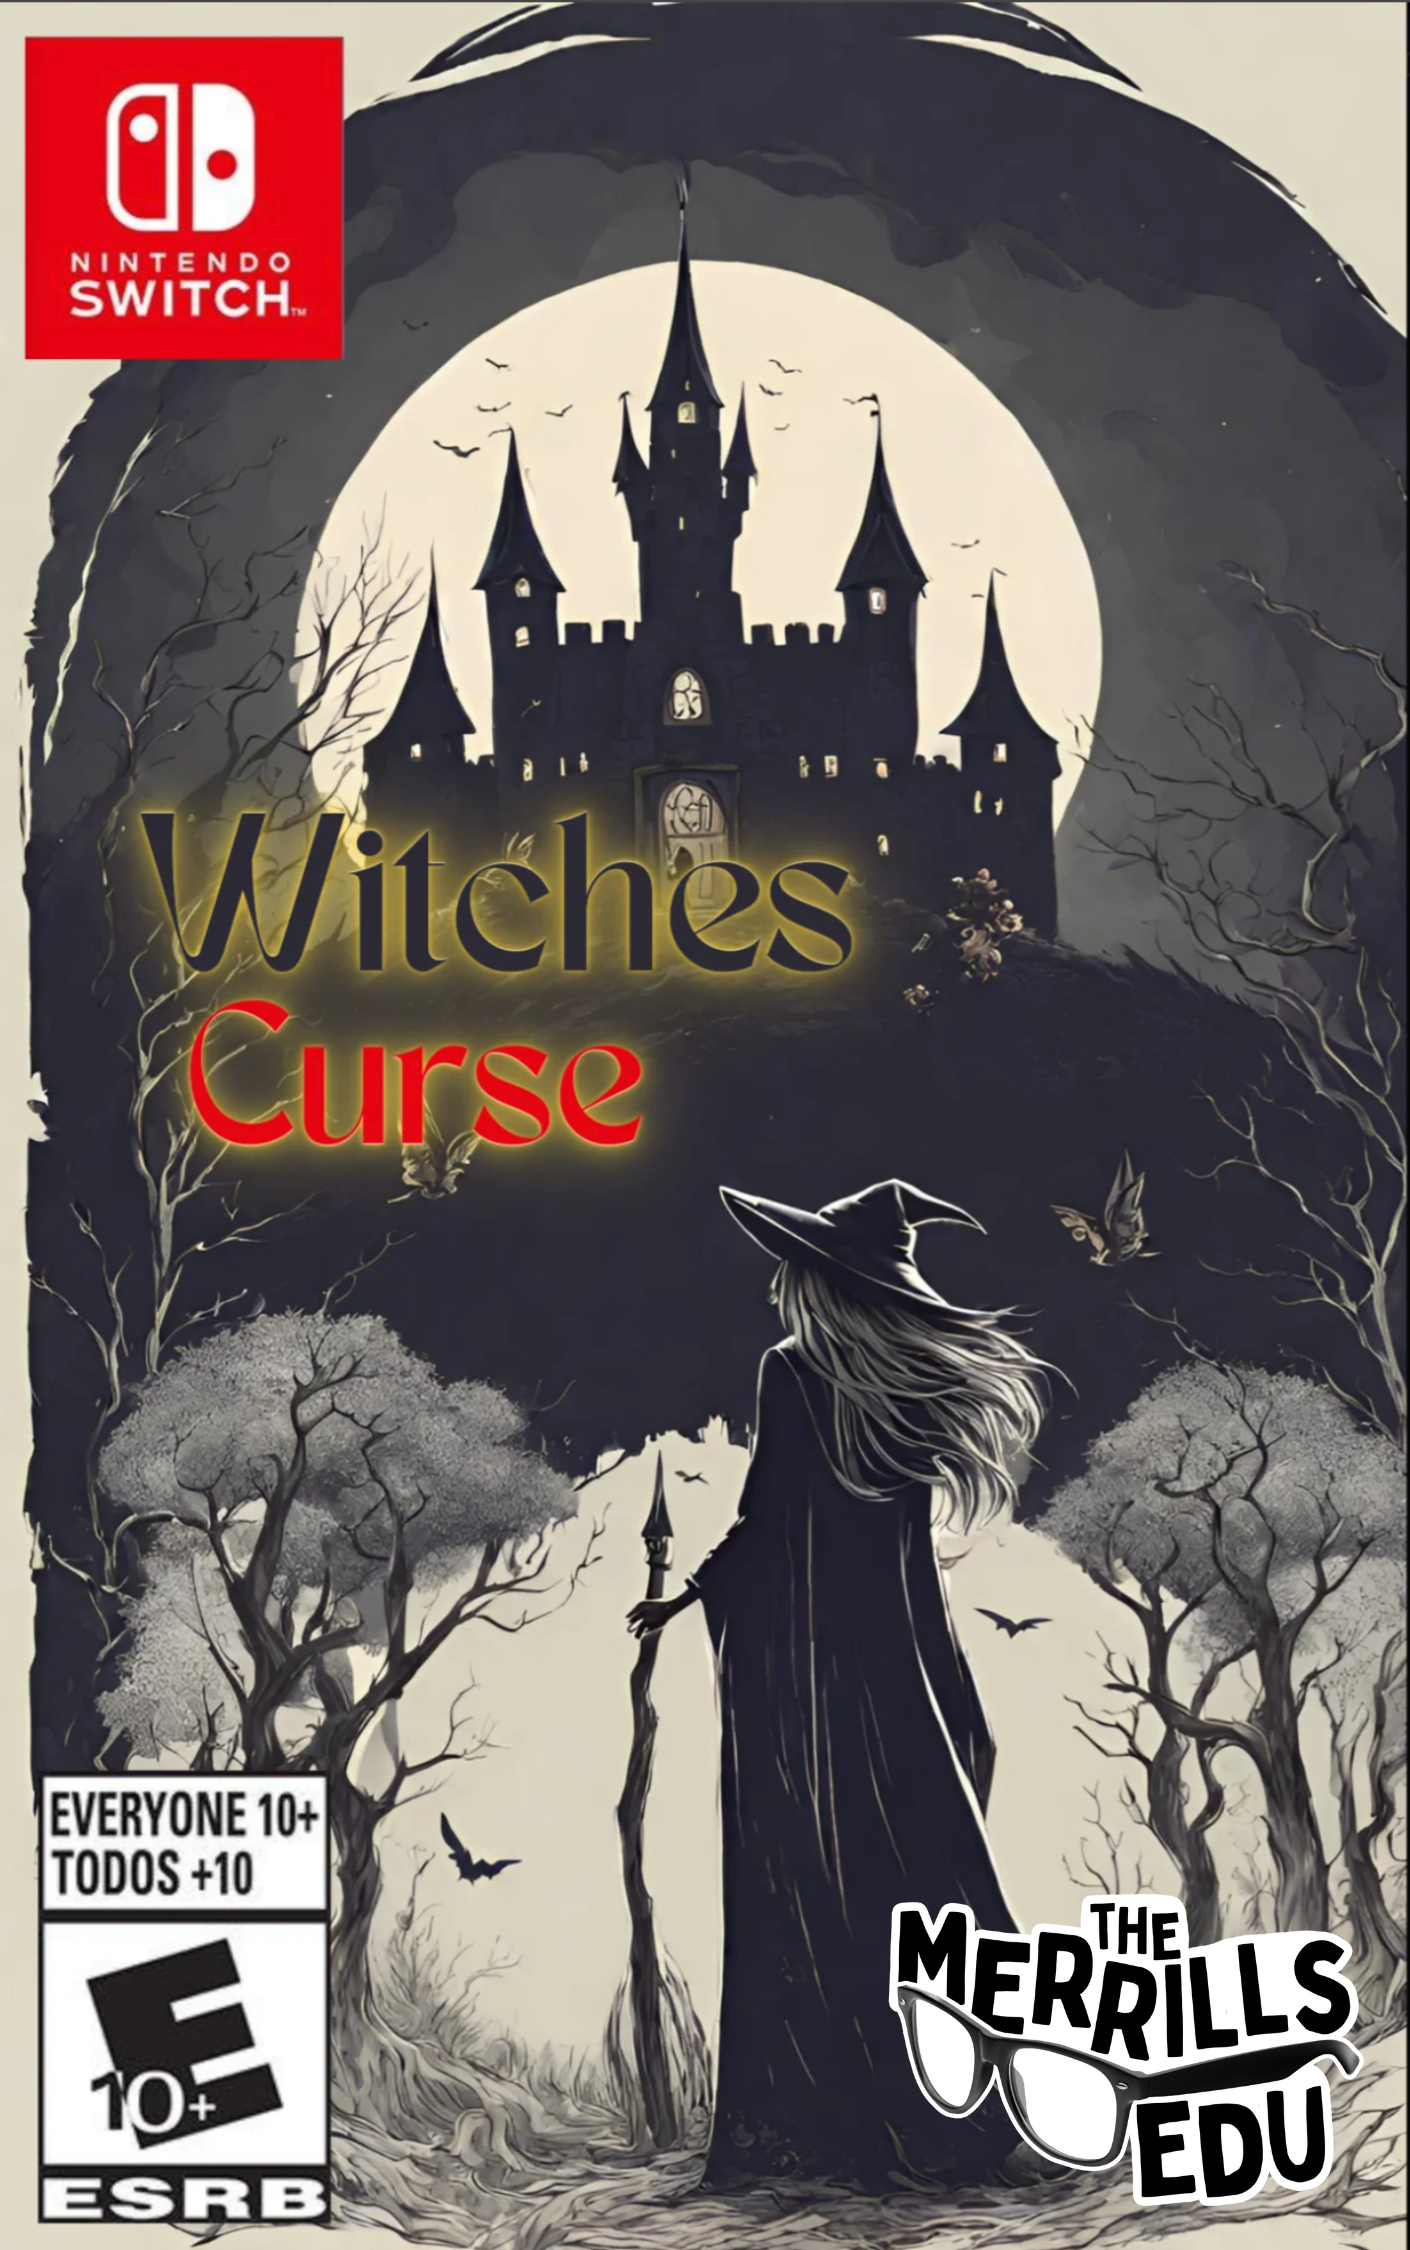
Magic Media: Book Covers and Writing
with a Video Game Twist!
Canva’s Magic Media is one of our favorite apps simply because it can deliver images based on creative prompts. We encourage our students to stop and think about what they want the image to look like before generating any images. The more creative the prompt, the more creative the image generated will be.
This idea can be used with either Canva’s templates and Magic Media. We asked our students to recreate the cover of a book by changing the setting or characters. The students found a book cover template or generated their own using Magic Media. They added additional elements, text, and details to their covers before finishing up. See it in action below!


Who says writing has to be dreadful for kids? This project gave students an opportunity to take a narrative writing piece and turn it into a video game! Students still completed all of the traditional writing on paper and pencil, but when it came time for a final project, we had the kids design the video game covers on Canva using Magic Media to generate the backgrounds. We also gave the kids a change to create a video game video trailer, where they used Magic Media files to compile into a video. Check them out below!


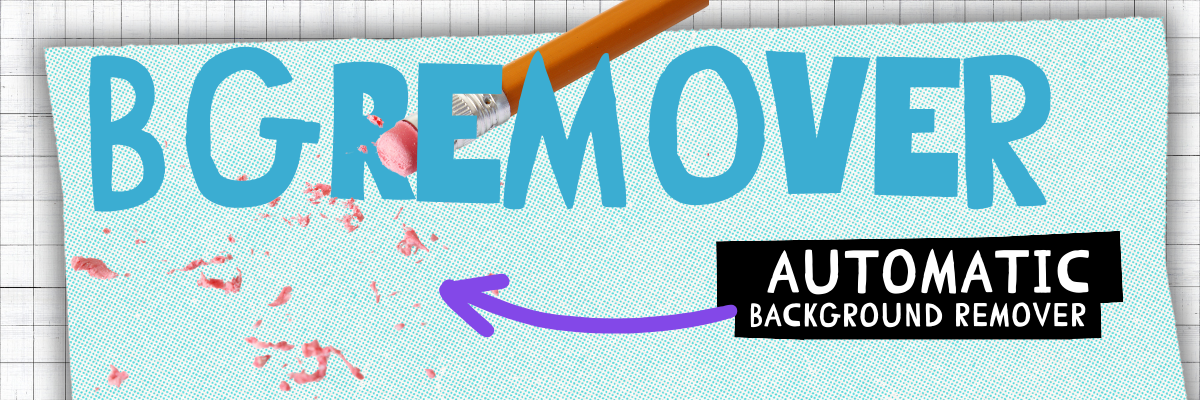
BG Remover: Automatic Background Remover

Canva’s BG Remover, or background remover, makes automatic background removal effortless. Simply drag and drop your photo to instantly upload and open a new design project in the online editor. Select your photo, then click BG Remover to work the magic of removing whatever is behind the image. Students love this feature, and we are obsessed with these examples. Below, the students used the BG Remover to place characters from the story in a different setting, and then explain how that would change the entire story. Can you guess the story below?

Magic Eraser: Remove
Unwanted Objects
Canva’s Magic Eraser instantly cleans up pictures online. It's easy to remove unwanted objects or erase people from photos. This allows students to brush over distractions to instantly remove them with Canva Pro's Magic Eraser. In the example below, students


Magic Edit: Swap out Objects in a Photo

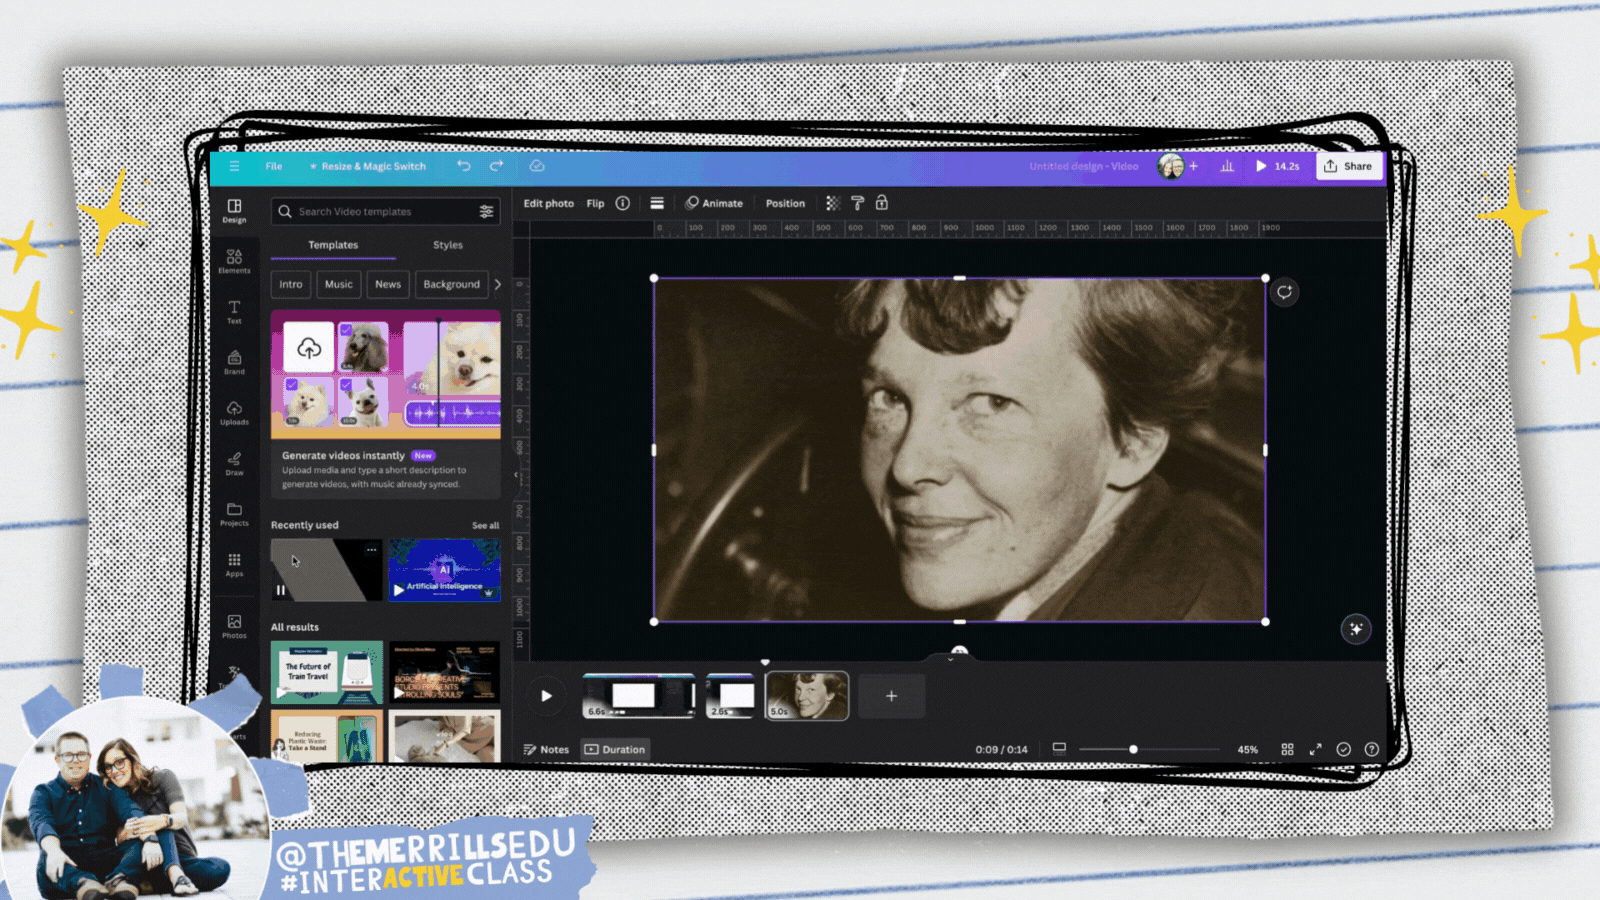
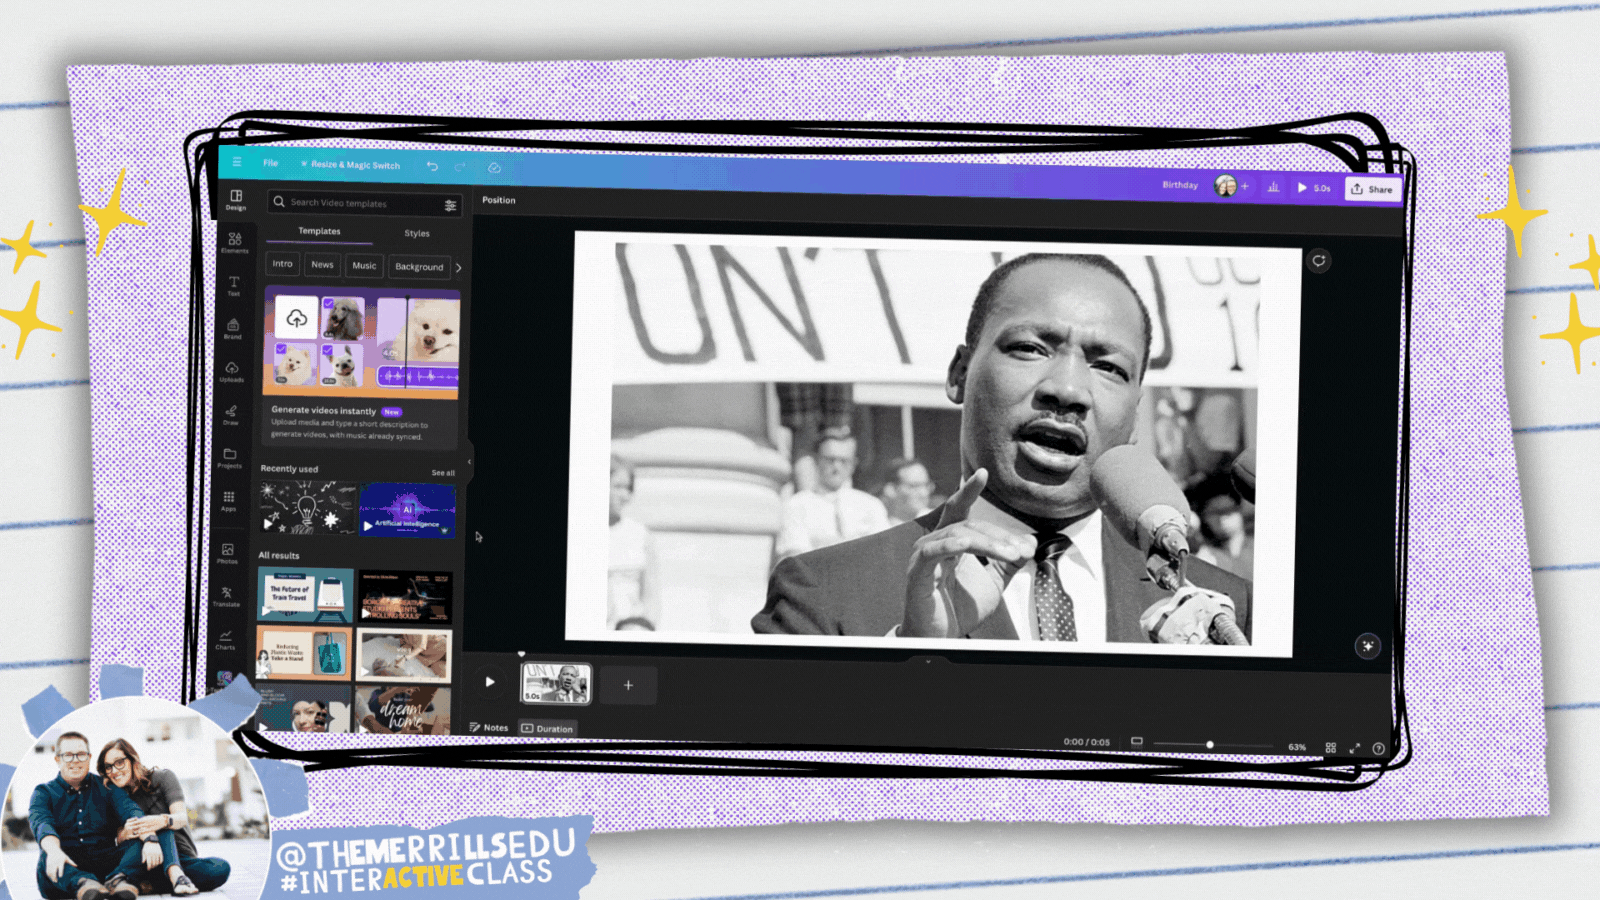
Similar to the Magic Eraser, Canva’s Magic Edit allows users to easily remove distractions or add new things to your photos with a few clicks. Simply brush over the areas you'd like to modify and then describing what you want to add. The students have used this tool to replace a face on Mount Rushmore. Who would you add to the mountain if there was an available spot? The kids have also used this to add historical figures from the past onto Martin Luther King Jr’s "I Have a Dream” speech. For example, how do you think Abraham Lincoln would have responded if he was there at the speech? Check out the examples below!

SecretInk: Artistic Text
Hidden in Plain Sight
SecretInk blends text into any image background to create an optical illusion. Sometimes you have to zoom in or out to see it, but we love how this app puts the text in unexpected places. Our students used this app to provide a one word summary of the theme of the books they were reading. Can you guess which book this was for?


How Can Teachers Use the AI in Canva?
Students can’t have all the fun! There’s plenty of ways that educators can use the AI tools located in Canva. These timesavers and tools will help even the most organized classroom teachers. Here are a few of our favorites!

Upload a PDF: PDF’s Transformed Into
A Different File Type
Have you ever found a great PDF resource that you wish was just slightly different? Maybe you wish you could have edited the PDF to better fit your learners? Well, with Canva’s PDF uploader, now you can! Just upload the PDF from the main dashboard, and then you can edit and save the file as whatever you would like. Here’s how it all works:
Log onto Canva
Locate and click the Upload button on the top right side
Select your file(s) to upload. Canva automatically uploads the file to your projects.
Open the project from your Recent Designs section on the main dashboard.


Magic Design: Education
Resources for Your Classroom
Fumbling through templates is SO 2022! Now, with Canva’s Magic Design, educators can use AI to produce a project design that directly aligns with their topics. There’s a couple of ways that you can find and produce these resources. Here’s how:

Templates
Log onto Canva
Search for your topic in the search bar and hit enter (tip: be sure your search is set to Templates and not Projects)
Select a template then click Customize this template to add it to your own projects.


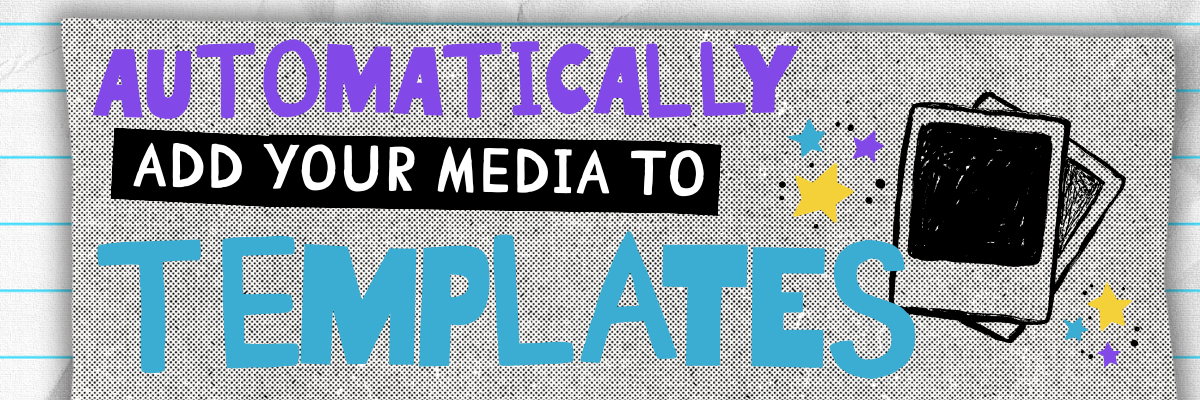
Automatically Add Your Media to Templates
Canva now allows users to add uploaded media into template searches so that users can preview what the designs would look like with the uploaded media inserted. Here’s how it works:
Log onto Canva
Search for your topic in the search bar and hit enter (tip: be sure your search is set to Templates and not Projects)
Next to All Filters and Category, click on Media.
Select the files that you would like to include, and then click See results.
Canva will embed your imported media / images into the designs and you may select from the generated selections.


Magic Design: AI generated content
Canva’s Magic Design is an AI-powered design generation tool that lets you input any media or prompt, and transforms it into customizable designs that match the content and context you need. We appreciate how the platform automatically generates examples to view, giving you a choice to select from. To access Magic Media, follow these steps:
Log onto Canva
Click the Create a design button located on the top right side
Choose your desired file size. The project will open in a new tab.
Make sure that you are on the Design tab located on the left side panel.
Directly to the right Design tab (at the top), type what you would like the AI to generate in five or more words.
Magic Design will suggest different files for you. Select the one you like!


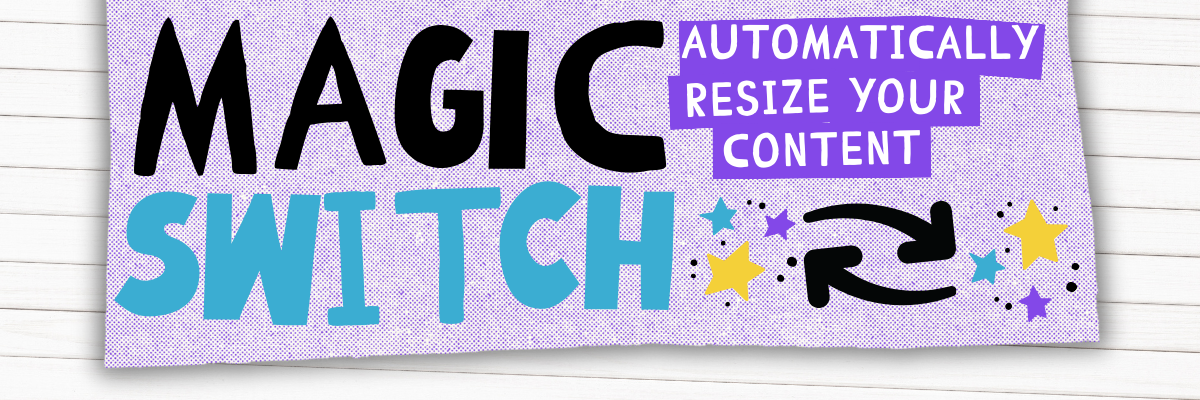
Magic Switch: Automatically Resize Your Content
Canva’s Magic Switch uses AI change the format of your file or transform it into something entirely new. With Magic Switch you can: Transform your design into any type of Doc like a blog post, summary, email or even a poem. Resize one design into many for all channels, all with just a few clicks. Here’s how it all works:
Log onto Canva
Open a design that you wish to resize or transform.
Locate and click Resize & Magic Switch on the top left side of the screen.
Search for a resize option (for example: type worksheet). Tip: You can select more than one size.
Click Continue, then click either Copy & resize or resize this design.
Your new size(s) will be automatically generated. You may need to move elements around a bit, but it saves a lot of time!

Translate: Instantly Translate Your Content

Canva’s built in translator tool can translate text in your designs to 1,000’s of different languages. In just a few clicks, you can translate your content instantly. Finding it is a bit tricky, though. To access it, follow these steps:
Launch a Canva project
Right click a text box and then scroll down to Translate Text.
Complete the prompts to translate the text!
Canva also has a free document translator standalone website where anyone can upload a document and it will translate the content for you automatically. To check it out, click here or the image below!
Magic Write: Generate Text and Content Easily

Canva’s Magic Write is an AI-powered tool that helps users generate text and content ideas quickly and easily. It allows users to create a wide range of graphic design projects such as social media posts, presentations, flyers, and more. We appreciate the ability to quickly add clear directions to a resource, or narrow down a learning goal into a language that students can understand. Here’s how to access Magic Write:
Launch a Canva project
Click on any text box
Click Magic Write
Select your preference!
-- Please follow us on social media and tag us with how you’re using the AI in Canva in your classroom! 👓👗
For more tips, tricks and lesson ideas for making learning more interACTIVE, check out our books The InterACTIVE Class and Flipgrid in the InterACTIVE Class on Amazon!


How to Use AI Tools for Teachers to Save Time, Boost Engagement, and Personalize Learning
@TheMerrillsEDU share how teachers can use AI tools to save time, boost engagement, and personalize learning. You’ll learn about ten different tools to use in your classroom immediately and efficiently!

As a teacher, you know how challenging it can be to plan, prepare, and deliver effective and engaging lessons for your students. You also know how important it is to personalize learning for each student, according to their needs, interests, and goals. But how can you do all this without spending hours of your precious time and energy?
The answer is AI tools for teachers. AI, or artificial intelligence, is the technology that enables machines to perform tasks that normally require human intelligence, such as understanding language, recognizing images, and solving problems. AI tools for teachers are applications that use AI to help you with various aspects of teaching and learning, such as creating content, assessing students, providing feedback, and more.
In this blog post, we will show you how to use AI tools for teachers to save time, boost engagement, and personalize learning for your students. We will show how you can get started with them, and by the end of this post, you will have a better understanding of how AI tools for teachers can transform your classroom and enhance your teaching experience.
Please note: This blog post was hand-crafted and was not created using AI.
(click on any subheading to jump to that section)


How to Prompt AI as a Teacher
There doesn’t sound like there’s much to launching an AI tool, entering a prompt and seeing the results. But, prompting AI is a work of art that takes us beyond our world of immediate ask and receive. As we learn more about AI, we’ve come to realize that it’s important to be specific, thorough, and challenging.

A teacher using AI to generate content needs to be specific. Try entering in a grade level, targeted standards, learning goals, and even rubrics. If you’re looking to clarify directions, try adding, “make these directions clear for students age 10.” We find it helpful to use natural language that’s easy to understand and follow. Try to use keywords or phrases that match the topic and level of your students. Teachers can also use filters or modifiers to narrow down or expand search results.

Remember, AI responses can contain biases and out-dated information, so it’s important to think and challenge what is being generated. If a generated response doesn’t look right - challenge it. For example, if you use the prompt: “Generate a lesson plan on _______,” and the lesson plan doesn’t look grade-level appropriate, respond to your current prompt with, “now make it appropriate for ______ grade.” This can help the AI narrow down the content.
Diffit
Cost: Free and paid versions available
Compatibility: web based
Diffit is an AI-based platform that helps teachers customize their teaching methods to suit students’ reading levels and needs. Diffit can help teachers differentiate their content and instruction by:
Instantly creating leveled resources for any topic, lesson, or student
Providing vocabulary words, multiple choice questions, and other features to enhance comprehension and retention
Converting any content to all reading levels from 2nd to 11th grade (and higher), and in over 30 languages
Click here to sign up for a free account and watch and learn how it all works below!


Magic School AI
Cost: free and paid versions available
Compatibility: web based
Magic School AI is an AI platform for educators that offers 60+ tools to help with translation, differentiation, assessment, communication, and more. It can help teachers save time, fight burnout, promote sustainability, and build AI competencies and skills. Some of our favorite features of Magic School include their Text Leveler, Clear Directions, Custom Chatbox, Math Story Problems, and more. There’s a lot to love about Magic School AI, but another feature that has us excited is MagicStudent. MagicStudent is an AI platform designed to build AI literacy for students. It not only teaches students to use AI responsibly, it also unlocks learning opportunities not possible without generative AI. This feature is coming, so be sure to stay tuned for updates. Sign up for a Magic School AI account by clicking here and check out what it has to offer below!
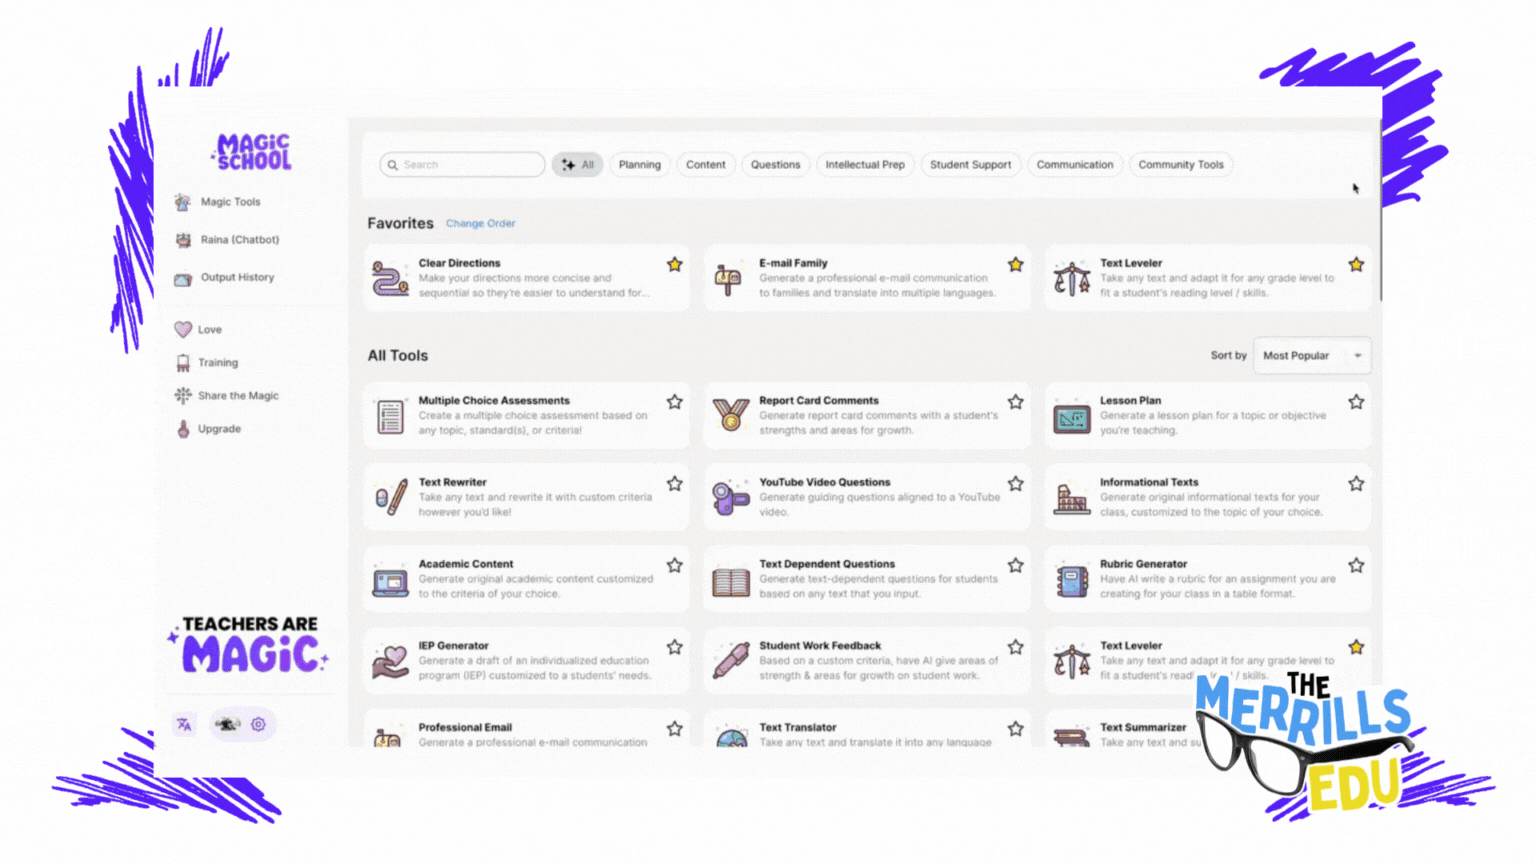

School AI
Cost: free
Compatibility: web based
School AI is an AI platform that helps teachers create, personalize, and engage their students with adaptive and interactive learning experiences. It also helps students learn at their own pace, level, and style, and get instant feedback and guidance from the AI. School AI is designed for K12 students and has built-in monitoring and controls for teachers.
School AI can help both teachers and students be successful by:
Saving teachers time and effort in planning, preparing, and delivering lessons
Providing teachers with data and insights on student performance and progress
Offering teachers various tools to customize and differentiate their instruction
Enhancing student motivation, engagement, and retention with gamified and immersive content
Supporting student autonomy, self-regulation, and metacognition with AI feedback and scaffolding
Catering to student diversity, inclusivity, and accessibility with multilingual and multimodal options
One of our favorite parts of SchoolAI is Spaces. With Spaces, users (both students and teachers) can use AI powered chatbots in creative ways. For example, you can set up a chatbot to act as a historical figure, taking questions from the student(s). It all feels very familiar to the kids - resembling a text message thread.
You can sign up for free and start using School AI today by clicking here, and check out what it has to offer below!


Class Companion
Cost: free
Compatibility: web based
We’re not going to lie….Class Companion is one of the tools that we’re most excited about. Class Companion is a website that uses AI to help teachers give instant, personalized feedback on written assignments. It can help teachers save time, monitor student progress, and differentiate instruction. It can also help students practice their writing skills, get immediate guidance, and improve their learning outcomes. Here’s how it works:
Teachers start by uploading an assignment and rubric. (TIP: When creating the assignment, we HIGHLY recommend setting the maximum number of attempts to more than 1. Doing so provides an opportunity to edit their work after the AI provides feedback.)
This gets shared to students (student accounts are required) via a shared link or an email.
Students complete their writing by typing out their essay in Class Companion, then submit for AI review / grade.
If you’ve chosen more than one attempt for your students, the AI will coach them through the teacher’s rubric, explaining whether or not the student has met the expectations. The student then has the opportunity to edit their work and try to improve.
When an assignment is submitted, the teacher has the ability to edit the AI’s score to provide a final grade.
To sign up for your FREE account, click here and check out our video below. You can also check out ouf full blog post on Class Companion by clicking here!

Curipod
Cost: free and paid versions available
Compatibility: web based
Curipod is a website that helps teachers create and deliver interactive lessons on any topic, with the help of artificial intelligence. Teachers can use Curipod to:
Generate lessons with AI: Curipod can suggest content, questions, and activities based on the topic and learning objectives that the teacher inputs. The teacher can then customize the lesson according to their preferences and needs.
Engage students with curiosity: Curipod’s lessons are designed to spark students’ curiosity and interest in learning, by using multimedia, gamification, and social learning features. Students can share their voices, opinions, and creations with their classmates and teachers.
Save time and resources: Curipod reduces the workload and stress of lesson planning and delivery, by providing ready-to-play lessons from verified educators and authors, as well as a user-friendly interface and seamless integration with other platforms.
To sign up for a free account, click here. Check out our video for more information below!

Eduaide.AI
Cost: free and paid versions available
Compatibility: web based
Eduaide.AI is a website that helps teachers create lesson plans, teaching resources, and assessments using artificial intelligence. Teachers can use Eduaide.AI in the classroom in the following ways:
Generate teaching resources: Teachers can choose from over 100 resource types and learning objects, such as worksheets, quizzes, slides, videos, etc. and use AI to generate content based on their topics and objectives.
Personalize instruction: Teachers can use the “transform” tool to modify the generated content to suit their students’ needs and preferences. They can also use the “feedback bot” to provide instant and customized feedback to students.
Collaborate with AI and other teachers: Teachers can use the “Eduaide chat” to ask questions and brainstorm ideas with the AI model. They can also share their resources with other teachers and access a community of practice.
To sign up for your account, click here and check out our video below!


CoPilot
Cost: free
Compatibility: web and mobile
Microsoft CoPilot is an AI companion that can help teachers and students with various tasks and projects, such as:
Writing and editing: CoPilot can assist with writing essays, reports, summaries, poems, stories, and more. It can also help with editing, proofreading, and improving the quality and clarity of the text.
Researching and learning: CoPilot can provide information, facts, definitions, examples, and explanations on any topic. It can also help with finding and citing sources, creating bibliographies, and checking plagiarism.
Coding and creating: CoPilot can help with coding in different languages, such as Python, Java, C#, etc. It can also help with creating apps, games, websites, graphics, and more.
Teaching and assessing: CoPilot can help teachers with creating lesson plans, teaching resources, and assessments. It can also help with providing feedback, grading, and tracking student progress.
Generating images: CoPilot paired with Microsoft Designer is able to produce images that may be used for presentations, lessons, etc.
To use CoPilot in the classroom, teachers and students need to sign in to their Microsoft account or Entra ID account and access CoPilot through the Microsoft Edge or Chrome browser, on Windows or Mac OS. They can also use CoPilot in select Microsoft 365 apps, such as Word, Excel, PowerPoint, Outlook, OneNote, and Teams. They can chat with CoPilot by typing or speaking their requests, and CoPilot will respond with relevant and useful information, suggestions, or content. They can also ask CoPilot to show examples, explain how it works, or give feedback. Check out our video below for more info!


Gemini (formely Bard)
Cost: free
Compatibility: web and mobile
Google's Gemini (formerly Bard) is a tool designed that can assist teachers in various ways, primarily by providing them with access to educational resources, streamlining administrative tasks, and facilitating communication and collaboration among teachers, students, and parents. Here are several ways Gemini can help teachers:
Resource Access: Gemini provides teachers with access to a wide range of educational resources, including lesson plans, teaching materials, videos, and interactive activities. These resources can help teachers enhance their lessons and engage students more effectively.
Curriculum Planning: Gemini offers tools for curriculum planning, allowing teachers to create, organize, and share lesson plans, unit outlines, and assessments. This helps teachers align their curriculum with educational standards and goals.
Assessment and Feedback: Gemini enables teachers to create and administer assessments, quizzes, and assignments digitally. Teachers can track student progress, provide timely feedback, and analyze assessment data to inform instruction and support student learning.
Teachers are able to access Gemini by clicking right here and accepting the terms. Educators can find Gemini in Google apps such as: Google Classroom, Google Docs, Google Sheets, Google Drive, and more.


Canva Magic Suite
Cost: free
Compatibility: web and mobile
Canva's Magic suite tools are a set of features designed to enhance the design process and make it easier for users to create visually appealing graphics and designs. These tools leverage artificial intelligence (AI) and automation to assist users in various aspects of design, including layout, color selection, and image editing. Here are some of the key features included in Canva's Magic suite:
Background Remover: This tool automatically removes the background from images, allowing users to create transparent or custom backgrounds for their designs. It simplifies the process of isolating subjects from their backgrounds, which is useful for creating product images, profile pictures, and design elements.
Color Palette Generator: Canva's Color Palette Generator analyzes an image and generates a complementary color palette based on the colors present in the image. This tool helps users create cohesive and visually appealing designs by providing color inspiration and ensuring color harmony.
Font Pairing: Font Pairing suggests font combinations that work well together, helping users choose complementary fonts for their designs. It takes into account factors such as font style, weight, and contrast to ensure readability and aesthetic appeal.
Layout Suggestions: Canva's Layout Suggestions feature analyzes the content of a design and provides suggestions for layout options. It helps users quickly explore different layout possibilities and find the best arrangement for their content, saving time and effort in the design process.
Smart Resize: Smart Resize automatically adjusts the dimensions of a design to fit different aspect ratios and sizes, making it easy to create variations of the same design for different platforms and devices. This feature saves time by eliminating the need to manually resize and reformat designs for different purposes.
Image Cropping: Canva's Image Cropping tool provides intelligent cropping suggestions based on the composition of the image and the aspect ratio of the design. It helps users crop images to fit specific dimensions or aspect ratios while preserving the most important parts of the image.
Overall, Canva's Magic suite tools leverage AI and automation to simplify the design process, provide creative inspiration, and assist users in creating professional-looking designs with ease. These features are valuable for students and teachers looking to create high-quality graphics and visual content for academic purposes. To learn more about how Canva can be used in the classroom, check out our blog posts and video tutorials below:
-- Please follow us on social media and tag us with how you’re using AI tools in your classroom! 👓👗
For more tips, tricks and lesson ideas for making learning more interACTIVE, check out our books The InterACTIVE Class and Flipgrid in the InterACTIVE Class on Amazon!


How to Use AI to Automatically Grade Writing Assignments with Class Companion
Learn how AI can automatically grade your student’s writing assignments using the FREE app, Class Companion! We’ll walk you through how to sign up, how it works, and what it looks like for students!

What if we told you that you could use AI to automatically grade your student’s writing assignments? What seemed like a dream is now reality thanks to Class Companion! Class Companion is a website that uses AI to help teachers give instant, personalized feedback on written assignments. It also provides engaged practice for students, time savings and insights for teachers. Teachers can use built-in assignments or add their own. In this blog post, we’ll show you where to sign up for your account, how to create a rubric and assignment, how to get students on (and what that looks like), and how educators have the final say in the grading process.
Please note: This blog post was hand-crafted and was not created using AI.
(click on any subheading to jump to that section)


What is Class Companion and how does it work?
With Class Companion, teachers can cheer on their students with immediate feedback and tailor their learning to their individual needs. Teachers can also use the AI platform to design fun and challenging assignments, spark students' curiosity, share helpful tips, and track their growth over time. Check out our brief overview of the platform in the video!

Where to Sign Up for a Class Companion Account
You heard, “automatically graded writing assignments,” and you were sold! Now what? Class Companion is free for educators and students. However, both teachers and students will need accounts to use the platform. Educator accounts can be created by clicking on the link here. Heads up, students are required to use an email address. Students are able to create accounts by being invited by their teacher(s) via shared link. To create student accounts and invite them to your class, follow these steps:

Log into Class Companion as a teacher. Locate the Students tab on the top, then click it.
Click the +Add students button located on the top right.
Now, select your preferred method: Copy link to share or Invite via email. The Copy link to share option will generate a private link that may be shared to students. Students will use this link to enter their email address and a password to create their accounts. The Invite via email works similarly, only the link is shared via email.
After using either method, your students will automatically appear in your class.

How to Create a Rubric and Assignment
in Class Companion
Now that you have your accounts ready, it’s time to create your first rubric and assignment. Here’s how to create an assignment in Class Companion:
On the top toolbar, click on Assignments.
Now click on “+Add Assignment,” then select either: Duplicate from Content Library, Generate with AI, Import, or Create From Scratch.
Then, complete the steps filling out the information. (TIP: When creating the assignment, we HIGHLY recommend setting the maximum number of attempts to more than 1. Doing so provides an opportunity to edit their work after the AI provides feedback.)
Now, let’s add a rubric to our assignment.
Under Rubric, click Add rubric.
When creating a rubric, you have a choice of the type of format you’d like to use: Paragraph or list, and Table. Select your preferred format, then enter your information in the text boxes. When you’ve finished, click the Create rubric button on the top right.
Your rubric will now be added to the writing assignment. Once everything looks good, click on Save located on the top right. Your assignment will now appear on the student’s dashboard when they log in.
This gets shared to students (student accounts are required) via a shared link or an email.
Students complete their writing by typing out their essay in Class Companion, then submit for AI review / grade.
If you’ve chosen more than one attempt for your students, the AI will coach them through the teacher’s rubric, explaining whether or not the student has met the expectations. The student then has the opportunity to edit their work and try to improve.
When an assignment is submitted, the teacher has the ability to edit the AI’s score to provide a final grade.

How to Get Students Logged Onto Class Companion (and What That Looks Like)
Now that you’ve created a class, rubric, and assignment, it’s time to get your students logged on and working. Have your students follow these steps to find their assignments (note: students must have their accounts created prior to these steps):

Direct students to this link, and have them log in using their credentials.
Once students log in, they will see their assignment(s). They may click on the assignment to get started.
Now that the student has logged in and opened the assignment, they will be prompted according to the directions that you gave when creating the assignment. The students will complete the assignment and turn it in for AI feedback / grading by clicking the Submit assignment button located at the bottom of the screen. Once they submit their work, the AI will produce feedback / grade their work. If you have selected multiple attempts when creating the assignment, the students will have the opportunity to read over the feedback from the AI and make changes to their work. They may repeat this as many times as you have allowed (when selecting multiple attempts). So, if you gave them 8 multiple attempts, they can submit it up to 8 times for feedback.

How to Override the AI’s Grade in Class Companion
Once they’ve turned the essay in, they will be able to see how they performed according to your rubric / the AI. Something worth noting, is that when a student submits their work, you also have the ability to see if they copied & pasted their work. You will see, “pasting” listed next to the student’s assignment status. As the educator, you have full control and are able to edit any scores as you see fit. Here’s how to edit student scores:
Log onto the Class Companion dashboard, then click on Submissions located at the top of the page.
Click on the student / assignment and review how the AI graded the student’s work.
If you disagree with how the work was graded, you can easily edit the score(s). To do so, click on the Override icon (that looks like a hammer or paint roller).
Then, edit the final score. You also have the option to leave feedback or a comment. Once you have entered the information, click on the save button.
The new score will now be reflected!
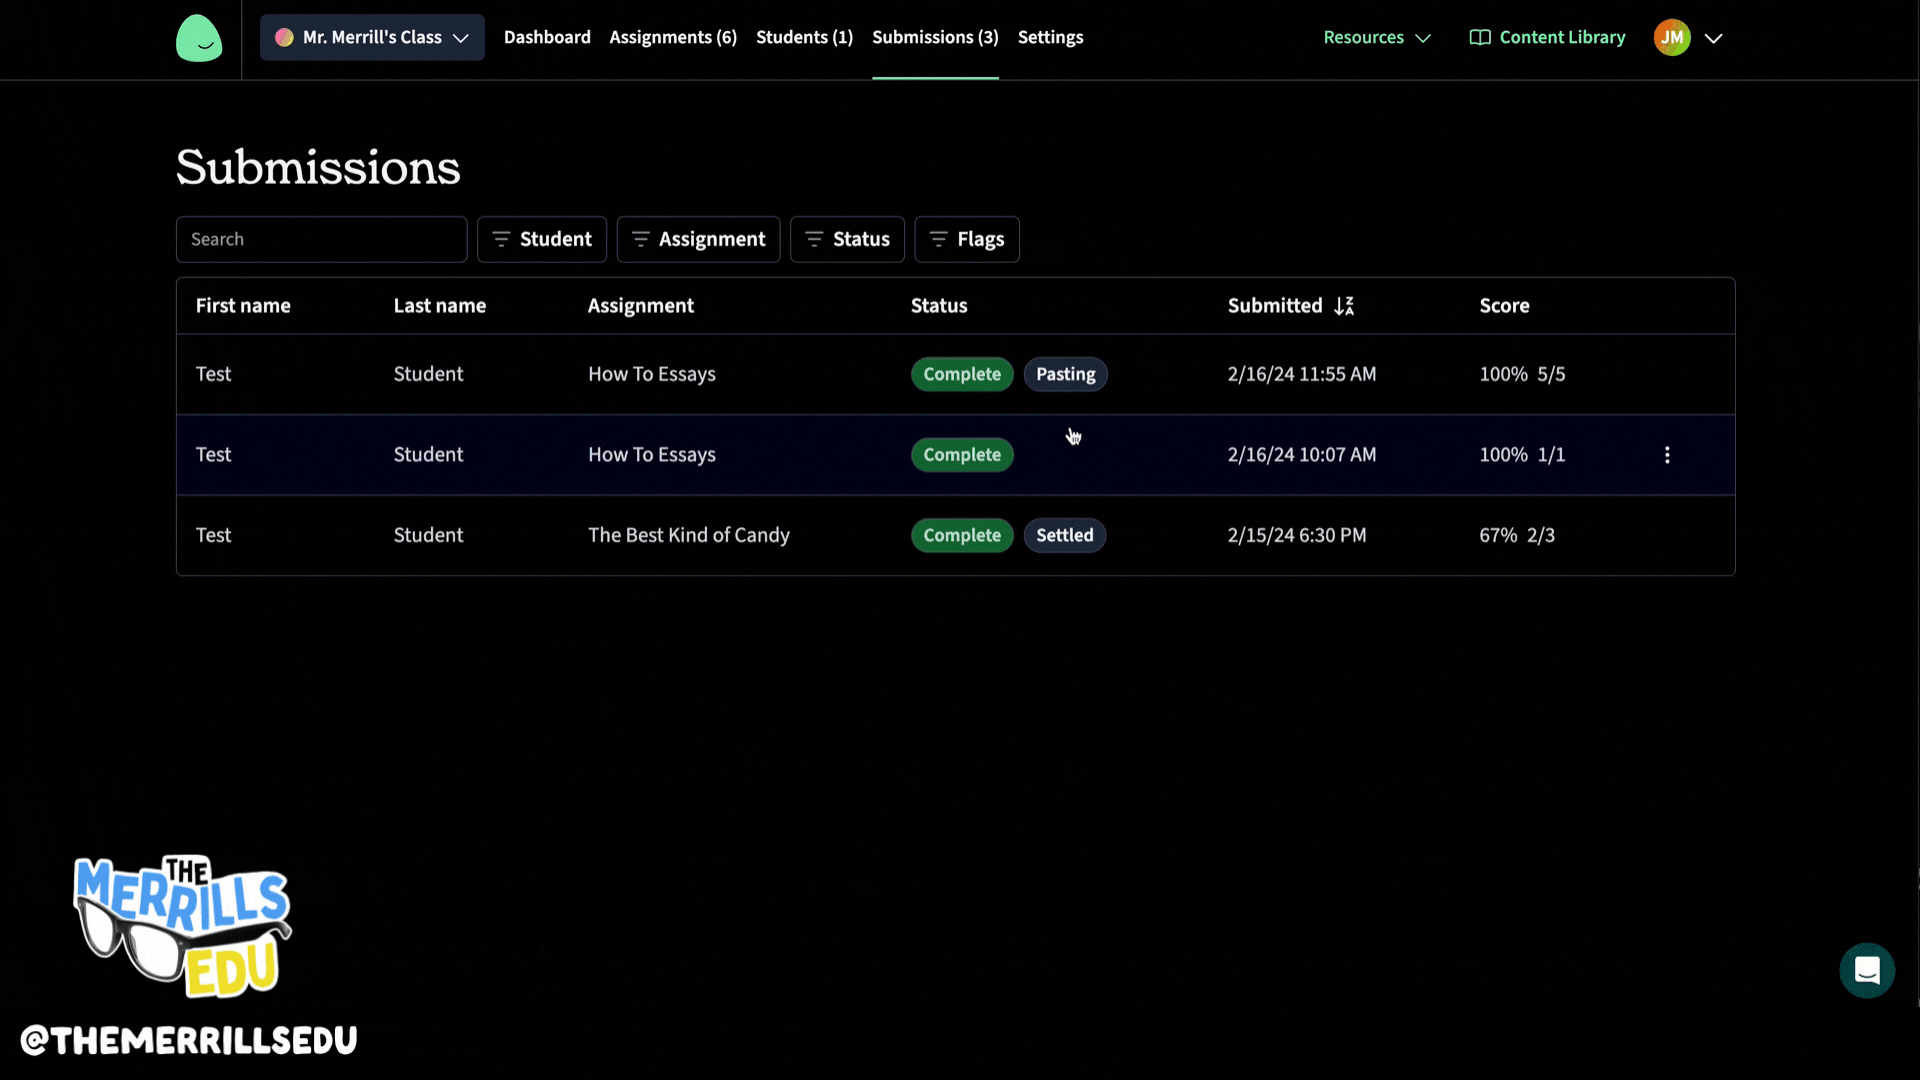
-- Please follow us on social media and tag us with how you’re using Class Companion activities in your classroom! 👓👗
For more tips, tricks and lesson ideas for making learning more interACTIVE, check out our books The InterACTIVE Class and Flipgrid in the InterACTIVE Class on Amazon!


10 Education Apps to Use in 2024
We’ve picked ten must see applications that we believe will be handy in 2024! Everything from AI helping teachers and students, to coding and creation. You have to see them to believe them!

With the rise of AI in 2024, the landscape of education is evolving rapidly. With a myriad of education apps revolutionizing how we acquire knowledge and skills. Whether you're a student looking to enhance your academic performance or creeativity, an educator aiming to upskill in your field, or a lifelong learner thirsty for new information, there's a new app for you. In this blog post, we'll explore the top ten ed tech apps of 2024, curated to cater to various learning styles, subjects, and levels of expertise. Check them out below!
(click on any subheading to jump to that section)


Magic School AI
Cost: Free and Premium ($100 per year) Options available
Platform: Mobile and PC
Magic School AI is an AI-powered platform that helps teachers with various tasks such as lesson planning, differentiation, writing assessments, writing IEPs, and communicating clearly. It is designed to save time, fight burnout, and promote sustainability for educators. It also helps teachers build AI competencies and skills by using and learning about AI in the process. To learn more and sign up for an account, click here or the image below.


Diffit for Teachers
Cost: Free and Premium ($14.99 per month) Options available
Platform: Mobile and PC
Diffit for teachers (we believe could be short for “Differentiation for Teachers”) is an AI-powered tool that helps teachers create leveled resources for any topic, lesson, or text. It can analyze, modify, and generate texts that are tailored to each student’s reading level and needs, providing a natural way for teachers to differentiate. It can also provide vocabulary words, multiple choice questions, and other features to enhance learning. Diffit for teachers can save time, support differentiation, and foster literacy skills for teachers and students alike. To learn more or sign up for an account, click here or the image below.


Moov
Cost: TBD (Demo version available)
Platform: Mobile and PC
Moov is a startup from young CEO Kevin Camson. Kevin learned how to code and created a groundbreaking way to communicate to students. Moov is a one-stop-shop that will take attendance, track school busses, promote school events, meetings, school groups and so much more. Think of it as a secure and safe “social media” type feeling to an internal way of connecting with your students. Moov also has the coolest looking website that we have seen in a long time! Check it out and sign up for a demo by clicking here or the image below!


Class Companion
Cost: FREE FOR TEACHERS AND STUDENTS
Platform: Mobile and PC
Class Companion is an AI-powered platform that helps high school social studies teachers assess written assignments. It can provide instant, personalized feedback to students, as well as generate and modify texts for different reading levels. It can also help teachers create assignments, track student progress, and learn about AI themselves. Class Companion is a great option for teachers to save time, support differentiation, and foster literacy skills. To sign up for an account or learn more, click here or the image below.
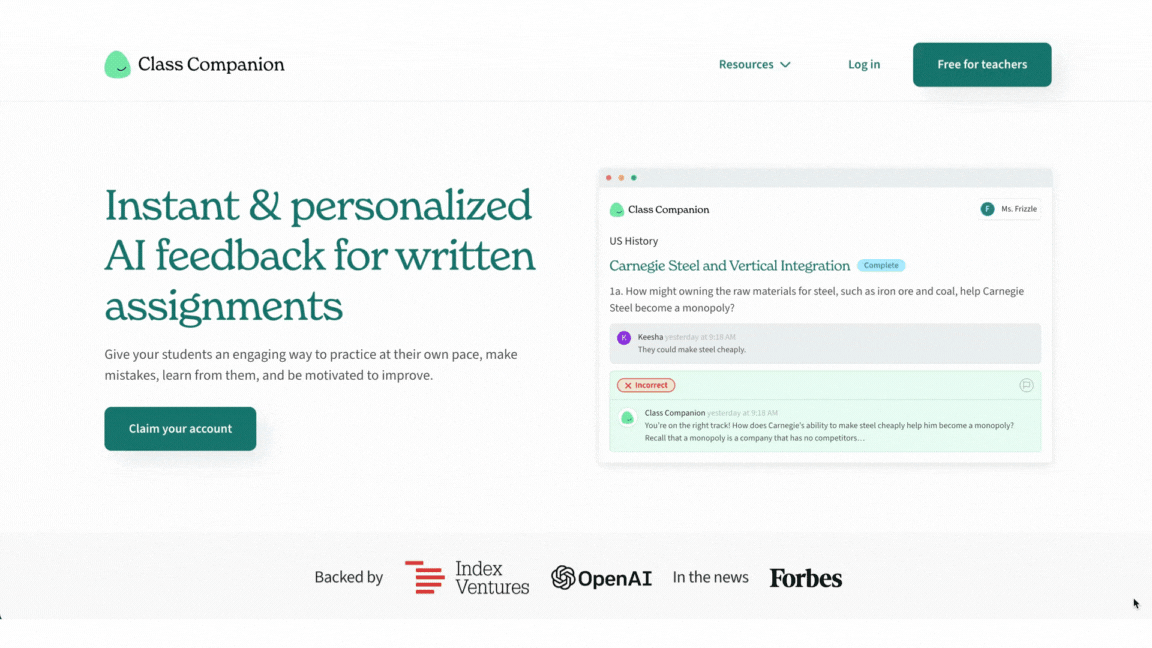

Book Creator
Cost: FREE and premium ($13 per month) options available
Platform: Mobile and PC
If you’ve followed us, then you know our love for Book Creator runs deep. But, this platform does so much more than it’s name suggests. Book Creator has added an integration with Canva which allows students to design their books using Canva without having to leave Book Creator (you read that right - click here to learn more). Book Creator also has added HUGE updates to their collaboration features including: commenting, video, audio recordings, emojis, and more. But students aren’t the only ones excited about Book Creator. Now, there are LMS (Learning Management Software) integrations with Canvas and Schoology. So, teachers can Book Creator assignments right within their LMS. These books can be submitted by students, read / graded by teachers, and even shared within a district. Book Creator has also just announced that central libraries are coming to it’s platform, This will soon be the starting place for educator’s to build and share resources that your whole district can use. To sign up for an account or learn more, click here or the image below.

Canva for Education
Cost: FREE
Platform: Mobile and PC
If you’re reading this and think, “Canva? That’s not a new tool!” You’re right, but what has been sticking out lately is Canva’s updates and integrations. There are a TON of AI options, including Canva’s Magic Suite (click here to learn more about them here). There are new apps being loaded into it’s integrations all the time, but some of our favorite include SecretInk, Murf AI, Type Gradient and more. To learn more and sign up for a free account, click here or the image below!


Kami
Cost: FREE and premium ($99 / year) options available
Platform: Mobile and PC
Kami is an online platform that allows teachers and students to annotate, collaborate, and interact with digital documents. It can be integrated with popular learning management systems such as Google Classroom, Canvas, and Schoology. Kami can also be used as a digital whiteboard, a PDF editor, and an accessibility tool. The app aims to make learning more engaging, flexible, and inclusive for all. To sign up for an account, click here or the image above. (NOTE: Microsoft Innovative Educator Experts, Google Certified Trainers / Innovators / Coaches can all receive a free Kami premium license for one year by singing up here.)

Lucidspark
Cost: FREE
Platform: Mobile and PC
Lucidspark is a virtual whiteboard app that allows you to brainstorm, collaborate, and interact with digital documents in real time. You can use it to capture and share your ideas, make connections, and plan and track projects visually. Lucidspark can also be integrated with Lucidchart, a diagramming and data visualization app, to create more polished and professional documents. Jamboard users will want to familiarize themselves with Lucidspark, because Lucidspark has created a way for Jamboard users to upload their Jamboard files and maintain the ability to edit them. To learn more and sign up for an account, click here or the image.

Beanstack
Cost: Contact for pricing
Platform: Mobile and PC
Beanstack is an online platform that helps schools, libraries, and families read more with fun reading challenges, easy tracking, and insightful data. You can use Beanstack to join reading programs, log your reading sessions, earn badges and rewards, and discover new books. It can also help you raise money for your organization with reading fundraisers. To learn more, click here or the image!


imagi
Cost: Contact for pricing
Platform: Mobile and PC
imagi is a coding education platform that teaches Python, a real programming language, through creative and social activities. It consists of two main components: imagiCharms and imagi Edu. imagiCharms are colorful and customizable accessories that you can program with the imagi app. imagi Edu is a learning platform that provides interactive and inclusive coding lessons and tools for educators and students. imagi aims to make coding fun, accessible, and empowering for everyone. To learn more, click here or the image below!
-- Please follow us on social media and tag us with how you’re using these platforms in your classroom! 👓👗
For more tips, tricks and lesson ideas for making learning more interACTIVE, check out our books The InterACTIVE Class and Flipgrid in the InterACTIVE Class on Amazon!


What is Lucidspark?
@TheMerrillsEDU explain the all-new Jamboard alternative, Lucidspark. Learn how this free for educators tool can enhance collaboration, promote creativity, and provide outlets for multimedia.

Recently, Google announced that it’s sunsetting Jamboard as of December 2024. Google has partnered with third-party providers to offer alternative solutions for digital whiteboarding, and one of them is Lucidspark. Lucidspark is a virtual whiteboard that fosters collaboration in the classroom, while empowering students to bring their best ideas to life. It has many features never offered in Jamboard, such as integrations with other apps, live voting, timers, templates, and collaborative AI. In this blog post, we’ll explain what Lucidspark is, compare it to Jamboard, how to get students logged on and show you where to create your own free acount.
(click on any subheading to jump to that section)


What is Lucidspark for Education?

Jamboard users loved the platform for it’s digital whiteboard features, but Lucidspark takes learning to the next level, giving students and teachers a smarter way to diagram. Lucid brings your ideas to life with easy-to-use features, unmatched intelligence, and end-to-end visual collaboration for everyone. The Lucid for Education Learning Suite is the perfect next step for anyone using Jamboard in education—from kindergarten to college. It has hundreds of customizable templates and gives educators controls for managing student interactions. The best part of all, it’s completely free!

One of our favorite features of Lucidspark is it’s ability to bring collaboration easily into the classroom. Educators can seamlessly guide, moderate, and evaluate collaborative discussions while maintaining students' focus on the board and locking elements of the template that shouldn't change. But the power of Lucidspark gets even better: Educators can easily increase the equality of student participation by selecting from a bank of ready-to-use activities. Your students complete them independently, eliminating peer bias. Then, Lucid instantly synthesizes the responses and generates a visual report of the combined results, along with each student's individual work. Lucid does the calculating for you so you can assess student comprehension immediately.
Lucidspark is compatible with multiple platforms, including Google and Microsoft. Educators and students can gain access to Lucidspark from the tools like Google Classroom or Canvas, streamlining your experience and eliminating the need for multiple sign-ins. Lucidspark is COPPA, FERPA, and GDPR compliant. It can be used by students of all ages, in all countries. Students under 13 use Lucid as directed by their schools.

How Does Lucidspark Compare to Jamboard?
Lucidspark has all of the features you’ve come to know and love in Jamboard, and so much more. Just like in Jamboard, you can place sticky notes, add text, add drawing, insert shapes and images, and add GIFs with your document. Lucidspark also has many additional tools that educators have been asking for like facilitator controls for the teacher, student names on sticky notes, voting, timers, emojis, and more. Check out our breakdown below for more details!


Embedding in Lucidspark is as easy as copying and pasting! Users can copy a hyperlink, then paste it anywhere on a board. These can be moved anywhere that you’d like. Users can also add media such as playable videos, images, GiFs, emojis, icons, or search the web right within the platform.


Collaborative AI is built directly into the Lucidspark toolbar. Users can launch this feature by clicking on the diamond icon, and then type out a prompt. This will allow users to generate ideas, extend brainstorming sessions, uncover key themes, and rapidly summarize the latest working session.
One of our favorite features of Lucidspark is it’s ability to generate Breakout Boards. Similar to breakout rooms, Breakout Boards are initiated when a collaboration session begins. To start the breakout session, select Start Breakout from the bottom of the Breakout Board panel. The Breakout Boards panel will become visible to all participants and they'll be able to select a board to join, which will send them to a separate Lucidspark board.
You can also share a direct link to a Breakout Board. You can do this by selecting Copy direct link from the three-dot menu in the Breakout Board panel and from within a Breakout Board by selecting Copy link in the upper-right corner. When the session is over, select Call Back to bring everyone back to the Main Board. Participants can also navigate back to the main board themselves at any time by clicking Main Board in the upper-left corner.


Timers will help keep your students on track and focused during activities. The built-in timer shows the countdown on everyone’s screens so educators can keep things moving. Launch a timer at the top of a Lucidspark document, then click on the clock icon.
Immediately next to the Timer is the Voting feature. In the voting feature, educators can create a voting session, set a timer for voting, provide instructions and much more. Launch the voting session by clicking on the blue start voting button.

Let’s face it…digital whiteboards can be a classroom management challenge. But, with Lucidspark’s collaboration features, students can see authors, have different colored cursors, launch a chat and follow a collaborator. These features can be found at the top of a Lucidspark document, by clicking on the collaboration icon.


Another powerful feature is Lucidspark’s Gather and Sort. With this feature, educators and students can quickly organize the board’s content. For example, if each student or group uses a different color of sticky note, the educator can use the Gather and Sort feature to place similar colors together on the board.

How to sign up for a Lucidspark Educator Account

Lucidspark is available at no cost for individual educators and students. Click here or the image to the right to create an account and get started! K-12 schools and districts are eligible to receive a complimentary, centrally-managed account. Complete this interest form and a member of the Lucid for Education team will email you to complete the account set up process. Higher Education professors, instructors, and students can also receive a free Lucid for Education upgrade. To sign up, create a free Lucid account using your school email address. When asked to select the role that best fits you, just select Student or Educator.

How to Get Students to log Onto Lucidspark
Now that you’ve created your EDU account, let’s talk about how you can get your students logged onto your board. There are several integrations that are available directly through Lucidspark, including: Canvas and Google Classroom. You can learn more about how to use these integrations by clicking here for Canvas and here for Google Classroom.
However, there are simple and efficient ways to get your students on-board without using the aforementioned integrations. One way is to just simply share the link to the board. To do so, follow these steps:

Open the Lucidspark board that you’re attempting to share.
Click on the “Share” button located on the top right.
A pop up will open. Select Link in the pop up window.
Toggle on the Shareable link.
Select your preferences, then click Copy link.
Paste this link onto wherever your students have access.

Another method is to use Lucidspark’s Join ID. This option uses a six digit code that can be entered to gain access. When students log onto https://lucid.app/join, they can enter the ID to the Lucidspark board. Follow these steps to use this method:

Open the Lucidspark board that you’re attempting to share.
Click on the “Share” button located on the top right.
A pop up will open. Select Join ID in the pop up window.
Toggle on the Share a join ID for easy access.
Click Copy invitation
Direct students to https://lucid.app/join and when prompted, have them enter the six digit ID generated for your board.
-- Please follow us on social media and tag us with how you’re using Lucidspark activities in your classroom! 👓👗
For more tips, tricks and lesson ideas for making learning more interACTIVE, check out our books The InterACTIVE Class and Flipgrid in the InterACTIVE Class on Amazon!


How to Use Canva's Magic Tools in the Classroom
Now, generating content for your classroom is even easier thanks to Canva’s new Magic features. Whether you’re trying to find resources for lessons, create engaging activities, promote accessibility, or adding some glitter to your creations - Canva’s Magic tools can help. In this post, we’ll take a dive into each of the features and how they can help you in your classroom.

Now, generating content for your classroom is even easier thanks to Canva’s new Magic features. Whether you’re trying to find resources for lessons, create engaging activities, promote accessibility, or adding some glitter to your creations - Canva’s Magic tools can help. In this post, we’ll take a dive into each of the features and how they can help you in your classroom.
Please note: This blog post was hand-crafted and was not created using AI.
(click on any subheading to jump to that section)


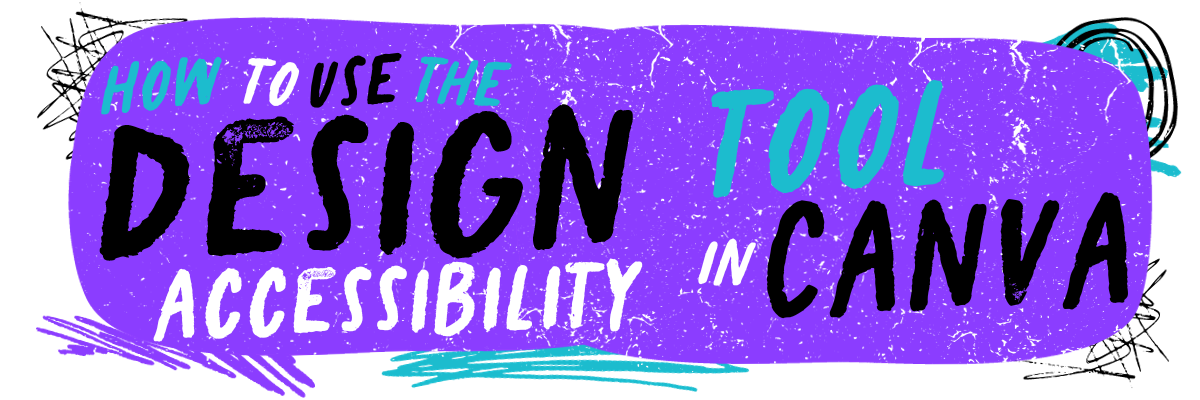
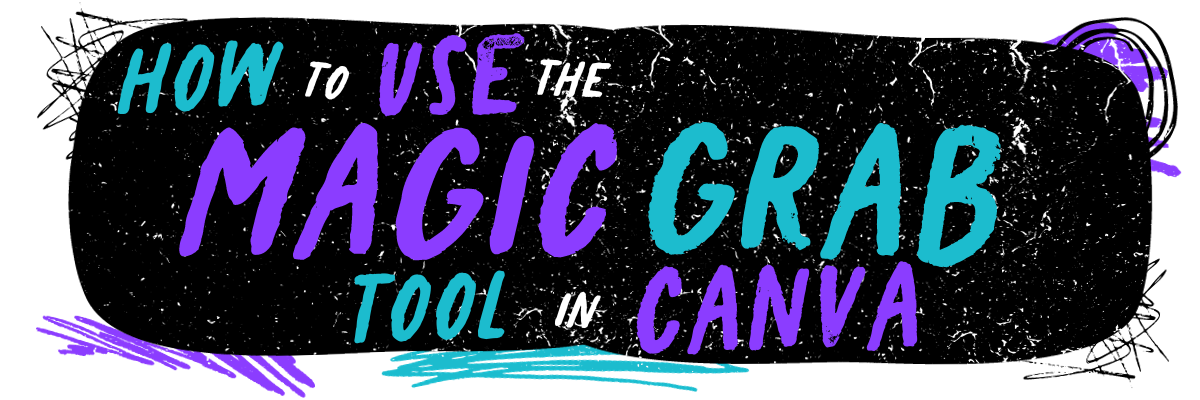


EDU Library in Canva
Canva’s EDU Library is full of teaching resources broken down by subject areas, grade levels, and more. These lessons are free and ready-to-teach. At the time of this original post, there were over 1,000 K-12 lessons designed by teachers, for teachers.
To access the EDU Library, click here or on the video. Then, you can narrow down your search by selecting the appropriate grade level and subject. Click on a lesson to view a preview of the contents, along with the design. Then, click Use this lesson to add it to your own Canva account. These lessons are fully editable, so if you’d like to change anything, you can. Additionally, you can share the lesson with other teammates by clicking on the “sharrow” or share icon.
You can check out our step-by-step video tutorial up on our Youtube channel (click here) or watch it to the left!


Creating Courses in Canva
Once you’ve added the content from above to your Canva account, Canva will automatically break down the content - essentially creating a course. From here, you can choose the type of experience for users. For example, you have the option to grant students to download the lesson(s) as a template file, giving them their own copy to edit and submit. Or, students can just use the design as a resource - which will not let them edit the design. Click on the play icon (or “Open course”) to launch the entire project. Now your class will have access to the course.
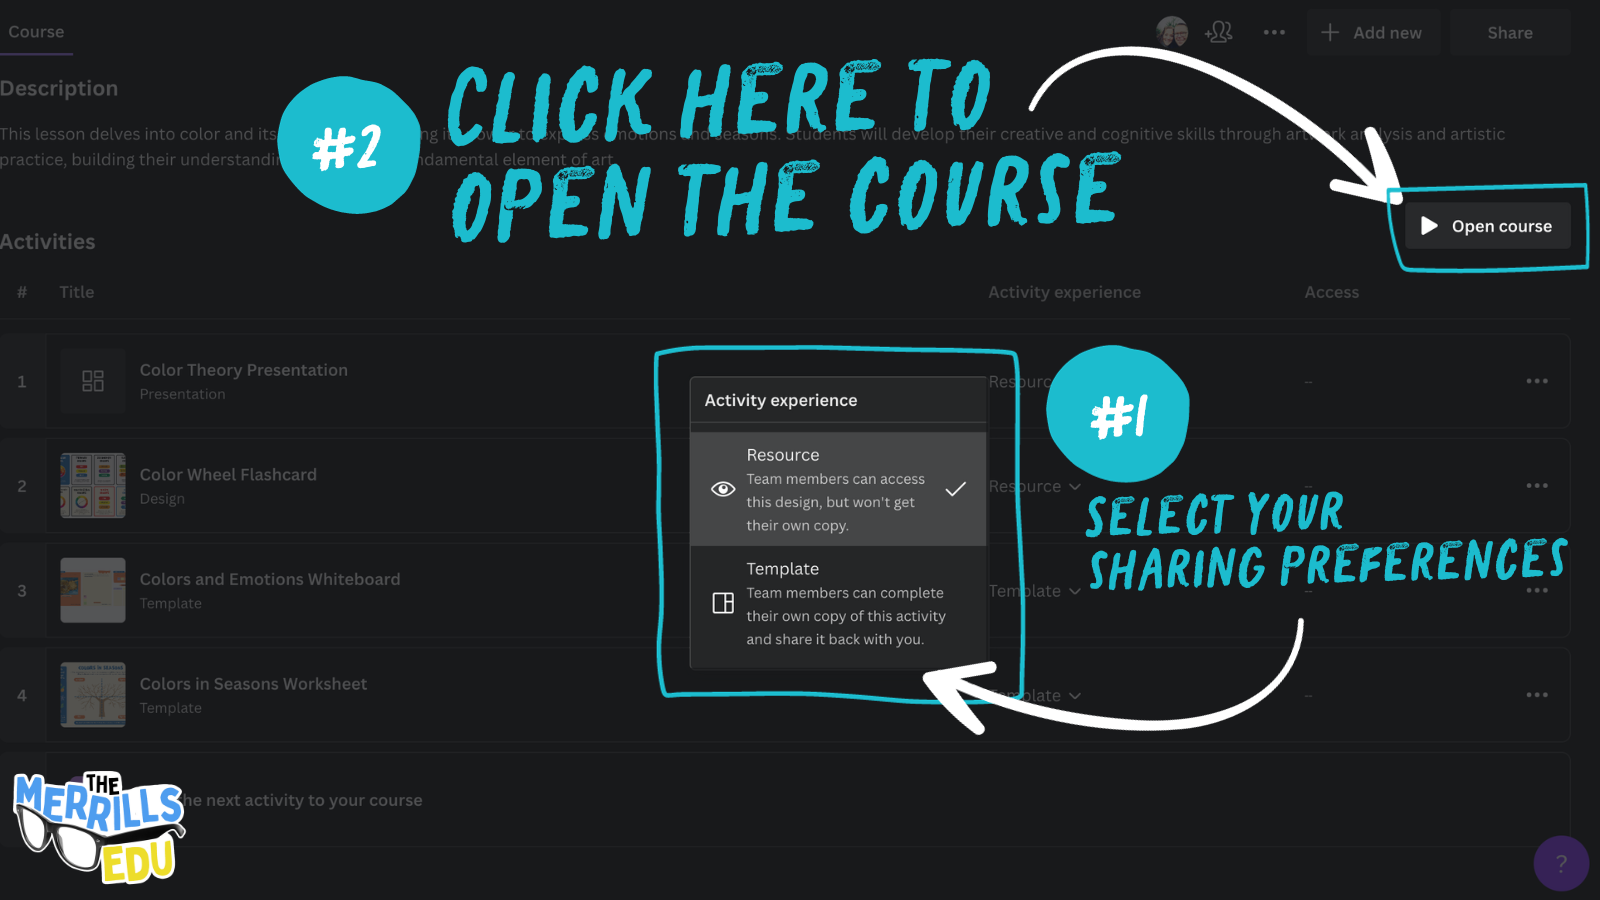
You are always able to remove or add content the course by returning to it and selecting “Add the next activity to your course.” You can even edit the description at the top of the page by clicking on the pencil icon. All of the contents within this course get saved into a Folder located in your Canva account. If you need to revisit the content, just click on the file from your dashboard.

Ready to Teach Lessons in Canva
We’ve shared how to find the EDU Library, and now you know how to design a course - but we though we would share some of our favorite lessons that we found in the library. For convenience, we’ve broken them down by grade level. Check them out below!

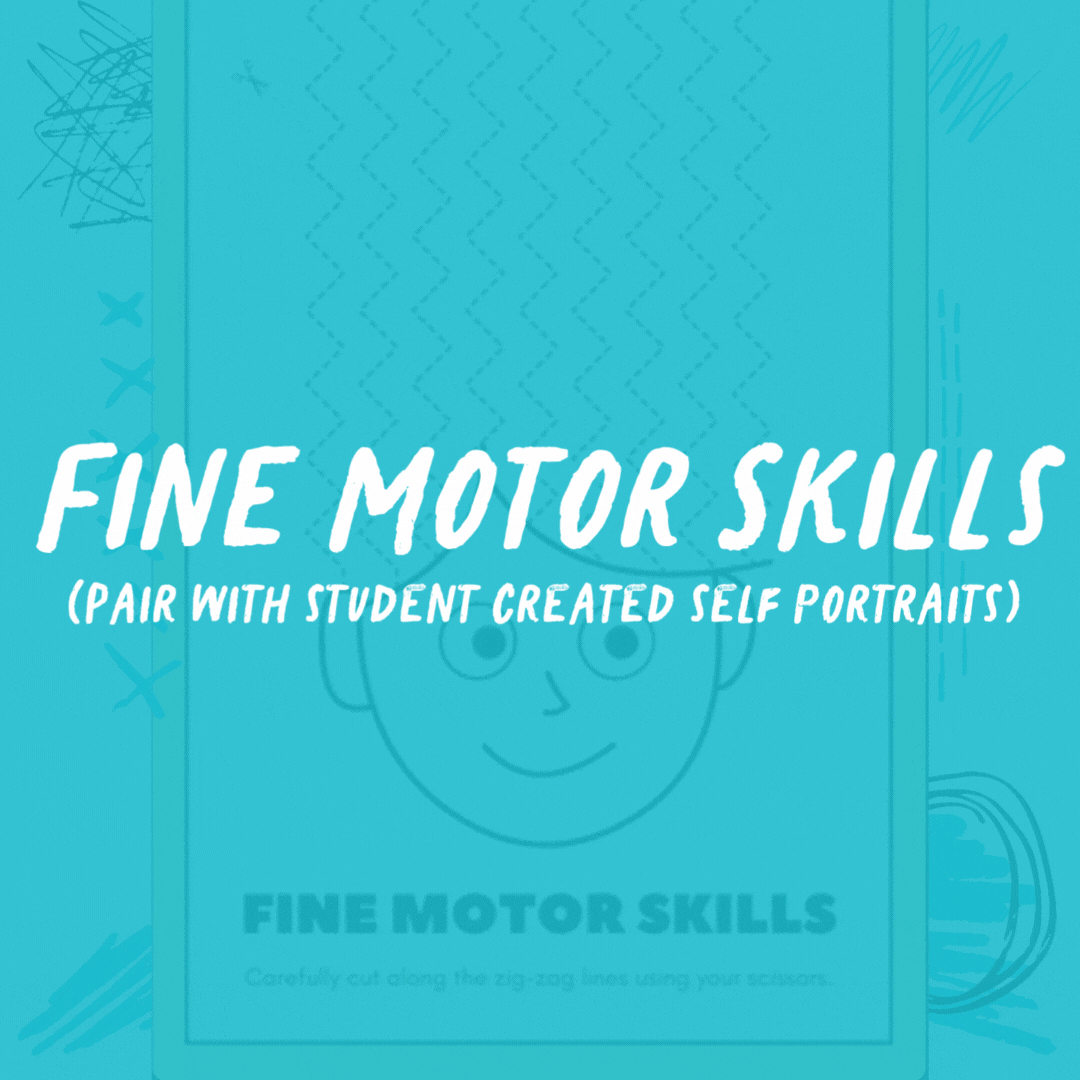
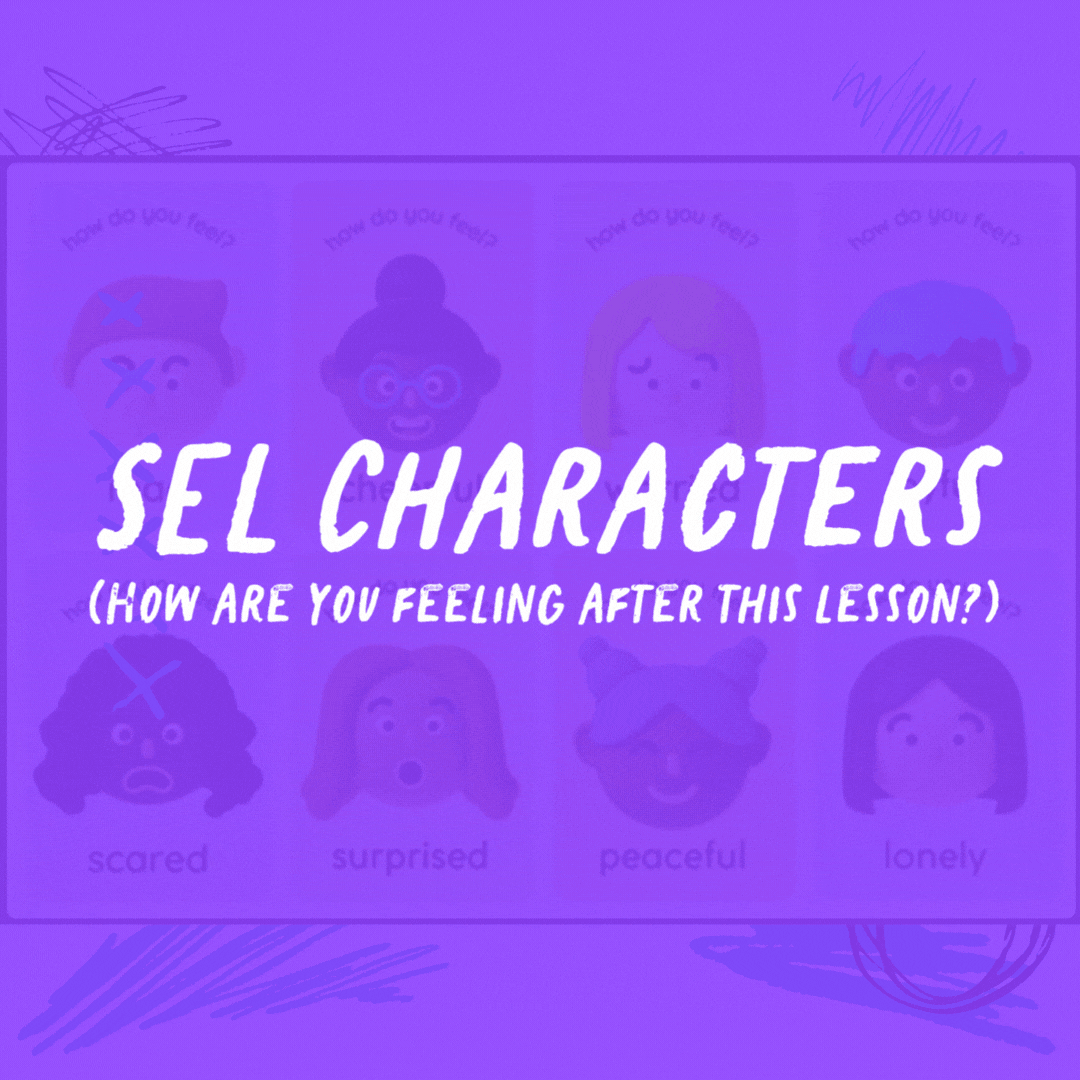


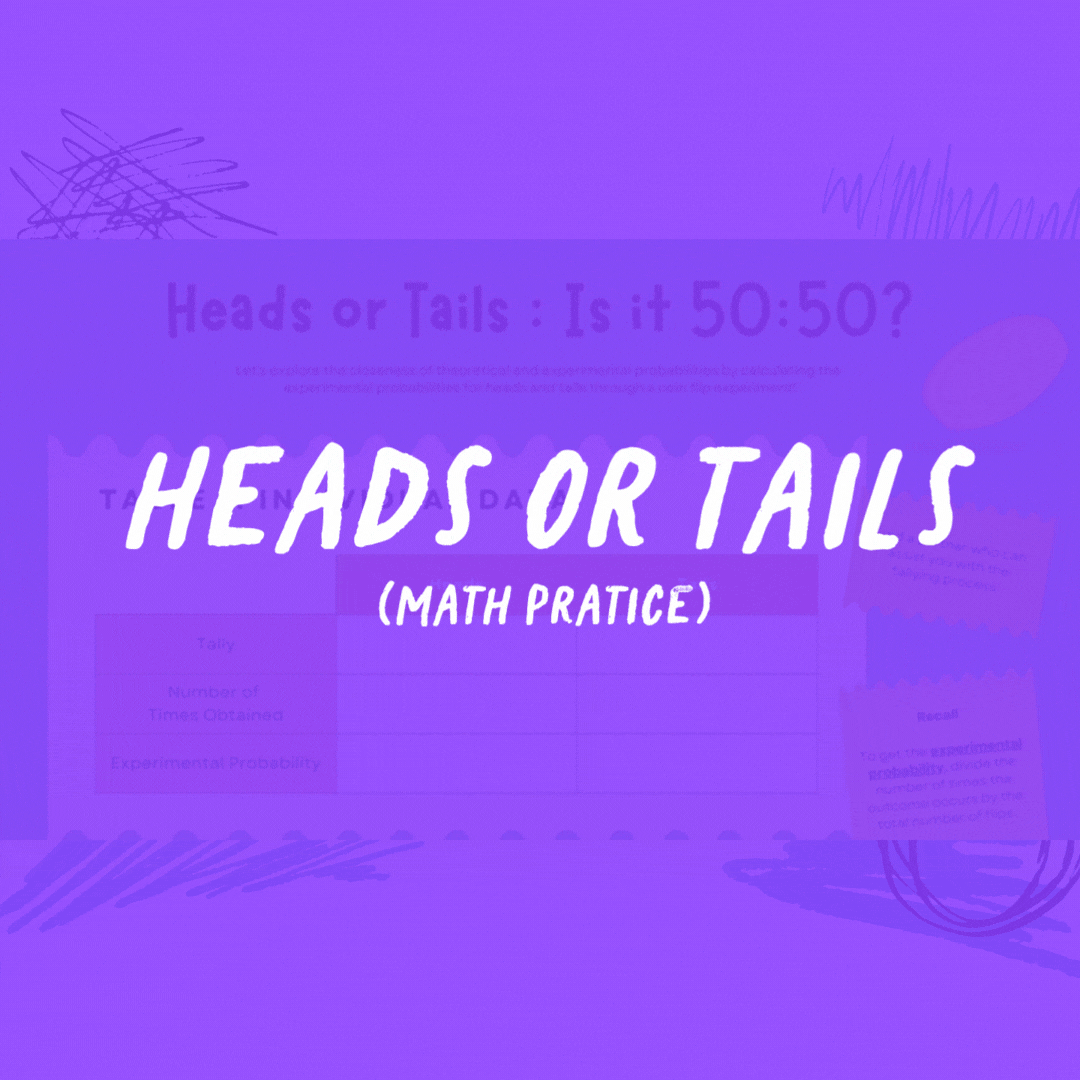


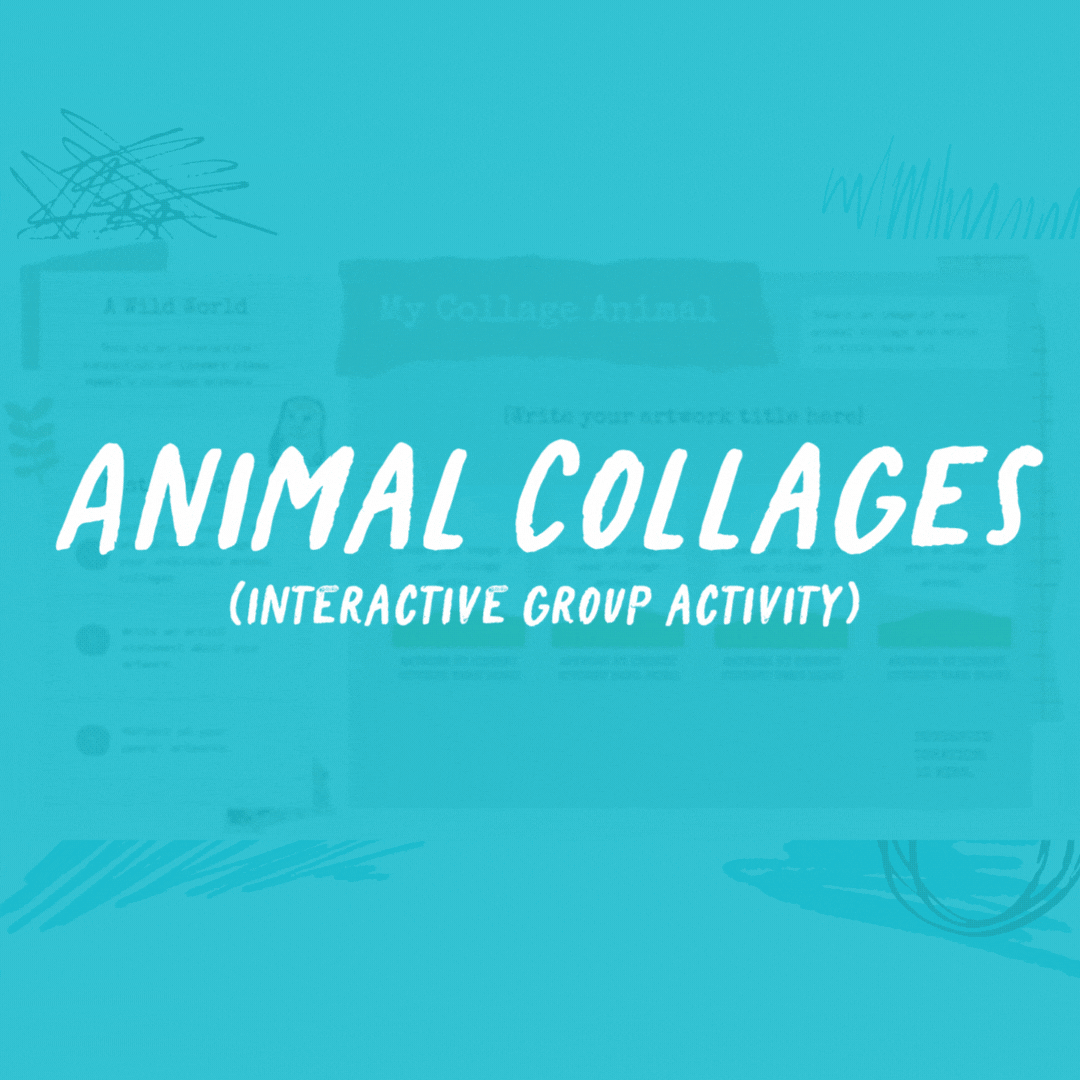


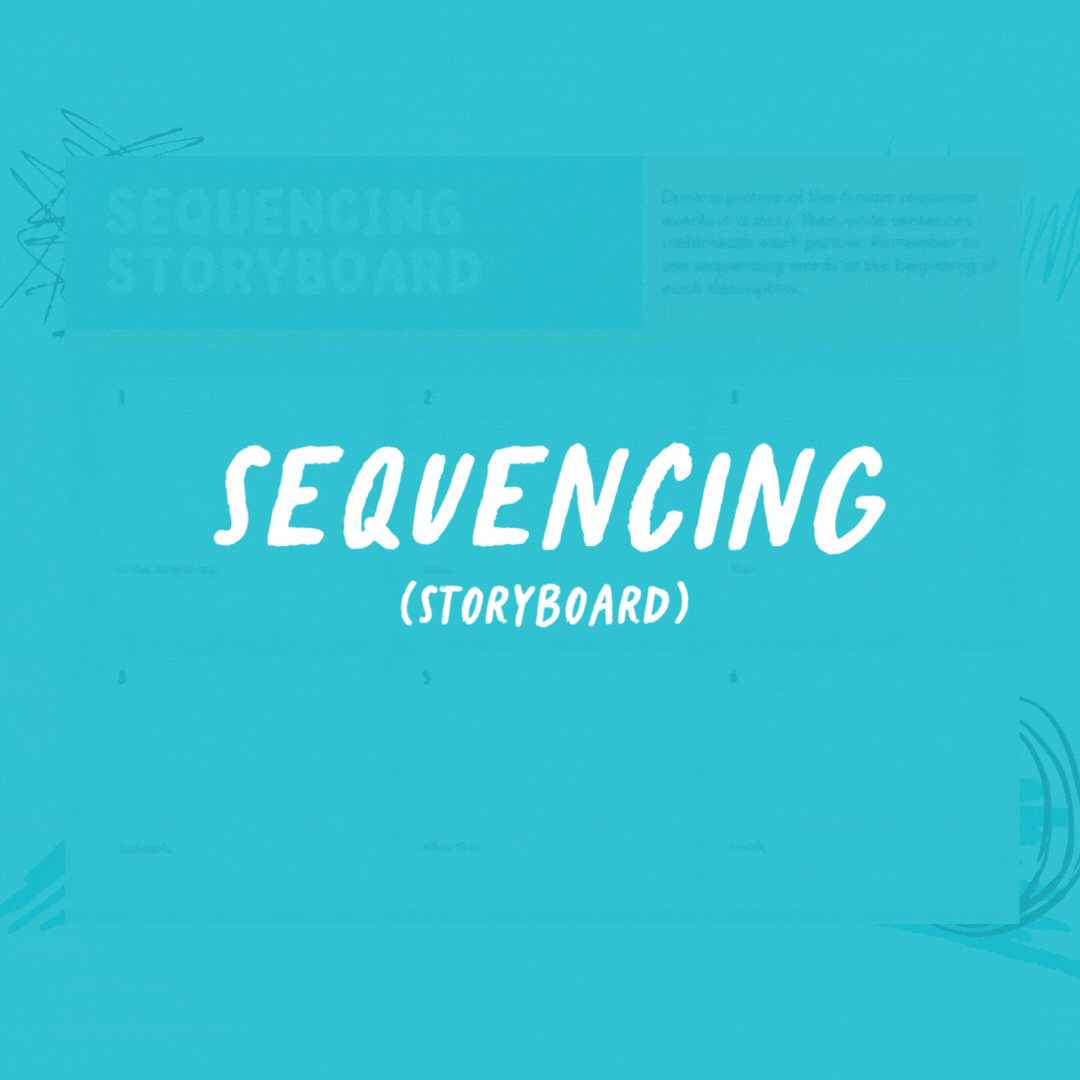


How to Use Magic Animate in Canva
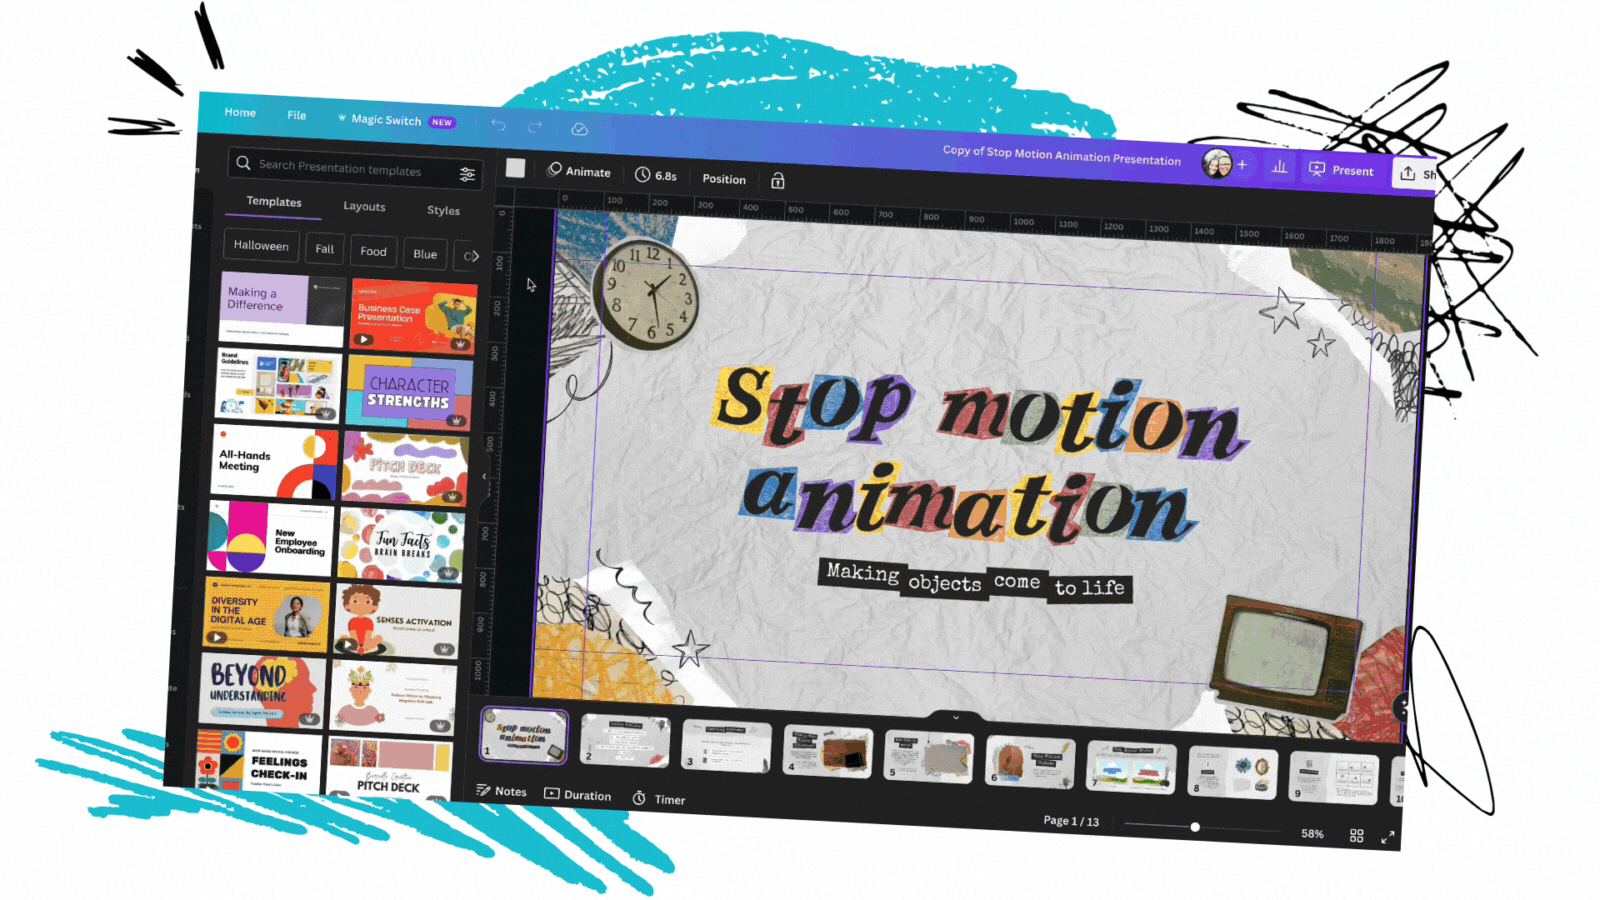
Canva’s Magic Animate instantly applies perfectly suited animations and transitions to your schoolwork. To try Magic Animate, open a project and then click on Animate. A new panel will open on the left hand side. Click on Magic Animate, then select your desired effect. Now, the animations and transitions will be automatically applied. If you’re saving the design, it’s important to remember that animations and transitions will not be saved if the file is downloaded as a JPEG or PNG. In order to preserve the animations and transitions, the file will need to be saved as a video/movie or GIF. Check out how it works below!

How to Use the Design Accessibility Tool in Canva

Canva’s Design Accessibility Tool ensures that educational resource you share is effortlessly designed with accessibility in mind. The tool will check for potential accessibility issues, create inclusive lessons and activities, and improve the accessibility of your designs without having to leave Canva. Here’s how it all works:
Open a Canva project, then click on File on the top left.
Then, select “View Settings.” A list of options will appear.
Now select, “Check design accessibility.” This will coach you through any potential issues with your design.
For a video tutorial, check out our YouTube channel here, or click on the video below!

How to Use Canva’s Magic Grab

Canva’s Magic Grab allows you to easily transform images. Using Magic Grab, you can make any image editable, even the text within it. Here’s how it works:
Start by uploading a photo or screenshot of an activity
Grab a part of the photo to edit, reposition, or resize.
This allows you to transform the look of the design.
This feature pairs well with other Magic Studio features like Text to Image. Give it a try!
For a video tutorial, check out our YouTube channel here, or click on the video below!

How to Use Canva’s Magic Write AI in the Classroom

Canva’s Magic Write is a handy teaching assistant. This tool will save you time, utilizing Canva’s AI-powered generators to create content. Simply type a promopt and watch Magic Write generate the teaching content. Or, try streamlining tasks like creating lesson plans or activities. As with all AI generated content, educators will need to review the material to make sure it aligns with learning standards. So, all of Magic Write is fully editable. To try it out, click on a piece of text, then select Magic Write to generate a different description.

How to Use Canva’s Magic Switch
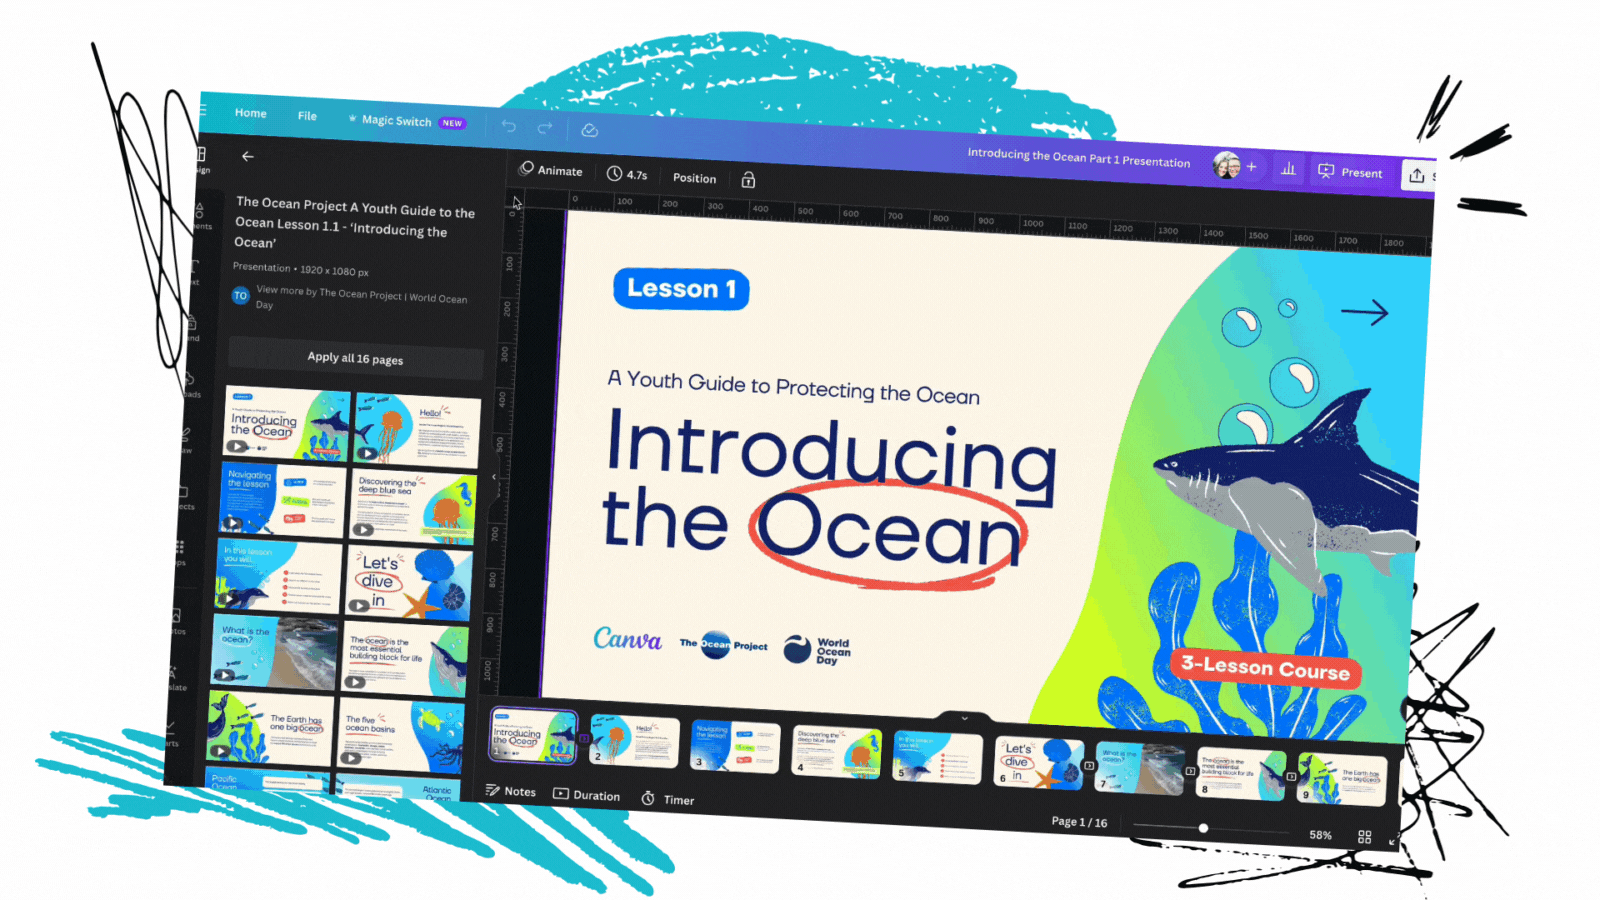
If you’ve ever been working on a Canva design, only to stop and wish you had sized the project for something else - then this is for you! Magic Switch will resize schoolwork into multiple formats all at once. So, now you can transform your presentations into a doc or a whiteboard. Previously, users would have to copy the design and then rearrage all the elements so that they appeared correctly on the design. Now, with Magic Switch, the AI does the work for you. Check it out below!
Open the Canva design that you wish to resize
Click on Magic Switch located on the top left
Select or search for your preferred size
Choose to either copy and resize into a new document (which will duplicate the document into the new size), or resize the current document (which will change the size of the current document that is open).
Let the AI do the work, and then open the template or design!
For a video tutorial, check out our YouTube channel here, or click on the video below!
-- Please follow us on social media and tag us with how you’re using these Canva activities in your classroom! 👓👗
For more tips, tricks and lesson ideas for making learning more interACTIVE, check out our books The InterACTIVE Class and Flipgrid in the InterACTIVE Class on Amazon!


How to Use Figjam in the Classroom
Figjam is a FREE, cross platform infinite canvas and digital white board that has powerful tools embedded right within the program. Whether your students are brainstorming on their next writing assignment, collaborating on math strategies, or taking a deep dive into a novel - Figjam is the right tool for you! Learn how it all works, grab some templates, and get started today!

Figjam is a FREE, cross platform infinite canvas and digital white board that has powerful tools embedded right within the program. Whether your students are brainstorming on their next writing assignment, collaborating on math strategies, or taking a deep dive into a novel - Figjam is the right tool for you! If you haven’t signed up for your free account, click here to do so! After that, check out some ways that we have used it, along with some helpful tips and tricks!
(click on any subheading to jump to that section)


Figjam’s Toolbar
Figjam’s tool bar is loaded with powerful tools for students (and educators). The first visible features are impressive, but it’s what’s hidden that truly brings out the magic of Figjam. Here’s a break down of the toolbar’s capabilities:

Stickies

Stickies can be placed anywhere on the canvas. Users can change the color of the stickies, and even type directly onto it. These can be placed from the stickies on the toolbar, or the shortcut is to type “s” on the canvas. One impressive feature to highlight is that educators have the ability to “show the authors” name. The defaults keeps this on, so when a student adds a sticky along with content, it will display their name on the sticky note. However, some times we don’t want students to know who is posting what. So, educators can hide the author.
Voice Memos / Recordings

This feature is hidden within the power of Figjam’s toolbar. Voice Memos allows users to add audio recordings to the Figjam file. This can be done by students or teachers (no more repeating directions!), and here’s how:
From the tool bar, click “More.” A new window will open. Click on “Widgets,” then search for “voice memo.” This will add a microphone icon onto the canvas (tip: you may need to zoom in to see if if you’re too far out). Click the microphone icon to begin recording. You’ll have 30 seconds to add your voice. Once you’re finished, stop the recording and then it will be automatically embedded into the canvas. From here, you can add a title, name, or even what is being discussed.
Emotes and Stamps

Figma’s emotes and stamps can be launched by clicking on the wheel located on the toolbar, or by typing the “e” key. This is a great way for students to show that they agree or disagree with a particular idea. Users can toggle between emotes and stamps by typing “e.” One area of particular interest for us was that students also have the ability to use their profile pic as a stamp. This would allow them to add their own face to a particular thought without having to upload a picture.

Chat Cursor
When the classroom conversation is going well, you don’t want to interrupt the flow of learning with side comments. For example, when a student is explaining their thinking, others can explain that perhaps they also had the same thought in mind without distracting the pace of the conversation. To launch the chat cursor, type the “/” character, then start typing. Your message will only appear where your cursor is pointing - so be sure you have it in the right place. The message will only be visible for a few seconds before it disappears.

Connectors and Lines

Connectors connect sections in a Figjam file. To use connectors, make sure you have at least two sections that you want to connect. Then, click on the connector icon located on the toolbar, or use the shortcut of typing “x.’ Then, hover over one of the sections. Figjam will intelligently give you centered points of where to click. Find your starting point, then click and drag to the next section that you want to connect to. Let go once you find the center point on the second section. Now, the two sections will be connected. The same process works for lines. To access lines, click on the carrot (or ^) to toggle between both. You can also use the shortcut of typing “L” to quickly launch lines.
Timers and Background Music

With Figjam’s built-in timers and background music, you won’t need to worry about opening a YouTube tab to start them. Simply click on the upper left hand side of the screen, set your length and click play! One important feature to point out - sometimes your students are working diligently on their work and you may want to provide them with a few extra minutes. You don’t have to start a whole new timer, just click “+1 minute” to add the time. If you’d like to add background music, you can do that here as well. There’s a few options to choose from including “Acoustic Ambient, Lo-Fi Hiphop,” and our favorite - “It’s Friday!”
Hyperlinks

The ability for us to add content, specifically hyperlinks, is very important when using a tool. Figjam goes a step beyond and beautifully embeds your hyperlinks in a slick way. To add a hyperlink, simply copy the URL to the site that you’d like to add. Then, be sure to click on the canvas and then paste the url. Doing so will add a thumbnail of the hyperlink right to the canvas. This means links to places like Microsoft Flip, Wakelet, Canva, and more!
Voting
Figjam’s Voting tool allows users to cast votes on either the entire board / canvas, or just select items. To insert a voting session, click “More” on the toolbar. Then, click “Widgets,” and search for “Voting Session.” This inserts the voting session into the canvas. Click the purple “Start voting session” to begin editing. There are several options when launching a voting session, including naming what you are voting on, objects to vote on, votes per person and a duration of time that others can vote. Tip: If you want students to vote on certain items, you’ll need to select them before starting the voting session. Once you have everything set, click on ‘Start voting session.” This will embed the voting session onto the canvas. When the duration is over (or if you stop it), you will receive the feedback and totals of the responses!

Figjam Templates
If you’re looking for ideas, be sure to check out the ones found in Figjam’s community. There’s tons of pre-designed templates that you can add to your own library in just a few clicks. To preview Figjam’s community library, click here! Once you find a template that you like, click on it. In the next window, click “Open in Figjam.” This will copy the file into your own, so now you have a copy for yourself. Here are a few of our favorite templates:
Figjam and Draw

Figjam and Draw allows users to drawing boards for a collaborative drawing activity. Educators simply add in a prompt, then have students add their names and use the marker, highlighter, and shape tools to unleash their creativity! To download this template, click on the image or right here!
All About Me Figjam Activity

Figjam’s All About Me activity is a classroom activity where you have students introduce themselves and share more about what they like to do and their favorite things. However, we love putting a spin on this activity and asking students to use it when describing a character from a book, historical figure, etc. To download this template, click on the image or right here!
Vertical Graphic Organizer

The Vertical Graphic Organizer template is great when students are working to organize and plan their writing. This template is ideal for sequencing, constructing paragraphs planning, or story planning. Tip: Encourage the students to add stickies along side of the template for ideas, vocabulary terms, or even adjectives that fit the writing that they’re constructing. To download this template, click on the image or right here!
Exit Ticket: Bumper Sticker Activity

Quickly assess your students understanding with this highly engaging exit ticket! With Figjam’s Check for Understanding, students design a bumper sticker to represent what they are learning about. This could be something that they believe a character would say, or perhaps recreate the story’s theme. To download this template, click on the image or right here!

Figjam Classroom Examples
Using Coins (Math)

This template gives students coins that they can manipulate to make a number. The key here is to promote multiple ways of solving. So, when a student shows a strategy, we explain to the other students that they may not use that same strategy again. Instead, the can break apart the coins to show a similar, but different method. To download this template, click the image or right here!
Tracing Character Emotions

This template provides students with the opportunity to explain how they think the main character of the story is feeling. Students draw an emoji that they feel best describes the character at that point in the story. Then, they can use the Voice Recording tool to explain using their words. To download this template, click the image or right here!
Stay tuned for more templates coming soon!

Figjam Videos
-- Please follow us on social media and tag us with how you’re using these Figjam and Figma activities in your classroom! 👓👗
For more tips, tricks and lesson ideas for making learning more interACTIVE, check out our books The InterACTIVE Class and Flipgrid in the InterACTIVE Class on Amazon!


10 End of the Year Activities for Elementary Students
@TheMerrillsEDU share 10 end of the year activities for elementary students! this blog post includes actvities from Epic For Kids, Microsoft Flip, Canva, Metademolab, Adobe Express, Wakelet, WeVideo, Do Ink’s Green Screen, Wonderopolis and more! There are also FREE packets! Just print, copy and you’re read to go!

(Edited: May 4th, 2025)
The end of the year is a challenging time for everyone. Whether you’re shuffling state mandated assessments, preparing to move into a new room, or just clinging onto whatever focus your students have left - it’s important to remember one thing: Don’t count down the days. Make them count! We reserve these activities for the last ten days of school. Our students love them, and we hope that yours will too!
Please note: This blog post was hand-crafted and was not created using AI.
(Click on any subheading to jump to that section)


Virtual Reality Field Trip Day
Activity length: All Day

All that’s required to participate in our VR Field Trip Day is a computer / device and a wifi connection - no bus necessary! We wanted to make the experience unique, so the first stop our students make is the airport. They must “check in” before proceeding through “security.” Once they get through, they’ll see a departure sign indicating that all flights are now boarding. Time to head to the gate! Once the student arrive at the “gate” they will choose which destination they would like to visit. To head to that destination, students just click the image at the “gate” which will automatically take them there. Students can easily “hop on another flight” to a different destination (or go back to the tab that has the “gate” opened) at any time.

While they’re at their destinations, they can complete this packet. These activities may be done on paper/pencil/crayons or digitally. The students can add a picture of each destination in the polaroid frames (there are two pages: two pages with 5 frames, and one page with ten - just pick which one you want to use and delete the other), and include the location on the label. Students can also design a sticker to put on their suitcase for each destination. The sticker should describe the destination and should reflect what they saw on their trip. Next up is a pair of binoculars, where the student will illustrate or design an image of their favorite destination. It wouldn’t be a trip without a souvenir, so now they’ll have to design a t-shirt from one of the destinations they visited. Last but not least, double check to make sure that you have visited all ten locations!

Artist Day
Activity length: All Day

Artist Day is the day where we build the confidence of our artistic abilities. First up, we read about what artists do. There are several books available for free on Epic For Kids. We enjoyed reading: “Artist Studio,” and “A Squiggly Story.” Once we’ve read these, it’s time to put our skills to the test. We’ve curated some of our favorite drawing tutorials from YouTubers, “Art For Kids Hub.” The students can pick and choose which videos they would like to watch. Then, they illustrate these on blank pieces of paper. Check out one of the videos below, and be sure to find their other content on their YouTube page here.
The fun is only just beginning, though! Students can upload their illustrations to MetaDemoLab. This will scan their illustrations and create an animation of their work. But, let’s level up! Download the video file and then upload it to Canva as a video file. once it’s uploaded in Canva, remove the background. Then, add a different background of your choice. Now your illustration is wandering in a far away place! Check out the tutorial below to see how it all works!

Wild Life Day
Activity length: All Day
Wild Life Day is dedicated to learning about two related animals: Elephants and Manatees! We kick things off by watching back a previously recorded Flip (RIP!) Live event on Manatees from the Mote Aquarium. You can check out both events to the left and below! .
After watching, students use Canva, Google Slides, Powerpoint, Adobe Express, or paper to create an ideal manatee habitat. After that, we watch the second Flip event. This time the topic is Elephants brought to us by The Elephant Sanctuary. Afterwards, repeat the same activity, designing an ideal habitat for Elephants. Now, with both habitats in hand, share your designs on a Wakelet or Padlet board. Students can use the comments to explain what both animals need in the habitats and why it’s critical for their survival. Check out some of our student examples made in Canva below!


Dance Day
Activity length: 1-2 Hours

Q: What kind of music do rabbits like to dance to? A: Hip-hop! Dance Day is a day dedicated to self expression for all students. We start off by reading several books. We liked these from Epic for Kids: “Artist Studio Dance” and “Dance, Dance, Dance!” After reading through these, students create their own dance moves. They can practice their moves by using their device’s camera on Padlet. Then, when they’e ready, they can create a video tutorial on Padlet of how to do their dance, along with how it should look. After that, they can watch each other’s videos and learn one another’s dances!

Weather Day
Activity length: All Day
Weather Day is dedicated to all the types of weather that the summer months bring. We’ll focus on: Thunder & Lightning, Wild Fires, Tornadoes and Hurricanes. Epic for Kids has a TON of content on each of these categories, but to save you some time, we’ve curated collections of each below. Click on an image to download the collection.


We like to have the students work in groups for these activities. Give each student a copy of the packet found here. Students pick one type of weather and then they’ll take turns reading through the books on Epic. When they find important details, they can screen shot them and add them into a collaborative Wakelet collection (see below). Using the content they have collected, they can choose important details about their weather type. These can be recorded on the circle map. We encourage the students to narrow down their facts to 6 key details. These six details can then be recorded onto the flow map. The next page has the students providing a five day forecast. Students can draw images on each day, and predict a high and low temperature. The last two pages are called the “teleprompter” pages. This is where students can create a script to read as if they were a meteorologist providing a forecast. This script can be used to create a weather video.


To find your local weather radar, type “_____(my state)____ weather radar gif” on google. Then, click on images to generate GIF files of your local radar. Right click and save the image of your choice, but remember to provide credit from the original source. To create a meteorologist video, students can use Canva, WeVideo, Adobe Express or Do Ink’s Green Screen. Simply upload the GIF file as the background, then add a green screen video of your student as the foreground layer. If you’re using Canva, remove the background of the student, and now they will appear in the weather radar. If you’re using WeVideo or Do Ink, just set the chroma key to the appropriate green color.
Once students have created their video, they can share their work on a Padlet or Wakelet board. Doing so will allow them to view each other’s work and easily provide an opportunity for you to share student work with families.

Water Day
Activity length: 2-3 hours

Water day is the day that we learn about some of the ocean’s most endearing creatures: Sea Turtles! We’ll start off the day by reading some books on Sea Turtles. You can download an entire collection of books from Epic by clicking here.
After we’ve built up some background knowledge, we’ll watch this Flip (RIP!) Live Event from The Mote Aquarium on Sea Turtles. Click here for the event!

After the event, we have our students design Sea Turtle hatching warning posters on Canva. There are lots of inspiring templates to help get the creative juices flowing. Just search for “turtle poster.” These can be shared around school to raise awareness and encourage students to be respectful while visiting beaches over the summer months.

To top everything off, we enjoy spending some time on this website. The Deep Sea starts at the surface of the ocean and plunges deep below, giving facts about different depths in the water. You can check it out by clicking on the image to the right, or right here!

Create Day
Activity length: 2-3 hours

Create Day is best paired with the book, “I Need My Own Country,” by Rick Walton. In this book, the readers are encouraged to create a very special place of their own, by you guessed it - creating their own country! You can get a preview of the book by clicking here, and purchase the book by clicking here.
After reading the book, students can complete the “I Need My Own Country” packet. This may be done digitally or on paper. First, students will design a flag for their country. Then, they’ll illustrate what their currency will look like. Last, they’ll assign jobs to their family / friends. After they’ve developed their country, it’s time to invite tourists! Create a commercial on Canva that encourages people to visit your country. Download your video, then share it on either Wakelet or Padlet. This will allow students to share each other’s country and even vote for “the most desired vacation spot!”

We know that some students will finish an activity like this before others, so here’s an idea for those who do…Let them design the next iPhone! Check out this website, “Design the Next iPhone,” and your students will become the creators of tomorrow’s technology! Check it out by clicking here or the image below!


Wonder Day
Activity length: 2-3 hours

Wonder Day is for any child who has ever asked “Why?” — and any adult who has attempted an explanation. We kick things off with another read aloud. Today’s selection is called “Just Because,” by Mac Barnett. This is a storybook for dreamers who are looking for answers beyond “Just because.” You can preview the book by clicking here, and purchase it by clicking here.

Next up, students brainstorm some of their biggest wonders. They can ask questions similar to what they read about in “Just Because,” like, “why do birds fly south for the winter?” Don’t worry, most of these same questions can be answered on one of our favorite websites: Wonderopolis! Click here to head to the website, and then search for the questions found in the book. Students can read these on their own (Immersive Reader can help them!), or try reading some as a while group.
After that, we watch Flip’s Live Event with the Mote Aquarium entitled, “Does it Snow in the Ocean?” This event describes what ocean animals do during the winter. Students will learn more about animals like sharks, sea turtles and reptiles. You can watch the event by clicking here.
Last up, we log onto a Padlet board and have a little bit of fun. We call this activity, “Wrong Answers Only.” In this topic, students post questions (like the ones covered today) and then classmates respond to their video with the wrong answer. It’s a little silly, but encourage the students to get creative with their responses. Make the poster wonder if that could actually be true!

NASA Day
Activity length: All Day
How do you go about hosting NASA Day? You “planet!” Get ready for an out-of-this-world day! NASA Day is the day is dedicated to all things space. We kick things off by reading some books about NASA astronauts. Check out our collections by clicking on the images below, or here (Mae Jemison), here (Buzz Aldrin), and here (Neil Armstrong).


After we gain some knowledge about these astronauts, we read two space-themed books: “Earthrise” by James Gladstone, and “Eight Days Gone” by Linda McReynolds. “Earthrise” highlights the Apollo 8 mission which captured the iconic photo of Earth rising from the rear of the moon. “Eight Days Gone” is about the Apollo 11 mission to the moon. You can preview “Earthrise” by clicking here, and purchase it by clicking here. You can preview “Eight Days Gone” by clicking here, and purchase it by clicking here.

After reading both books, students can re-create the Apollo 11 moon landing on Canva. They can take things to the next level by animating the astronauts, gear, or maybe even a passing comet or two! Have them explain what occurred, then they can download the project as a video. Next, save the video and then share it to Microsoft Flip. Students will be able to view each other’s work and share their thinking.


Now that they have some background knowledge, invite them to blast off on a mission to the International Space Station! All that you need is a computer / device and wifi. This website will take them on a VR tour throughout the entire space station. It also includes hotspots, or areas where additional information may be accessed. Click here to access the VR Reality Tour!

Another fun activity for learning all about launching into outer space is this website from Neal.fun. “Space Elevator” takes you from ground zero, all thee way into outer space - explaining sharing facts along the way. Click here or the image to the right to check it out! Lastly, if you students are having a hard time grasping
the size of space, or objects in space, let them check out this website. “The Size of Space” sequentially places all things space related. Check it out by clicking on the image to the left, or right here!

Adventure Day
Activity length: 2 hours

Adventure Day is the day where students get to travel around the world being tourists! The Adventure Day menu features tourist attractions like The Georgia Aquarium, Eiffel Tower, Boston’s Children Museum, National Portrait Gallery and more! Click here or the image to the left to access the Adventure Day page!

While visiting these destinations, students can complete the packed either digitally or on paper. The packet features tickets where students can explain where they visited, picture frames for students to illustrate photos, a coffee cup souvenir, and a fanny pack where they can design commemorative buttons for each location. To download the pack, click here!
-- Please follow us on social media and tag us with how you’re using these end-of-the-year activities in your classroom! 👓👗
For more tips, tricks and lesson ideas for making learning more interACTIVE, check out our books The InterACTIVE Class and Flipgrid in the InterACTIVE Class on Amazon!


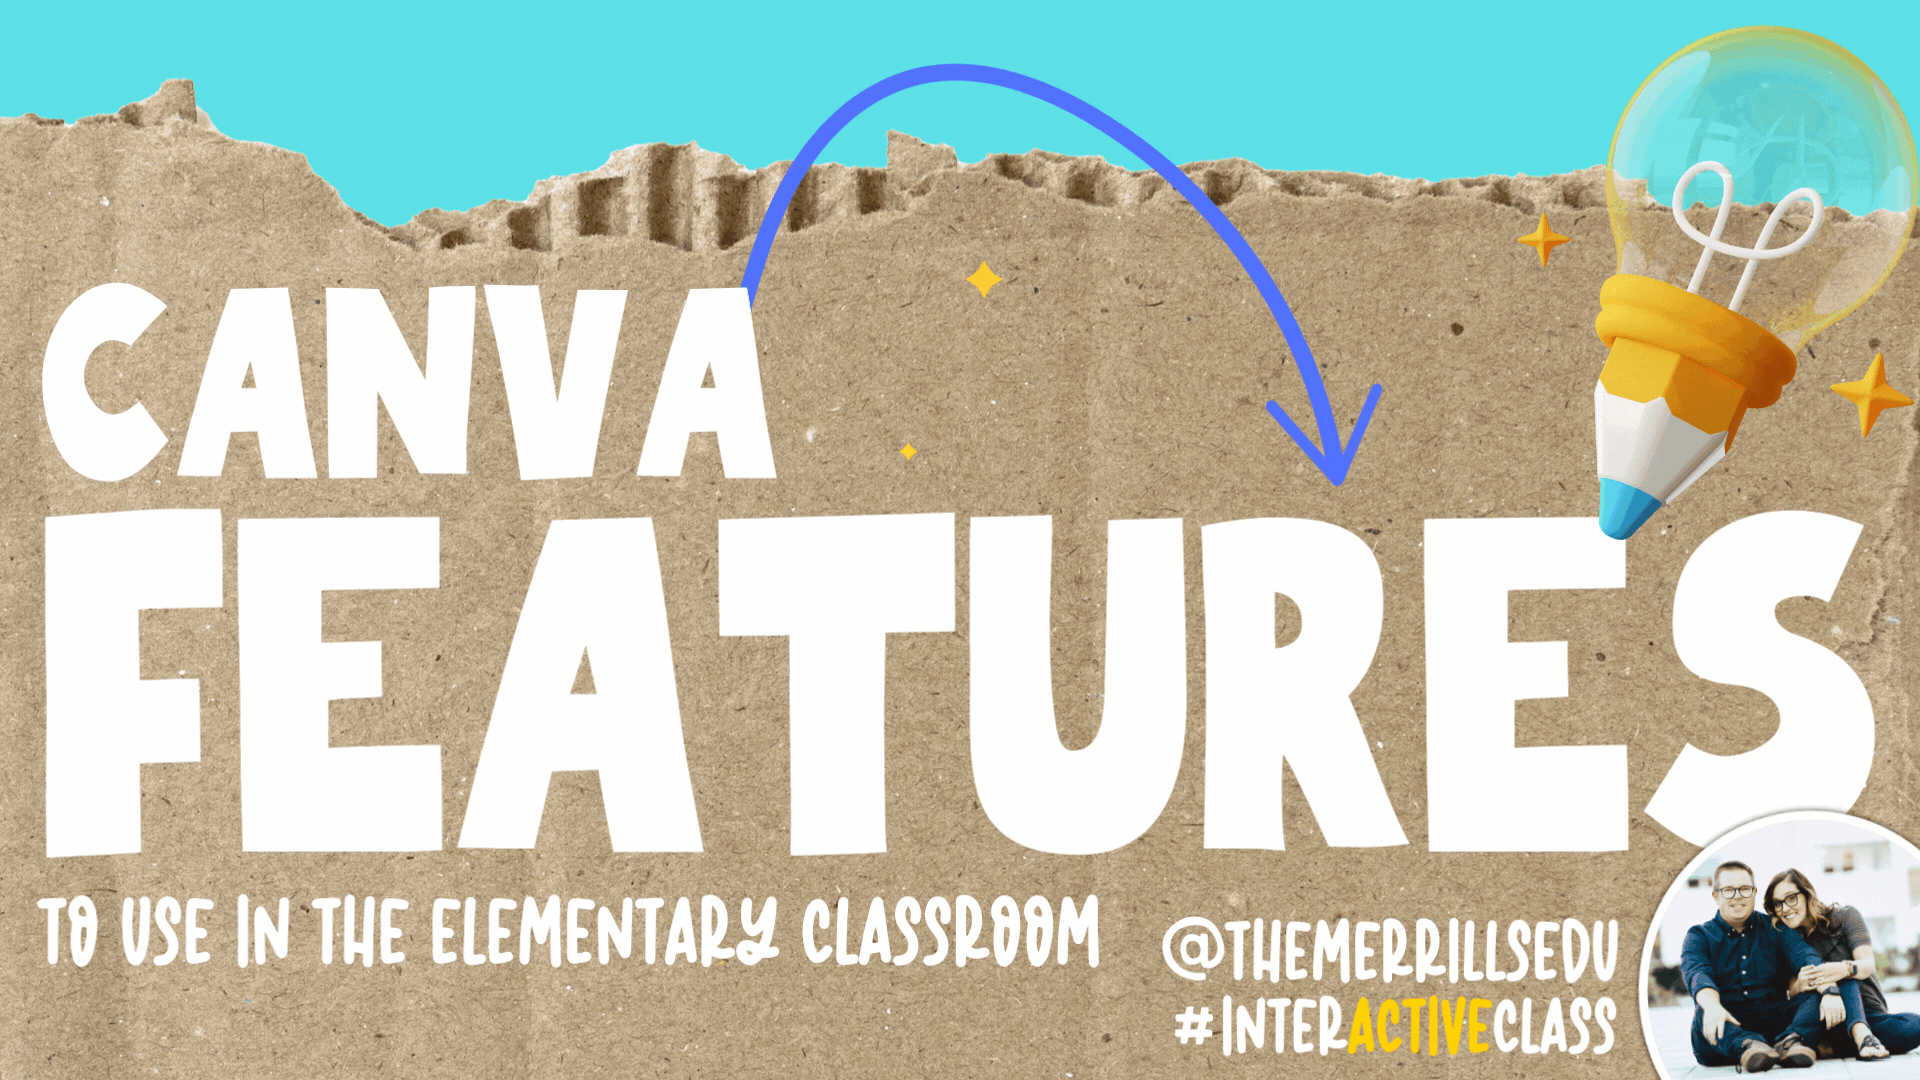
Canva Features To Use in the Elementary Classroom
@TheMerrillsEDU share some of the best Canva features to use in the Elementary Classroom! We’ll even provide some student examples for inspiration!

We’ve curated 5 of our favorite Canva features that we love to use. These are both teacher and student friendly! Check out how they work, along with some student examples below!
(Click on any subheading to jump to that section)


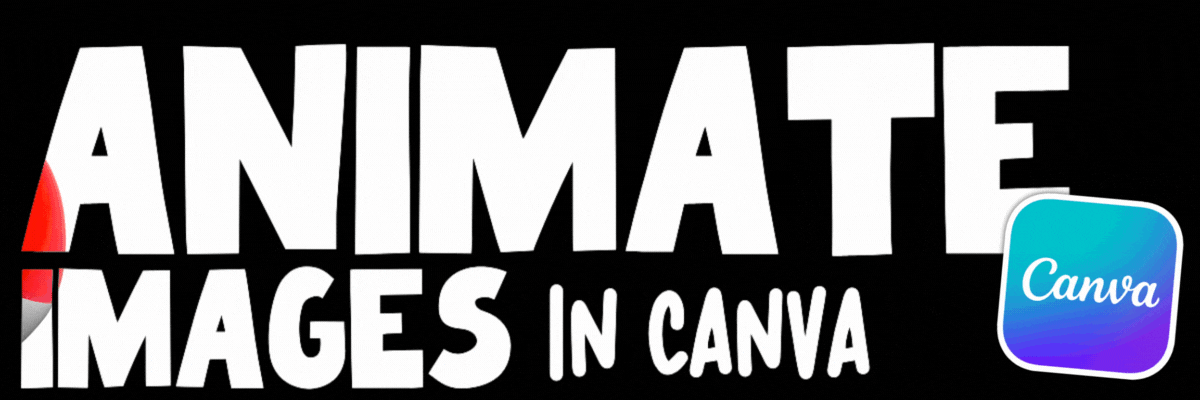
How to Animate Elements and Images in Canva
The ability to animate in Canva has been around for a while, but now users can create custom animations to any element or image. Enabling the animation allows the user to create a path, or custom movement, which the element or image will follow. There are options to fine tune how this looks, including stability and speed. Check out our video tutorial or read below to see how it all works:
Open a Canva project
Select the image or element that you would like to animate
With the image or element selected, click Animate
Click “Create an Animation”
Select and drag the image or element around the screen
The image or element will now be animated!
Student Examples and Ideas of Ways to Use Canva Animation
Here are some ways that our students have been using animation in Canva. We hope these inspire you, too!

Canva Animation: Animating the Apollo 11 mission
Students read the book: “Eight Days Gone”
Students animated the astronauts and recreated the events of the Apollo 11 mission

Canva Animation: Animating the items recovered in a lost and found box
Students read the book, “Lost and Found” (by: Bill Harley)
Students explained the sequence of events by animating items recovered
Canva Animation: Animating characters

Students read the book, “How to Catch a Star” (by: Oliver Jeffers)
Students animated the characters and retold the story

Using Layers in Canva
Have you ever been working on a project with lots of elements in Canva? Sometimes you’ll need to select a layer that’s in the back, but in order to do so - you have to move all the other elements out of the way. Well, now you don’t have to! Layers are the order of everything (text, images, elements, videos, etc) in your design. Enabling layers will allow you to select the specific item you wish to edit. Check out our video tutorial or read below to see how it all works:
Open a Canva project
Select any item on your design
Click the three dots
Scroll down to “Layers",” then click “Show Layers”
All of the items on that design / project will now be visible on the left
Click and drag and item to move the Layer to a new position!
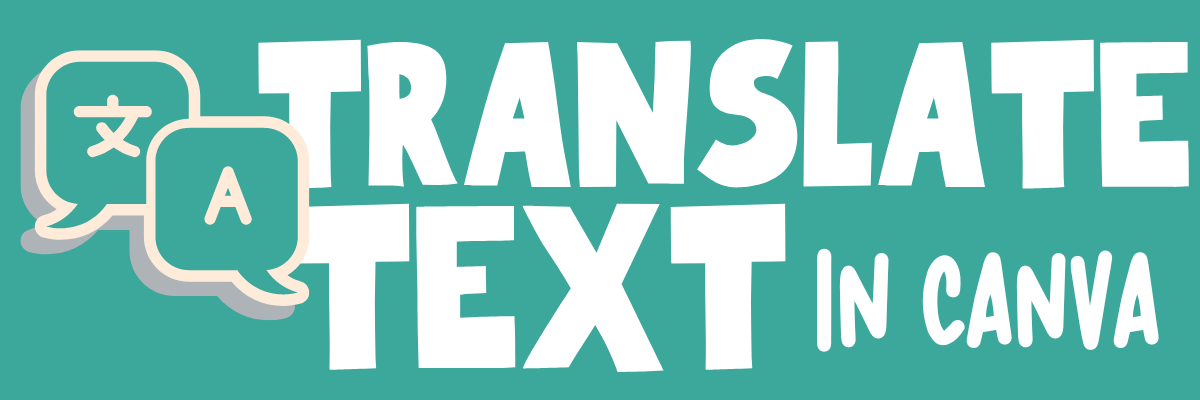
How to Translate Text in Canva
The ability to translate text in Canva is now live - and can be done in just 3 clicks! Translate is an online AI-powered machine translation tool built into Canva that automatically translates the text in your existing designs into your chosen language(s). You can access this tool for free to translate designs with a lifetime cap of 50 pages. With a Canva Pro or Teams subscription, you can increase this limit to 500 pages per user, per month. Check out our video tutorial or read below to see how it all works:
Open a Canva project
Click on “Apps” from the left panel
Search for: “Translate”
With the Translate app open, select the language you would like the text to be translated to.
Select the page you would like to apply the translation to
Click on “Translate!”

How to Use Canva’s Magic Edit
Canva’s Magic Edit allows you to easily remove distractions or add new things to your photos with a few clicks. Magically transform your photos by brushing over the areas you'd like to modify and then describing what you want to add. A few things to note here:
Magic Edit is currently not available in Canva for Education
It can't be used with Background Remover, Magic Eraser, or Autofocus on the same image.
Check out our video tutorial or read below to see how it all works:
Launch a new design project
Add an image
Select the image, then click “Edit Photo”
Click on “Magic Edit” (tip: if Magic Edit does not appear, you’ll need to switch to the new Canva editor)
Adjust the brush size and then highlight the area you would like to edit.
Now describe what you want to generate inside of the highlighted area.
Say abracadabra and wait for the results! Now you’re a Canva magician!

How to Use Canva’s Magic Eraser
Canva’s Magic Eraser provides an easy way to remove unwanted objects or erase people / things from photos. It’s as simple as highlighting what you want removed, and then let Canva do all the work! Check out our video tutorial or read below to see how it all works:
Launch a design project
Select an image
With the image selected, click “Edit Photo”
Click on “Magic Eraser” (tip: if Magic Eraser does not appear, you’ll need to switch to the new Canva editor)
Adjust the brush size and then highlight the area you would like to edit.
Sit back and wait for the results! The best part, you don’t even have to blow away all of eraser bits!
-- Please follow us on social media and tag us with how you’re using these Canva features in your classroom! 👓👗
For more tips, tricks and lesson ideas for making learning more interACTIVE, check out our books The InterACTIVE Class and Flipgrid in the InterACTIVE Class on Amazon!


How to Use AI in the Classroom
Artificial Intelligence (AI) has become a hot topic in education in recent years. It has the potential to transform the way teachers teach and students learn in the classroom. Here are six AI tools that you can use in your classroom immediately!

Artificial Intelligence (AI) has become a hot topic in education in recent years. It has the potential to transform the way teachers teach and students learn in the classroom. By using AI, teachers can create a more personalized learning experience for each student, and help them to achieve their full potential. Here are five AI tools that can be easily integrated into our classrooms.
(Click on any subheading to jump to that section)


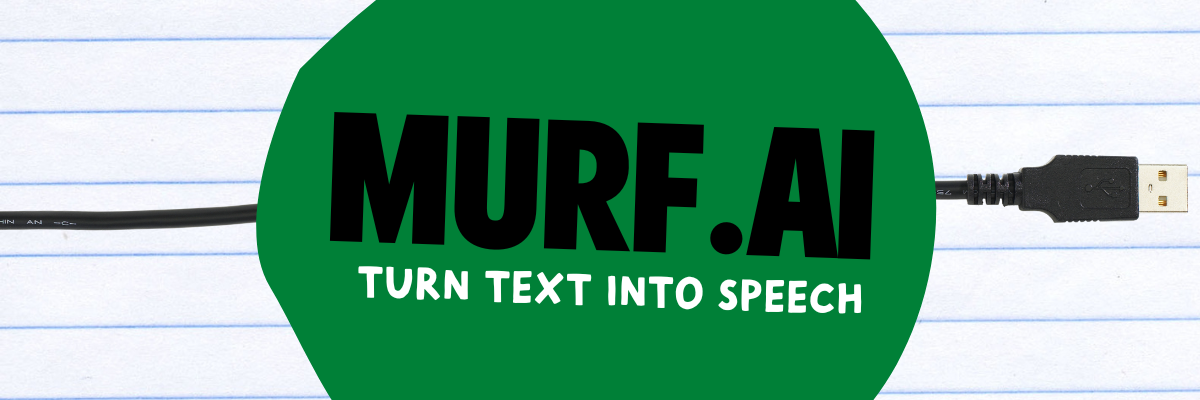


CoPilot:
Generate Lesson Plans & Other Educational Materials in Seconds
Education CoPilot streamlines your planning and prep with AI generated templates for lesson plans, writing prompts, educational handouts, student reports, project outlines and lots more.
This is an incredibly efficient way to gather content for those pesky units where you’re scrambling to find resources for. In our example, we were working on a unit covering this standard: SC.1.E.6.2 Describe the need for water and how to be safe around water. After entering some information (including the standard), we were provided five lessons all covering the content!
There are also workshop tools that can help generate educational handouts, writing prompts, parent emails, and quiz builder. All are easy to use and require just a few clicks to generate! Check out how it all works below!

Curipod:
Make interactive lessons filled with creativity, reflection and critical thinking.
Curipod is an interactive presentations software for education, meetings and workshops, sparking curiosity and engaging everyone. Create your own presentations, or find premade templates and inspiration.
Enter the topic of your lesson, followed by learning objectives and standards. Give it a few seconds and Curipod will generate an interactive presentation that is fully editable! In our example, we were looking to create content on this standard: ELA.1.R.1.1: Identify and describe the main story elements in a story.
Curipod also features a Discovery library where users can access content created by other educators. The content can be narrowed down by subject, or by searching for what you’re looking for! Check out the video below to see how it all works!
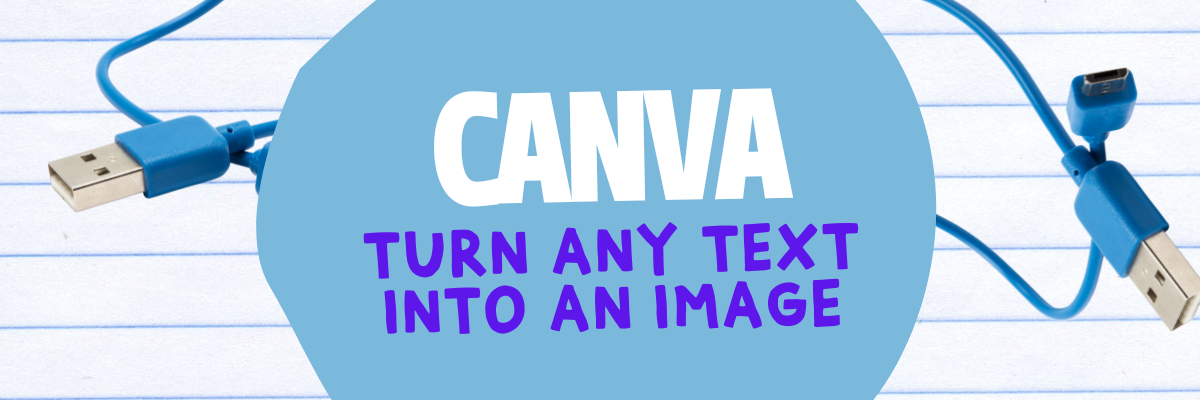
Canva: Text to Image:
Automatically Create the Images You’re Looking For
Now, whenever you can't find the perfect images, you only need to find the right words instead – then watch them magically come to life. Once you’ve entered your words, rather than combining existing images, Text to Image creates entirely new ones from scratch. From practical descriptions to whimsical concepts, Text to Image can create one-of-a-kind images, with the click of a button.
Canva is free for all educators, and “Text to Speech” is available in all Canva accounts now! Here’s a quick overview / tutorial!

Deep Nostalgia:
Video reenactment technology to animate
the faces in still photos
Deep Nostalgia is a video reenactment tool that will animate the faces in still photos. This feature uses deep learning technology to create animated, lifelike movements in static images, bringing old family photos to life.
Deep Nostalgia uses an artificial neural network to apply pre-recorded facial movements to a still photo. When a user uploads a photo, the AI analyzes the face in the photo and applies movements based on a library of pre-recorded facial expressions. These expressions are created by actors and used to simulate realistic movements such as blinking, smiling, and head tilting.
The result is a short video of a still image, where the subject's face appears to be moving and reacting to the environment around them. The effect can be striking, as it creates the impression of bringing a historical figure back to life. Check out the video below to see it in action!

Murf.ai:
Turn Text into Speech
Murf is a tool that allows users to turn typed text into speech. It offers a selection of 100% natural sounding AI voices in 20 languages to make professional voice over for your videos and presentations. Users can easily toggle the different voices to select a voice that is appropriate for the content.
Check out the video below to see how it all works!

Synthesia:
AI video creation platform
Synthesia AI is a video production software that uses artificial intelligence (AI) to create lifelike videos of people speaking in different languages or using different gestures, facial expressions, and body language. This technology allows users to create videos that appear to feature real people speaking and moving, even if those people never actually appeared on camera.
Synthesia AI works by analyzing a script, recording a voiceover, and then mapping the speech to a 3D model of a person's face and body. The AI algorithms then use this information to generate a video of the person speaking, complete with realistic facial expressions and body movements. The resulting videos can be customized in a variety of ways, including adding different backgrounds, changing the clothing or hairstyles of the virtual person, and altering the tone and speed of the voiceover. See it in action below!
-- Please follow us on social media and tag us with how you’re using these ideas in your classroom! 👓👗
For more tips, tricks and lesson ideas for making learning more interACTIVE, check out our books The InterACTIVE Class and Flipgrid in the InterACTIVE Class on Amazon!


10 Innovating Ed Tech Ideas to Try in 2023
@TheMerrillsEDU share 10 Ed Tech ideas that you have to try this coming year! Whether it’s animating drawings into characters, collaborating on docs, or assessing - we’ve got something for you!

If you’re looking for something new to try in the new year, you have come to the right place! We’ve compiled a list of ten innovating ed tech ideas that you can try RIGHT NOW! Check them out below!
(click on any subheading to jump to that section)


Meta Demo Lab & Canva

Meta Demo Lab is a website that will take your drawings and automatically animate them. The key is that the drawings need to be completed on white paper. Once you run through the process of creating your animation, you can download the file as an MP4. But, this is where the magic starts. Take your MP4 file and upload it to a video project in Canva. Once the video uploads, remove the background using Canva’s Background Remover tool. Replace the background with a new element of photo from Canva, and now your drawing is in an entirely different place. We’ve used this idea to have our students illustrate story book characters or historical figures and then animate them back into the setting or moment in time. Click here or the image below to visit the Meta Demo Lab website!


Immersive Reader & Microsoft Edge

Microsoft takes accessibility very seriously, and this new feature in Microsoft Edge is a prime example. This shortcut / hack allows users to turn on Immersive Reader for any Edge web page In the address bar, add "read:" in front of any link. For example, if you’re using Microsoft Edge and visit our website using this link:
read:https://www.themerrillsedu.com
Then, Immersive Reader will be able to read aloud the content of the website to you!

360Schools


360schools is a unique immersive 360° / VR education service designed for teachers and their students. This website brings hundreds of thousands of incredible 360° panoramas to your students. Educators and students can search for specific locations, share content, and even embed the 360 images into a website or LMS. There are even a few guided tours which will take users from point to point in images. For some amazing results, search “underwater” or “The Alamo!” Click here or on the image above to learn more and sign up for an account today!

Adobe Animate from Audio


Adobe’s Animate from Audio is a part of its Animate app. The difference between the two is that Animate from Audio is a free online converter and you won’t need to download the Animate app, or have an Adobe account. This can be done right within your web browser! Click here or the image to the right to visit the Animate from Audio website. Your first task is to select a character. Once you’ve done this, you can choose from a variety of backgrounds (tip: if you choose green, you can remove the background and upload it to Canva to drop your character into a background of your choice). The last option is the size. Once you’ve configured your project, just hit the record button and follow the steps to save your work. It’s that easy!
Canva Docs


Canva Docs is a visual-first document creator that allows you to design documents supercharged with videos, images, graphics, charts, and graphs. It lets you bring the same color, movement, and eye-catching visuals you usually reserve for presentations to your documents. So, now your students’ word documents don’t have to be boring! Another thing to love about Canva Docs is the ability to collaborate quickly and efficiently. Now, your students can brainstorm, write, create, and design their projects without ever having to leave Canva. Learn more about Canva docs by clicking here or the image to the right!

Animal Crossing Digital Room Transformation

Chances are if you’re an Elementary teacher, your kids are obsessed with the game Animal Crossing. So, we wanted to figure out a way to integrate this into the classroom. If you’re unfamiliar with the game, it basically works by using a character to walk around an island performing tasks, catching fish & bugs, and then selling them to a store in return for “bells,” or money. Then, you can use the bells to purchase items to put into your house. So how does this translate into the classroom? Well, if you’re looking for a classroom management idea or if you’re learning about map skills, this is for you! Students can use the ABD card to accumulate bells. The catalogue will allow them to purchase items using their bells. The items purchased can go into their house - which they have picked out on the class map. Check out the explanation in our video above, or download each item below!

Each student gets an ABD card. Students can earn “bells” by completing tasks or doing jobs around the classroom. Click here or the image above to download the ABD card!

Students use their bells from the ABD card to purchase items from the catalogue. We recommend sharing this template on your LMS, then your students an copy / past the items to their own homes. Click here or the image above to download the catalogue!

Students use Canva to create their own room (as a blank presentation slide). Then, have them share their slide to you. Next, have them pick out a house from the map. Then, hyperlink their slide to the master copy of the class map. Click here to or the image above to download the map template!

Microsoft Word - Share Link for Review Mode

Writing in the 21st Century looks different. Students are still using paper and pencil, but the possibilities no longer stop there. Now students of all ages are able to publish their writing to share with broader audiences. Microsoft Word has used accessibility features like dictation, Immersive Reader and more to help make this happen. But, educators know that sometimes students like to rush the process a bit. Enter “Share Link for Review” mode. When a student is working on a Word document, they can generate a share link which will allow for review. Then, they can share the link with the teacher who will then be able to leave comments or suggest revisions. Check out the video from Mike Tholfsen to the right for more information!

Microsoft Forms: Insert Images in Multiple Choice Questions


Let’s face it…Multiple choice assessments aren’t our favorite way of assessing, but there are times where we must use it. Microsoft Forms is a great way to generate a quick assessment, and now you can add images in multiple choice selections. This means you can add a picture to each answer selection, giving clear and concise expectations to your students. Learn how it all works by clicking the image to the right or right here!

Minecraft EDU

There are many possibilities with Minecraft EDU, but some of our favorite activities have been where students have created unique features in their worlds. For example, while learning about local Native American tribes, the students re-created their villages and included explanations for the different landmarks. Another class favorite was when the students created theme park rides and the experience had to include the plot and theme from the story. If you’re looking for a history idea, check out the museum template idea featuring information from World War I - where the students included important artifacts and information. Check out examples from all three below!

Students created theme park rides and the experience had to include the plot and theme from the story.

While learning about local Native American tribes, the students re-created their villages and included explanations for the different landmarks.

This is a museum template idea featuring information from World War I - where the students included important artifacts and information.

Osmo Words


Osmo Words has been around for a while, but educators are catching on to the fact that you can create your own custom Osmo Words Albums. The process isn’t as difficult as you think, and can be done in just several clicks. Here’s how:
Go to your myWords dashboard.
Click on Create New Album, and you will be automatically taken to the new album page.
Click on Add Title (or on Untitled Album) to add your album title.
Click on Add Image to upload a picture (or to take one, if you are using your tablet or phone). You can also drag multiple files to upload images in a batch.
Hover your cursor over the image you have just added and click the Edit button.
Type your chosen word in the Add Word field and select a difficulty. If you want some of the letters to appear as given on the screen, you can put them in parentheses. A(NT) will show as _NT, for example. Add a couple more words; the more the merrier!
Return to your album homepage to add as many images and words as you wish.
-- Please follow us on social media and tag us with how you’re using these ideas in your classroom! 👓👗
For more tips, tricks and lesson ideas for making learning more interACTIVE, check out our books The InterACTIVE Class and Flipgrid in the InterACTIVE Class on Amazon!


10 Education Websites to Check Out in 2023
Whether we need to tie gaps in student learning, or we need to take things to the next level, there are some great FREE teacher / EDU websites out there. We’ve hand-picked ten of our favorite, that we currently use, and are sharing them with you here!
Whether we need to tie gaps in student learning, or we need to take things to the next level, there are some great FREE teacher / EDU websites out there. We’ve hand-picked ten of our favorite, that we currently use, and are sharing them with you here!
(click on any subheading to jump to that section)


Math Learning Center
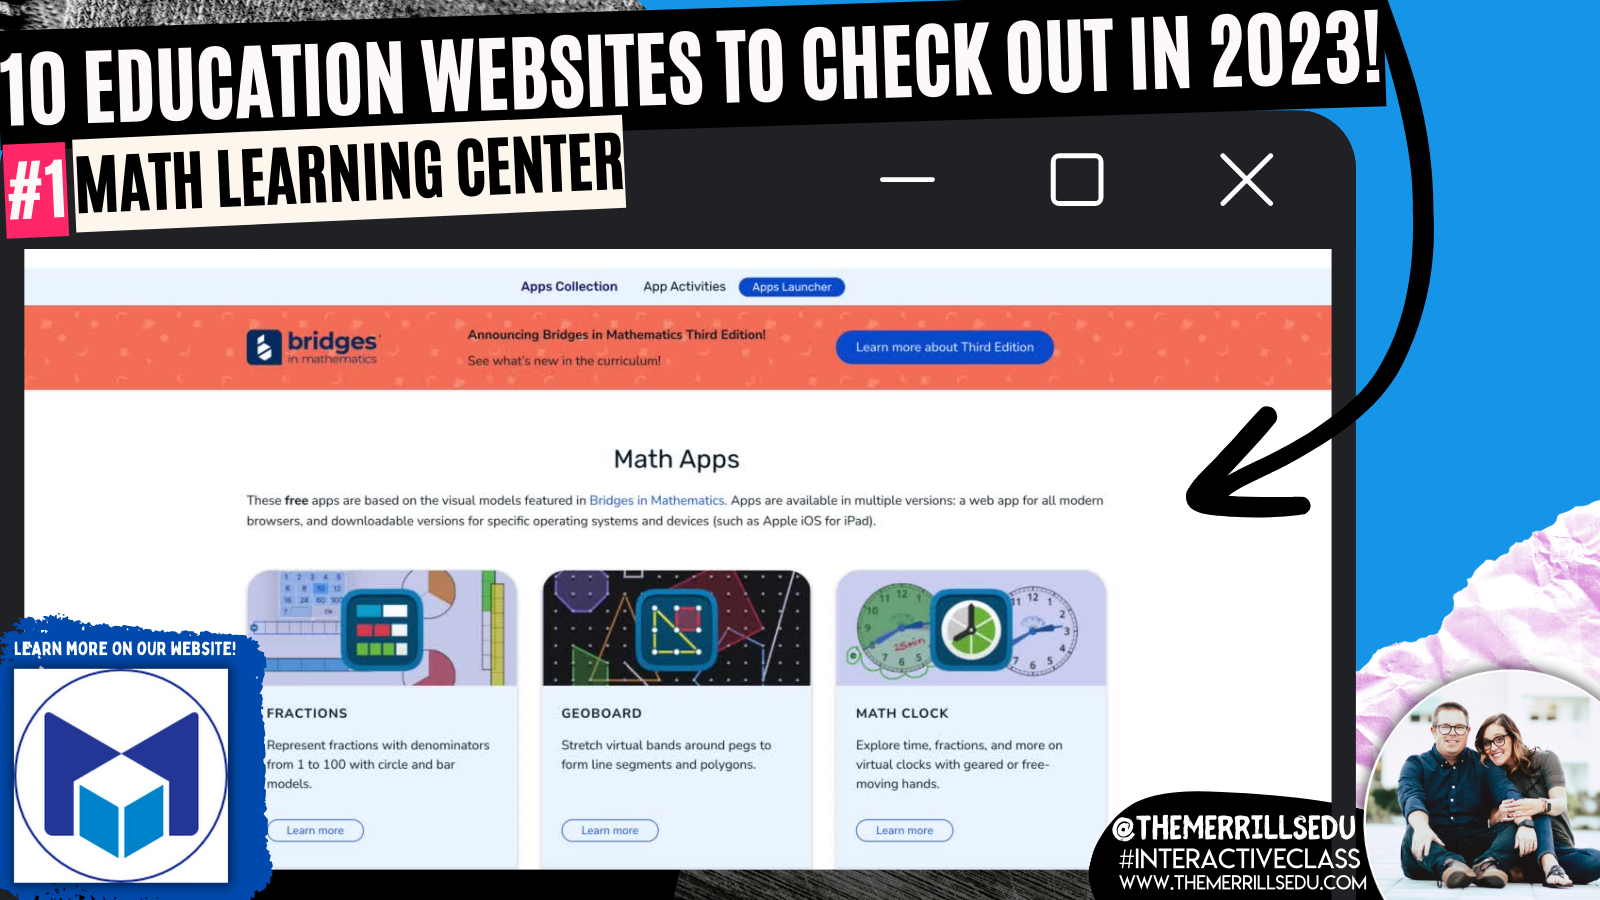
The Math Learning Center website was absolute life saver during remote learning. This website provides professional development, lesson ideas, and most important: FREE virtual manipulatives! Their apps are cross platform and will work with desktops, iPads and more. It’s a great way for your students to have access to these materials - especially since they seem so difficult to come by these days. Tip: If you have an LMS like Canvas, Teams or Google Classroom, you can hyperlink directly to the app that you’d like the kids to use. If you’re using mobile devices, you can download each app from the app store. Apps include: fractions, geoboard, clock, money pieces, number chart, number frames, number pieces, number liner, and more! Check them out by clicking the image below to learn more!
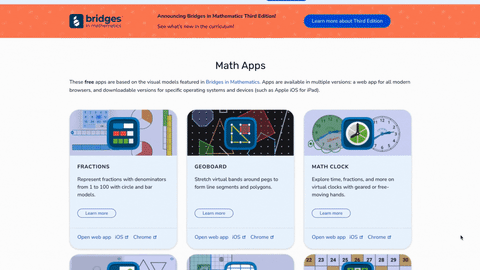

Slides Mania


Slides Mania is a site offering free creative PowerPoint templates and Google Slides themes. The entire site is operated by one fantastic human being named Paula. Paula has created TONS, and we mean TONS, of FREE resources for you. This site has it all, from educational resources, planners, formal presentations and so much more. You’re going to want to take some time here, as there are SO MANY goodies. Paula even has educational bundles, games, certificates, and more. Click the image above to learn more and visit the site!

Flocabulary
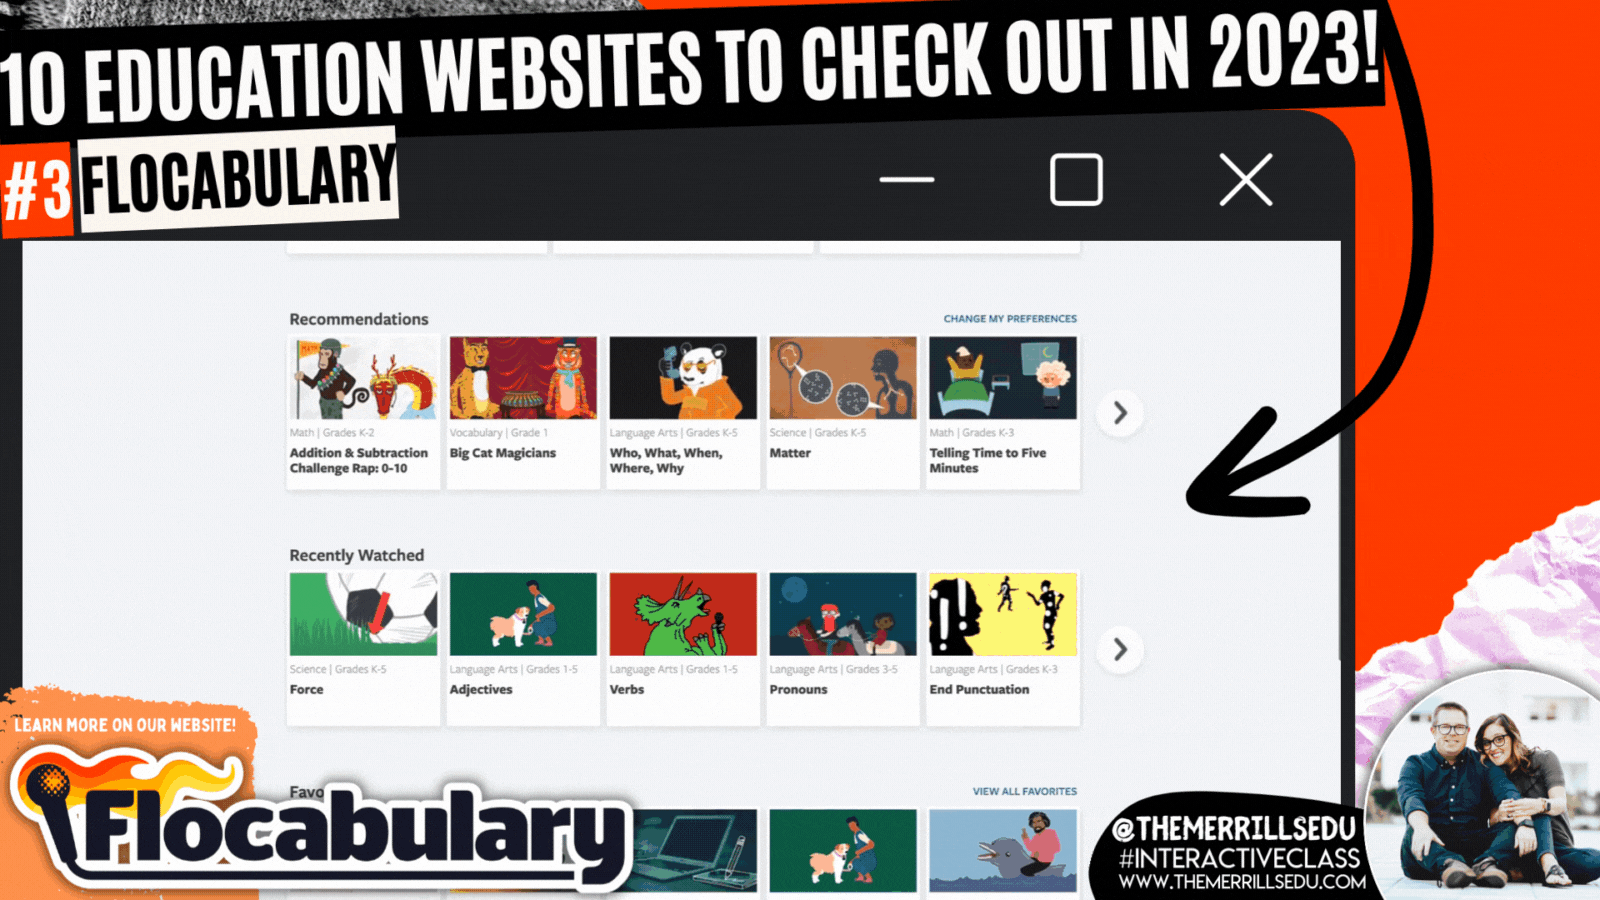

The Bright Horizons website explains that music ignites all areas of child development and skills for school readiness, including intellectual, social-emotional, motor, language, and overall literacy. It helps the body and the mind work together. Exposing children to music during early development helps them learn the sounds and meanings of words. Dancing to music helps children build motor skills while allowing them to practice self-expression. For children and adults, music helps strengthen memory skills. Enter Flocabulary. This website takes all of the topics that you would normally teach throughout the day, but then turns them into catchy tunes that will have your students reciting the words throughout your unit. Level it up with a built in activity where students can use beats from Flocabulary to with their own rap. Pair this with Microsoft Flip for a truly interACTIVE lesson! Click the image above or to the right to learn more about Flocabulary!

Would You Rather Math


Would You Rather Math (brought to us by John Stevens) is an incredibly resourceful website that differentiates itself by grade levels: K-2, 3rd-5th, 6th-8th, and 9th-12th. Each group features grade level appropriate content that educators can use to launch their math lessons. These prompts promote higher level thinking, requiring your learners to stop and process what is being asked before jumping to a conclusion. It’s a great way to get your students ready for the learning goal of the day. Check out some examples below and click the image to the right to visit Would You Rather Math!

Wonderopolis


Wonderopolis is an informational site that helps kids ask and answer interesting questions about the world. Every day, a new "Wonder of the Day" question is posted -- each designed to get kids to think, talk, and find learning moments together in everyday life. Wonderopolis is a place to find inspiration and provoke curiosity. We love using this site for enrichment or as an intro to a unit. What’s really impressive with Wonderopolis is the variety of content. Learners can find articles on everything from Space to Fortnite, to the Aztec Empire and why rainforests are important. Another important feature to include is that Wonderopolis now features Microsoft’s Immersive Reader, which means its articles can be read aloud to students. If you’re a Microsoft Flip user, you can find many different Topics in the Flip Discovery Library. Click here to check them out and click the image to the right to check out the Wonderopolis website!

Zoo Montana

Zoo Montana is a unique zoo with special insights into some of its animals. In addition to featuring teaching resources, you can also find LIVE animal cams. These change out, but currently you can view Bruno & Ozzy the (Grizzly) Bears and Winston the Sloth. What we really love about Zoo Montana is it’s partnership with Microsoft Flip. Students can watch a video from the Zoo and then respond in a Flip video. For example, students can learn about the Red Panda by watching a video from the Zoo. Then, they can create a habitat that they feel would be suitable for the Red Panda and share it on Microsoft Flip. You can grab this Topic from the Flip Discovery Library by clicking right here, or check out the other Topics in the Flip discovery Library by clicking the image to the right!

3 Act Math (Graham Fletcher)
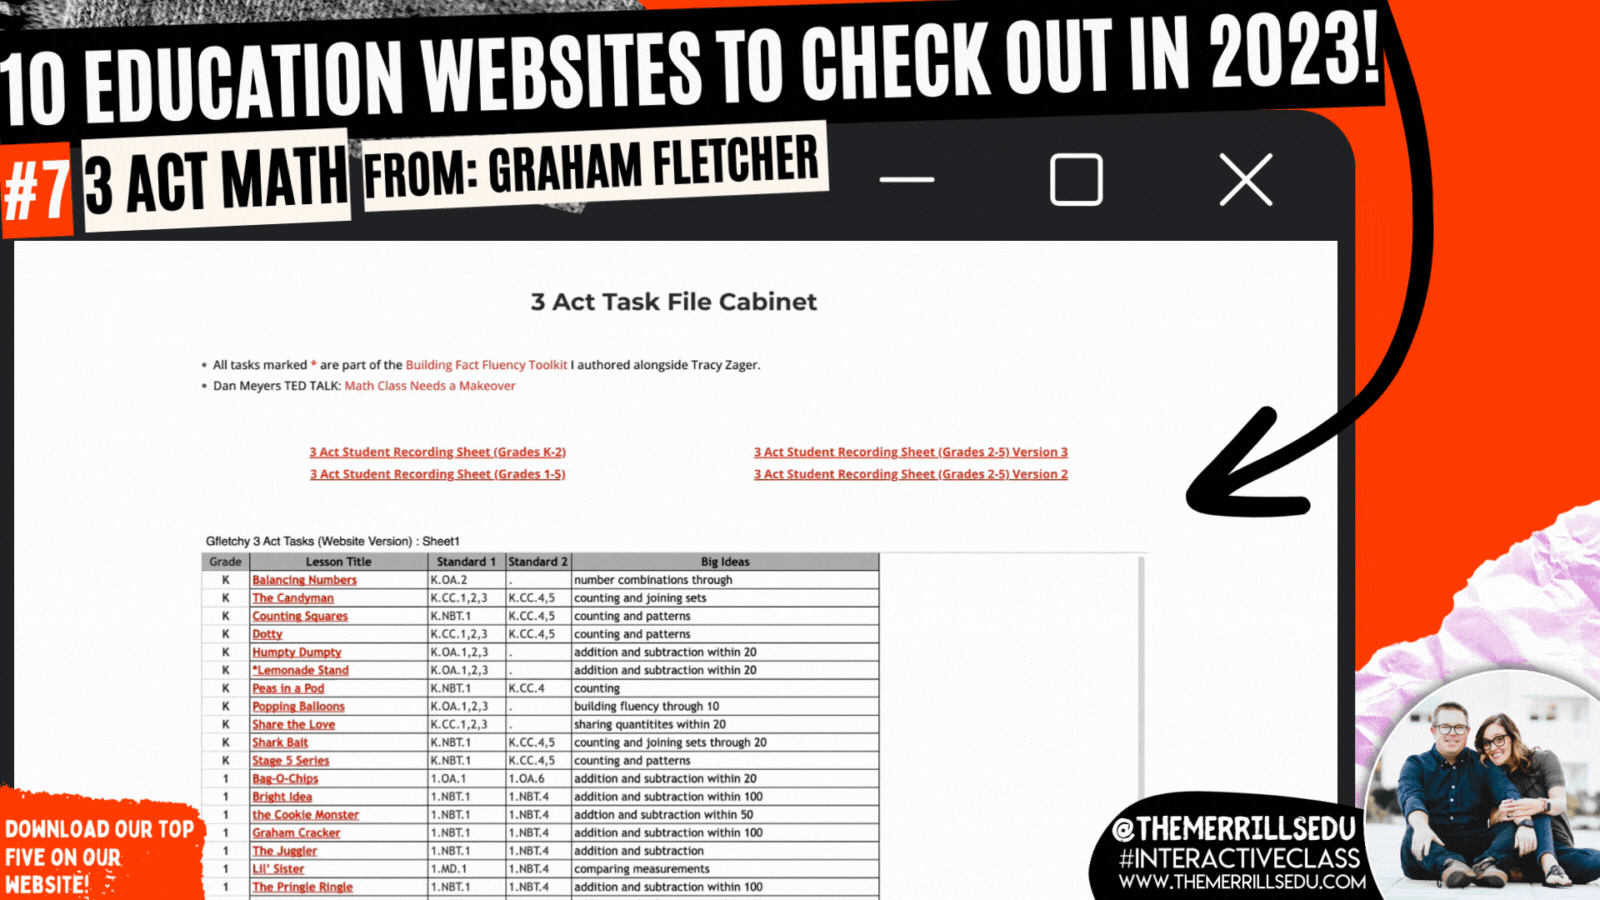

Graham Fletcher has an amazing website where he shares how to build fact fluency, progression videos (which we HIGHLY recommend), fresh ideas and 3 Act Tasks. A Three-Act Task is a whole-group mathematics task consisting of three distinct parts: an engaging and perplexing Act One, an information and solution seeking Act Two, and a solution discussion and solution revealing Act Three. Like in “Would You Rather Math,” we love using these ideas to launch our math lessons. Graham has done all of the hard work for you, creating videos targeting specific standards. Each task features a video and prompt - which can be modified and differentiated. Check out the full list of Graham’s 3 Act Math tasks by clicking on the image to the right!

Monterey Bay Aquarium


There’s a lot to love on the Monterey Bay Aquarium website. From it’s cute otters to sly sharks, to free online courses (in both English and Spanish), the Monterey Bay site has you covered! If you’re learning about anything that lives under the water, you’ll want to tie in this website. Students can log into LIVE web cams featuring 12 different species of animals. Our students’ favorite: the Shark cam which shares sharks and fish gliding through the aquarium’s exhibit. This could also be used as a calm down after returning from recess or transitioning from an exciting activity. Click the image to the right to check out the website and all of the animal cams!

Pebble Go

Pebble Go is hands down the best research website constructed for primary and intermediate level students. The site has tons of topics for students to learn about - all with accessibility in mind. Students can click on an article and have it read aloud. Each article is broken down into different tabs, targeting important content regarding the subject. For slightly older students, Pebble Go Next takes all of the amazingness of Pebble Go and kicks it up a notch. This version is more appropriate for 3rd-5th grades. It features topics that pertain to their interests. To level it up, pair Pebble Go with Buncee Create - the new partnership aimed at getting creative with its content. Click the image above or to the right to visit the Pebble Go website!

Epic


Epic is a teacher’s dream come true. A FREE digital library built on a collection of 40,000+ popular, high-quality books from 250+ of the world's best publishers. Books are categorized by subjects, topics, F&P levels and more. WE love that educators can create assignments and collections to assign to specific students (or groups of students). This allows for quick and easy differentiation. The community on Epic is very strong and a lot of material is shared. If you’re looking for a collection of books on the Planets, chances are someone already has created exactly what you are looking for. Just add it to your own collection and assign away! Check out some of our favorite collections below, or click the image to the right to head over to the Epic website!


-- Please follow us on social media and tag us with how you’re using these websites in your classroom! 👓👗
For more tips, tricks and lesson ideas for making learning more interACTIVE, check out our books The InterACTIVE Class and Flipgrid in the InterACTIVE Class on Amazon!


10 Education Apps to try in 2023
@TheMerrillsEDU share 10 different education apps that you’re going to want to try in the new year! We’ve got something for Literacy, Math, Social Studies and Science. Check it out!
2022 introduced to one of our favorite new education apps, new ways to collaborate, news ways to create, and so much more. We’re sharing 10 different education apps and how you can use them in 2023. Check them out below!
(click on any subheading to jump to that section)


Osmo’s Reading Adventure
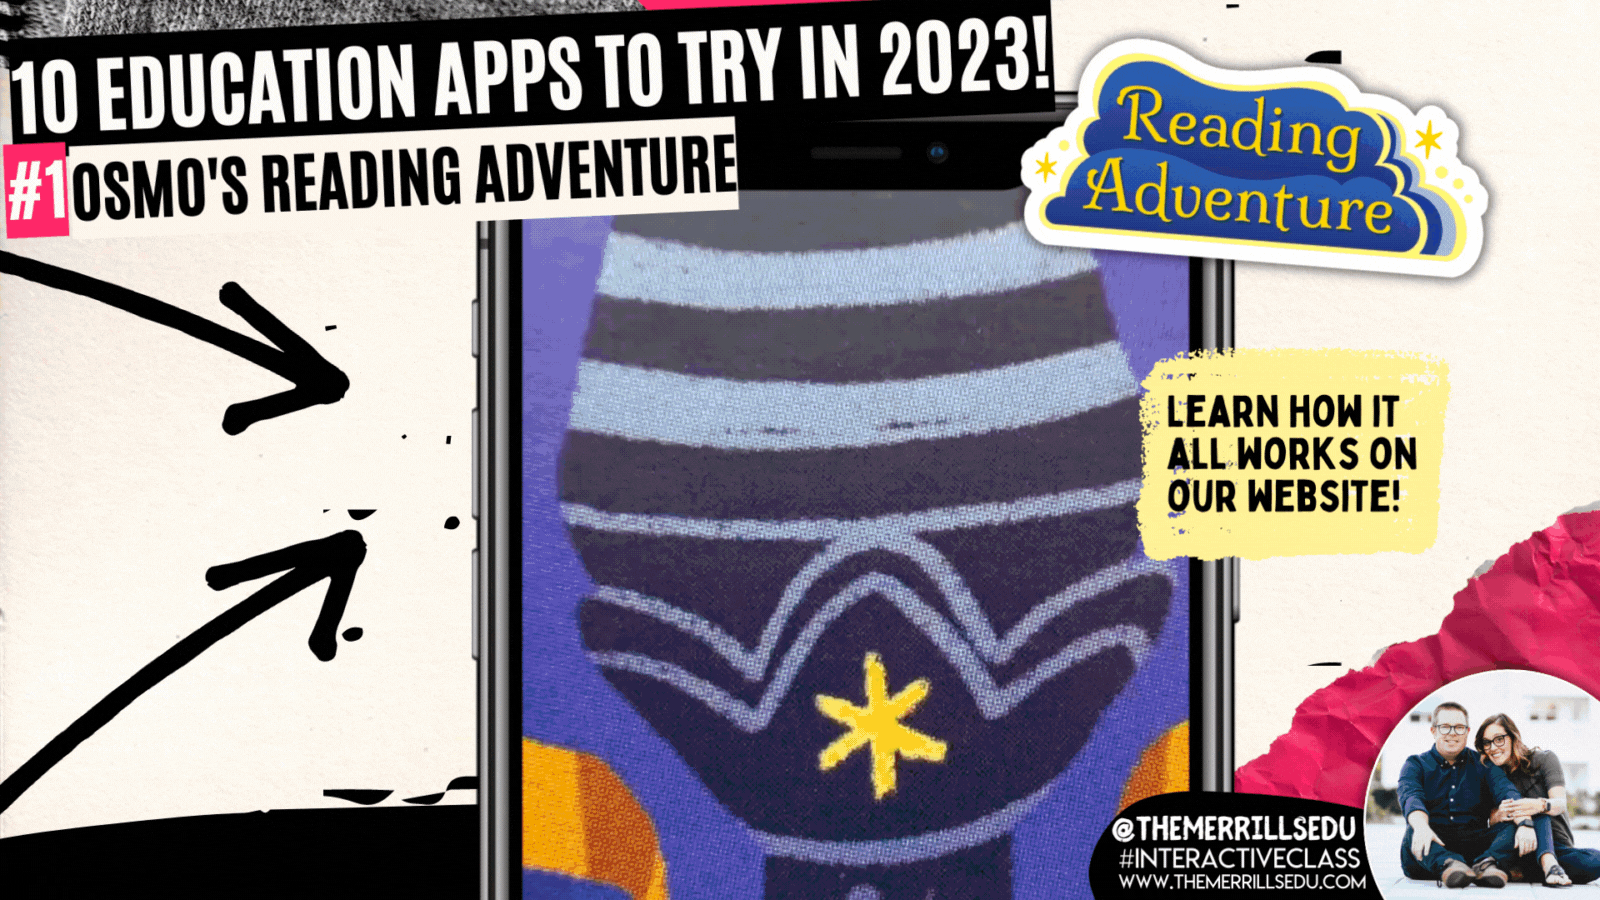
This past summer, we were introduced to Osmo’s latest addition: “Reading Adventure.” Reading Adventure is an interactive program that helps students learn to read. Reading Adventure uses speech recognition to create a personalized reading experience for your students, complete with actual books and a crystal wand. Developed with educators, Reading Adventure interacts with your child to give personalized feedback, increasing reading proficiency. The game features the characters Oliver and Nebula, who join your child on a quest to catch "Dreams" and return them to the Kingdom of Slumber. Check out how it works in our video below!


Book Creator
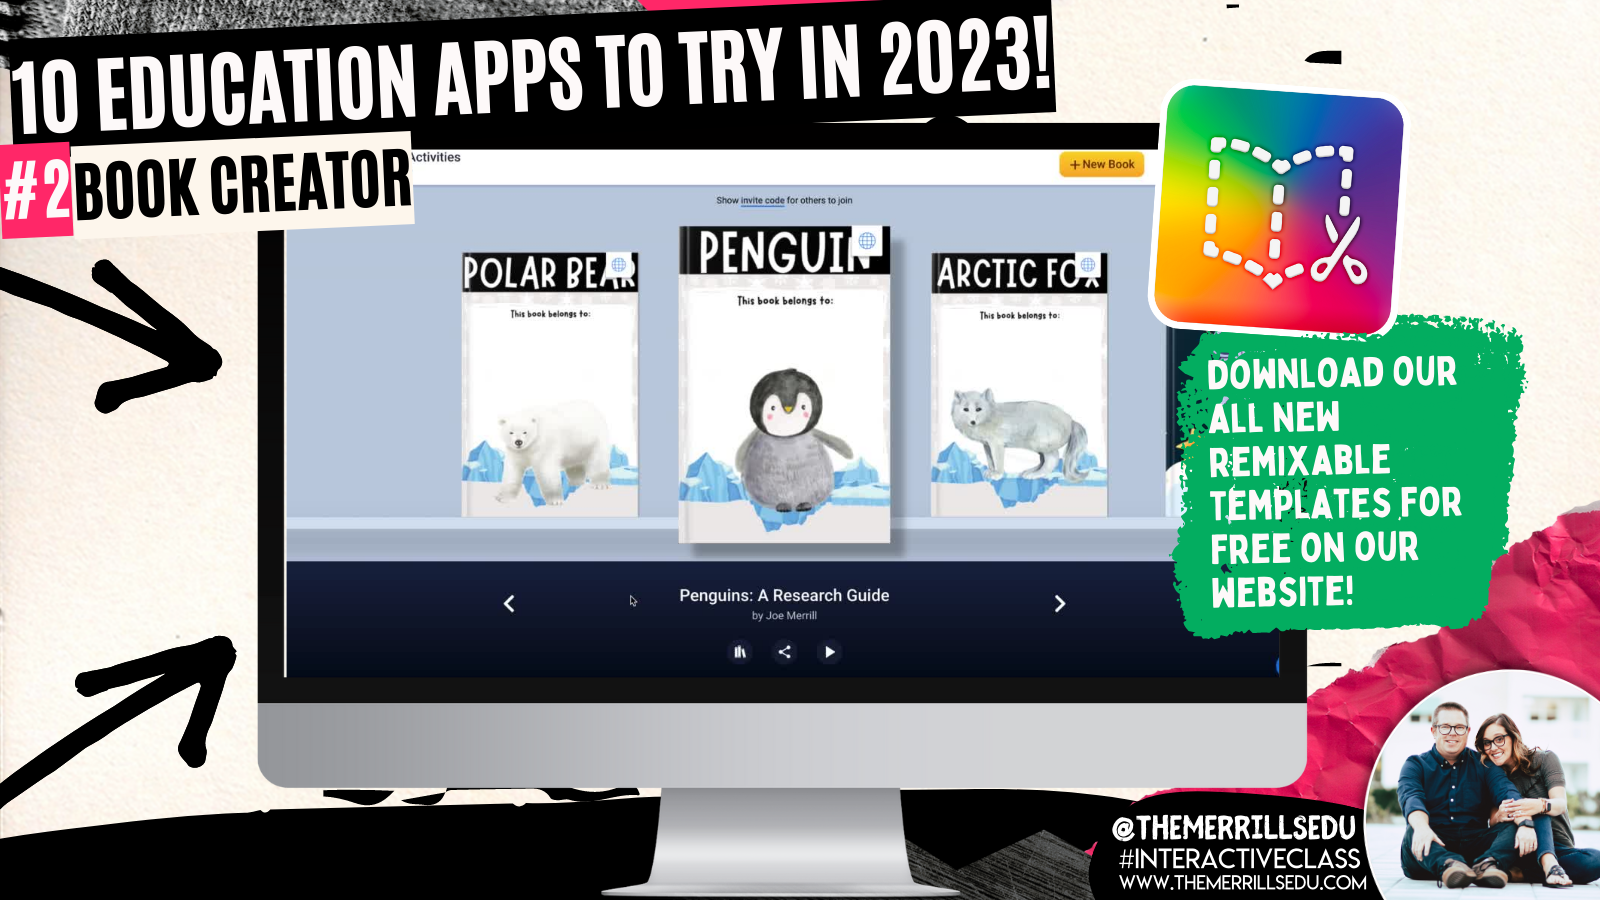
Book Creator announced some key updates this past fall. In addition to its integration with Canva, remixable books and comments, now users can crop images and import PDF’s. We’re HUGE fans of the Canva integration, which allows students to design using Canva without ever having to leave Book Creator (you read that right)! Learn more about this update by clicking here and checking out our blog post! our next favorite update has to be the ability to “remix” books. Think of these as templates that can be shared and edited / altered. We’re loving the designs being shared, and there are more appearing every day! To see some of our remixable books, click here or the images below. Let us know how you are using them!


Gimkit
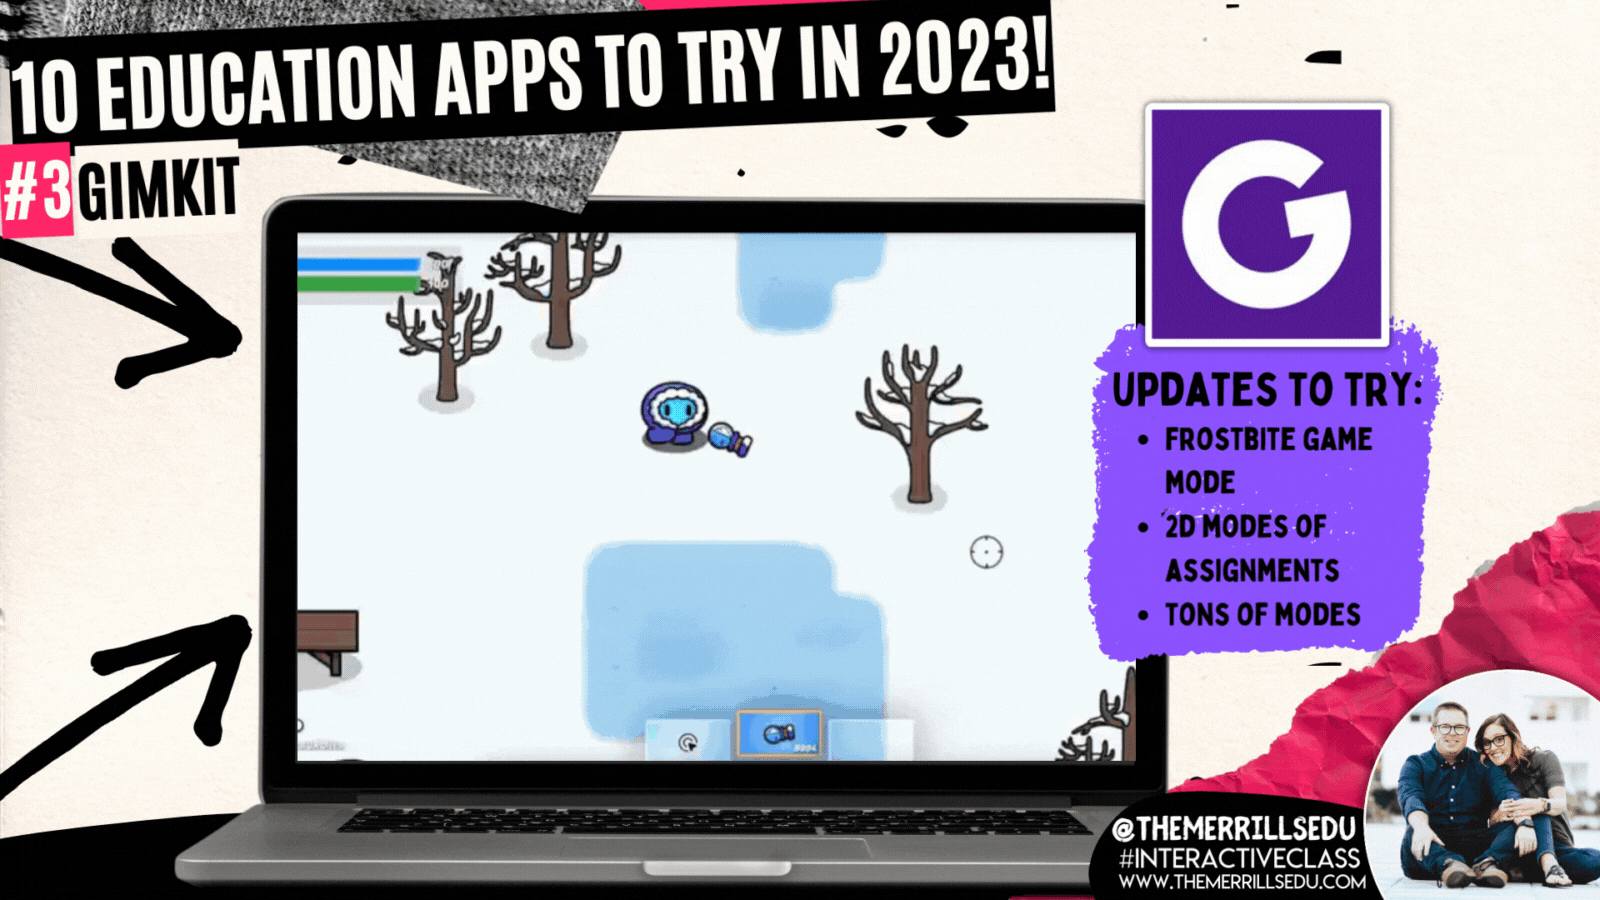
GimKit is a great way to take those boring formative assessments and turn them into engaging experiences for your students. There is a free and paid version, but we highly recommend the paid version as it unlocks all of the modes (and won’t break your bank at only $59.88 a year or $9.99 per month). The Pro (or paid) version will give you access to new modes like “Frostbite,” “This or That,” and “Farmchain.” We love these modes because it adds a new element of excitement into the games. For example, in “Frostbite,” the focus isn’t necessarily on money, but rather “knockouts” with snowballs. The only way you can earn snowballs is to answer questions! Learn more about the other modes below and give GimKit a shot!

Seesaw

Seesaw has always been a top five app for us. Its ability to communicate with families in a quick and efficient manner is a must for any classroom. Then, add on it’s creation tools, and it’s a must have. But, this past summer Seesaw took parent engagement to the next level by adding a messaging option. Now, educators can communicate with families via messages. A lot of attention went into the details of this feature. Educators can start 1:1 messages, group conversations, or whole-group announcements. They can choose if a message is one-way or two-way, and even use the search bar to quickly find recipients. There are also options for specialist teachers to message multiple classes at once, or give students the ability to reach out to the teacher for help. Learn more about messaging on Seesaw by clicking right here or check out the tutorial below!

Wakelet


Wakelet is one of our favorite ed tech apps and it just keep getting better. What started out as a way to curate information, has now turned into a creative outlet for your students. Our favorite new Wakelet feature introduces its integration with Canva. Now, users can design with Canva without ever having to leave Wakelet (yes, you read that right!). For example, when adding an image to a collection, the option to design with Canva appears. Clicking it will launch Canva as a pop up right within the same browser window. If you’re on the educator side, you can use Canva to design differentiated Wakelet collections. Canva has a ton of header template images available. to view them, click the image to the right or here!

Canva
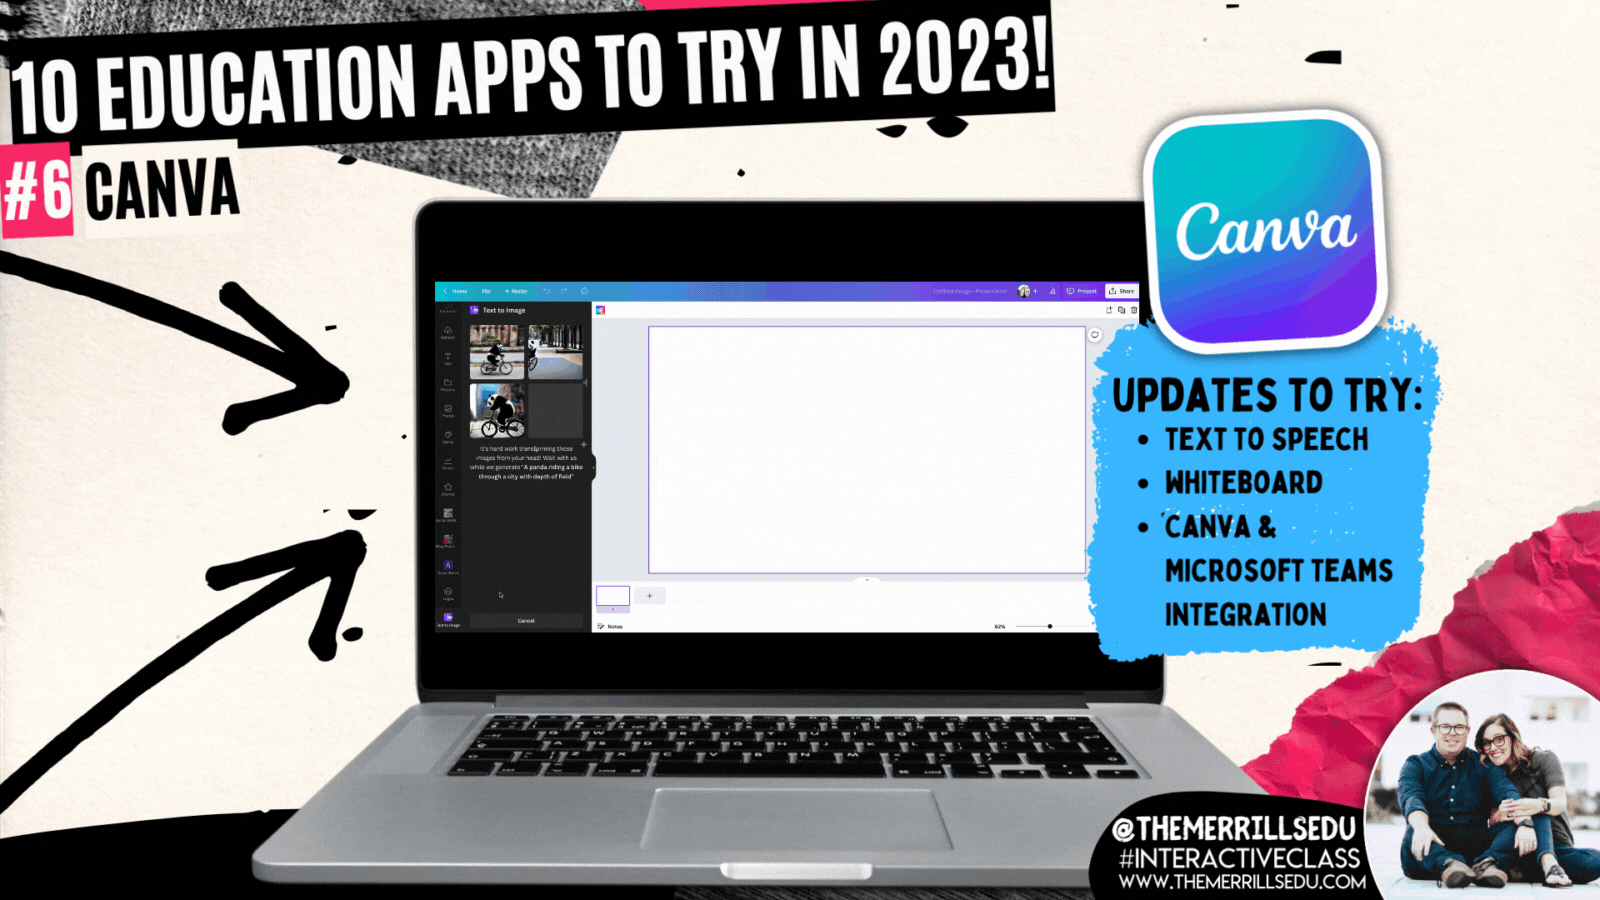
Canva announced a slew of updates this past year, some more hidden than others. This past year brought us tables, whiteboards and docs into Canva. But, some of the more well hidden features caught our attention. For example, check out the all-new magic design tool called “Text to Generate Images.” With “Text to Generate Images,” users type of the specifics of what they are looking for. Then, Canva does all the work - looking for a design that best suits what was described. Check out out video to the right to learn how it all works! Another feature added (to premium accounts only) was “Magic Write,” which is an AI-enabled writing assistant that empowers anyone to effortlessly and quickly create written content. You can use it for social posts, business plans, websites, blogs, poems, journaling, creative writing, and so much more. It can generate sentences, paragraphs, lists, outlines, and more based on the text prompt you enter. This was intended for creators, so Canva has not (yet) included it in their Education accounts. However, educators should familiarize themselves with this tool and educate students accordingly. It’s an incredible resource, but could be used in the wrong way if it isn’t taught properly. Learn more about “Magic Write” by clicking on the image below or right here!


Novel Effect


Novel Effect has exploded over the past year. This app uses the microphone built into your smart phone (or iPad) to listen to you read. As you read a story, Novel Effect will play music and / or soundscapes that go along with the book. It’s important to note that while Novel Effect uses your devices microphone, it’s not actually recording and saving you read. New books are being added every day, and now the entire library is full of books that you most likely already own in your own personal classroom library. But, what really got us thinking this past year was Novel Effect’s ability to impact our student’s reading. For example, give students the chance to be the readers while using Novel Effect. This will encourage them to slow down so that the sound effects can keep up with what they are reading. Novel Effect has also started a learning resource page on their website. Here you can find FREE content that goes along with the books you are reading. Check it out by clicking the image to the right or here!

Classkick


Classkick is a website / app that allows you to see all your students work and give high-quality feedback–from anywhere, anytime. The key word being “anywhere,” and they mean it! Even if a student is home working on an assignment, you can see them working in real time. You can also provide feedback to them in real time. The educator dashboard gives you a class-wide view of everything that the students are doing, so you can tell what the pace of the class is. As amazing as all of this sounds, what we really love about Classkick is the accessibility features. Educators and students can add audio recordings to explain directions or how they were thinking. There’s also options to allow collaboration. Students can help out others once they have completed tasks - all of which can be easily monitored on the educator side. To learn more, click on the image to the right or here!

Microsoft Flip (Formally Flipgrid)

Microsoft Flip is always listening to educators and updating based on their preferences. The major take away from Flip this year is it’s all-new educator dashboard, which mirrors what students see on their side. This makes it easier to get a student-view of what is being asked. Hidden amongst the platform comes another slew of valuable updates. The key takeaway here: don’t be afraid to push some buttons! You may find hidden features! For example, with the camera launched - click the three dots. A drop down will appear giving you the option to mirror your camera. Dig a little deeper and you’ll quickly find that you are able to toggle between both front and rear facing cameras without having to pause! Check out our video to the right for a full walk through! Another hack / tip our students came up with this year was using Flip for writing. When working on a “How To” writing assignment, the kids began by recording a video of the steps required to accomplish the task. Then, they enabled the captions to make sure that they were able to spell difficult words that they normally may not be able to spell. This helped them as they went on to write. Normally, we think of Flip as being the final place for content - but in this case, it ignite learning! (Note - we actually circled back around and created final videos for each writing piece!) To learn more about this writing process, click here or the image below!


Microsoft Teams

Microsoft Teams acts like a house for content. Some of the more stand-out updates come from built-in apps like Reflect, Reading Progress and Whiteboard. In Reading Progress, educators can gain valuable insights and data on student progress. The program will intelligently identify “challenge” or frequently mis-read words. On the educator side, you can now create an assignment to help your readers master the missed terms. Check out the video from Mike Tholfsen to learn more. Also new in Teams is an updated student view in the app “Reflect.” Students can privately answer questions that educators can use to monitor the social and emotional well being of their students. To learn more, click here! Lastly, Whiteboard lands with more features than ever. We love differentiating our instruction into groups on Teams, and then letting the small groups use Whiteboard to collaborate. Students can now add images, videos and links - all collaboratively!
-- Please follow us on social media and tag us with how you’re using these resources in your classroom! 👓👗
For more tips, tricks and lesson ideas for making learning more interACTIVE, check out our books The InterACTIVE Class and Flipgrid in the InterACTIVE Class on Amazon!


10 Classroom Management Tips and Strategies
Danny Steele was quoted as saying, “Classroom Management is not about having the right rules. It’s about having the right relationships.” We completely agree here. If you’re looking for classroom management tips, it’s important to take into consideration that your management should change every year because your students change every year. Deepening the relationships between you and your students can create a rich and thriving interACTIVE environment. To get to this point, we’ve curated 10 classroom management tips. Check them out here!

Danny Steele was quoted as saying, “Classroom Management is not about having the right rules. It’s about having the right relationships.” We completely agree here. If you’re looking for classroom management tips, it’s important to take into consideration that your management should change every year because your students change every year. Deepening the relationships between you and your students can create a rich and thriving interACTIVE environment. To get to this point, we’ve curated 10 classroom management tips.
(click on any subheading to jump to that section)


Custom Device Wallpaper Using Canva

Whether you’re using shared devices or in a 1:1 ratio, device management is crucial. To make this easier, we like to change out the wallpaper on the devices so that we can differentiate them. Canva makes this easy! Just search for your device’s wallpaper dimensions and you will find templates to use immediately.


Compliment Overload!

Positive reinforcement is the most important key to unlocking powerful student relationships - and it doesn’t take much effort at all. In fact, your words are the most powerful tool to making your students feel welcome, encouraged and successful. Even when your students are wrong, there are ways to go about encouraging them in a discouraging situation. Here are some examples:
Thank you for showing me that you are ready!
I love the way that (student) is showing me that they are (task).
You are absolutely on fire right now!
I like the way you’re thinking…
You were a leader when you…
That was an amazing idea!
You’ve inspired us all!
I’m really impressed with your ability to…
Amazing work! I can tell you put a lot of effort into…
Thank you for teaching us the way that you think. We have all learned from you today!

Differentiation with Wakelet

Differentiating instruction doesn’t have to be hard or time consuming. With Wakelet, educators can quickly and easily assign targeted content to their students. Start with a collection and then add the work you’d like the students to complete. If you have groups working on the same task(s), you can always copy your Wakelet collection to save even more time. With integrations like Canva and Microsoft flip, you have tons of options for your students. To download our template, click here or thee image below!


Class Callouts!

Class callouts (or chants) are a fun way to grab your students’ attention in a hurry. It’s best to use these with regularity to help your students become more familiar with them. Here is a list of some of our favorites:
“Shark bait…” (HOO-HA-HA!)
“Flat tire…” (Shhhh!)
“Hear ye, hear ye…” (Yes, Queen?)
“Yellow or red, let’s discuss…” (Time to stop acting SUS!) [Among Us reference]
“Tootsie Roll, Lollipop…’ (We were talking, now let’s stop!)
“Hey, ho…” (Let’s go!)
“Does anybody know?” (We don’t talk about Bruno, no, no!)
“Shake it, shake it…” (Like a polaroid picture!)

Group Management

In our classrooms, we have multiple incentives: one for individual students, one for tables/groups, and one for the entire class. In Joe’s room, he has five tables of students (each is named “Hot Spot #1, Hot Spot #2, etc). When he sees tables working together as a team, he moves a bandana (located hanging on the front board) to that particular table/group. The bandana gets moved frequently throughout the day, but whichever table/group has it at dismissal wins a prize. The kids love it and it’s a great way to encourage teamwork!

Music Transitions

We know what you’re thinking…How can music have anything to do with classroom management? The key is familiarity! When you use a class playlist and repeat the tracks, your students become familiar with the songs. For example, if you’re playing the same 2 minute long song, the students will know exactly how much time is left in the song as it is played. We have a transition song going from one activity to the next, a clean up song (for a bit longer tasks), and a pack-up song. The kids hear these songs day after day and know that they need to be ready and focused by the time the song is over. Below is a playlist of tracks that we curated that our students enjoy. Click the image below to download for yourself!


Teacher Created Clever Pages

Digital management can be tricky. But, if your district has access to Clever, you can easily get your students to where they are supposed to be quickly and efficiently. Clever is a single-sign on application that basically acts like a bridge between sites. When your students log onto Clever, they are able to log onto other websites without having to re-enter a username or password. The best part of all is that teachers can create their own pages with specific apps and links that are relevant to the class. Swipe through the images and check out our tutorial below!
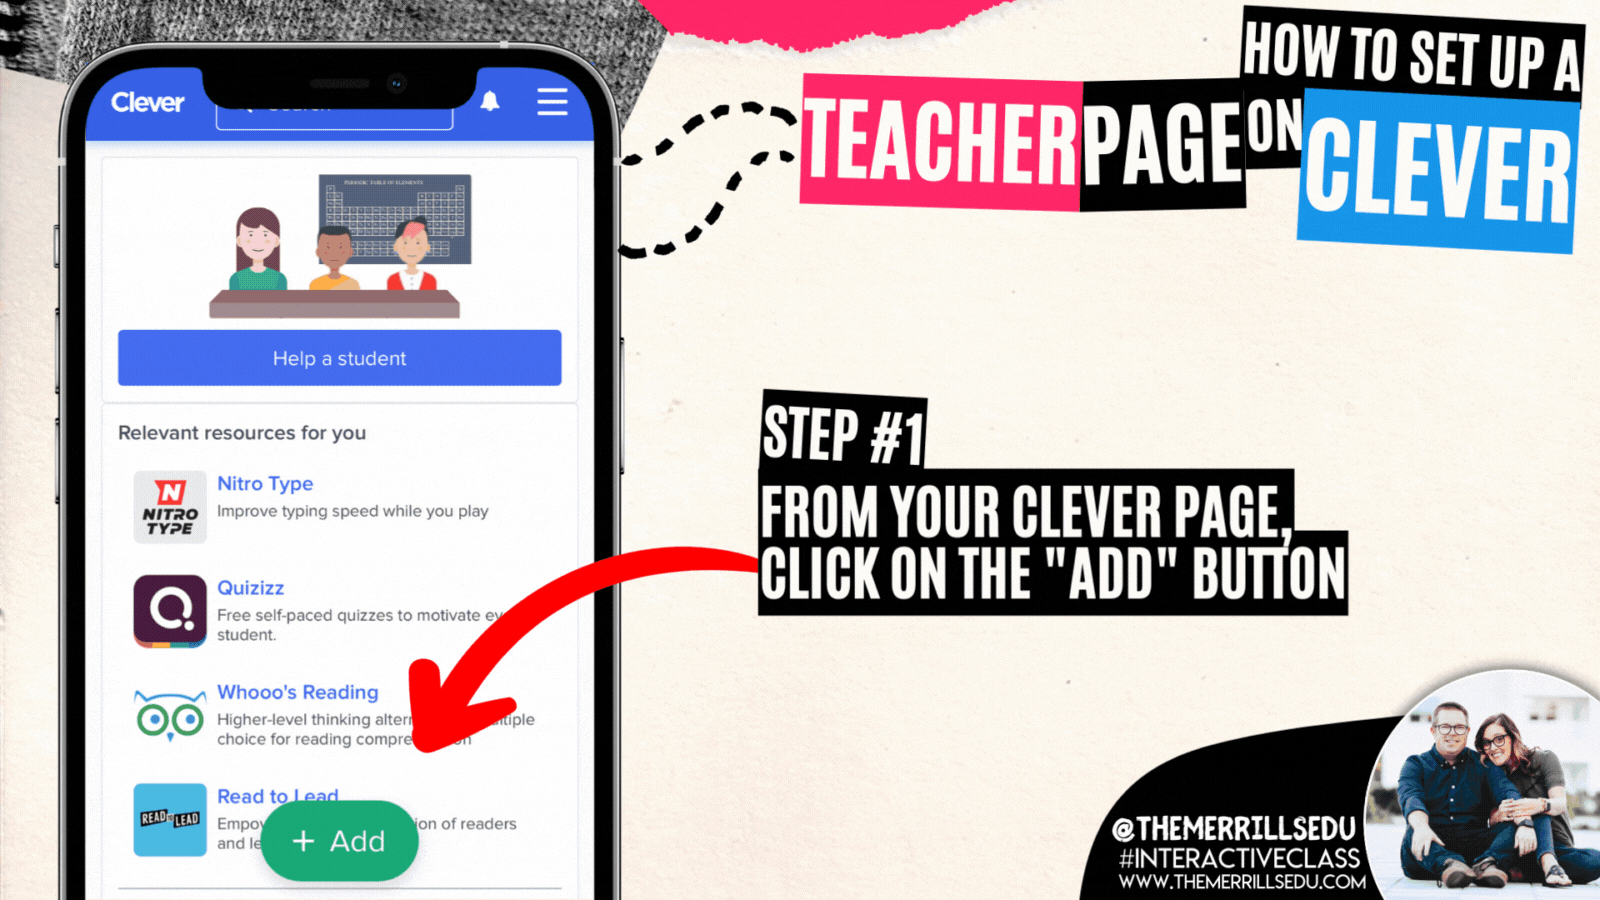
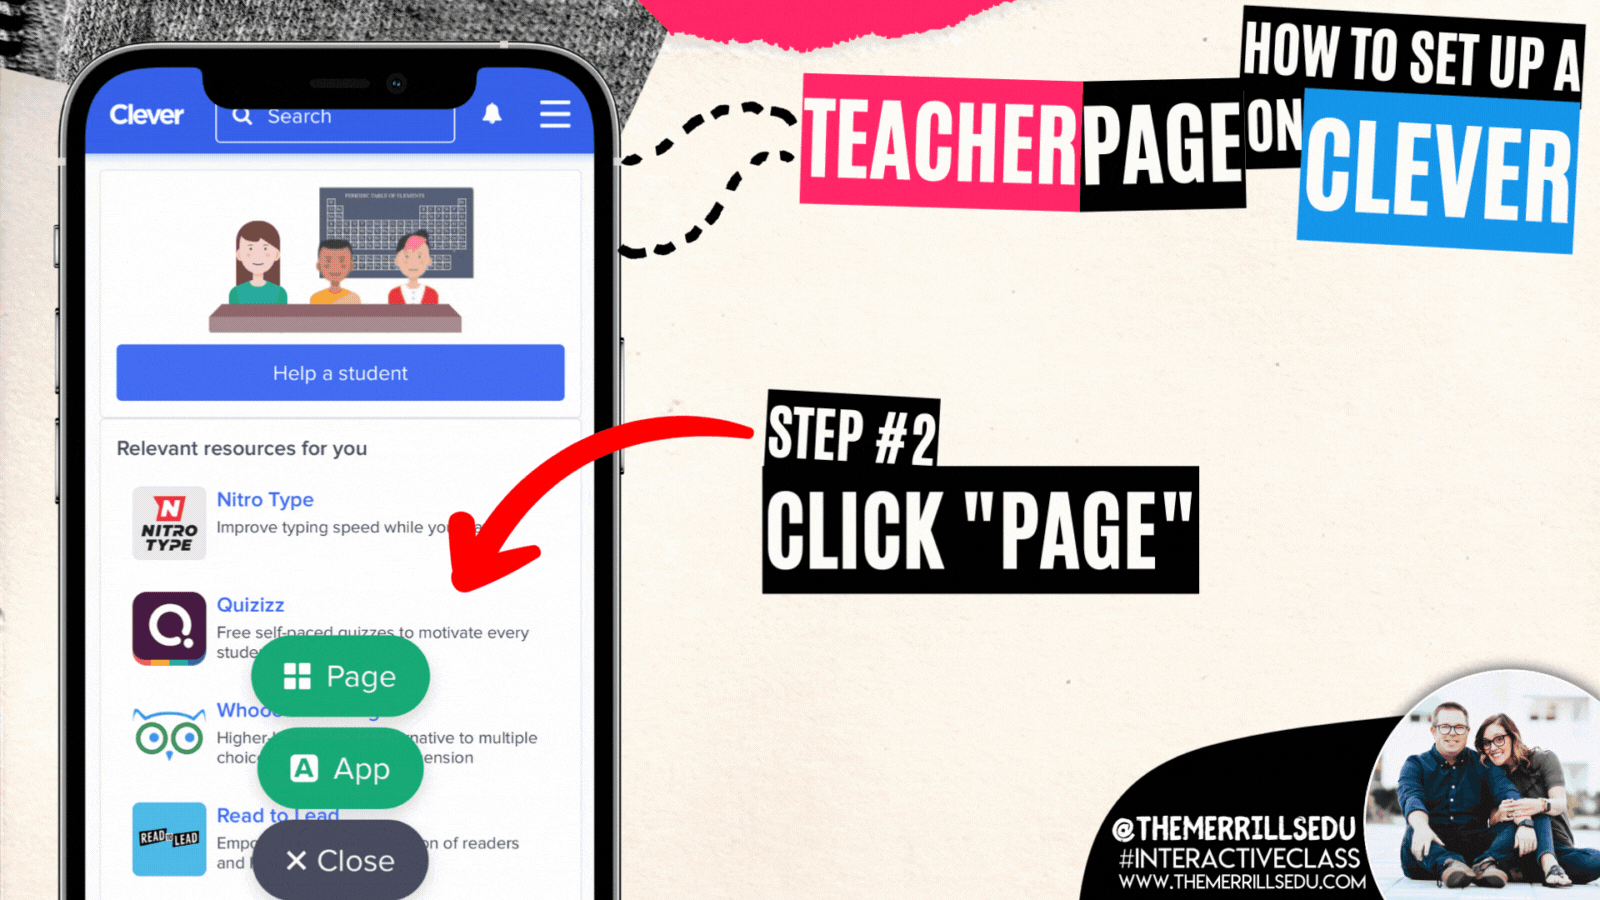
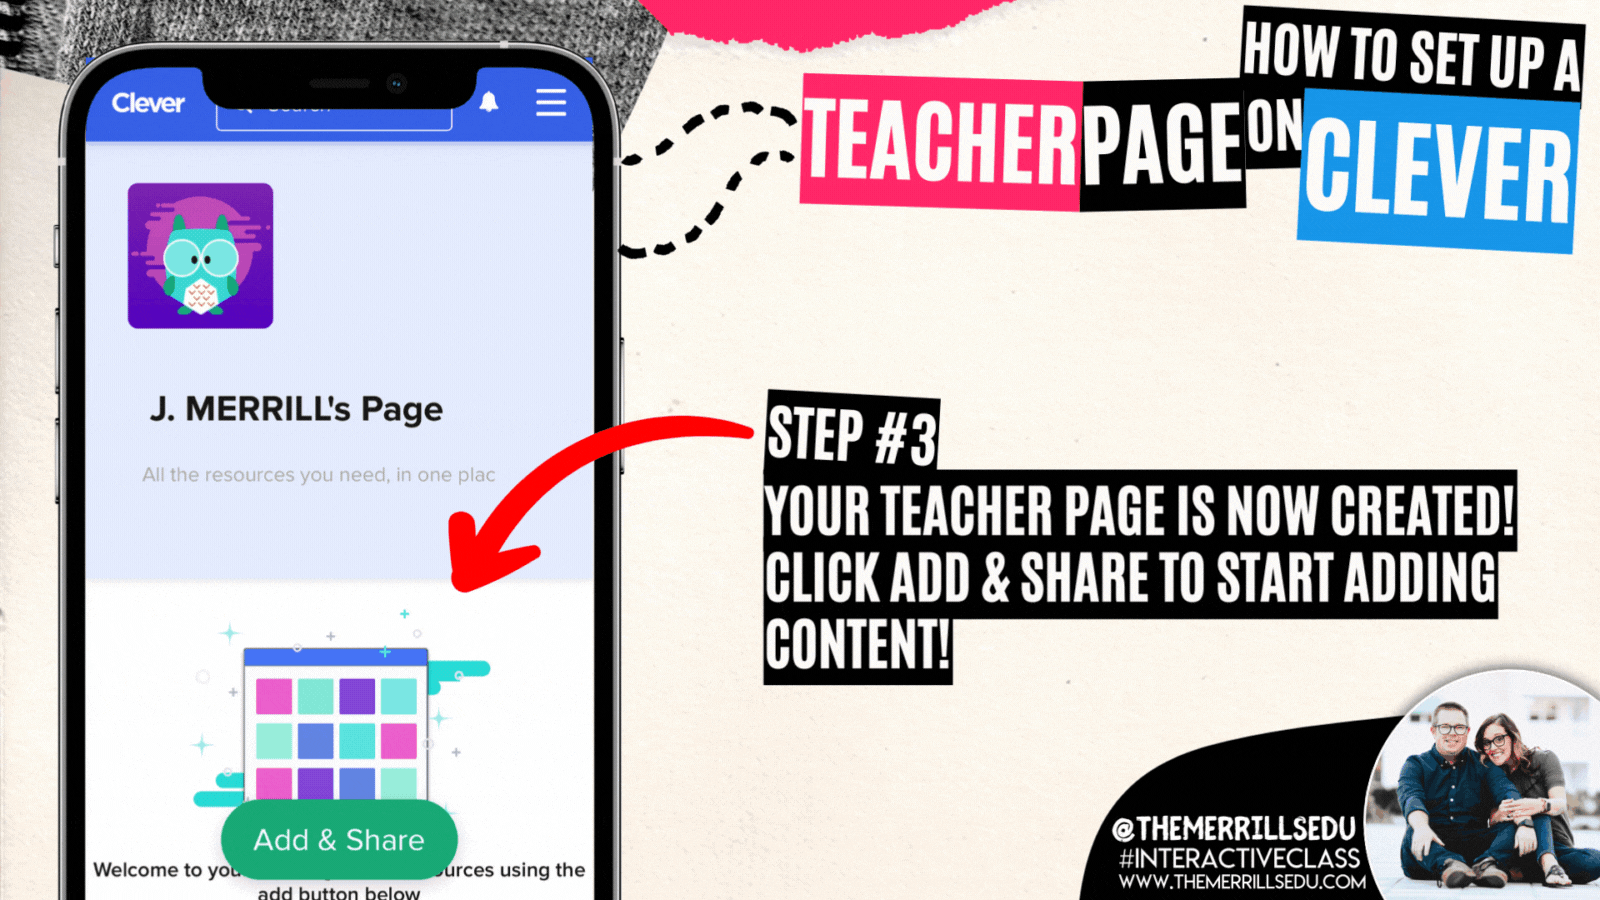
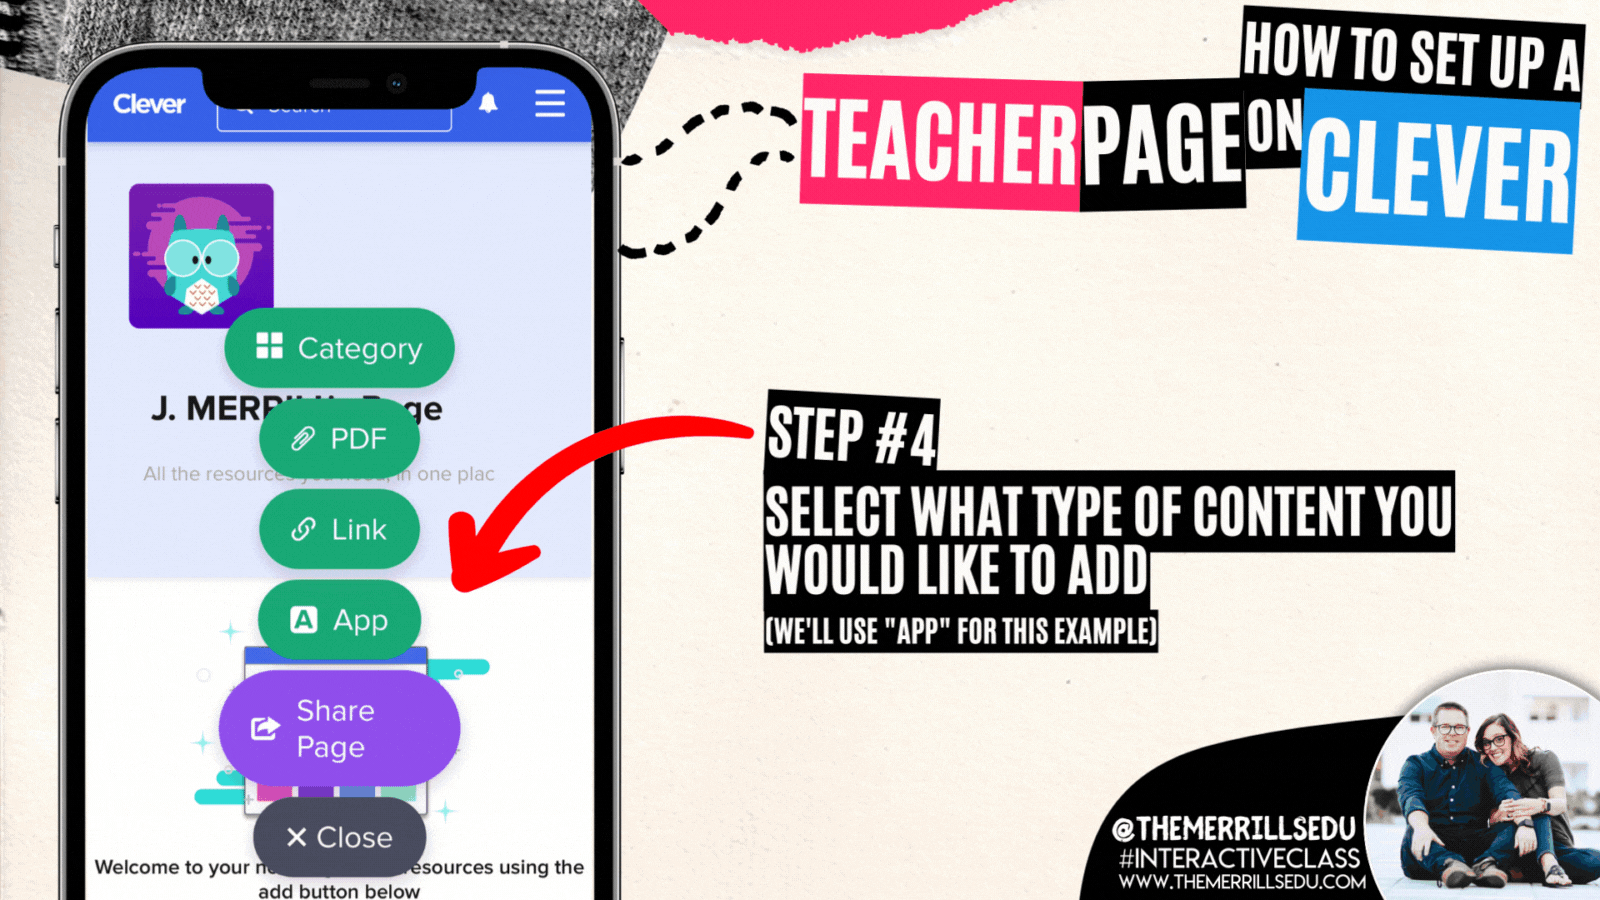
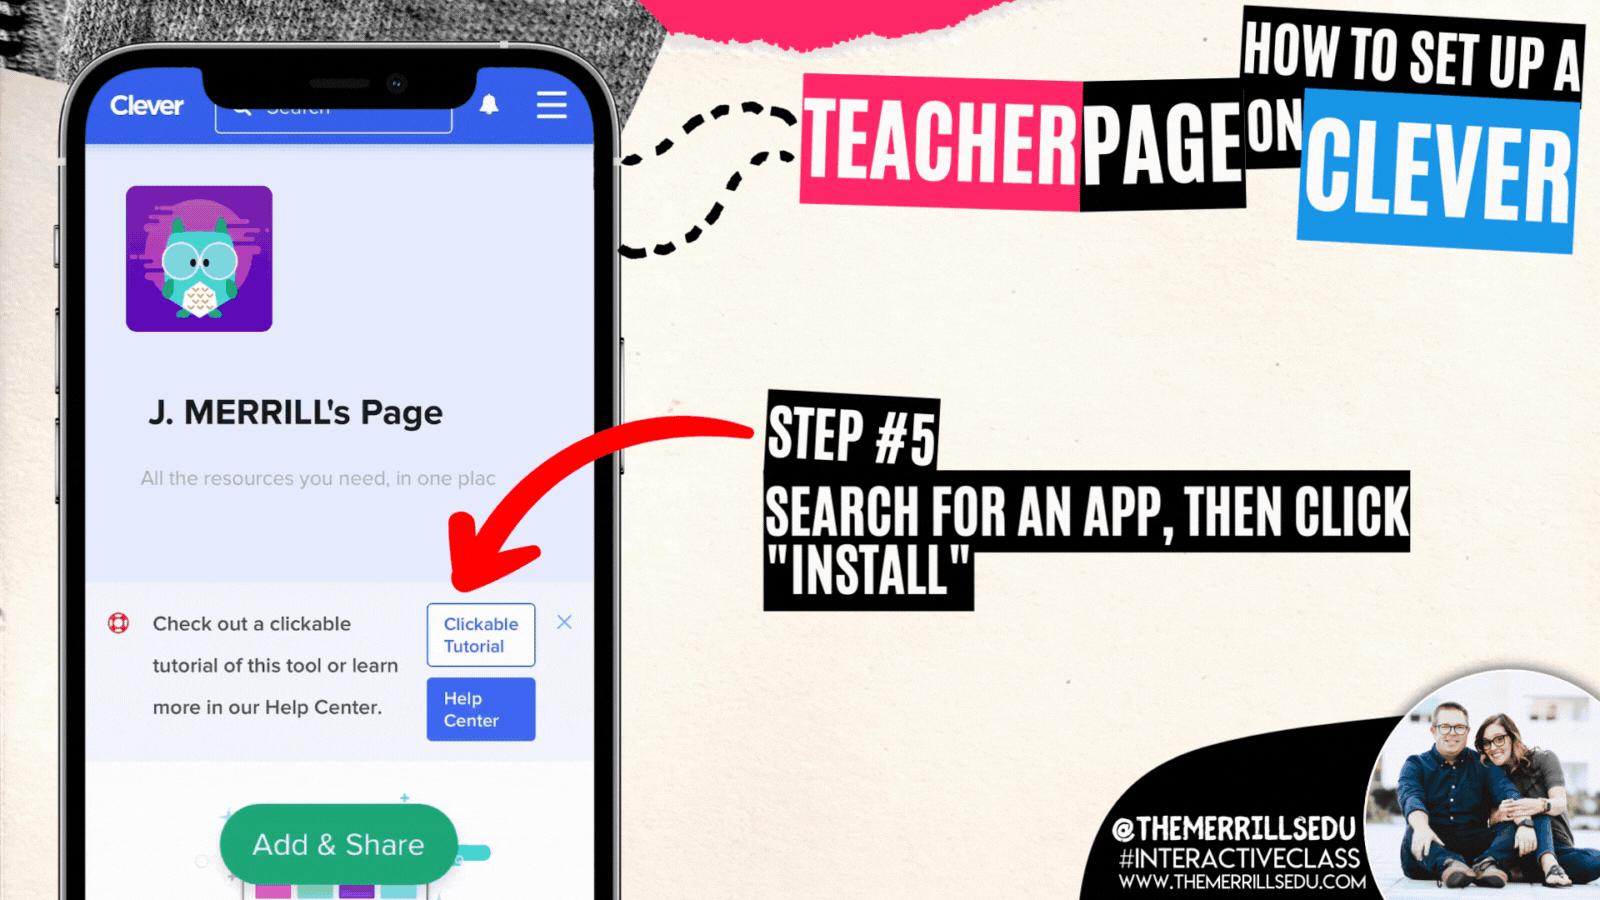
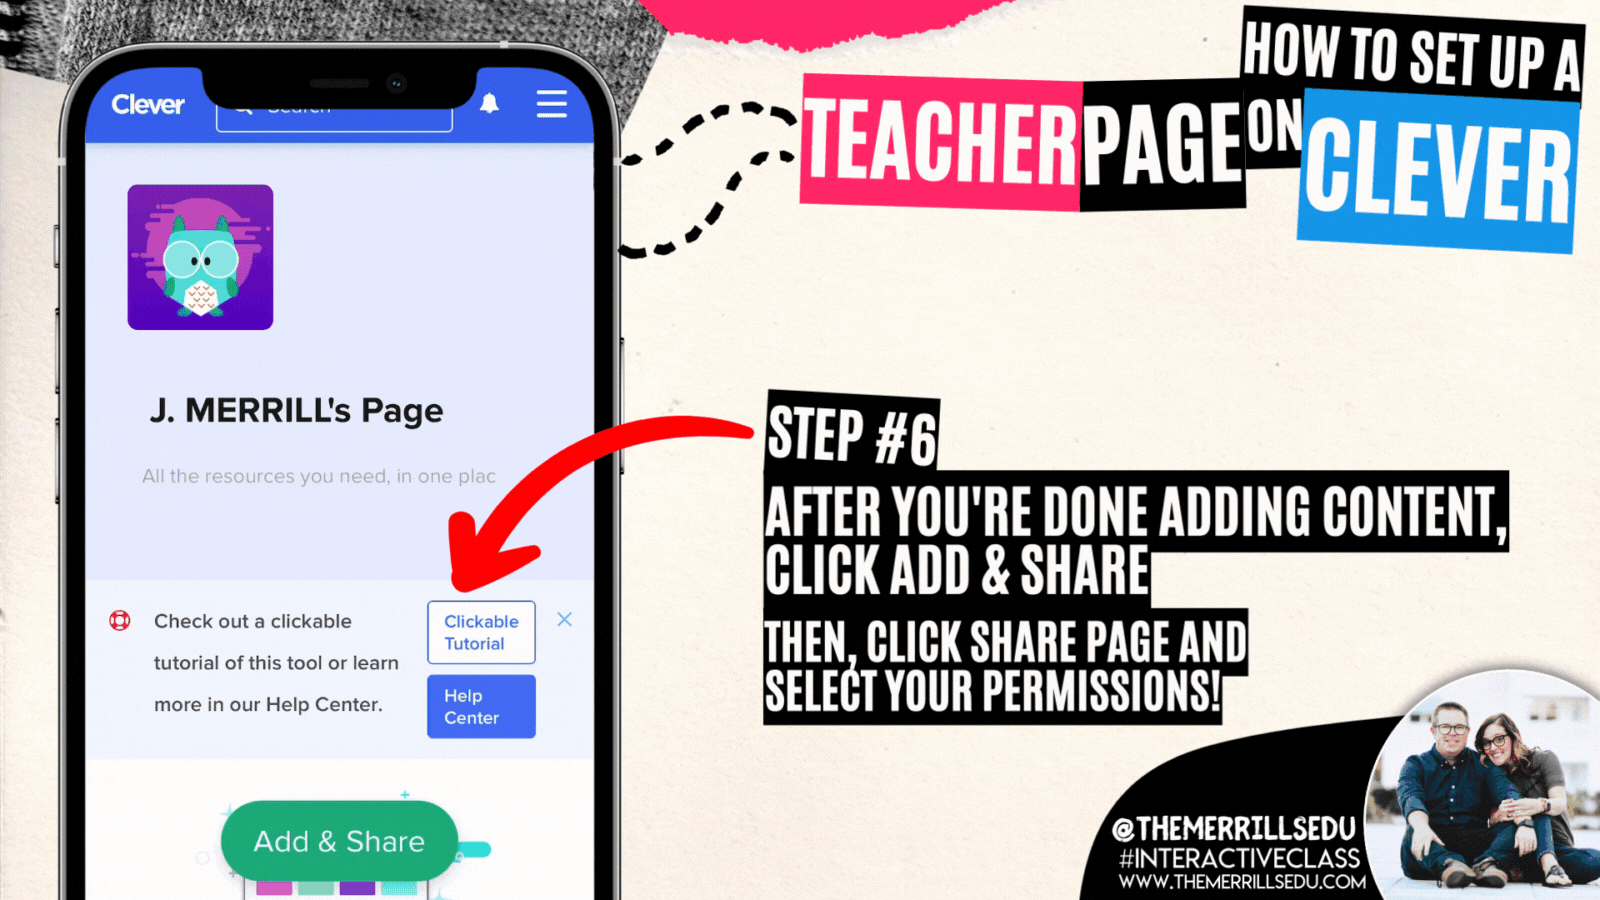
This process may be completed online or via the Clever app. To create your own Teacher page on Clever, log onto Clever. From your educator panel, click on the “add” button.
Once you’ve clicked on the “Add” button, a few options appear. Click “Page” to add your own Teacher page.
Congrats! Your teacher page has been created! Now, it’s time to start adding content to share out to your students. Click on “Add & Share” to start adding content!
Several options appear. Depending on what you are looking to add, click that particular button. For this example, we’ll choose an App.
Search for an app that you wish to add to your teacher page. When you find the app, click it and then click “Install” to add it to your teacher page.
Lastly, click ‘Add & Share.” Then, click “Share Page” and select your permissions!

“S.U.S.” Student Award (Seriously, Unbelievable, Student - inspired by Among Us)

Kids today are going crazy for the game Among Us. Like most video games, in addition to characters and strategy, you also have to learn it’s lingo. one of the more popular terms to come from Among Us is the term: “sus” (short for suspicious). Since the kids are already heads over heels on this, we decided to bring it INTO the classroom. This plush Among Us toy travels around the classroom throughout the day. Every time we catch a student doing something well, we place it on their desk. The agreement is that the only ones allowed to touch the plush is the teacher and the student who earned it. If another student touches it, they may lose the privilege of earning it that day. Whoever has this plush at the end of the day wins a prize! (Tip: we recommend paring this with our bandana / Group Management idea above!)


ClassroomScreen.com
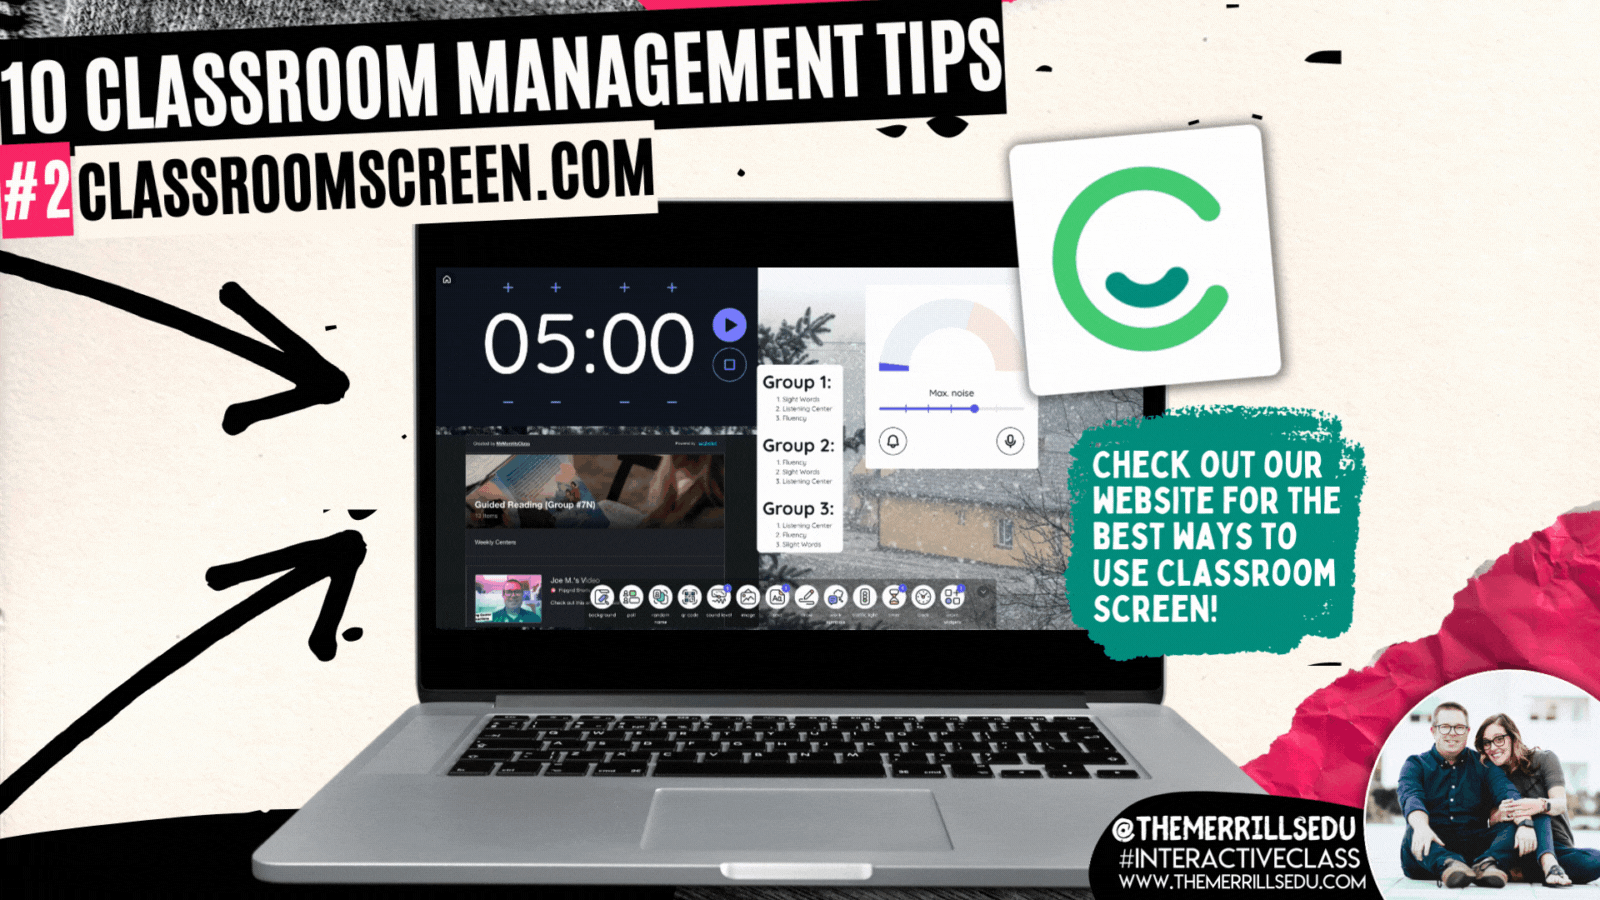
If you’re looking for a good whole group management website, then look no farther than Classroomscreen.com. This website comes in both free and paid versions ($30 a year to go Pro), and offers tons of options. Here are a few of our favorite ways to use it in our classrooms:
Set timers: Let’s be honest…this is every bit as much for us as it is for the kids. We’ve got to stay on schedule!
Add notes: Give specific instructions, spell tough words and more.
Launch noise meters that will “ding” every time the noise level goes beyond a selected range
Embed content: Embed content from your favorite ed tech tools like: Canva, Wakelet, Flip and more!
Random Name Selector: With a “Pro” account, you can enter your class names and this feature will randomly select a student for you1
Webcam: Add your document camera to your Classroom Screen!
There are so many more features to be explored! How are you using ClassroomScreen.com? Tag us on social media and let us know!

Embedding Content

Embedding apps is a great way to keep your content organized, but more importantly, it can help keep your students focused when working on tasks. The option to embed from apps is becoming increasingly more popular, and you may even be able to embed some of the apps you’re using right now! We hand picked 15 different ways to embed your content. You can learn about them all in our blog post below! Click the image to head that way!
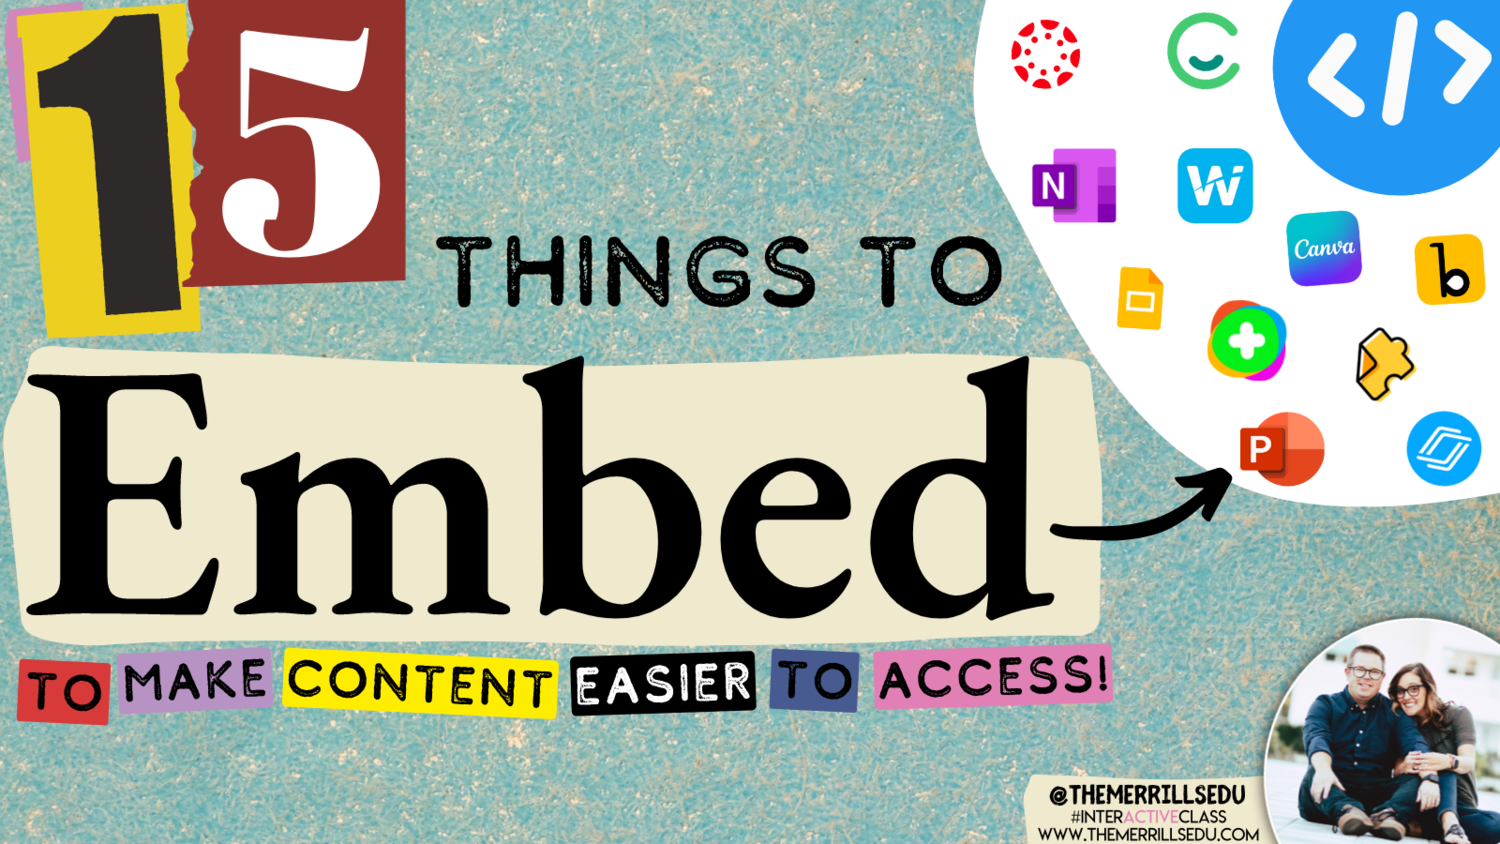
-- Let us know if you’re using any of these ideas in your classroom! Be sure to follow us on social media (@TheMerrillsEDU everywhere) and tag us! 👓👗
For more tips, tricks and lesson ideas for making learning more interACTIVE, check out our books The InterACTIVE Class and Flipgrid in the InterACTIVE Class on Amazon!


Christmas Ideas and Activities for the Elementary Classroom!
@TheMerrillsEDU share Christmas ideas and activities for the Elementary Classroom! You’ll find: Something to Make 🎨, Something to Wear 👕, Something to Read 📚, and Something to Share 🙌🏻!

Boy, do we have something for YOU! 😲🫢
Your "P🎁R🎁E🎁S🎁E🎁N🎁T🎁S" is requested!
This holiday season, we've collected ideas of:
🎨Something you MAKE
👕Something you WEAR
📚Something to READ
🙌Something to SHARE
Check it out below, or click on a day to jump to that content!


“Trap” students inside their own designed snow globe with these pre-made templates! Click below to download our Adobe Express, Canva, Buncee or print template!


Joy to the wool 🎄! Challenge students or staff to design the ugliest holiday sweater! We’ve also included a template for an Ugly Stocking and Ugly Socks! Click the image below or right here to download all templates w/ instructions!

We’re KNOT kidding, this simple craft is perfect for the holiday season! All you need is a ring, string, and knowledge on how to tie a loop knot!


Will you catch an ELFie this year? Now, you can create a video of the elf on the shelf in YOUR OWN classroom! 👀 Click on the image below or right here to download our template with instructions!

Go where SNOWman has gone before! Pair our Adobe Express template with any of these snowman books. Then, have your students build their on snowman! Click the image below or right here to download the template!


You don’t need a Christmas tree to give a memory that families won’t FIRget! Try this Canva card template! Just download and then have your students change out the pictures with their own. This would be great as an individual student project, or as a class card! To grab the template, click the image below or right here!


Here’s a quick and easy class craft idea that your class is FIR sure to enjoy! These can hang BEANIEth any tree! All you need is a paper towel roll, yarn, and cotton balls! Follow our directions above!

Forgetting things around the Holidays? YULE be sorry! 😲 Foster responsibility with our reminder bracelets from Canva! Click the download button below to grab the template and print or edit for yourself!


Sleigh it ain’t so! Share this Adobe Express overlay sticker template with students for simple, personalized cards or holiday crafts! Click the image or right here to download it for yourself!

Roses are 🌹, Violets are blue 💙, David agrees 👍🏻, Worksheets are, “EW!” 👎🏻
Pick up our latest shirt design from our merch store by clicking on the image above or right here!


They say that Christmas is a time to “tree-t” yourself, so why not show off your interACTIVE spirit with some festive wear? Check out our store by clicking on the image below or right here!


Turn your holiday read alouds into a magical experience with Novel Effect! Learn more about Novel Effect by clicking the image above or right here!


Your students will open these gifts at a WRAPid pace! 🎁 Give the gift of a new book this season! This idea from TheGameGal.com has everyone starting with a wrapped book and each time the words left or right are read aloud in the poem, you pass your “present” along. When the poem ends, you get to unwrap your new book! Click on the image above, here, or below to download the poem!


Treat yo’elf to a magical read aloud activity with the book, “How to Catch an Elf!” Read along to the book on Novel Effect, then incorporate STEM into the holiday season with an elf trap building challenge! We’ve also included a persuassive letter template from the elf’s point of view - trying to convince the students to release him! You can grab the template by clicking on the image below, or right here!

How about a Holiday READth?! Click on any book in the image above to immediately “spruce” up your classroom!
Get Hanukkah off to a great STARCH with Oskar and the Eight Blessings! Read this special story on Novel Effect and then discuss / brainstorm gifts and acts on Microsoft Flip. Then, download & print our template where students can discuss blessings found in the story. Click on the image below or right here to download our template!


We BELIEVE that you will love this Polar Express activity! Start out ordering some small jingle bells by clicking here or the image below. When they arrive, place a fake return address on the package and then place them into the freezer. Let them sit in the freezer for as long as possible (even if it’s for a day or so). Pro tip: I like to have our office manager save them in her refrigerator, so that way she can hand deliver them to the class to make it look like the package is more authentic. She usually comes in and plays the part well - exclaiming that there has been a “special delivery for the class!”
After that, print and cut out tickets from our Polar Express Ticket Canva template, and our letter from “The Boss” (links below). Then, read the book with Novel Effect and watch the movie! Lastly, have the bells “delivered!” Be sure to explain to the person delivering the bells that they will need to do so quickly, as the bells will thaw quickly. But, if you are able to deliver them fast enough, the bells will be cold when you open the package! Download / purchase all necessary materials below!


The Holidays are a FONTastic time of the year! Check out some of our favorites and download them all for ⭐️FREE⭐️ by clicking on the image below or right here!


Time to SPRUCE things up with a new idea or two! 🎄 We’re inspired daily by the interACTIVE ideas from across the world. So, we decided to curate them and share them with you! To view the entire collection, click on the image below or right here!

Encourage your students to see the “bigger picture” with our interACTIVE posters! Just download, print, and hang! Click the image below or right here to download!


Oh, DEER! 🦌 Your students will love this ⚡️LIVE⚡️ reindeer cam! Just click on the image below or right here to access the website!


These year-round tunes will have the sugar plums dancing in your head! These hits aren’t just for the Holidays, so keep them jamming all year long! These are available on Apple Music or Spotify - you choice! Click on the image you prefer below!


Gifts are meant to be shaken like a pole-aroid picture! Use these tags to keep track of whose is whose. We’ve got several different designs for you. Which one will you choose? Click the image below or right here to download! 🤶

-- Please follow us on social media and tag us with how you’re using these Christmas Ideas and Activities in your classroom! 👓👗
For more tips, tricks and lesson ideas for making learning more interACTIVE, check out our books The InterACTIVE Class and Flipgrid in the InterACTIVE Class on Amazon!


Practicing and Assessing Sight Words in Canva!
Learn how to use Canva to practice and assess your students sight words! These ideas can be used to assess or as a center!

If you’re a primary teacher, you know the pain of assessing 20+ students. Chances are that this takes a great deal of time and can be frustrating for both teachers and students. We’ve used tools like Microsoft’s Reading Progress to assess sight words (click here to learn more), but sometimes you just need to sit down with a student to hear how they’re performing. That’s where this idea comes in! In this mini-blog post, you’ll learn how to use Canva to assess sight words. Click any subheading to jump to that section:


How to use Canva to Practice and Assess Sight Words
This idea can be used as a center for students, or as an assessment tool. The idea is to have your slides automatically advance so that they progress through the words relatively quickly. Here’s how it all works:
Start off by creating a presentation deck that has all of your sight words on it.

Once you’ve settled on a design, change the timing on your slides. To do this, click on the clock icon located at the top of the screen. Adjust the timing to your preference. We recommend around 5 seconds. Be sure toggle on “Apply to all pages,” which will place the same timing on all of your pages.
Now your deck is ready. When you want to start assessing a student, explain that a sight word will appear on the screen. If they know if, they can say the word. If they don’t know it, that’s okay. The word will change in a few seconds and they can try the next word. Here are the steps to launch the deck:
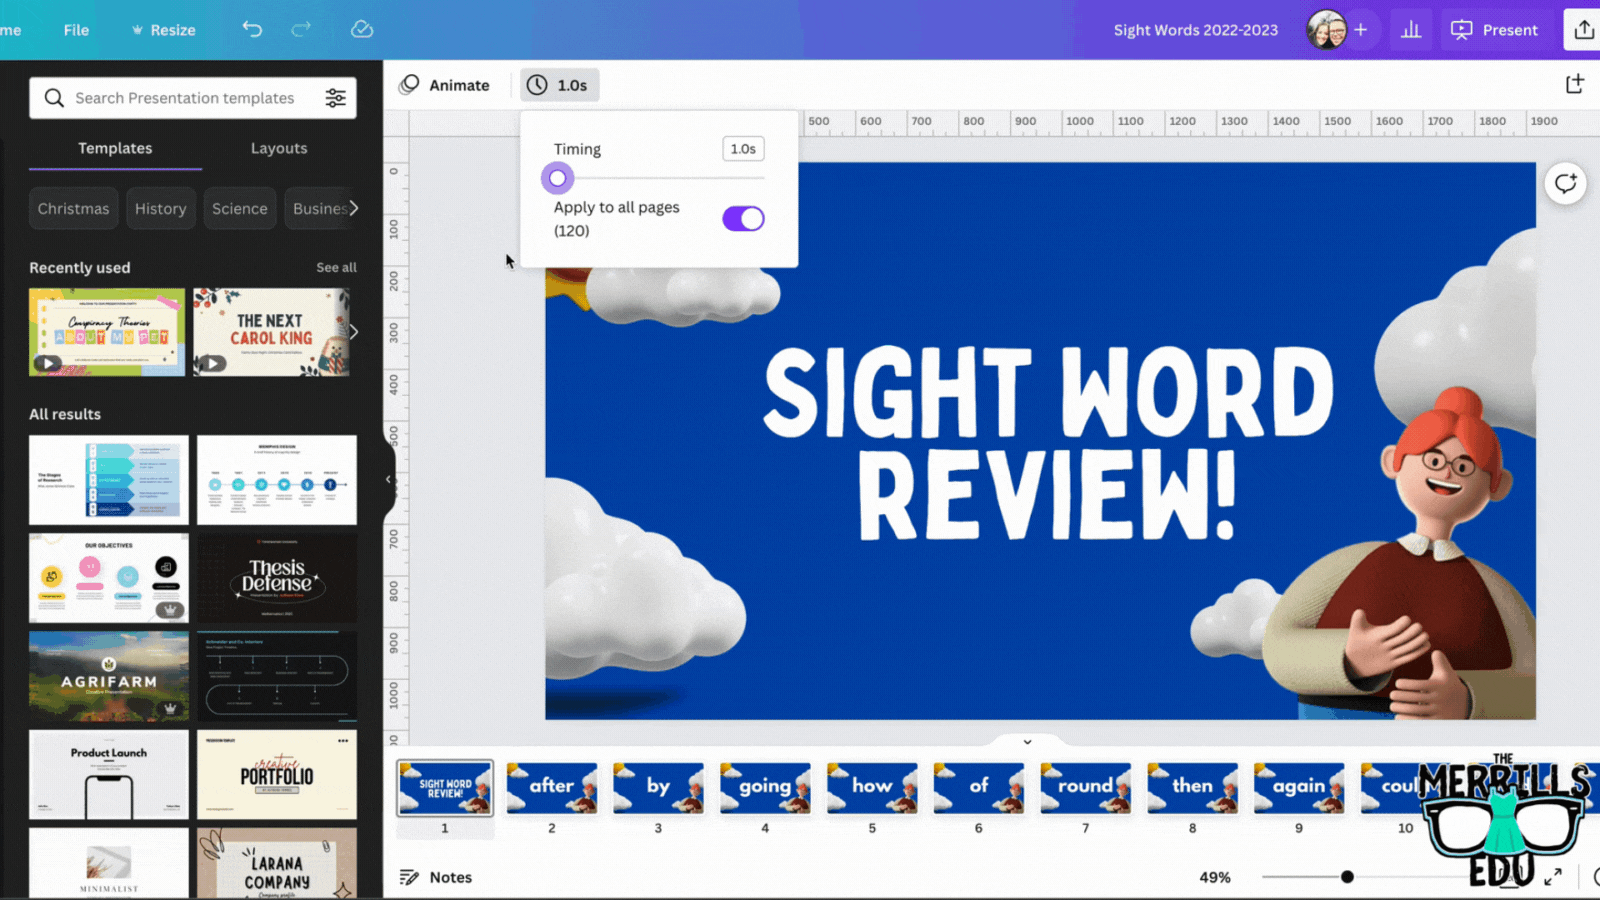
In the deck, click “present” to take the pages full screen. Now, change the type from “Standard,” to “Autoplay.” This will automatically transition the pages to the time you selected. Students read off the words as they appear on the screen.

Download our Excel template to
record student responses
If you prefer to manage your data digitally, we have you covered! We’ve designed a Microsoft Excel sheet that has all of our sight words on it. When a student gets a word correct, enter a “1” in the white box. Doing so will change the word from being highlighted to white - an indication that the student has mastered that particular word. This document will also automatically calculate the number of correct words. Record each assessment on the lower right side to keep accurate data. Note: this document is editable, but you may need to change the formulas if you edit it. Click here or the image below to download it now!


How to use Canva to Practice and Assess Sight Words (Video Tutorial)
Need to see it in action to understand all of this? We’ve got you! Check out the video tutorial below to understand each step.

Download our Free Canva Sight Word Deck
Does all of this sound awesome but you’re just not sure where to start? Teachers are busy, so we’ve got you covered here, too! You can download our Canva Sight Word deck by clicking here or the image below.

-- Please follow us on social media and tag us with how you’re using these Canva Sight Word ideas in your classroom! 👓👗
For more tips, tricks and lesson ideas for making learning more interACTIVE, check out our books The InterACTIVE Class and Flipgrid in the InterACTIVE Class on Amazon!


