Top Tools to Use Now That Flip is Gone
Discover top alternatives to Microsoft Flip for creating engaging video content in education. Explore tools like Adobe Express, Canva, and other innovative platforms that enhance student learning, creativity, collaboration and critical thinking. Find the perfect tool for your classroom today!

Over the summer of 2024, Microsoft announced that it would be shutting down beloved ed tech app, Flip (aka Flipgrid). The absence of such an innovative app leaves a hole in many of our classrooms. So, now that Flip is no more, where do we go from here? We want to be very clear, these apps and suggestions are NOT a replacement for Flip. These platforms contain similar features or integrations that may be used as a way to replicate what you were doing with Microsoft Flip.
THIS BLOG POST IS HAND CRAFTED AND WAS NOT GENERATED USING AI.
IT HAS BEEN UPDATED ON: November 2025
(click on any subheading to jump to that section)


Video Creation Platforms


Adobe Express
Price: Free for both students and educators
Compatibility: Web based, iOS, Android
Similarities to Flip: Students can create and download videos
Differences from Flip: Students do not have a collected space to share their videos, but they can collaborate on the creation of a video.
Sign up: https://www.adobeforeducation.com/k-12/express-for-education/
Adobe Express, formerly known as Adobe Spark, is an excellent tool that can help students create and edit videos easily. Although Adobe Express is more focused on graphic design, it does have features that can be utilized for video creation and editing. Check out what it offers for students in terms of recording and editing videos in the image below.


Canva
Price: Free for both students and educators
Compatibility: Web based, iOS, Android
Similarities to Flip: Students can create and download videos
Differences from Flip: Students do not have a collected space to share their videos, but they can collaborate on the creation of a video.
Sign up: https://www.canva.com/education/
Canva offers a range of features that can help students with recording and editing videos, making it a valuable tool for various educational purposes. Canva also places an emphasis on graphic design, and many of it’s features can be utilized while creating videos. Check out the image below for a breakdown of some of our favorites!


Seesaw
Price: Free and paid options
Compatibility: Web based, iOS, Android
Similarities to Flip: Students can create and download videos and use the screen as a white board.
Differences from Flip: Educators are able to enable the ability for students to view each other’s work, but students do not have a way to comment (with a video) back-and-forth.
Sign up: https://seesaw.com/
Seesaw is an educational platform designed to engage students in learning by allowing them to create, reflect, share, and collaborate on various types of content. When it comes to recording videos, Seesaw offers several features that can be beneficial for students. The image below shares a few of our favorites!

Any of these apps can be used to create videos, and all of them do it exceptionally well. However, if you’ve ever seen us speak, or read our books, you know that we have a passion for providing students with an outlet to share their creativity to broader audiences. While the apps above will permit students to create content, they do not provide a space for students to be able to view and provide feedback to their classmates (as we mentioned above - Seesaw does have a feature where students can view each other’s work, but it doesn’t have the same feel as Flip did). So, let’s take a look at some other apps that might provide a way for students to both record, share, and comment back and forth.

Platforms That Allow for Video Creation, Sharing, Reflection and Commenting


Snorkl
Price: Free and paid options
Compatibility: Web based
Similarities to Flip: Students can record whiteboard-styled annotated videos and submit them for other student’s to view and comment on.
Differences from Flip: Videos are whiteboard-style only. AI is integrated within the platform, which will assess the student work and provide feedback.
Sign up: https://snorkl.app/
Snorkl is an educational app designed to help students record and explain their thinking visually and verbally. It provides tools for students to record their voice while using a digital whiteboard to represent their ideas. The app’s AI offers instant feedback on these recordings, helping students deepen their understanding and improve their explanations. This is a step above where Flip left off - providing a way for students to receive instant coaching on their submissions. On the educator side, teachers can use AI-powered analytics to monitor student progress and gain insights into their thinking. Check out some of our favorite features below!

Let’s take a look at Snorkl’s platform. On the educator side, teachers create a class. Then, you can add assignments to the class (or classes). When assigning an activity, you can choose from Snorkl’s library (Grades 3 and up), or create your own. If you’re starting your own activity, you can use the Snorkl whiteboard to provide a template for your students to work on top of. Setting up the AI feedback is optional, but can be easily generated with Snorkl’s autofill. Educator’s have full control, and can choose to auto-approve or teacher-approve the AI feedback. Check out our walkthrough below!


On the student side, students log on with an email address. Assigned activities will appear when they log in. The whiteboard is the same as the one on the educator side (where you can add your own template for students to work on top of). Check out our deep dive of the tools the students have access to within the app below.


MirrorTalk
Price: Free and paid options
Compatibility: Web based, iOS and Google Play
Similarities to Flip: Students reflect on the assignment, sharing their thinking.
Differences from Flip: Videos are not seen by classmates, but are visible to the educator.
Sign up: https://mirrortalk.ai/
MirrorTalk is an educational app designed to help students and teachers build reflective thinking skills. Educators create a class, then set up a topic that they would like the students to reflect on. MirrorTalk provides several options for how students log in. If the educator selects “Login,” the students will need to enter an email address which will create an account for them. The benefit here is that with a student account, students have access to the entire dashboard: start a new reflection, view past reflections, and access AI-driven insights. If the educator selects “Session” under the Access menu, this will provide a unique link where students will only need to enter their name to add a reflection. They will not see the dashboard, and only be able to respond to the prompted question. This method is highly recommended if you are a K-2 educator, as the reflections can be hyperlinked on your LMS for quick and easy access. In “Open” access, students do not need to enter a name. After clicking on the reflection link, they are immediately prompted with the question.


When a student launches a reflection, they are prompted to answer questions. Their responses are recorded and then analyzed using AI. The AI then prompts the students to explain in more detail, analyzing the response. The app then provides educators with AI-driven insights to identify learning gaps, develop understanding, and manage mindsets. Here’s what we love about MirrorTalk!


Book Creator
Price: Free and paid options (collaboration requires a paid version)
Compatibility: Web based, iOS and Google Play
Similarities to Flip: Students can record videos and comment on classmates work with either text or video.
Differences from Flip: The camera does not contain additional add-ons and is strictly meant to capture raw video (no filters, effects, etc.) and comments appear off to the right side of the book.
Sign up: https://bookcreator.com/
Don’t let the name fool you! Book Creator is an amazing tool to create books, but it’s capabilities go far beyond what the name suggests. With a paid version of Book Creator, a teacher can turn collaboration on, providing ways for students to work together on the same assignment. As cool as this is, one of our favorite features in Book Creator is the commenting feature (and it comes with the free version). Clicking on the comment icon in the lower right panel opens up an area for students to record a video, audio message, or leave a GIF / emoji. We like to encourage the student who’s project is being viewed to record a video explaining their thinking alongside their book. Then, their classmates can read the book and add comments below the original message. We love how the comments stay in a thread, making it easy and accessible.


This feature can be used similarly to Flip by allowing students to comment on each other’s work. This builds constructive and critical thinking, all while providing a creative outlet for your students. The best part of all: books can be shared with families in just several clicks! Check out what we love about Book Creator below!


Padlet
Price: Free and paid options
Compatibility: Web based, iOS and Google Play
Similarities to Flip: Students can record videos and comment on classmates work with either text or video.
Differences from Flip: The camera does not contain additional add-ons and is strictly meant to capture raw video (no filters, effects, etc.).
Sign up: https://padlet.com/
For those who have been around ed tech for some time, you most likely have used Padlet at some point in your career. While nothing can fully replace Flip, Padlet’s work into video integration within their platform definitely feels familiar for Flip users. Educators create a Padlet board and share the link with the students. The students click on the + symbol, followed by “More attachment types.” In the pop up menu, students click “Video Recorder” to launch the camera. Unlike Flip’s camera, there are no flashy add-ons, filters, or effects. We actually prefer this to the last version of Flip’s camera. This keeps the attention on the objective, but Padlet also offers the option to upload video (so you can always use a different app to create the video and then smash it with Padlet). Students have up to 2 minutes of recording time, and the recording can be paused at any time during the process. Also like Flip, students have the ability to watch their videos back before submitting their response.

After submitting a video response, the video thumbnail will appear on the Padlet board. Clicking on a video’s thumbnail will open a familiar view to Flip users. Here, the students can view the original video and all other comments made to the video. Just like on Flip, the content is threaded and organized, making it easy for students to interact with.

Padlet also stepped up and created a Flip importer tool to bring all previous content in Flip into Padlet. Click this link to learn more and transfer your videos. The attention to detail is impressive, and as we have mentioned before - nothing will replace the Flip(grid) that we all knew and loved. But, Padlet’s efforts are definitely recognized and appreciated. This gives it our highly recommended rating, and if you are desperately looking for a replacement option, start with Padlet.

-- Please follow us on social media and tag us with how you’re using these apps in your classroom! 👓👗
For more tips, tricks and lesson ideas for making learning more interACTIVE, check out our books The InterACTIVE Class and Flipgrid in the InterACTIVE Class on Amazon!


How to Use AI in Canva (for Teachers and Students)!
In this post, we’ll share where to find AI apps in Canva, how students can use the AI in Canva, and how Teachers can use the AI in Canva - all while maintaining an innovative level of creativity!
When we think of AI in Canva, we imagine a place where artistry meets innovation. In this blog post, we're diving headfirst into the magical realm of Canva's AI features, tailored to empower both educators and students alike. From spicing up lesson plans to adding flair to presentations, Canva's AI tools are here to sprinkle a touch of magic on your design endeavors.
(click on any subheading or button to jump to that section)


What are the Different Types of AI That Can
Be Found in Canva?
There are lots of different types of AI that can be found in Canva. These Apps can be found on the left side of the main screen in your dashboard by clicking Apps. To enable them, all you have to do is grant permission by opening the desired app and choosing to use it in an existing design or new design. Below are some of our favorite apps, along with descriptions for each. Check out our video to see how some of these work. To find a complete list of AI powered apps within Canva, click here or the image.

Magic Media: Generate
images & video
Canva’s Magic Media app turns creative ideas into images or video. Enter a few words or a sentence about what you would like to generate and then sit back and let the AI do the work! (This app is for ages 13+, unless supervised.)


Dall*E: Generate Realistic Images
Dall*E allows users to quickly generate realistic images or art using AI. Users enter in a few words to describe what they want to generate and then the AI creates it! (This app is for ages 13+, unless supervised.)

Image Upscaler: Elevate Picture Resolution
a1d.ai’s Image Upscaler takes blurry or old photos and applies AI to sharpen them. This allows users to refine their images, ensuring that they stand out in your Canva designs.


Magic Morph: Turn Elements Into Something Extraordinary
Canva’s Magic Morph allows users to transform words and shapes with a simple prompt. It can be used to enhance text or shapes, quickly create graphics or textures, and much more.

Murf AI: Add Audio
Voices to Designs
Murf.AI allows users to add natural sounding voices to designs. Just type out the script and Murf.AI will create the audio to embed into your design.


Soundraw: AI Music Generator
Soundraw takes the time out of searching for the perfect song. Now, with Soundraw, simply choose the mood, theme and length of song you want. The AI will generate the track for you to embed into your design! Note: This app requires a Soundraw account to use. There is a fee to use this app, but the first 14 days are a trial.

Translate Text: Translate Any Text to Another Language
Canva’s built in translator tool can translate text in your designs to 1,000’s of different languages. To access it, right click a text box and then scroll down to Translate Text. Complete the prompts to translate the text!


Colorify: Add Color to
Black & White Photos
Colorify is an app that restores color to black & white photos, making them look vibrant and lively again. This is great for researching historical figures from the past!

Transcribe Audio: Add
Captions to your Designs
SRB’s Transcribe Audio app allows users to generate a transcription text from an uploaded audio file. This is perfect for subtitles or captions! You can transcribe from these file types: mp3, wav, m4a, and ogg files.


SecretInk: Artistic Text
Hidden in Plain Sight
SecretInk allows users to blend text into any image background, creating an artistic illusion. If it’s unclear, try zooming in or out to see the magic! But be on the lookout! You might see things in unexpected places!
How Can Students Use the AI in Canva?
As creatives, we believe that there is a fine line between using AI to generate ideas and generate inspiration. Teachers and students can use AI to generate content - and there is definitely a place for that. However, as innovative educators we believe that the AI should be used to inspire ideas. For example, students can get creative with the prompt they use to generate the content. So, let’s look over some ways that students from our own classrooms have used the AI in Canva.


Templates: Find Inspiration Quickly
Canva has tons of ready-to-use templates in it’s library. These are a great starting point for students to ignite their creativity. In the example below, students were breaking down the chapters of a book by creating a magazine cover for each chapter. What started off as a template was quickly edited and altered to include the specific details from the book. To view the magazine cover templates on Canva, click here.


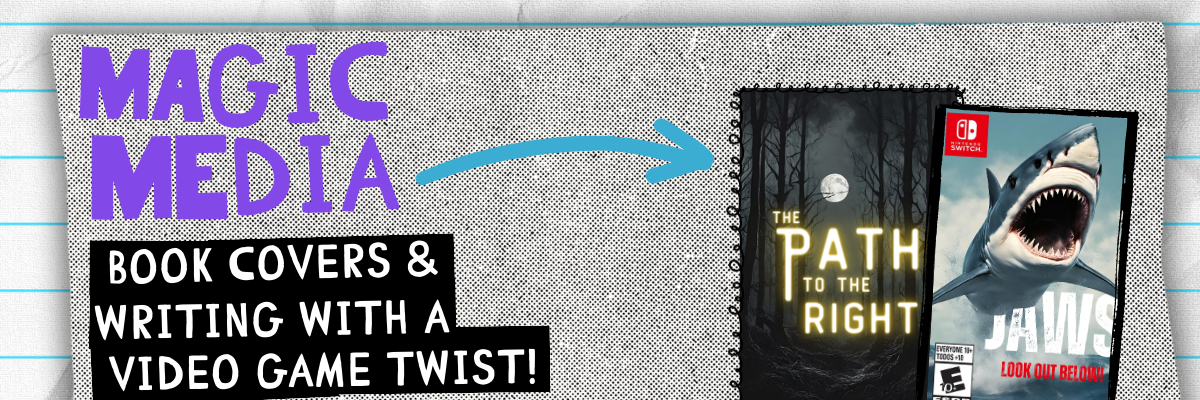
Magic Media: Book Covers and Writing
with a Video Game Twist!
Canva’s Magic Media is one of our favorite apps simply because it can deliver images based on creative prompts. We encourage our students to stop and think about what they want the image to look like before generating any images. The more creative the prompt, the more creative the image generated will be.
This idea can be used with either Canva’s templates and Magic Media. We asked our students to recreate the cover of a book by changing the setting or characters. The students found a book cover template or generated their own using Magic Media. They added additional elements, text, and details to their covers before finishing up. See it in action below!


Who says writing has to be dreadful for kids? This project gave students an opportunity to take a narrative writing piece and turn it into a video game! Students still completed all of the traditional writing on paper and pencil, but when it came time for a final project, we had the kids design the video game covers on Canva using Magic Media to generate the backgrounds. We also gave the kids a change to create a video game video trailer, where they used Magic Media files to compile into a video. Check them out below!


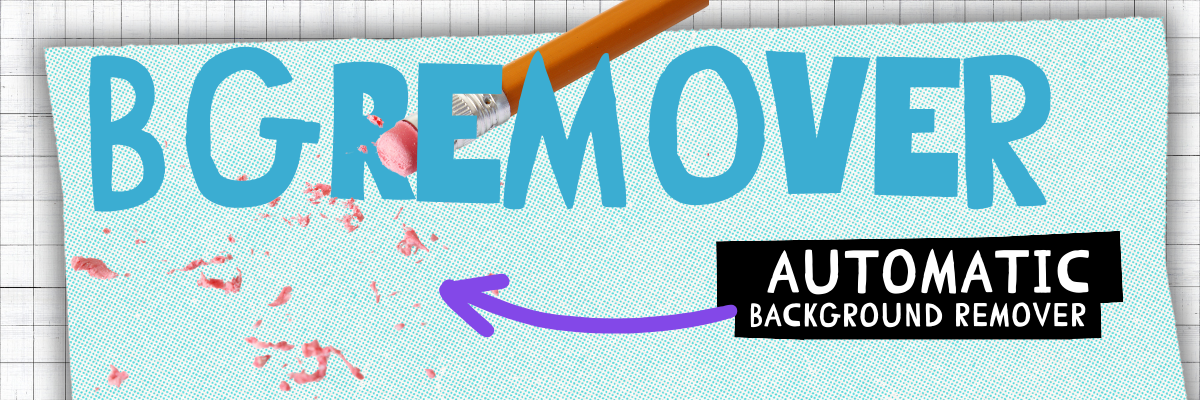
BG Remover: Automatic Background Remover

Canva’s BG Remover, or background remover, makes automatic background removal effortless. Simply drag and drop your photo to instantly upload and open a new design project in the online editor. Select your photo, then click BG Remover to work the magic of removing whatever is behind the image. Students love this feature, and we are obsessed with these examples. Below, the students used the BG Remover to place characters from the story in a different setting, and then explain how that would change the entire story. Can you guess the story below?

Magic Eraser: Remove
Unwanted Objects
Canva’s Magic Eraser instantly cleans up pictures online. It's easy to remove unwanted objects or erase people from photos. This allows students to brush over distractions to instantly remove them with Canva Pro's Magic Eraser. In the example below, students


Magic Edit: Swap out Objects in a Photo

Similar to the Magic Eraser, Canva’s Magic Edit allows users to easily remove distractions or add new things to your photos with a few clicks. Simply brush over the areas you'd like to modify and then describing what you want to add. The students have used this tool to replace a face on Mount Rushmore. Who would you add to the mountain if there was an available spot? The kids have also used this to add historical figures from the past onto Martin Luther King Jr’s "I Have a Dream” speech. For example, how do you think Abraham Lincoln would have responded if he was there at the speech? Check out the examples below!

SecretInk: Artistic Text
Hidden in Plain Sight
SecretInk blends text into any image background to create an optical illusion. Sometimes you have to zoom in or out to see it, but we love how this app puts the text in unexpected places. Our students used this app to provide a one word summary of the theme of the books they were reading. Can you guess which book this was for?


How Can Teachers Use the AI in Canva?
Students can’t have all the fun! There’s plenty of ways that educators can use the AI tools located in Canva. These timesavers and tools will help even the most organized classroom teachers. Here are a few of our favorites!

Upload a PDF: PDF’s Transformed Into
A Different File Type
Have you ever found a great PDF resource that you wish was just slightly different? Maybe you wish you could have edited the PDF to better fit your learners? Well, with Canva’s PDF uploader, now you can! Just upload the PDF from the main dashboard, and then you can edit and save the file as whatever you would like. Here’s how it all works:
Log onto Canva
Locate and click the Upload button on the top right side
Select your file(s) to upload. Canva automatically uploads the file to your projects.
Open the project from your Recent Designs section on the main dashboard.


Magic Design: Education
Resources for Your Classroom
Fumbling through templates is SO 2022! Now, with Canva’s Magic Design, educators can use AI to produce a project design that directly aligns with their topics. There’s a couple of ways that you can find and produce these resources. Here’s how:

Templates
Log onto Canva
Search for your topic in the search bar and hit enter (tip: be sure your search is set to Templates and not Projects)
Select a template then click Customize this template to add it to your own projects.


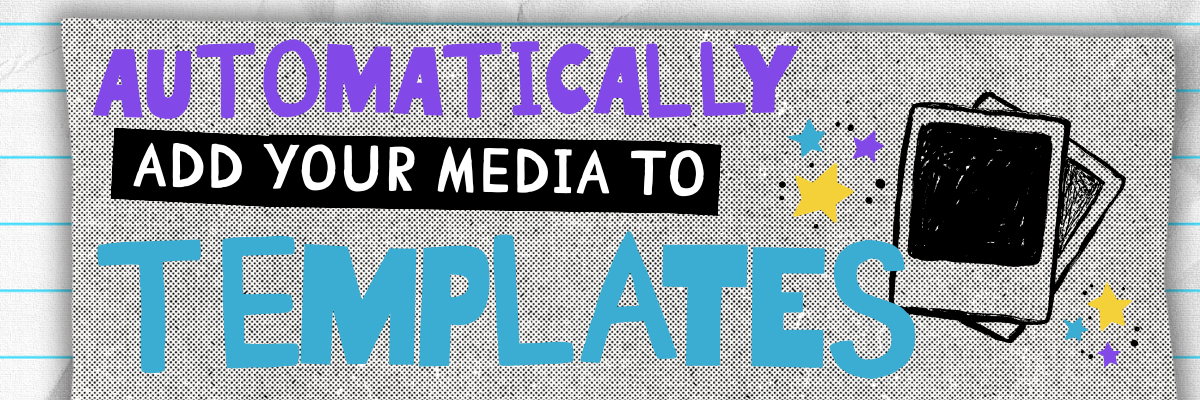
Automatically Add Your Media to Templates
Canva now allows users to add uploaded media into template searches so that users can preview what the designs would look like with the uploaded media inserted. Here’s how it works:
Log onto Canva
Search for your topic in the search bar and hit enter (tip: be sure your search is set to Templates and not Projects)
Next to All Filters and Category, click on Media.
Select the files that you would like to include, and then click See results.
Canva will embed your imported media / images into the designs and you may select from the generated selections.


Magic Design: AI generated content
Canva’s Magic Design is an AI-powered design generation tool that lets you input any media or prompt, and transforms it into customizable designs that match the content and context you need. We appreciate how the platform automatically generates examples to view, giving you a choice to select from. To access Magic Media, follow these steps:
Log onto Canva
Click the Create a design button located on the top right side
Choose your desired file size. The project will open in a new tab.
Make sure that you are on the Design tab located on the left side panel.
Directly to the right Design tab (at the top), type what you would like the AI to generate in five or more words.
Magic Design will suggest different files for you. Select the one you like!


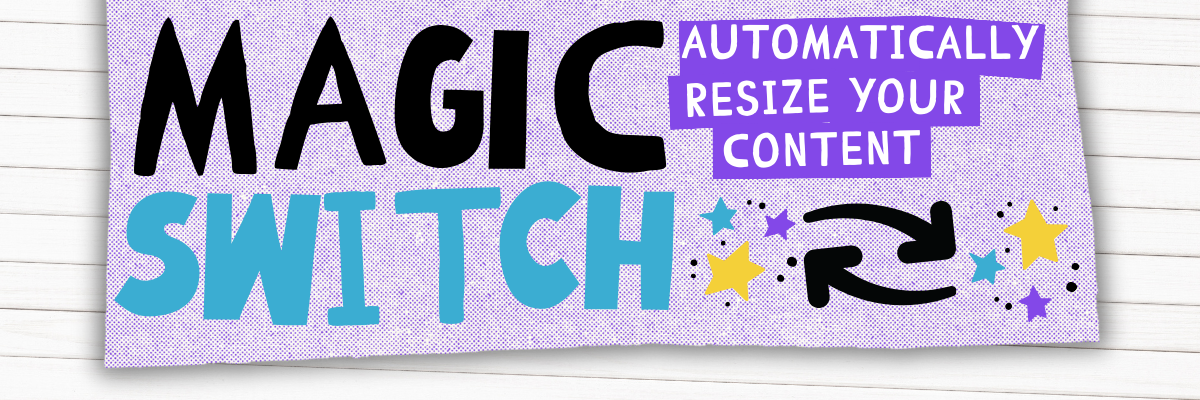
Magic Switch: Automatically Resize Your Content
Canva’s Magic Switch uses AI change the format of your file or transform it into something entirely new. With Magic Switch you can: Transform your design into any type of Doc like a blog post, summary, email or even a poem. Resize one design into many for all channels, all with just a few clicks. Here’s how it all works:
Log onto Canva
Open a design that you wish to resize or transform.
Locate and click Resize & Magic Switch on the top left side of the screen.
Search for a resize option (for example: type worksheet). Tip: You can select more than one size.
Click Continue, then click either Copy & resize or resize this design.
Your new size(s) will be automatically generated. You may need to move elements around a bit, but it saves a lot of time!

Translate: Instantly Translate Your Content

Canva’s built in translator tool can translate text in your designs to 1,000’s of different languages. In just a few clicks, you can translate your content instantly. Finding it is a bit tricky, though. To access it, follow these steps:
Launch a Canva project
Right click a text box and then scroll down to Translate Text.
Complete the prompts to translate the text!
Canva also has a free document translator standalone website where anyone can upload a document and it will translate the content for you automatically. To check it out, click here or the image below!
Magic Write: Generate Text and Content Easily

Canva’s Magic Write is an AI-powered tool that helps users generate text and content ideas quickly and easily. It allows users to create a wide range of graphic design projects such as social media posts, presentations, flyers, and more. We appreciate the ability to quickly add clear directions to a resource, or narrow down a learning goal into a language that students can understand. Here’s how to access Magic Write:
Launch a Canva project
Click on any text box
Click Magic Write
Select your preference!
-- Please follow us on social media and tag us with how you’re using the AI in Canva in your classroom! 👓👗
For more tips, tricks and lesson ideas for making learning more interACTIVE, check out our books The InterACTIVE Class and Flipgrid in the InterACTIVE Class on Amazon!


How to Use AI Tools for Teachers to Save Time, Boost Engagement, and Personalize Learning
@TheMerrillsEDU share how teachers can use AI tools to save time, boost engagement, and personalize learning. You’ll learn about ten different tools to use in your classroom immediately and efficiently!

As a teacher, you know how challenging it can be to plan, prepare, and deliver effective and engaging lessons for your students. You also know how important it is to personalize learning for each student, according to their needs, interests, and goals. But how can you do all this without spending hours of your precious time and energy?
The answer is AI tools for teachers. AI, or artificial intelligence, is the technology that enables machines to perform tasks that normally require human intelligence, such as understanding language, recognizing images, and solving problems. AI tools for teachers are applications that use AI to help you with various aspects of teaching and learning, such as creating content, assessing students, providing feedback, and more.
In this blog post, we will show you how to use AI tools for teachers to save time, boost engagement, and personalize learning for your students. We will show how you can get started with them, and by the end of this post, you will have a better understanding of how AI tools for teachers can transform your classroom and enhance your teaching experience.
Please note: This blog post was hand-crafted and was not created using AI.
(click on any subheading to jump to that section)


How to Prompt AI as a Teacher
There doesn’t sound like there’s much to launching an AI tool, entering a prompt and seeing the results. But, prompting AI is a work of art that takes us beyond our world of immediate ask and receive. As we learn more about AI, we’ve come to realize that it’s important to be specific, thorough, and challenging.

A teacher using AI to generate content needs to be specific. Try entering in a grade level, targeted standards, learning goals, and even rubrics. If you’re looking to clarify directions, try adding, “make these directions clear for students age 10.” We find it helpful to use natural language that’s easy to understand and follow. Try to use keywords or phrases that match the topic and level of your students. Teachers can also use filters or modifiers to narrow down or expand search results.

Remember, AI responses can contain biases and out-dated information, so it’s important to think and challenge what is being generated. If a generated response doesn’t look right - challenge it. For example, if you use the prompt: “Generate a lesson plan on _______,” and the lesson plan doesn’t look grade-level appropriate, respond to your current prompt with, “now make it appropriate for ______ grade.” This can help the AI narrow down the content.
Diffit
Cost: Free and paid versions available
Compatibility: web based
Diffit is an AI-based platform that helps teachers customize their teaching methods to suit students’ reading levels and needs. Diffit can help teachers differentiate their content and instruction by:
Instantly creating leveled resources for any topic, lesson, or student
Providing vocabulary words, multiple choice questions, and other features to enhance comprehension and retention
Converting any content to all reading levels from 2nd to 11th grade (and higher), and in over 30 languages
Click here to sign up for a free account and watch and learn how it all works below!


Magic School AI
Cost: free and paid versions available
Compatibility: web based
Magic School AI is an AI platform for educators that offers 60+ tools to help with translation, differentiation, assessment, communication, and more. It can help teachers save time, fight burnout, promote sustainability, and build AI competencies and skills. Some of our favorite features of Magic School include their Text Leveler, Clear Directions, Custom Chatbox, Math Story Problems, and more. There’s a lot to love about Magic School AI, but another feature that has us excited is MagicStudent. MagicStudent is an AI platform designed to build AI literacy for students. It not only teaches students to use AI responsibly, it also unlocks learning opportunities not possible without generative AI. This feature is coming, so be sure to stay tuned for updates. Sign up for a Magic School AI account by clicking here and check out what it has to offer below!

School AI
Cost: free
Compatibility: web based
School AI is an AI platform that helps teachers create, personalize, and engage their students with adaptive and interactive learning experiences. It also helps students learn at their own pace, level, and style, and get instant feedback and guidance from the AI. School AI is designed for K12 students and has built-in monitoring and controls for teachers.
School AI can help both teachers and students be successful by:
Saving teachers time and effort in planning, preparing, and delivering lessons
Providing teachers with data and insights on student performance and progress
Offering teachers various tools to customize and differentiate their instruction
Enhancing student motivation, engagement, and retention with gamified and immersive content
Supporting student autonomy, self-regulation, and metacognition with AI feedback and scaffolding
Catering to student diversity, inclusivity, and accessibility with multilingual and multimodal options
One of our favorite parts of SchoolAI is Spaces. With Spaces, users (both students and teachers) can use AI powered chatbots in creative ways. For example, you can set up a chatbot to act as a historical figure, taking questions from the student(s). It all feels very familiar to the kids - resembling a text message thread.
You can sign up for free and start using School AI today by clicking here, and check out what it has to offer below!


Class Companion
Cost: free
Compatibility: web based
We’re not going to lie….Class Companion is one of the tools that we’re most excited about. Class Companion is a website that uses AI to help teachers give instant, personalized feedback on written assignments. It can help teachers save time, monitor student progress, and differentiate instruction. It can also help students practice their writing skills, get immediate guidance, and improve their learning outcomes. Here’s how it works:
Teachers start by uploading an assignment and rubric. (TIP: When creating the assignment, we HIGHLY recommend setting the maximum number of attempts to more than 1. Doing so provides an opportunity to edit their work after the AI provides feedback.)
This gets shared to students (student accounts are required) via a shared link or an email.
Students complete their writing by typing out their essay in Class Companion, then submit for AI review / grade.
If you’ve chosen more than one attempt for your students, the AI will coach them through the teacher’s rubric, explaining whether or not the student has met the expectations. The student then has the opportunity to edit their work and try to improve.
When an assignment is submitted, the teacher has the ability to edit the AI’s score to provide a final grade.
To sign up for your FREE account, click here and check out our video below. You can also check out ouf full blog post on Class Companion by clicking here!

Curipod
Cost: free and paid versions available
Compatibility: web based
Curipod is a website that helps teachers create and deliver interactive lessons on any topic, with the help of artificial intelligence. Teachers can use Curipod to:
Generate lessons with AI: Curipod can suggest content, questions, and activities based on the topic and learning objectives that the teacher inputs. The teacher can then customize the lesson according to their preferences and needs.
Engage students with curiosity: Curipod’s lessons are designed to spark students’ curiosity and interest in learning, by using multimedia, gamification, and social learning features. Students can share their voices, opinions, and creations with their classmates and teachers.
Save time and resources: Curipod reduces the workload and stress of lesson planning and delivery, by providing ready-to-play lessons from verified educators and authors, as well as a user-friendly interface and seamless integration with other platforms.
To sign up for a free account, click here. Check out our video for more information below!

Eduaide.AI
Cost: free and paid versions available
Compatibility: web based
Eduaide.AI is a website that helps teachers create lesson plans, teaching resources, and assessments using artificial intelligence. Teachers can use Eduaide.AI in the classroom in the following ways:
Generate teaching resources: Teachers can choose from over 100 resource types and learning objects, such as worksheets, quizzes, slides, videos, etc. and use AI to generate content based on their topics and objectives.
Personalize instruction: Teachers can use the “transform” tool to modify the generated content to suit their students’ needs and preferences. They can also use the “feedback bot” to provide instant and customized feedback to students.
Collaborate with AI and other teachers: Teachers can use the “Eduaide chat” to ask questions and brainstorm ideas with the AI model. They can also share their resources with other teachers and access a community of practice.
To sign up for your account, click here and check out our video below!


CoPilot
Cost: free
Compatibility: web and mobile
Microsoft CoPilot is an AI companion that can help teachers and students with various tasks and projects, such as:
Writing and editing: CoPilot can assist with writing essays, reports, summaries, poems, stories, and more. It can also help with editing, proofreading, and improving the quality and clarity of the text.
Researching and learning: CoPilot can provide information, facts, definitions, examples, and explanations on any topic. It can also help with finding and citing sources, creating bibliographies, and checking plagiarism.
Coding and creating: CoPilot can help with coding in different languages, such as Python, Java, C#, etc. It can also help with creating apps, games, websites, graphics, and more.
Teaching and assessing: CoPilot can help teachers with creating lesson plans, teaching resources, and assessments. It can also help with providing feedback, grading, and tracking student progress.
Generating images: CoPilot paired with Microsoft Designer is able to produce images that may be used for presentations, lessons, etc.
To use CoPilot in the classroom, teachers and students need to sign in to their Microsoft account or Entra ID account and access CoPilot through the Microsoft Edge or Chrome browser, on Windows or Mac OS. They can also use CoPilot in select Microsoft 365 apps, such as Word, Excel, PowerPoint, Outlook, OneNote, and Teams. They can chat with CoPilot by typing or speaking their requests, and CoPilot will respond with relevant and useful information, suggestions, or content. They can also ask CoPilot to show examples, explain how it works, or give feedback. Check out our video below for more info!


Gemini (formely Bard)
Cost: free
Compatibility: web and mobile
Google's Gemini (formerly Bard) is a tool designed that can assist teachers in various ways, primarily by providing them with access to educational resources, streamlining administrative tasks, and facilitating communication and collaboration among teachers, students, and parents. Here are several ways Gemini can help teachers:
Resource Access: Gemini provides teachers with access to a wide range of educational resources, including lesson plans, teaching materials, videos, and interactive activities. These resources can help teachers enhance their lessons and engage students more effectively.
Curriculum Planning: Gemini offers tools for curriculum planning, allowing teachers to create, organize, and share lesson plans, unit outlines, and assessments. This helps teachers align their curriculum with educational standards and goals.
Assessment and Feedback: Gemini enables teachers to create and administer assessments, quizzes, and assignments digitally. Teachers can track student progress, provide timely feedback, and analyze assessment data to inform instruction and support student learning.
Teachers are able to access Gemini by clicking right here and accepting the terms. Educators can find Gemini in Google apps such as: Google Classroom, Google Docs, Google Sheets, Google Drive, and more.


Canva Magic Suite
Cost: free
Compatibility: web and mobile
Canva's Magic suite tools are a set of features designed to enhance the design process and make it easier for users to create visually appealing graphics and designs. These tools leverage artificial intelligence (AI) and automation to assist users in various aspects of design, including layout, color selection, and image editing. Here are some of the key features included in Canva's Magic suite:
Background Remover: This tool automatically removes the background from images, allowing users to create transparent or custom backgrounds for their designs. It simplifies the process of isolating subjects from their backgrounds, which is useful for creating product images, profile pictures, and design elements.
Color Palette Generator: Canva's Color Palette Generator analyzes an image and generates a complementary color palette based on the colors present in the image. This tool helps users create cohesive and visually appealing designs by providing color inspiration and ensuring color harmony.
Font Pairing: Font Pairing suggests font combinations that work well together, helping users choose complementary fonts for their designs. It takes into account factors such as font style, weight, and contrast to ensure readability and aesthetic appeal.
Layout Suggestions: Canva's Layout Suggestions feature analyzes the content of a design and provides suggestions for layout options. It helps users quickly explore different layout possibilities and find the best arrangement for their content, saving time and effort in the design process.
Smart Resize: Smart Resize automatically adjusts the dimensions of a design to fit different aspect ratios and sizes, making it easy to create variations of the same design for different platforms and devices. This feature saves time by eliminating the need to manually resize and reformat designs for different purposes.
Image Cropping: Canva's Image Cropping tool provides intelligent cropping suggestions based on the composition of the image and the aspect ratio of the design. It helps users crop images to fit specific dimensions or aspect ratios while preserving the most important parts of the image.
Overall, Canva's Magic suite tools leverage AI and automation to simplify the design process, provide creative inspiration, and assist users in creating professional-looking designs with ease. These features are valuable for students and teachers looking to create high-quality graphics and visual content for academic purposes. To learn more about how Canva can be used in the classroom, check out our blog posts and video tutorials below:
-- Please follow us on social media and tag us with how you’re using AI tools in your classroom! 👓👗
For more tips, tricks and lesson ideas for making learning more interACTIVE, check out our books The InterACTIVE Class and Flipgrid in the InterACTIVE Class on Amazon!


How to Use Canva's Magic Tools in the Classroom
Now, generating content for your classroom is even easier thanks to Canva’s new Magic features. Whether you’re trying to find resources for lessons, create engaging activities, promote accessibility, or adding some glitter to your creations - Canva’s Magic tools can help. In this post, we’ll take a dive into each of the features and how they can help you in your classroom.

Now, generating content for your classroom is even easier thanks to Canva’s new Magic features. Whether you’re trying to find resources for lessons, create engaging activities, promote accessibility, or adding some glitter to your creations - Canva’s Magic tools can help. In this post, we’ll take a dive into each of the features and how they can help you in your classroom.
Please note: This blog post was hand-crafted and was not created using AI.
(click on any subheading to jump to that section)


EDU Library in Canva
Canva’s EDU Library is full of teaching resources broken down by subject areas, grade levels, and more. These lessons are free and ready-to-teach. At the time of this original post, there were over 1,000 K-12 lessons designed by teachers, for teachers.
To access the EDU Library, click here or on the video. Then, you can narrow down your search by selecting the appropriate grade level and subject. Click on a lesson to view a preview of the contents, along with the design. Then, click Use this lesson to add it to your own Canva account. These lessons are fully editable, so if you’d like to change anything, you can. Additionally, you can share the lesson with other teammates by clicking on the “sharrow” or share icon.
You can check out our step-by-step video tutorial up on our Youtube channel (click here) or watch it to the left!


Creating Courses in Canva
Once you’ve added the content from above to your Canva account, Canva will automatically break down the content - essentially creating a course. From here, you can choose the type of experience for users. For example, you have the option to grant students to download the lesson(s) as a template file, giving them their own copy to edit and submit. Or, students can just use the design as a resource - which will not let them edit the design. Click on the play icon (or “Open course”) to launch the entire project. Now your class will have access to the course.
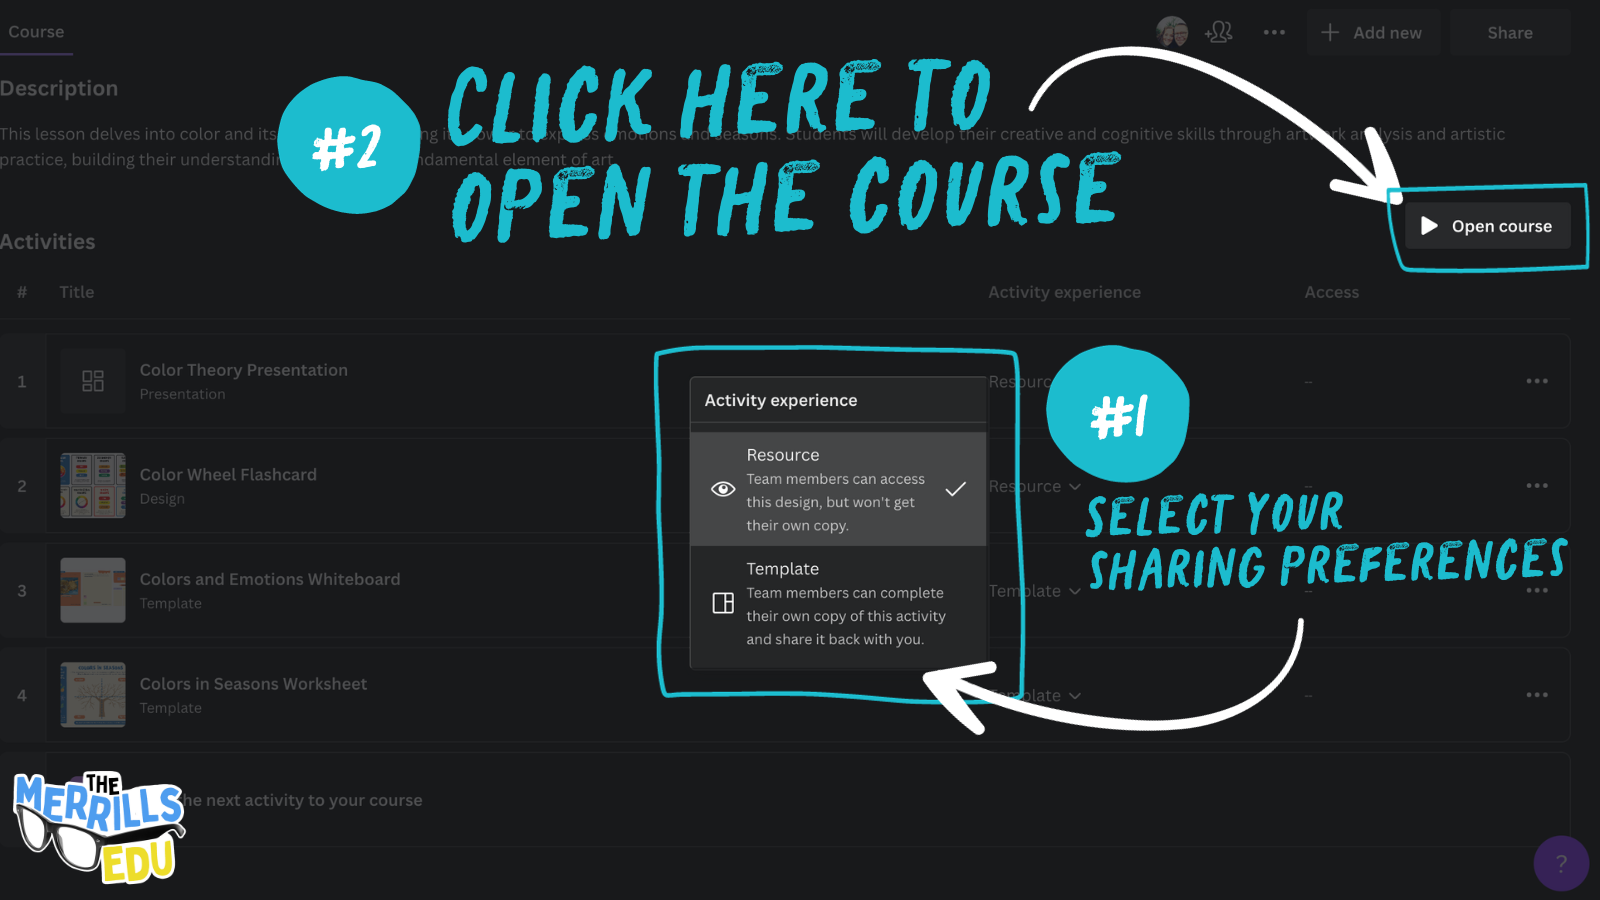
You are always able to remove or add content the course by returning to it and selecting “Add the next activity to your course.” You can even edit the description at the top of the page by clicking on the pencil icon. All of the contents within this course get saved into a Folder located in your Canva account. If you need to revisit the content, just click on the file from your dashboard.

Ready to Teach Lessons in Canva
We’ve shared how to find the EDU Library, and now you know how to design a course - but we though we would share some of our favorite lessons that we found in the library. For convenience, we’ve broken them down by grade level. Check them out below!


How to Use Magic Animate in Canva
Canva’s Magic Animate instantly applies perfectly suited animations and transitions to your schoolwork. To try Magic Animate, open a project and then click on Animate. A new panel will open on the left hand side. Click on Magic Animate, then select your desired effect. Now, the animations and transitions will be automatically applied. If you’re saving the design, it’s important to remember that animations and transitions will not be saved if the file is downloaded as a JPEG or PNG. In order to preserve the animations and transitions, the file will need to be saved as a video/movie or GIF. Check out how it works below!

How to Use the Design Accessibility Tool in Canva

Canva’s Design Accessibility Tool ensures that educational resource you share is effortlessly designed with accessibility in mind. The tool will check for potential accessibility issues, create inclusive lessons and activities, and improve the accessibility of your designs without having to leave Canva. Here’s how it all works:
Open a Canva project, then click on File on the top left.
Then, select “View Settings.” A list of options will appear.
Now select, “Check design accessibility.” This will coach you through any potential issues with your design.
For a video tutorial, check out our YouTube channel here, or click on the video below!

How to Use Canva’s Magic Grab

Canva’s Magic Grab allows you to easily transform images. Using Magic Grab, you can make any image editable, even the text within it. Here’s how it works:
Start by uploading a photo or screenshot of an activity
Grab a part of the photo to edit, reposition, or resize.
This allows you to transform the look of the design.
This feature pairs well with other Magic Studio features like Text to Image. Give it a try!
For a video tutorial, check out our YouTube channel here, or click on the video below!

How to Use Canva’s Magic Write AI in the Classroom

Canva’s Magic Write is a handy teaching assistant. This tool will save you time, utilizing Canva’s AI-powered generators to create content. Simply type a promopt and watch Magic Write generate the teaching content. Or, try streamlining tasks like creating lesson plans or activities. As with all AI generated content, educators will need to review the material to make sure it aligns with learning standards. So, all of Magic Write is fully editable. To try it out, click on a piece of text, then select Magic Write to generate a different description.

How to Use Canva’s Magic Switch
If you’ve ever been working on a Canva design, only to stop and wish you had sized the project for something else - then this is for you! Magic Switch will resize schoolwork into multiple formats all at once. So, now you can transform your presentations into a doc or a whiteboard. Previously, users would have to copy the design and then rearrage all the elements so that they appeared correctly on the design. Now, with Magic Switch, the AI does the work for you. Check it out below!
Open the Canva design that you wish to resize
Click on Magic Switch located on the top left
Select or search for your preferred size
Choose to either copy and resize into a new document (which will duplicate the document into the new size), or resize the current document (which will change the size of the current document that is open).
Let the AI do the work, and then open the template or design!
For a video tutorial, check out our YouTube channel here, or click on the video below!
-- Please follow us on social media and tag us with how you’re using these Canva activities in your classroom! 👓👗
For more tips, tricks and lesson ideas for making learning more interACTIVE, check out our books The InterACTIVE Class and Flipgrid in the InterACTIVE Class on Amazon!


Canva Features To Use in the Elementary Classroom
@TheMerrillsEDU share some of the best Canva features to use in the Elementary Classroom! We’ll even provide some student examples for inspiration!

We’ve curated 5 of our favorite Canva features that we love to use. These are both teacher and student friendly! Check out how they work, along with some student examples below!
(Click on any subheading to jump to that section)


How to Animate Elements and Images in Canva
The ability to animate in Canva has been around for a while, but now users can create custom animations to any element or image. Enabling the animation allows the user to create a path, or custom movement, which the element or image will follow. There are options to fine tune how this looks, including stability and speed. Check out our video tutorial or read below to see how it all works:
Open a Canva project
Select the image or element that you would like to animate
With the image or element selected, click Animate
Click “Create an Animation”
Select and drag the image or element around the screen
The image or element will now be animated!
Student Examples and Ideas of Ways to Use Canva Animation
Here are some ways that our students have been using animation in Canva. We hope these inspire you, too!

Canva Animation: Animating the Apollo 11 mission
Students read the book: “Eight Days Gone”
Students animated the astronauts and recreated the events of the Apollo 11 mission

Canva Animation: Animating the items recovered in a lost and found box
Students read the book, “Lost and Found” (by: Bill Harley)
Students explained the sequence of events by animating items recovered
Canva Animation: Animating characters

Students read the book, “How to Catch a Star” (by: Oliver Jeffers)
Students animated the characters and retold the story

Using Layers in Canva
Have you ever been working on a project with lots of elements in Canva? Sometimes you’ll need to select a layer that’s in the back, but in order to do so - you have to move all the other elements out of the way. Well, now you don’t have to! Layers are the order of everything (text, images, elements, videos, etc) in your design. Enabling layers will allow you to select the specific item you wish to edit. Check out our video tutorial or read below to see how it all works:
Open a Canva project
Select any item on your design
Click the three dots
Scroll down to “Layers",” then click “Show Layers”
All of the items on that design / project will now be visible on the left
Click and drag and item to move the Layer to a new position!
How to Translate Text in Canva
The ability to translate text in Canva is now live - and can be done in just 3 clicks! Translate is an online AI-powered machine translation tool built into Canva that automatically translates the text in your existing designs into your chosen language(s). You can access this tool for free to translate designs with a lifetime cap of 50 pages. With a Canva Pro or Teams subscription, you can increase this limit to 500 pages per user, per month. Check out our video tutorial or read below to see how it all works:
Open a Canva project
Click on “Apps” from the left panel
Search for: “Translate”
With the Translate app open, select the language you would like the text to be translated to.
Select the page you would like to apply the translation to
Click on “Translate!”

How to Use Canva’s Magic Edit
Canva’s Magic Edit allows you to easily remove distractions or add new things to your photos with a few clicks. Magically transform your photos by brushing over the areas you'd like to modify and then describing what you want to add. A few things to note here:
Magic Edit is currently not available in Canva for Education
It can't be used with Background Remover, Magic Eraser, or Autofocus on the same image.
Check out our video tutorial or read below to see how it all works:
Launch a new design project
Add an image
Select the image, then click “Edit Photo”
Click on “Magic Edit” (tip: if Magic Edit does not appear, you’ll need to switch to the new Canva editor)
Adjust the brush size and then highlight the area you would like to edit.
Now describe what you want to generate inside of the highlighted area.
Say abracadabra and wait for the results! Now you’re a Canva magician!

How to Use Canva’s Magic Eraser
Canva’s Magic Eraser provides an easy way to remove unwanted objects or erase people / things from photos. It’s as simple as highlighting what you want removed, and then let Canva do all the work! Check out our video tutorial or read below to see how it all works:
Launch a design project
Select an image
With the image selected, click “Edit Photo”
Click on “Magic Eraser” (tip: if Magic Eraser does not appear, you’ll need to switch to the new Canva editor)
Adjust the brush size and then highlight the area you would like to edit.
Sit back and wait for the results! The best part, you don’t even have to blow away all of eraser bits!
-- Please follow us on social media and tag us with how you’re using these Canva features in your classroom! 👓👗
For more tips, tricks and lesson ideas for making learning more interACTIVE, check out our books The InterACTIVE Class and Flipgrid in the InterACTIVE Class on Amazon!


10 Innovating Ed Tech Ideas to Try in 2023
@TheMerrillsEDU share 10 Ed Tech ideas that you have to try this coming year! Whether it’s animating drawings into characters, collaborating on docs, or assessing - we’ve got something for you!

If you’re looking for something new to try in the new year, you have come to the right place! We’ve compiled a list of ten innovating ed tech ideas that you can try RIGHT NOW! Check them out below!
(click on any subheading to jump to that section)


Meta Demo Lab & Canva

Meta Demo Lab is a website that will take your drawings and automatically animate them. The key is that the drawings need to be completed on white paper. Once you run through the process of creating your animation, you can download the file as an MP4. But, this is where the magic starts. Take your MP4 file and upload it to a video project in Canva. Once the video uploads, remove the background using Canva’s Background Remover tool. Replace the background with a new element of photo from Canva, and now your drawing is in an entirely different place. We’ve used this idea to have our students illustrate story book characters or historical figures and then animate them back into the setting or moment in time. Click here or the image below to visit the Meta Demo Lab website!


Immersive Reader & Microsoft Edge

Microsoft takes accessibility very seriously, and this new feature in Microsoft Edge is a prime example. This shortcut / hack allows users to turn on Immersive Reader for any Edge web page In the address bar, add "read:" in front of any link. For example, if you’re using Microsoft Edge and visit our website using this link:
read:https://www.themerrillsedu.com
Then, Immersive Reader will be able to read aloud the content of the website to you!

360Schools


360schools is a unique immersive 360° / VR education service designed for teachers and their students. This website brings hundreds of thousands of incredible 360° panoramas to your students. Educators and students can search for specific locations, share content, and even embed the 360 images into a website or LMS. There are even a few guided tours which will take users from point to point in images. For some amazing results, search “underwater” or “The Alamo!” Click here or on the image above to learn more and sign up for an account today!

Adobe Animate from Audio


Adobe’s Animate from Audio is a part of its Animate app. The difference between the two is that Animate from Audio is a free online converter and you won’t need to download the Animate app, or have an Adobe account. This can be done right within your web browser! Click here or the image to the right to visit the Animate from Audio website. Your first task is to select a character. Once you’ve done this, you can choose from a variety of backgrounds (tip: if you choose green, you can remove the background and upload it to Canva to drop your character into a background of your choice). The last option is the size. Once you’ve configured your project, just hit the record button and follow the steps to save your work. It’s that easy!
Canva Docs


Canva Docs is a visual-first document creator that allows you to design documents supercharged with videos, images, graphics, charts, and graphs. It lets you bring the same color, movement, and eye-catching visuals you usually reserve for presentations to your documents. So, now your students’ word documents don’t have to be boring! Another thing to love about Canva Docs is the ability to collaborate quickly and efficiently. Now, your students can brainstorm, write, create, and design their projects without ever having to leave Canva. Learn more about Canva docs by clicking here or the image to the right!

Animal Crossing Digital Room Transformation

Chances are if you’re an Elementary teacher, your kids are obsessed with the game Animal Crossing. So, we wanted to figure out a way to integrate this into the classroom. If you’re unfamiliar with the game, it basically works by using a character to walk around an island performing tasks, catching fish & bugs, and then selling them to a store in return for “bells,” or money. Then, you can use the bells to purchase items to put into your house. So how does this translate into the classroom? Well, if you’re looking for a classroom management idea or if you’re learning about map skills, this is for you! Students can use the ABD card to accumulate bells. The catalogue will allow them to purchase items using their bells. The items purchased can go into their house - which they have picked out on the class map. Check out the explanation in our video above, or download each item below!

Each student gets an ABD card. Students can earn “bells” by completing tasks or doing jobs around the classroom. Click here or the image above to download the ABD card!

Students use their bells from the ABD card to purchase items from the catalogue. We recommend sharing this template on your LMS, then your students an copy / past the items to their own homes. Click here or the image above to download the catalogue!

Students use Canva to create their own room (as a blank presentation slide). Then, have them share their slide to you. Next, have them pick out a house from the map. Then, hyperlink their slide to the master copy of the class map. Click here to or the image above to download the map template!

Microsoft Word - Share Link for Review Mode

Writing in the 21st Century looks different. Students are still using paper and pencil, but the possibilities no longer stop there. Now students of all ages are able to publish their writing to share with broader audiences. Microsoft Word has used accessibility features like dictation, Immersive Reader and more to help make this happen. But, educators know that sometimes students like to rush the process a bit. Enter “Share Link for Review” mode. When a student is working on a Word document, they can generate a share link which will allow for review. Then, they can share the link with the teacher who will then be able to leave comments or suggest revisions. Check out the video from Mike Tholfsen to the right for more information!

Microsoft Forms: Insert Images in Multiple Choice Questions


Let’s face it…Multiple choice assessments aren’t our favorite way of assessing, but there are times where we must use it. Microsoft Forms is a great way to generate a quick assessment, and now you can add images in multiple choice selections. This means you can add a picture to each answer selection, giving clear and concise expectations to your students. Learn how it all works by clicking the image to the right or right here!

Minecraft EDU

There are many possibilities with Minecraft EDU, but some of our favorite activities have been where students have created unique features in their worlds. For example, while learning about local Native American tribes, the students re-created their villages and included explanations for the different landmarks. Another class favorite was when the students created theme park rides and the experience had to include the plot and theme from the story. If you’re looking for a history idea, check out the museum template idea featuring information from World War I - where the students included important artifacts and information. Check out examples from all three below!

Students created theme park rides and the experience had to include the plot and theme from the story.

While learning about local Native American tribes, the students re-created their villages and included explanations for the different landmarks.

This is a museum template idea featuring information from World War I - where the students included important artifacts and information.

Osmo Words


Osmo Words has been around for a while, but educators are catching on to the fact that you can create your own custom Osmo Words Albums. The process isn’t as difficult as you think, and can be done in just several clicks. Here’s how:
Go to your myWords dashboard.
Click on Create New Album, and you will be automatically taken to the new album page.
Click on Add Title (or on Untitled Album) to add your album title.
Click on Add Image to upload a picture (or to take one, if you are using your tablet or phone). You can also drag multiple files to upload images in a batch.
Hover your cursor over the image you have just added and click the Edit button.
Type your chosen word in the Add Word field and select a difficulty. If you want some of the letters to appear as given on the screen, you can put them in parentheses. A(NT) will show as _NT, for example. Add a couple more words; the more the merrier!
Return to your album homepage to add as many images and words as you wish.
-- Please follow us on social media and tag us with how you’re using these ideas in your classroom! 👓👗
For more tips, tricks and lesson ideas for making learning more interACTIVE, check out our books The InterACTIVE Class and Flipgrid in the InterACTIVE Class on Amazon!


10 Education Apps to try in 2023
@TheMerrillsEDU share 10 different education apps that you’re going to want to try in the new year! We’ve got something for Literacy, Math, Social Studies and Science. Check it out!
2022 introduced to one of our favorite new education apps, new ways to collaborate, news ways to create, and so much more. We’re sharing 10 different education apps and how you can use them in 2023. Check them out below!
(click on any subheading to jump to that section)


Osmo’s Reading Adventure
This past summer, we were introduced to Osmo’s latest addition: “Reading Adventure.” Reading Adventure is an interactive program that helps students learn to read. Reading Adventure uses speech recognition to create a personalized reading experience for your students, complete with actual books and a crystal wand. Developed with educators, Reading Adventure interacts with your child to give personalized feedback, increasing reading proficiency. The game features the characters Oliver and Nebula, who join your child on a quest to catch "Dreams" and return them to the Kingdom of Slumber. Check out how it works in our video below!


Book Creator
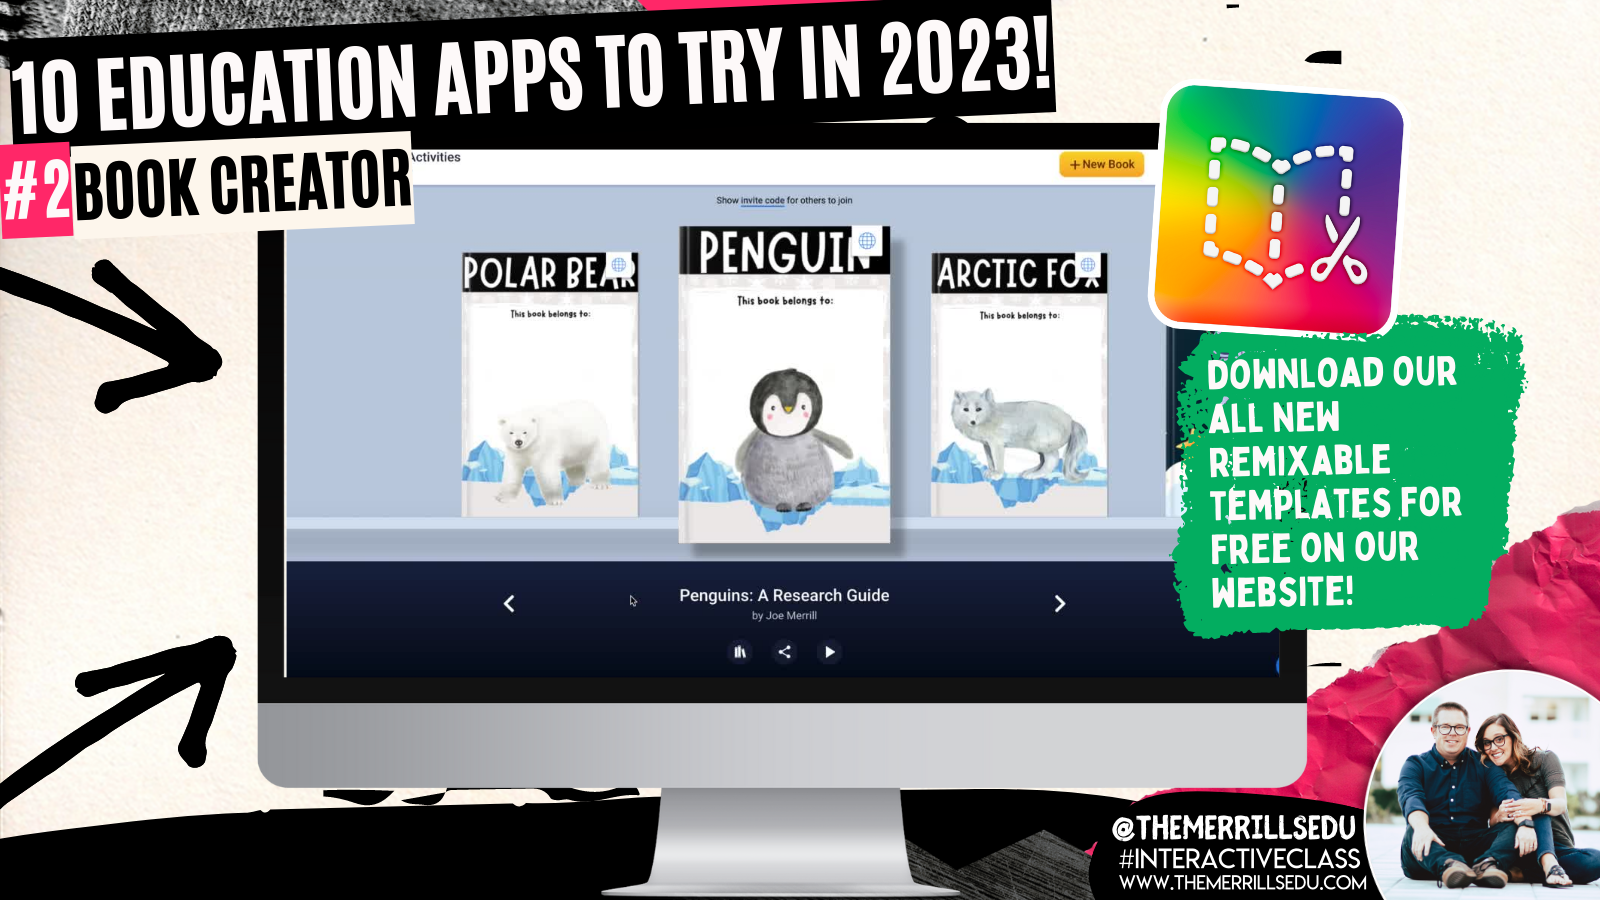
Book Creator announced some key updates this past fall. In addition to its integration with Canva, remixable books and comments, now users can crop images and import PDF’s. We’re HUGE fans of the Canva integration, which allows students to design using Canva without ever having to leave Book Creator (you read that right)! Learn more about this update by clicking here and checking out our blog post! our next favorite update has to be the ability to “remix” books. Think of these as templates that can be shared and edited / altered. We’re loving the designs being shared, and there are more appearing every day! To see some of our remixable books, click here or the images below. Let us know how you are using them!


Gimkit
GimKit is a great way to take those boring formative assessments and turn them into engaging experiences for your students. There is a free and paid version, but we highly recommend the paid version as it unlocks all of the modes (and won’t break your bank at only $59.88 a year or $9.99 per month). The Pro (or paid) version will give you access to new modes like “Frostbite,” “This or That,” and “Farmchain.” We love these modes because it adds a new element of excitement into the games. For example, in “Frostbite,” the focus isn’t necessarily on money, but rather “knockouts” with snowballs. The only way you can earn snowballs is to answer questions! Learn more about the other modes below and give GimKit a shot!

Seesaw

Seesaw has always been a top five app for us. Its ability to communicate with families in a quick and efficient manner is a must for any classroom. Then, add on it’s creation tools, and it’s a must have. But, this past summer Seesaw took parent engagement to the next level by adding a messaging option. Now, educators can communicate with families via messages. A lot of attention went into the details of this feature. Educators can start 1:1 messages, group conversations, or whole-group announcements. They can choose if a message is one-way or two-way, and even use the search bar to quickly find recipients. There are also options for specialist teachers to message multiple classes at once, or give students the ability to reach out to the teacher for help. Learn more about messaging on Seesaw by clicking right here or check out the tutorial below!

Wakelet


Wakelet is one of our favorite ed tech apps and it just keep getting better. What started out as a way to curate information, has now turned into a creative outlet for your students. Our favorite new Wakelet feature introduces its integration with Canva. Now, users can design with Canva without ever having to leave Wakelet (yes, you read that right!). For example, when adding an image to a collection, the option to design with Canva appears. Clicking it will launch Canva as a pop up right within the same browser window. If you’re on the educator side, you can use Canva to design differentiated Wakelet collections. Canva has a ton of header template images available. to view them, click the image to the right or here!

Canva
Canva announced a slew of updates this past year, some more hidden than others. This past year brought us tables, whiteboards and docs into Canva. But, some of the more well hidden features caught our attention. For example, check out the all-new magic design tool called “Text to Generate Images.” With “Text to Generate Images,” users type of the specifics of what they are looking for. Then, Canva does all the work - looking for a design that best suits what was described. Check out out video to the right to learn how it all works! Another feature added (to premium accounts only) was “Magic Write,” which is an AI-enabled writing assistant that empowers anyone to effortlessly and quickly create written content. You can use it for social posts, business plans, websites, blogs, poems, journaling, creative writing, and so much more. It can generate sentences, paragraphs, lists, outlines, and more based on the text prompt you enter. This was intended for creators, so Canva has not (yet) included it in their Education accounts. However, educators should familiarize themselves with this tool and educate students accordingly. It’s an incredible resource, but could be used in the wrong way if it isn’t taught properly. Learn more about “Magic Write” by clicking on the image below or right here!


Novel Effect


Novel Effect has exploded over the past year. This app uses the microphone built into your smart phone (or iPad) to listen to you read. As you read a story, Novel Effect will play music and / or soundscapes that go along with the book. It’s important to note that while Novel Effect uses your devices microphone, it’s not actually recording and saving you read. New books are being added every day, and now the entire library is full of books that you most likely already own in your own personal classroom library. But, what really got us thinking this past year was Novel Effect’s ability to impact our student’s reading. For example, give students the chance to be the readers while using Novel Effect. This will encourage them to slow down so that the sound effects can keep up with what they are reading. Novel Effect has also started a learning resource page on their website. Here you can find FREE content that goes along with the books you are reading. Check it out by clicking the image to the right or here!

Classkick


Classkick is a website / app that allows you to see all your students work and give high-quality feedback–from anywhere, anytime. The key word being “anywhere,” and they mean it! Even if a student is home working on an assignment, you can see them working in real time. You can also provide feedback to them in real time. The educator dashboard gives you a class-wide view of everything that the students are doing, so you can tell what the pace of the class is. As amazing as all of this sounds, what we really love about Classkick is the accessibility features. Educators and students can add audio recordings to explain directions or how they were thinking. There’s also options to allow collaboration. Students can help out others once they have completed tasks - all of which can be easily monitored on the educator side. To learn more, click on the image to the right or here!

Microsoft Flip (Formally Flipgrid)

Microsoft Flip is always listening to educators and updating based on their preferences. The major take away from Flip this year is it’s all-new educator dashboard, which mirrors what students see on their side. This makes it easier to get a student-view of what is being asked. Hidden amongst the platform comes another slew of valuable updates. The key takeaway here: don’t be afraid to push some buttons! You may find hidden features! For example, with the camera launched - click the three dots. A drop down will appear giving you the option to mirror your camera. Dig a little deeper and you’ll quickly find that you are able to toggle between both front and rear facing cameras without having to pause! Check out our video to the right for a full walk through! Another hack / tip our students came up with this year was using Flip for writing. When working on a “How To” writing assignment, the kids began by recording a video of the steps required to accomplish the task. Then, they enabled the captions to make sure that they were able to spell difficult words that they normally may not be able to spell. This helped them as they went on to write. Normally, we think of Flip as being the final place for content - but in this case, it ignite learning! (Note - we actually circled back around and created final videos for each writing piece!) To learn more about this writing process, click here or the image below!


Microsoft Teams

Microsoft Teams acts like a house for content. Some of the more stand-out updates come from built-in apps like Reflect, Reading Progress and Whiteboard. In Reading Progress, educators can gain valuable insights and data on student progress. The program will intelligently identify “challenge” or frequently mis-read words. On the educator side, you can now create an assignment to help your readers master the missed terms. Check out the video from Mike Tholfsen to learn more. Also new in Teams is an updated student view in the app “Reflect.” Students can privately answer questions that educators can use to monitor the social and emotional well being of their students. To learn more, click here! Lastly, Whiteboard lands with more features than ever. We love differentiating our instruction into groups on Teams, and then letting the small groups use Whiteboard to collaborate. Students can now add images, videos and links - all collaboratively!
-- Please follow us on social media and tag us with how you’re using these resources in your classroom! 👓👗
For more tips, tricks and lesson ideas for making learning more interACTIVE, check out our books The InterACTIVE Class and Flipgrid in the InterACTIVE Class on Amazon!


Practicing and Assessing Sight Words in Canva!
Learn how to use Canva to practice and assess your students sight words! These ideas can be used to assess or as a center!

If you’re a primary teacher, you know the pain of assessing 20+ students. Chances are that this takes a great deal of time and can be frustrating for both teachers and students. We’ve used tools like Microsoft’s Reading Progress to assess sight words (click here to learn more), but sometimes you just need to sit down with a student to hear how they’re performing. That’s where this idea comes in! In this mini-blog post, you’ll learn how to use Canva to assess sight words. Click any subheading to jump to that section:


How to use Canva to Practice and Assess Sight Words
This idea can be used as a center for students, or as an assessment tool. The idea is to have your slides automatically advance so that they progress through the words relatively quickly. Here’s how it all works:
Start off by creating a presentation deck that has all of your sight words on it.

Once you’ve settled on a design, change the timing on your slides. To do this, click on the clock icon located at the top of the screen. Adjust the timing to your preference. We recommend around 5 seconds. Be sure toggle on “Apply to all pages,” which will place the same timing on all of your pages.
Now your deck is ready. When you want to start assessing a student, explain that a sight word will appear on the screen. If they know if, they can say the word. If they don’t know it, that’s okay. The word will change in a few seconds and they can try the next word. Here are the steps to launch the deck:
In the deck, click “present” to take the pages full screen. Now, change the type from “Standard,” to “Autoplay.” This will automatically transition the pages to the time you selected. Students read off the words as they appear on the screen.

Download our Excel template to
record student responses
If you prefer to manage your data digitally, we have you covered! We’ve designed a Microsoft Excel sheet that has all of our sight words on it. When a student gets a word correct, enter a “1” in the white box. Doing so will change the word from being highlighted to white - an indication that the student has mastered that particular word. This document will also automatically calculate the number of correct words. Record each assessment on the lower right side to keep accurate data. Note: this document is editable, but you may need to change the formulas if you edit it. Click here or the image below to download it now!


How to use Canva to Practice and Assess Sight Words (Video Tutorial)
Need to see it in action to understand all of this? We’ve got you! Check out the video tutorial below to understand each step.

Download our Free Canva Sight Word Deck
Does all of this sound awesome but you’re just not sure where to start? Teachers are busy, so we’ve got you covered here, too! You can download our Canva Sight Word deck by clicking here or the image below.

-- Please follow us on social media and tag us with how you’re using these Canva Sight Word ideas in your classroom! 👓👗
For more tips, tricks and lesson ideas for making learning more interACTIVE, check out our books The InterACTIVE Class and Flipgrid in the InterACTIVE Class on Amazon!


20 Read aloud Activities to Use with Novel Effect (and Other Apps)!
Novel Effect is a MUST TRY app for any classroom! See how you can use this app with books that you’re already reading. Check out some of our favorite classroom activities to use Novel Effect with - including ideas with Microsoft Flip, Canva, Adobe Express, Seesaw and more. Here’s 20 of our favorite!

If you teach reading, you HAVE to check out Novel Effect. Novel Effect is an award-winning app that follows your voice as you read out loud from a children's story book and responds at just the right moment with interactive music, sound effects, and character voices. You can learn more and download it by clicking here!
So how can we fit this amazing app into our standards? It’s easy! Novel Effect’s library is FULL of books that you most likely already have in your collection - and they continue to add more weekly. Now that we have had some time using the app, we’d like to share 20 of our favorite activities. Click on any subheading to jump to that section/activity!


The Bad Seed
Jory John’s “The Bad Seed” has a bad temper, bad manners, and a bad attitude. But, it doesn’t last long in this popular story. One of our favorite activities to do with this book is with Novel Effect and Microsoft Flip. Follow the steps below:
Read The Bad Seed on Novel Effect
Have students use the Bad Seed sticker in a Microsoft Flip video
Students can retell the story, or explain what positive actions they can do to help promote kindness in the classroom and school campus
You can download The Bad Seed sticker by clicking here or the image.


The Good Egg
In part two of Jory John and Pete Oswald’s series, The Good Egg is trying to look out for others but forgets the most important person: themself. After some careful reflection, The Good Egg decides to do what’s best and make a change. We absolutely love to use this book as a classroom management tool. Here’s how:
Purchase an Egg plastic trophy here (you might want to remove the name plate)
Click here to read The Good Egg on Novel Effect
Give the egg trophy to a student who is meeting your expectations
Move the egg frequently, “catching” students who are doing the RIGHT thing.
The person who has the trophy at the end of the day earns a prize!

Purchase an Easter Egg trophy by clicking here
Here’s another idea that is great for the beginning of the year!

The Cool Bean

In part 3 of John and Oswald’s series, a bean always finds himself on the sidelines. After unsuccessfully trying everything he can to fit in with the crowd— the cool beans step in to show him how it’s done. Just when if it couldn’t get any cooler - it does! Now you can read this book on Novel Effect! Here’s our favorite activity includes using Microsoft Flip:
Read The Cool Bean on Novel Effect
Have students use the The Cool Bean “Raybean” sticker in a Microsoft Flip video
Students can retell the story, or explain how they would act like cool beans around the classroom and school campus.

The Couch Potato

In part 4 of John and Oswald’s series, The Couch Potato has everything within reach and doesn't have to move from the sunken couch cushion. But when the electricity goes out, Couch Potato is forced to peel away from the comforts of the living room and venture outside. Bring this story to life with Novel Effect and check out this activity:
Read The Couch Potato on Novel Effect
Have students use The Couch Potato “webcam” sticker in a Microsoft Flip video
Students can use the sticker to explain why using technology all the time may not be best.
Click here to download the The Couch Potato “Webcam” sticker


The Smart Cookie

In part 4 of Johns and Oswald’s series, This cookie has never felt like a smart cookie no matter how hard she tries, especially in comparison to all the clever cupcakes and brilliant rolls in the bakery. But, a dash of creativity and a sprinkle of confidence helps her learn that perfect scores and having all the answers aren’t the only ingredients for intelligence! But the cookie doesn’t have to be the only creative one. With this activity, your students will be creating the perfect cookie with all the right ingredients!

Here’s how:
Read The Smart Cookie on Novel Effect
Download the Smart Cookie Canva template
Assign the template to your students
Students use the template to design a smart cookie and use text boxes to include things that you are good at!
Save your work and then share it on Seesaw!


Chrysanthemum

Kevin Henke’s “Chrysanthemum” gets children thinking about and bonding with their own names and the names of everyone else in the class. It's the perfect vehicle for starting a discussion about treating classmates with tolerance, kindness, and compassion. With Novel Effect, this book comes alive! Here’s an activity that we’ve done in our own classrooms:
Give each student a copy of the Chrysanthemum name tag
Students create a design for the name tag that describes Chrysanthemum’s feelings in the beginning, middle and end.
(This can be done digitally on Canva or Adobe Express - or simply with crayons)
Share your work on Seesaw!
Click here to download the Chrysanthemum name-tag (Canva) template


Wemberly Worried

Okay, we might be a bit biased on this one…Together, we’re the voice actors for the mother and father of this book on Novel Effect. In this book, Wemberly worried about everything. Big things. Little things. And things in between. Then it was time for school to start. And Wemberly worried even more. If you ever worry (or know someone who does), this is the book for you! Here’s one of favorite activities to do with it:
Read Wemberly Worried on Novel Effect
Have students use the Wemberly Worried “cover” sticker in a Microsoft Flip video
Students can use the sticker to explain what are some things that they worry about.


Enemy Pie

Derek Munson and Tara Calahan King’s “Enemy Pie” is a funny yet endearing story where one little boy learns an effective recipe for turning a best enemy into a best friend. This book is perfect for any time of the year - and often we see ourselves re-visiting it throughout the year. Here’s our favorite “Enemy Pie” activity!
Read Enemy Pie on Novel Effect
Use Canva or Adobe Express to find a recipe template (or use our Canva below!)
Assign the template to your students
Students use the template to design a recipe that includes ingredients to become a good friend.
Save your work and then share it on Seesaw!

A Bad Case of Stripes

David Shanon’s “A Bad Case of Stripes” is about a little girl who secretly enjoys lima beans. However, she’s concerned about what others might think of her if they learn that she loves them. Until one day - when everyone finds out! Here’s our favorite “A Bad Case of Stripes” activity:
Read A Bad Case of Stripes on Novel Effect
Have students use the Bad Case of Stripes sticker in a Microsoft Flip video
Students can use the sticker to explain what happens in the story, or even share something unusual that they like.
Click here to download the Bad Case of Stripes sticker


Hey Little Ant

Phillip Hoose’s “Hey Little Ant,” is about a surprising conversation between a tiny ant and a little girl. The book is bound to inspire important discussions about caring, kindness and respect for both animals and humans. Here’s our favorite activity:
Read Hey Little Ant on Novel Effect
Have students use the magnifying glass sticker in a Microsoft Flip video
Students can use the sticker to explain how the illustrations in the book may portray a different message. than the words.


Grumpy Monkey

In “Grumpy Monkey,” Suzanne and Max Lang bring hilarity and levity to this very important lesson on emotional literacy, demonstrating to kids that they are allowed to feel their feelings. This is a great lesson for any time of the year, and here is our favorite activity:
Read Grumpy Monkey on Novel Effect
Have students use the Grumpy Monkey sticker in a Microsoft Flip video
Students can use the sticker to explain how the illustrations in the text told a different story than the words.


Mae Among the Stars

Roda Ahmed’s “Mae Among the Stars,” is an inspiration to students to reach for the stars - no pun intended. We love how it encourages girls (specifically) to aspire for the impossible, and to persist with childlike imagination. Here’s our favorite “Mae Among the Stars” activities:
Read “Mae Among the Stars” on Novel Effect
Have students use the astronaut sticker in a Microsoft Flip video
Students can use the draw tool to add planets, stars, etc. Or, students can add stickers like a rocket!
Have the students retell the story as an astronaut!

Duck! Rabbit!

Amy Rosenthal and Tom Lichtenheld’s, “Duck! Rabbit!” has a clever take on the age-old optical illusion: is it a duck or a rabbit? Depends on how you look at it! Readers will find more than just humor here; there's also a subtle lesson for kids who don't know when to let go of an argument. Here’s our favorite “Duck! Rabbit!” activity:
Read “Duck! Rabbit!” on Novel Effect
Have students use the Duck Rabbit sticker in a Microsoft Flip video
Students can use the draw tool to add a duck bill or rabbit ears to share their opinion on whether the image is a duck or a rabbit
Have students watch the other responses and see if another student can convince them otherwise!
Click here to download the Duck Rabbit sticker


The Oldest Student

Rita Hubbard and Oge Mora’s “The Oldest Student” is based on the true life story of Mary Walker. Imagine learning to read at the age of 116! Mary, the nation's oldest student, did just that. We love this story for so many reasons and it can be used in lots of different ways. Here is just one of our favorite ways to use it:
Read “The Oldest Student” on Novel Effect
Have students use the Grandma Glasses sticker in a Microsoft Flip video
Students can use the sticker to retell the events of the story and Mary Walker’s life!


I Want My Hat Back

Jon Klassen is one of our favorite authors. We love his writing and artistic style. “I Want My Hat Back,” is a take on the classic repetitive tale, but it plays out in sly illustrations laced with visual humor. The reader(s) feels to be in on the joke, as the bear frantically looks back to find his beloved hat. Here’s our favorite activity:
Read “I Want My Hat Back” on Novel Effect
Have students use the red hat sticker in a Microsoft Flip video
Students can use the sticker to retell the sequence of events in the story!


This is Not My Hat

In part 2 of Klassen’s series, the hat series takes a bit of a twist. This time, we follow the character who deliberately took a hat from its owner. The character is confident, perhaps overly confident, which leads him into trouble. We really enjoy reading this book after “I Want My Hat Back.” This allows us to complete this activity:
Read “This is Not My Hat” on Novel Effect
Have students use the tiny hat sticker in a Microsoft Flip video
Students can use the sticker to compare / contrast “I Want My Hat Back” and “This is Not My Hat.”


Are You Scared Darth Vader?

In Adam Rex’s “Are You Scared Darth Vader,” nothing can scare Lord Vader! Not monsters or witches or ghosts, and especially not the dark. So what is Darth Vader scared of? A surprise at the end, that’s for sure! If you’re a Star Wars fan - or have kids that are, then this book is for you! Here’s our favorite activity:
Read “Are You Scared Darth Vader” on Novel Effect
Have students use the Darth Vader sticker in a Microsoft Flip video
Students can use the sticker to recreate the ending of the story: What else do you think Darth Vader might be scared of?


Those Shoes

In Maribeth Boelts’ “Those Shoes,” Jeremy desperately wants a pair of popular shoes. However, he soon sees that the things he has -- warm boots, a loving grandma, and the chance to help a friend -- are worth more than the things he wants. Here’s our favorite activity:
Read “Those Shoes” on Novel Effect
Give each student a copy of the Shoes template (this can also be done virtually on Canva or Adobe Express)
Students design a pair of shoes that they would like to give to a friend
Students share their thoughts in a Microsoft Flip video: “Why would these be perfect for your best friend?”


Shark Lady: The True Story of How Eugenie Clark Became the Ocean's Most Fearless Scientist

Eugenie Clark devoted her life to learning about sharks. After earning several college degrees and making countless discoveries, Eugenie wrote herself into the history of science, earning the nickname "Shark Lady." Through her accomplishments, she taught the world that sharks were to be admired rather than feared and that women can do anything they set their minds to. This book by Jess Keating walks through those accomplishments! Here’s our favorite activity:
Read “Shark Lady” on Novel Effect
Have students use the underwater, mask and shark fin sticker sticker in a Microsoft Flip video
Layering is important for this to look correct. The underwater scene must be in the back. The next layer should be the mask - but if students place the mask layer in the back (behind the underwater scene) - it won’t look right.
Students can use the stickers to explain some of Eugenie Clark’s accomplishments


The Day the Crayons Quit

This classroom favorite from Drew Daywalt and Oliver Jeffers features crayons that are feeling overworked and exhausted. What can the main character, Duncan, possibly do to appease all of the crayons and get them back to doing what they do best? We love spreading this book out over several days to talk about persuasion. One of our favorite activities uses trading cards made by the students for each character. Here’s the activity:
Read “The Day the Crayons Quit” on Novel Effect
Give each student a copy of the trading card template
Students select crayons of their choice and decorate the cards as they see fit
On the “level” section of the cards, students can rate each crayon on a scale of how persuasive was the color was in the story (1 being the lowest, 10 being the highest)
Students can save their work, then upload it to Seesaw!


Download all of our stickers!
Love what you see, but don’t want to have to download each sticker one-by-one? We’ve got you covered! Click here or the button below to download every Flip sticker from our activities above!

-- Please follow us on social media and tag us with how you’re using Novel Effect or these activities in your classroom! 👓👗
For more tips, tricks and lesson ideas for making learning more interACTIVE, check out our books The InterACTIVE Class and Flipgrid in the InterACTIVE Class on Amazon!


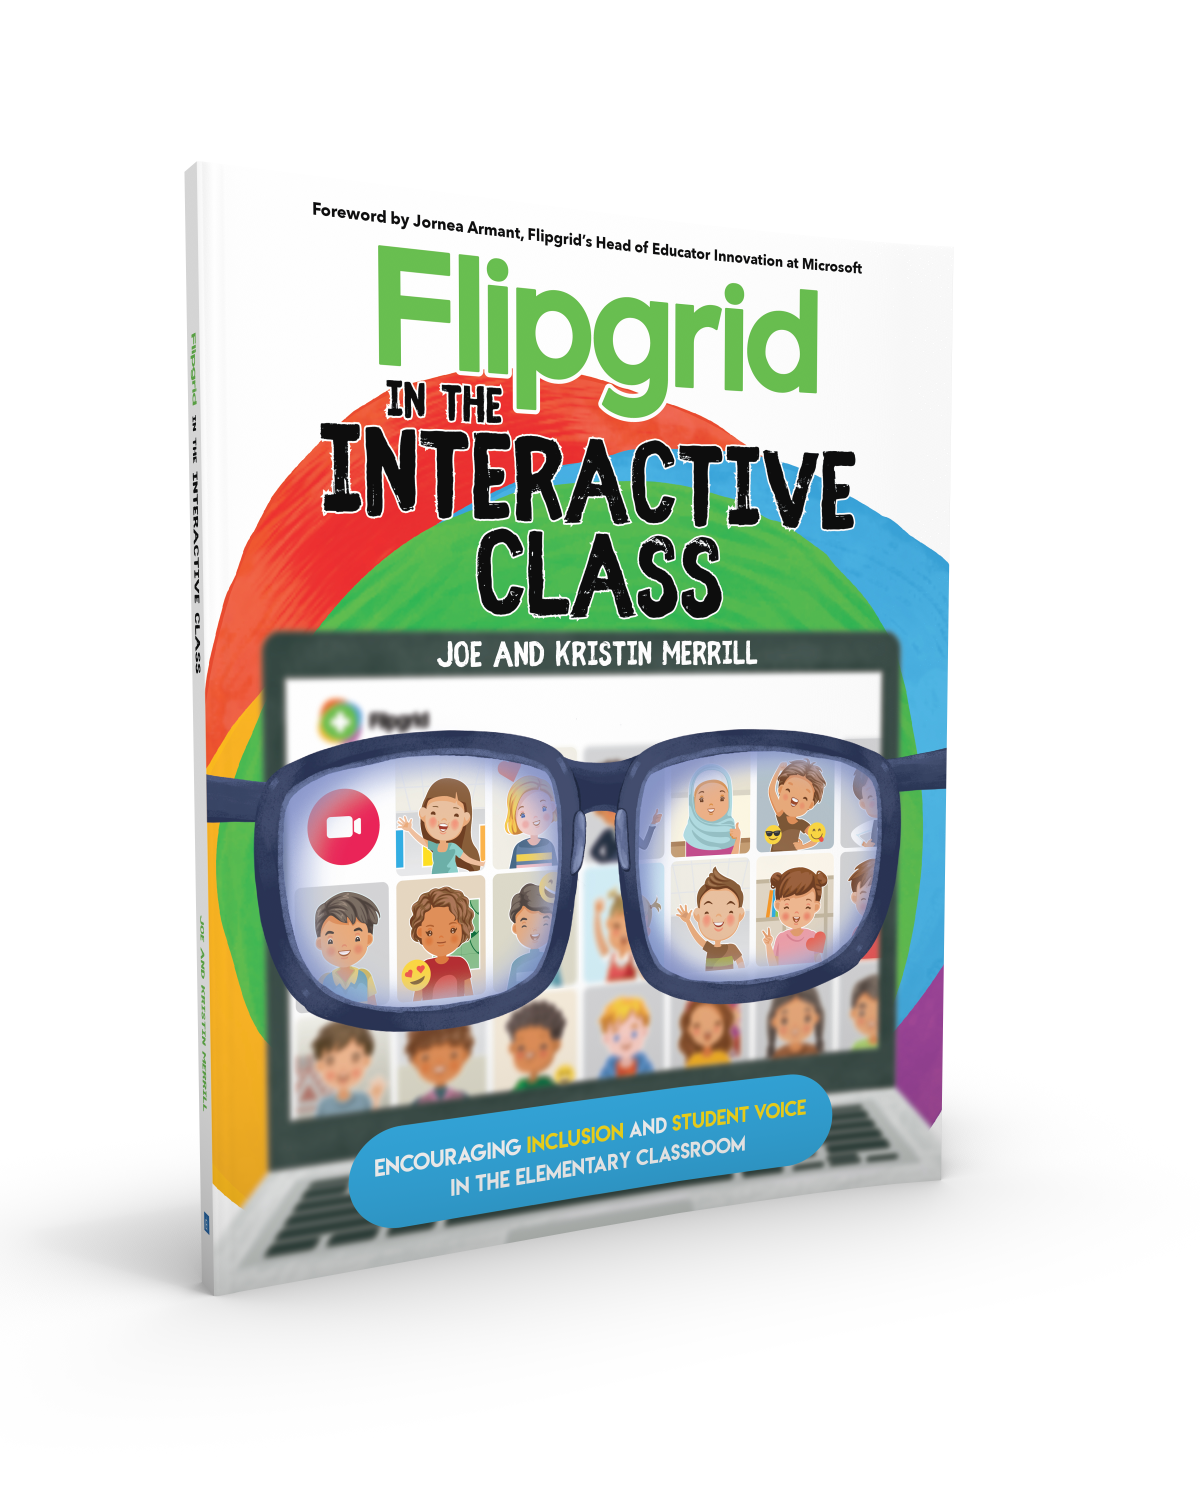


10 Ways for Teachers to Use Canva in the Classroom
Did you know that Canva for Education is 100% free for educators and students? It is! But how does one of today’s best design programs translate into your classroom? Here are our top 10 favorite ways for teachers to use Canva!

Canva for Education isn’t just for students! Even teachers can get in on the fun! Create your own designs from scratch, or choose from our library of over 60,000 high quality, educational templates. The best part of all, it’s absolutely FREE! So, how does this translate into the classroom? Here are 10 different ways that teachers can use Canva in the classroom.
(Click on any image to jump to that section. This is NOT a paid post.)


Creating Email Signatures in Canva
An email signature is an important element of your communication. It shows your personality, introduces the person behind emails, and provides necessary contact information. Designing one in Canva is easy! Just search “Email signatures” in the search box to find plenty of templates to choose from. Looking for something a but more “teacher” and little less “business?” Check out our template! You can download the template by clicking here or the image below!


Creating Headers in Canva
Custom created headers are more important than just looks. Creating headers that are directly associated with your class are easier for students to identify, which can lead them to your content quicker. In Joe’s first grade class, he creates customer headers for everything. This tells his young learners that they’re the right place. Designing your own isn’t difficult and with Canva, it can be done quickly. Here’s an image to help save you some time - all the header dimensions you’ll need! Check out our pre-designed templates for Flipgrid, Wakelet, Google Classroom, Canva and Microsoft Teams.

A good practice here is to make sure that your images match across the different platforms. For example, if you’re using Wakelet, Flipgrid and Teams - it’s recommended that your class header / theme and picture are all the same. This allows students to quickly identify where they are supposed to be. To save some time, we’ve created and collected some of our favorites in the template below. Click here or the image below to download them for yourself!

Once you’ve decided on an image, you can resize it to fit the platform you’re designing for. Just use our header dimensions guide (pictured above) and resize the image appropriately. If you’re not sure how to resize the image in Canva, just follow the steps below!


Creating Newsletters in Canva
Communication with your students’ families is an important key to providing success for your students. Canva’s newsletter templates for school publications make designing easy - even while on the go. Teachers can build and maintain their newsletters on a desktop or mobile device. These templates can be printed and then copied, or simply send out the share link to your families to save paper. Updating your families has never been easier! Check out some newsletter templates by searching for “School newsletter,” or just “newsletter.” Check out one of our favorite templates below! Click here or the image below to download it and edit it for yourself!


Student Awards on Canva
Are you looking to motivate your students? Generic awards can have positive effects, but what if you could design target specific achievements that can be printed and shared - either on a computer or mobile device? With Canva, you can! These can be printed or shared digitally. Stop using outdated programs - there’s an easier way! Check out the templates to choose from. Just search for “Student Award” in the search bar.

Device Wallpaper and Backgrounds on Canva
If you’re in a situation where your students use shared devices (or perhaps you just want to be able to tell the devices apart from one another), you can design wallpaper and backgrounds on Canva. This will help keep your tech organized and easy to maintain. No more, “Did I put that app on iPad #7?” Wait…Which one is #7?” 😂
There are different sizes depending on your device. Check out our image below to guarantee your creating the appropriate size for your devices.


Generally speaking, when designing it’s always better to start with an image that’s too big. Trying to stretch an image that’s too small can cause it to pixelate. So, be careful with your sizes. If you’re looking for some inspiration, or just something easy - we’ve got you covered! Check out our templates! Click here or the image to download them!

Creating Lesson Plans, Worksheets
and Resources on Canva
Using Canva to create lesson plans is definitely beneficial. For one, easy access to files provides quick and efficient editing. So, when a lesson doesn’t go as planned and you need to re-evaluate the next day’s plans, it can be done quickly (and from any device). We also love the idea of being able to share and collaborate on your plans with your teammates. Click on the image to the above to download some of our favorite templates. These templates can be duplicated for the day, or even the week.

Canva is also a great place to create your own worksheets and resources. The advantage here is that you can create target specific content that will deliberately meet the needs of your students - something that you cannot accomplish easily from downloading from other sites. Another advantage is that you can assign your resources to your students directly within Canva - so you can avoid the copier and save the environment! Check out a template we designed and a few others that we found below. Click here or the image above to get started!

Creating Anchor Charts on Canva
The whole point of an Anchor Chart is to provide an artifact of learning. They contain students' and teachers' thoughts, ideas and processes pertaining to the lesson. But often times, after the lesson concludes, the anchor charts fade into the distance. Creating your anchor charts on Canva serves a valuable purpose. For example, you will always have access to those files - meaning you can open them back up at any time. These can be shared with your students, but most importantly - collaborated on! You can start with a template, share it to the class and then have everyone working on the file at the same time. Now, your students can participate in the actual creation of the anchor chart. With a few clicks, this file can be exported / downloaded and uploaded into any LMS or even a Flipgrid video. Check out our example below and click here or the image to download it for yourself!


Yard Signs Created and Printed on Canva
If you’re interested in looking for a new way to build your classroom environment, we love this idea: Yard signs! Create a yard sign that your students can take home for a week (or two) at a time and then bring back to give to the next person. Maybe you’ve got a student of the week or terrific kid that the entire neighborhood deserves to know about? Or perhaps it’s for a broader school-wide effort. Just design the sign by searching for “yard sign” on Canva. Design your sign and then send it to Canva to print! To print from Canva, follow the steps below.

The $30 fee includes a yard sign. Shipping is free unless you need the sign in a hurry. In which case, you can pay for expedited shipping. We’ve created two signs that you can download and edit as you see fit. Click here or the image below to get started!


Digital Classroom Badges on Canva

This is a great way to kick off the new school year or returning from a break. Educators can create digital classroom badges that can be designed for any types of rewards that you feel as though should be given out throughout the year. Some good examples include: “Tech Trainer or “CANva” (students who can teach others about Canva). Check out our template by clicking here or the image! Looking for some easy inspiration? We’ve got you covered! You can download our template for free! Click here or the image above to download it!

Embed Anything Created in Canva
A little known secret is that anything that you create in Canva can be embedded into your LMS or classroom websites. For example, if you create a resource in Canva, you can then embed it onto your Canvas or Schoology class page. To do so, follow the steps below:
Click the three dots on the top right side of the screen
In the search box, type “embed”
Click on Embed when it pops up, then click the purple “Embed” button
Copy the code and paste it into your destination (rich media editor)


BONUS: Canva Presentation Hacks
If you’re using Canva as a presentation tool, these hacks will come in handy! Note, you must be in presentation mode for these to work. To enter presentation mode, click the three dots on the top right, then click “Present.” Now for the fun:
Letter C for confetti rain
Letter D for a drumroll animation
Letter O for floating bubbles
Letter Q for quiet
Letter B to blur the current slide
Any number for a timer (1 for one minute, 2 for two minutes, etc.)
You can also press Shift + / or ? on your keyboard to open the magic effects menu.
To exit presentation mode, press ESC on your keyboard.
-- Let us know if you’re using any of these ideas in your classroom! Be sure to follow us on social media (@TheMerrillsEDU everywhere) and tag us! 👓👗
For more tips, tricks and lesson ideas for making learning more interACTIVE, check out our books The InterACTIVE Class and Flipgrid in the InterACTIVE Class on Amazon!


20 Ways for Students to Use Canva in the Classroom
Canva for education is 100% free for students and educators. It’s a great place for students to get creative with their thinking. But, if you’re not sure where to start, here are 20 different ways students can use Canva!
(updated: 10/15/25)
Canva for Education is a powerful design tool, allowing you and your students to create visually stunning designs for any subject or age level. You and your students can create your own designs from scratch, or choose from our library of over 60,000 high quality, educational templates. The best part of all, it’s absolutely FREE! So, how does this translate into the classroom? Here are 20 different ways that your students can use Canva in the classroom.
(Click on any image to jump to that section. This is NOT a paid post.)


Creating Videos in Canva
Students can quickly and easily create videos in Canva that can be shared out beyond the platform. There are tons of templates that allow you to drag and drop media right into the video. Students can use elements right from Canva or upload their own.
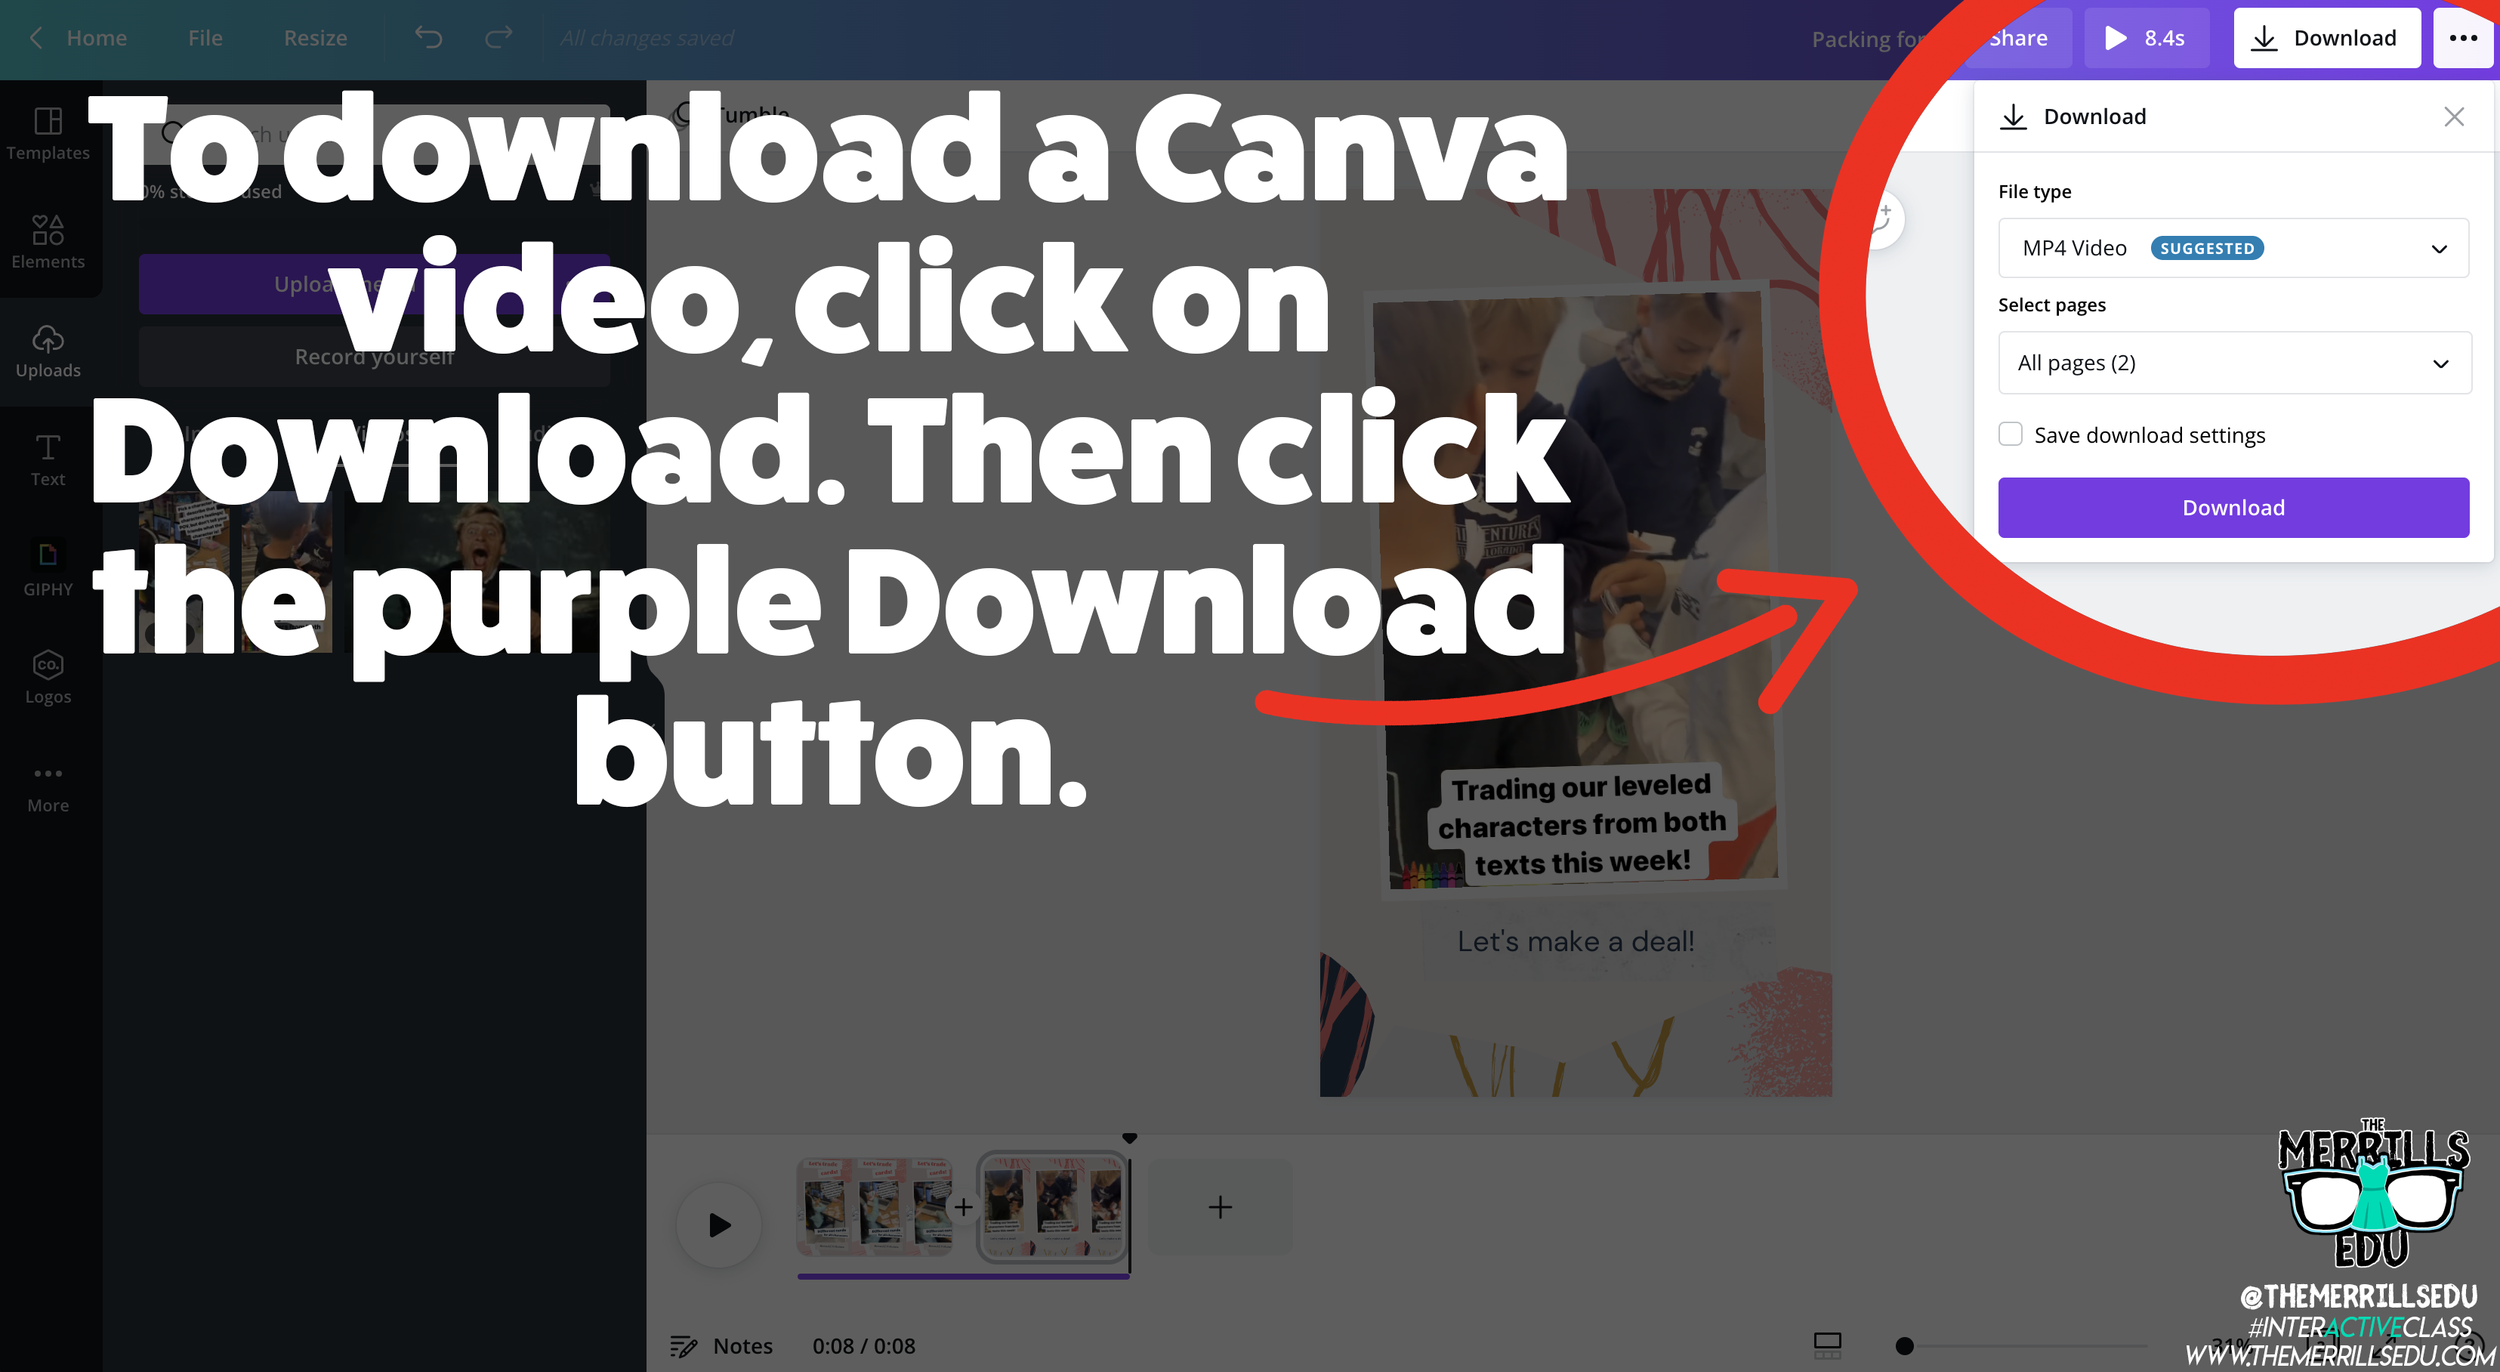
Saving and sharing can be done is several clicks. To save a video, click on the Download button, then click “Download.” This will download the video into your Downloads folder or camera roll (if on a mobile device).

To share the video, click on the three dots. Then, click “Share Link” and then “Copy.” This will allow students to share the video beyond the platform and into apps like Seesaw, Google Classroom, Microsoft Teams and more.
Removing a Background in Canva
Canva has made removing the background of an image simple. To do so, students will need to click on the image. Then, click on “Remove Background.” This process may take a few seconds. Once it has completed, students now have the background removed!

How to Create a Flipgrid Backdrop in Canva
Canva images can be downloaded, then uploaded into other platforms such as Flipgrid. This means students can create and design their own backdrop on Flipgrid! Backdrops act as virtual wallpaper. When students upload a backdrop on their Flipgrid video, they place themselves on top of the image. Students can move themselves around the video to place them in the proper spot. The recorded outcome will be them in front of the backdrop explaining their thinking!

So, how can this be done on Canva? It’s actually easier than you think! Once students have designed their image on Canva, they click on “Download” to download the image to their device. This will save the backdrop onto their device. Next, have them log onto Flipgrid. Once they have the Flipgrid Shorts Camera open, click on “Backdrops.” With Backdrops open, click on the “+” icon. This will allow up to upload your downloaded Canva file onto Flipgrid. Find your file then upload it. This will generate the Flipgrid Backdrop. Now students can move themselves around to properly keep the focus on their content. Fun tip: Backdrops can also be in the form of a video!

How to Present a Presentation on Canva and then Share it on Flipgrid

A great way for students to show their thinking is by explaining their work. Have your students create a presentation that covers what your class is learning. Once they have their presentation ready to share, have them click on “Present and Record,” located on the top right, then click “Go to recording studio.” They will need to provide permission to use the device’s camera and microphone. Now, click “Start recording!” This will give students a three second countdown before the recording process begins. Your students can now work through their presentation. One thing to note: while recording, Canva remains in presentation mode. This means the person presenting can see what slides come next, notes attached to the slides and more. The recording will only capture the Canva slides and a circle shaped webcam video of the presenter.

Once the student is ready to stop the recording, all they need to do is click “Stop Recording” from the top right side of the screen. One thing to note, students can always pause the recordings by clicking “Pause” next to the “End recording” button. Now that the student has clicked “Stop recording,” the video will be uploaded to Canva’s servers. Once it has been processed, students can either share the direct video link, save it for later or download the video to their device. In order to get the video over to Flipgrid, we will select “Download.” The download may take a few minutes and will be saved to your downloads folder. You can find it in your downloads folder under the name of the presentation. Now it’s time to head over to Flipgrid!

Log onto the Flipgrid Topic, then launch the Flipgrid Shorts Camera. Once the camera opens, click “Options” to the left of the record button. Now, click “Upload clip.” Upload your downloaded Canva presentation and then click “Next,” followed by “Confirm.” This will share your Canva presentation on Flipgrid for others to see and comment on!

How to Create Flipgrid Photo Stickers / Media on Canva
Adding different elements into Flipgrid videos results in instant student engagement. But, with Canva your students can design their own Photo Stickers / Media for their Flipgrid videos. To do so, have them create the sticker on Canva. It’s best to use a presentation sized template and we also recommend trying to make the sticker as large as possible within the template.
When finished, students will want to save their work as a PNG file. This will give the sticker the ability to have a transparent background. To save their work as a PNG file, click on the three dots located at the top right, then click “Download.” Be sure to check “Transparent background,” then, click “Download” to save the image to the students’ device.

Now, on the Flipgrid topic, open the Flipgrid Shorts Camera. Click on “Effects,” then click on “Media” (on laptop / PC) or “Photo Sticker” (mobile devices). From here, upload your Canva file. Once the file appears, you can move and resize it as you see fit! Fun fact: this process can be repeated as many times as you would like!

Using Inferencing on Canva

Inferencing skills require complex and critical thinking. These tasks can be daunting for students, but with the help of Canva this can be turned into a highly engaging and fun task! To help take inferencing to the next level, we created “Character Bulletin Boards.” This template was designed to look like a bulletin board where characters from a story might post things that happened from a story, or memories from a chapter that the character recalled. Students use the template to add elements, text, or photos that represent what happened in the story. You can even create a template that has multiple slides for multiple characters.

When your students are ready to share their work with you, they can do so in just several clicks. First, they will need to click “Send to teacher.” Next, your student(s) will need to select you (or they can select multiple teachers if you co-teach), and then click “Send.” This will share the work right into your teacher dashboard.
Interested in giving this activity a try? Click here or the image to download and copy the template!


Student Learning Portfolios on Canva
Canva is a well-known creation tool, but it can also help your students become more accountable. Student Learning Portfolios allow your students to maintain academic goals and curate learning artifacts that can be shared with their families and friends. To get started with Student Learning Portfolios on Canva, have your students select a template (like the one below). We recommend building the portfolios by months or subjects. Your first slide in the portfolio should resemble a table-of-contents. Students can hyperlink the text to different slides within the Canva presentation. This will allow them to maintain a running log of their work, but more importantly – share with others!


Student Created Websites on Canva
Similar to Student Learning Portfolios, student created websites are an easy way for your students to share (and show off!) their hard work. Have your students pick from the website templates on Canva. When they’re ready to publish the site, click on “Publish as Website.” This will provide the student with a shareable link. Fun fact: this URL will never change, even if your student(s) decide to edit it. If you’re looking to take things to the next level, you can have several students collaborate on the same Canva file. Then, the duo / team will have a published website for the group. Want a fast / easy start to this? Use our template below! Click here or the image to get started building your own student website today!


Virtual Science Fair Projects on Canva
Science Fair Projects are always exciting, but Canva can put a “new school” spin on them. Your students can design a trifold, add elements, text and even QR codes right into their Science Fair Projects. These can be shared publicly or right to the teacher. To generate a public share link, click on the three dots on the top right, then click “Share Link.” Click on “Copy” to share your URL. Now students can share this link with others! Tip: you can take this link into a URL shortener (like Bit.ly) and paste it to generate a shorter URL address (which will still point to the original link). To share directly with the teacher, click “Share,” then select the teacher(s) you wish to share with. This will send the Canva file to the teacher for review! Need some easy inspiration? Check out our template below! Click here or the image to get started!

Book Bumper Stickers on Canva
One of our favorite Canva activities is “Book Bumper Stickers!” For this activity, students design a bumper sticker based on the book, character / individual, subject, etc. The design can even be downloaded and shared onto places like Flipgrid or Seesaw. Check out our template below! Click here or the image below to download it and get started!


Character Trading Cards on Canva
Describing characters, their feelings and emotions is an important piece of comprehension. With Canva, we can make this process fun and engaging! Students use the template below to add characters from the story. This can be done by adding photos, uploading their own artwork or adding elements. Then, students can add text to describe the character. Teachers can print the designs and have students cut them out with scissors to trade with friends! How do your friends describe other characters? Did they use similar adjectives as you? Download our template by clicking here or the image above!

Create a Timeline on Canva

Whether you’re explaining historical events, the sequential order of a story, or important character accomplishments, timelines are a great way to show thinking. Canva has easy-to-use timelines that are simple to edit to fit your next assignment. To view Canva’s timeline templates, just search: “Timelines” in the search box.

Design Thinking / infographics on Canva

Design thinking provides students with a creative outlet where they can tie in their learning. Infographics are a great way to show this level of thinking and Canva makes it easy! There are many Canva infographic templates that students can choose from. These templates are fully editable – everything from the text to the colors. To find infographic templates on Canva, just type “infographic” into the search bar. Here’s a template that we found to help you get started! Click here or the image above to download it and get started!

Fake Instagram Character Posts on Canva
Have your students create a fake Instagram post describing the thoughts of a character from a book or historical figure. Check out our Instagram inspired Canva template here! Students can add the proper content in the template and even add a photo or drawing. This can be downloaded and shared on places like Flipgrid and Seesaw! To download our template, click here or the image above!

Student Created Classroom Badges on Canva
This is a great way to kick off the new school year or returning from a break. Plus, it teaches your students how to use all of Canva’s features! Student created classroom badges can be designed for any types of rewards that your students feel as though should be given out throughout the year. Have students use Canva’s features to design their badge. Remind them that it needs to have text / what the badge is for. Some good examples include: “Tech Trainer or “CANva” (students who can teach others about Canva). Check out our template by clicking here or the image! Looking for some easy inspiration? We’ve got you covered! You can download our template for free! Click here or the image above to download it!

Digital Murals on Canva

Digital murals are an engaging way to get your students thinking outside of the box. In Canva, students add a background image, elements, photos, text or anything else that they think should go on their digital mural. The murals might describe characters, feature vocabulary terms, describe the students themselves and much more. Need help getting started? You can download our template by clicking here or the image above!

Student Choice Boards on Canva

Student Choice boards give your students the chance to complete a task using multiple options. For example, some students might enjoy creating a video that answers the prompt while others might design a slide that goes into detail. Leaving it up to your students will guarantee engagement with an invested interest in their work. Check out our pre-designed template to help you get started. Click here or the image above to download and edit!

Collaborative Comic Strips

Canva makes collaboration easy and familiar (especially if you’ve collaborated on a Google Doc or Slide). You can share a link with others and even see who is on the file. These Collaborative Comic Strips can be completed in small groups. Students can keep work organized and even assign roles. The Comic Strips can retell a sequence of events, retell a timeline in history, or act as illustrations for a science journal log. Check out the template we found, which you can use right away! Click here or the image above to download and get started!

Collaborative Change of Scenery:
Change the Setting of a Story

Changing the setting of a story is a powerful way to monitor for comprehension. Level that up with collaboration, now you have a small group of students working together and thinking at a high level. With this template, your students can do just that! Work together and be creative! Check out the template we found! You can click here or the image above to download and get started!

Drawing on Canva
Canva users now have the ability to draw on their slides. To start drawing, follow these steps:

Click on “More” from the left side panel
In the search bar, type “Draw”. Or, you can scroll down to the bottom where you will see the Draw icon. Click it to open the next window.
One the next window, click “Use” to launch the draw feature.
Select a brush and color to start drawing!
We love this template that we found, which includes the drawing tool and collaboration! Students can work together to create a piece of art. Perhaps they’re redesigning the cover of a book or “painting a picture” of their understanding. Check it out by clicking here or the image below!
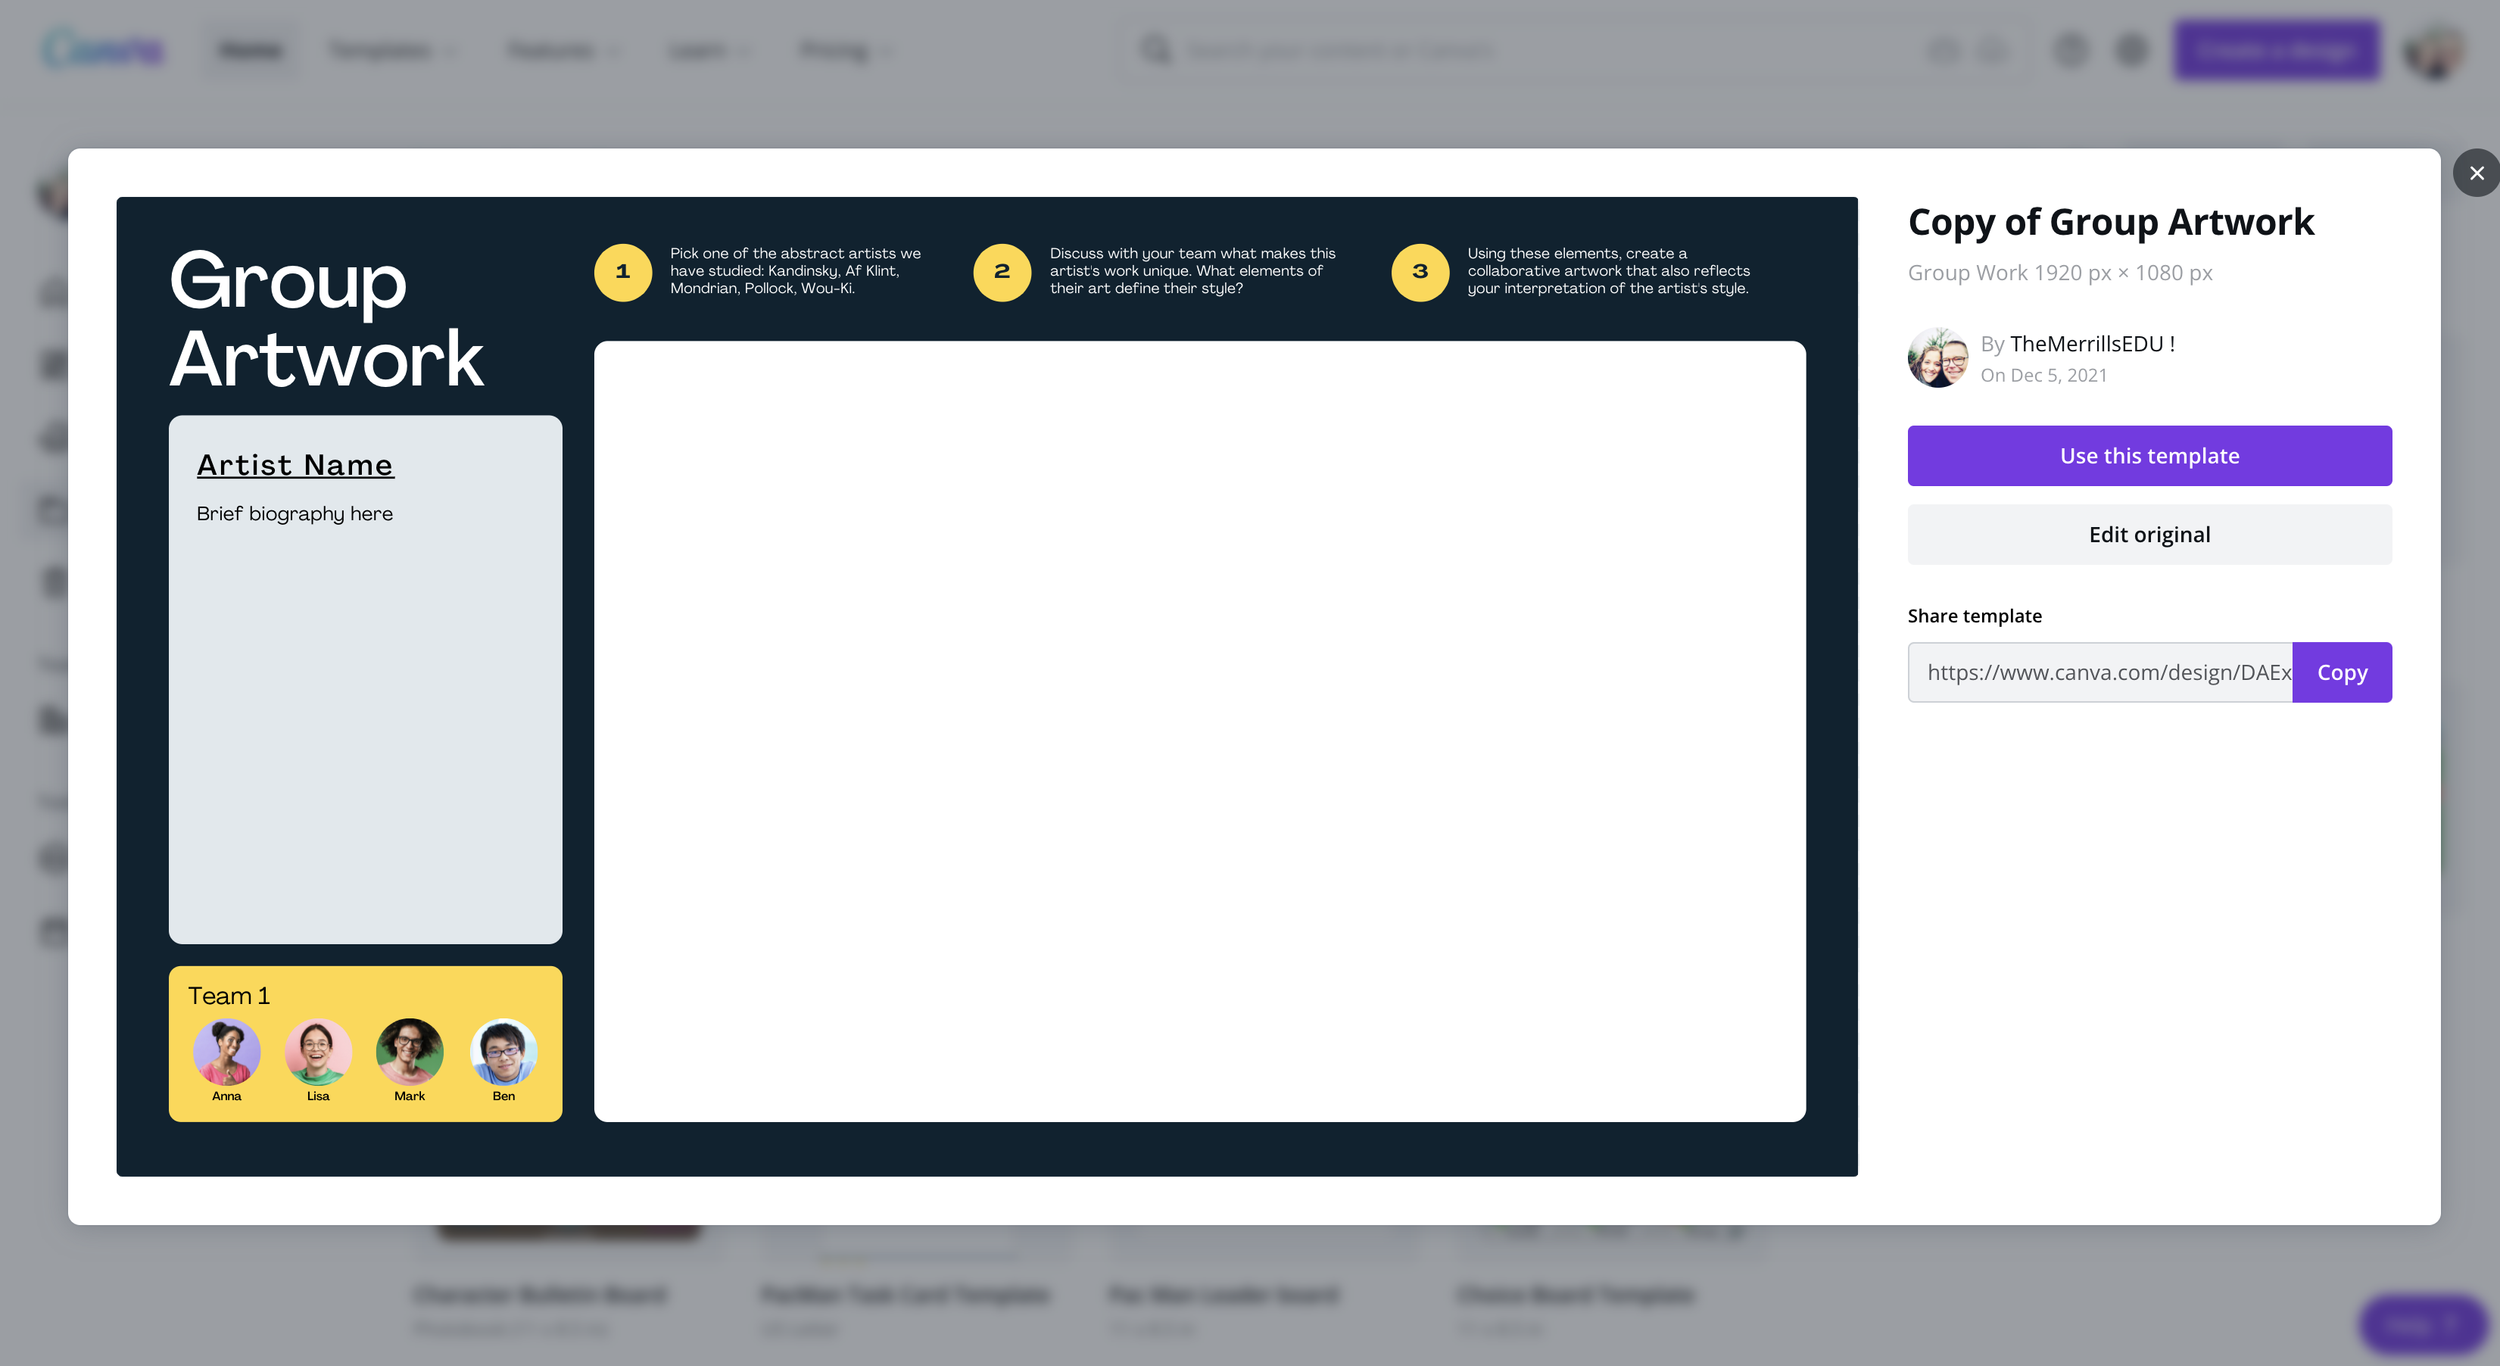
-- Let us know if you’re using any of these ideas in your classroom! Be sure to follow us on social media (@TheMerrillsEDU everywhere) and tag us! 👓👗
For more tips, tricks and lesson ideas for making learning more interACTIVE, check out our books The InterACTIVE Class and Flipgrid in the InterACTIVE Class on Amazon!