Five Must Try Flipgrid Hidden Gems Teachers and Students

One of our favorite things about Flipgrid is the fact that anyone can use it. It doesn’t matter if you’re just starting school, finishing school, teaching in school, or just using it to be COOL - Flipgrid is for you. The app is constantly changing, and often times gems are hidden right under our nose - or mouse pointer! In this blog post, you’ll learn about five MUST TRY Flipgrid hacks that both you and your students can try. Click on any button below to jump to that section, or check them all out!
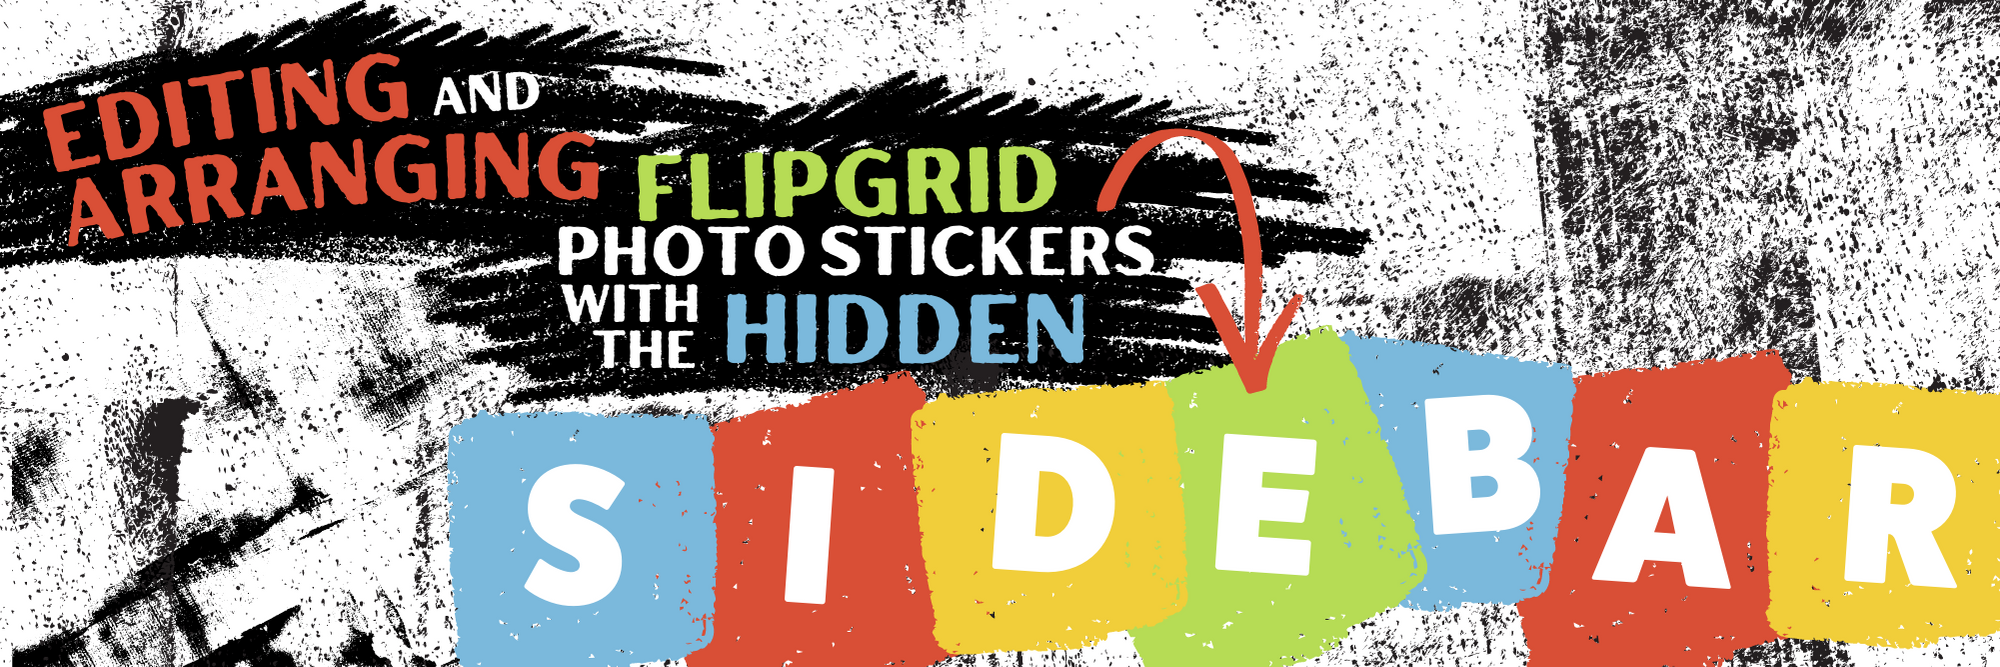


Editing and Arranging Flipgrid Photo Stickers
Our students love adding photo stickers to their videos. Sometimes it’s a book cover, other times it’s their own work. You may not realize this, but you can add more than one photo sticker on a video. But, figuring out where to position the photo sticker is important and sometimes it requires a little bit of precision. Which leads us to the first hack - guaranteed to blow your mind!
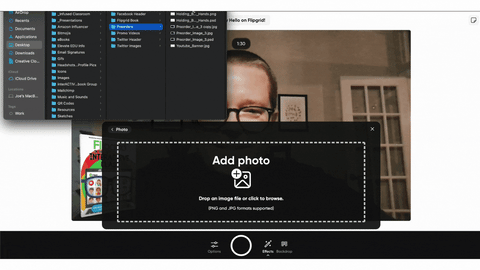
Launch the Flipgrid Shorts Camera and prepare to record your video.
Add a photo stickers of your choice.
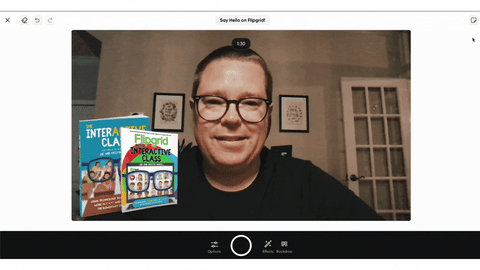
After you have added the second photo sticker, press one of the arrow keys on your keyboard. A new sidebar will appear on the right side of your screen!
This will allow you to position, scale, reorder, duplicate, trash or even undo the previous step. To remove the sidebar, simply click on the screen again and it will disappear. To make it reappear, just click the arrows on your keyboard again!

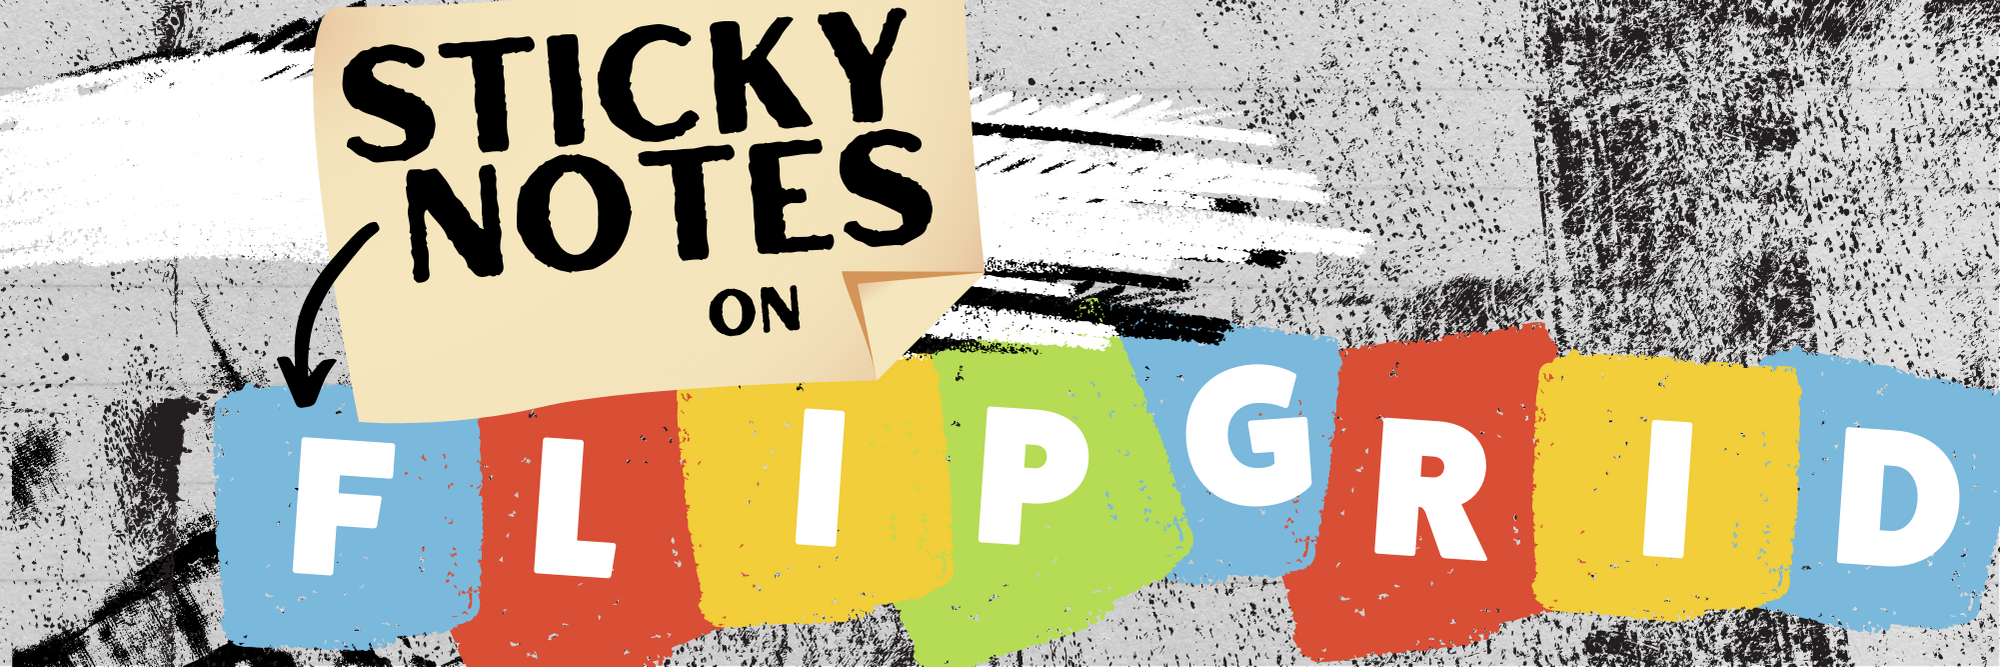
Sticky Notes on Flipgrid
A well hidden (pun intended) Flipgrid Feature is the ability to use Sticky Notes when creating your video. Adding sticky notes helps students keep focused and on task with what your prompt is. These notes aren’t visible to anyone else other than the student, and they will not appear in the final product of the video. But, hold on…It get’s better! You can add multiple sticky notes and move them around your screen as you please! Here’s how:

Launch the Flipgrid Shorts Camera and prepare to record a video.
Locate the Sticky Notes button on the outside of the recording area, located in the top right hand corner.
Click the button to open a Sticky Note. This can be moved anywhere on the screen and it will not appear in the final product. (TIP: Place the sticky note in the top-middle part of you screen. This will make it look like you’re still looking at the camera)
Repeat this process as many times as needed!
Mirroring the Flipgrid Shorts Camera
Often times, our students share work they have completed on a whiteboard or piece of paper right into their Flipgrid video. But, most students are using devices that utilize a front-facing camera. The end result is a backwards image / video. But, this hack will fix that in just two clicks!
Launch the Flipgrid Shorts Camera and prepare to record a video.
When the camera opens, click the Options button.
To mirror your video, click “Mirror Video.”


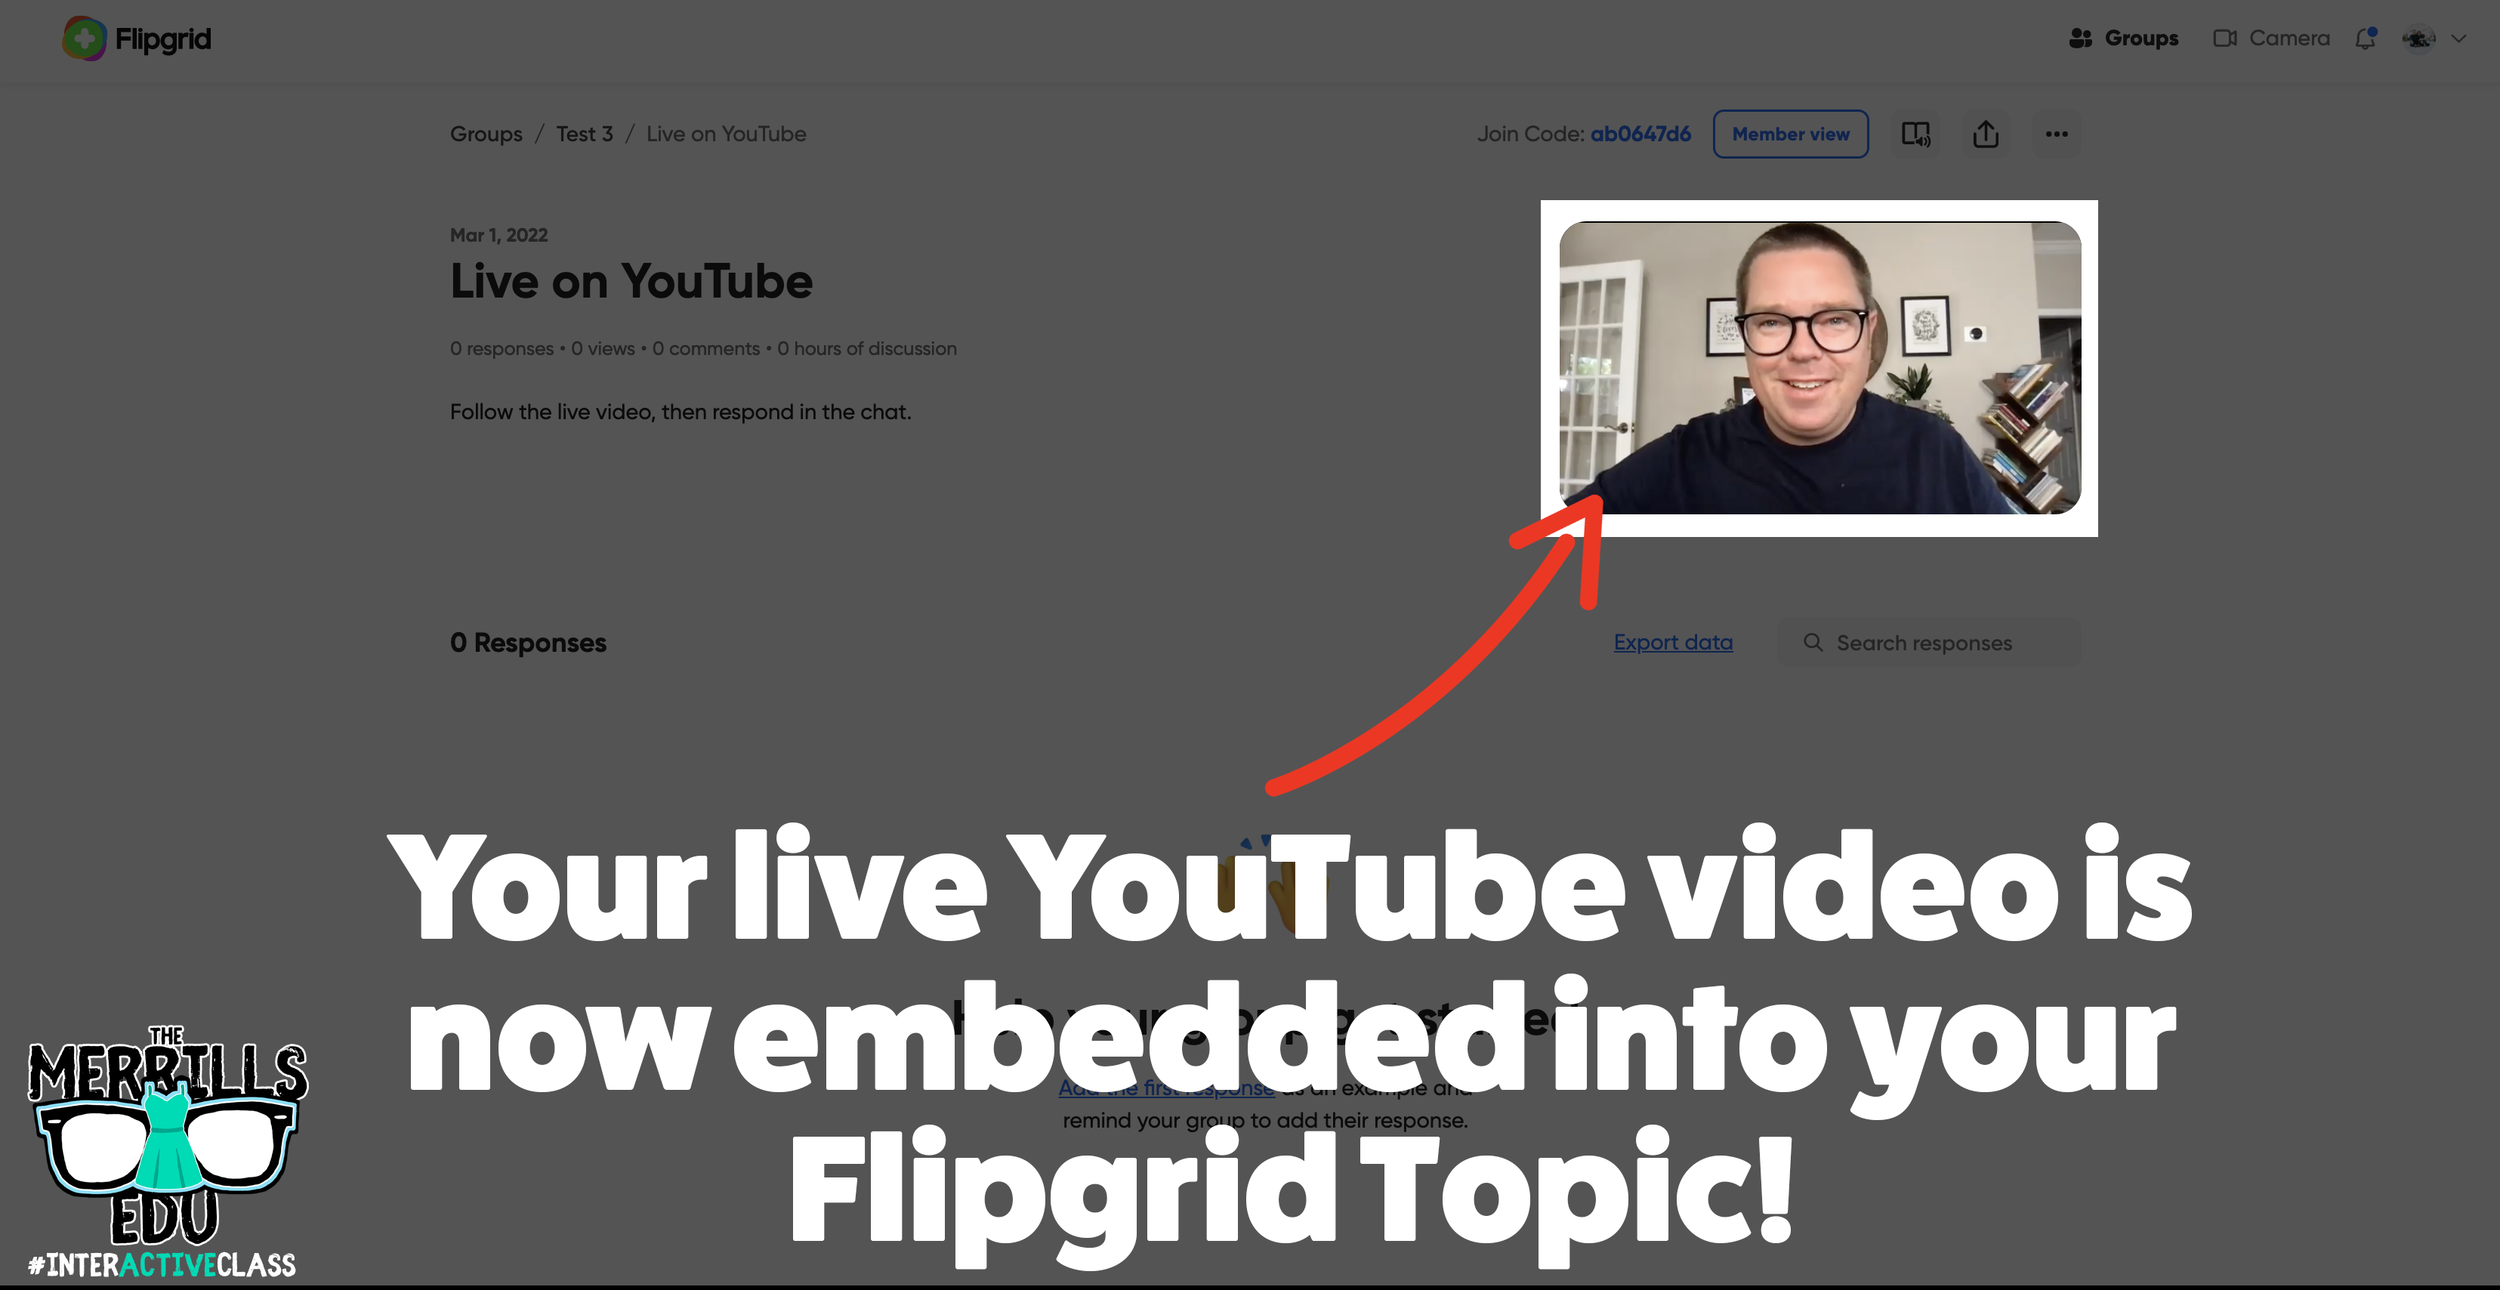
Go Live in a Flipgrid Topic with YouTube
this hack is definitely a level up and you’ll need both a Flipgrid and YouTube account. You’ll need the ability to go “Live” on YouTube - if you’re using a new YouTube account, this requires the use of a desktop computer and a 24 hour activation. Basically, you will need to wait 24 hours before you gain the ability to go live.
On the Flipgrid side, the steps are actually very easy. Here’s how it all works:
Create a new Flipgrid Topic.
Fill out the Topic’s Title and Description.
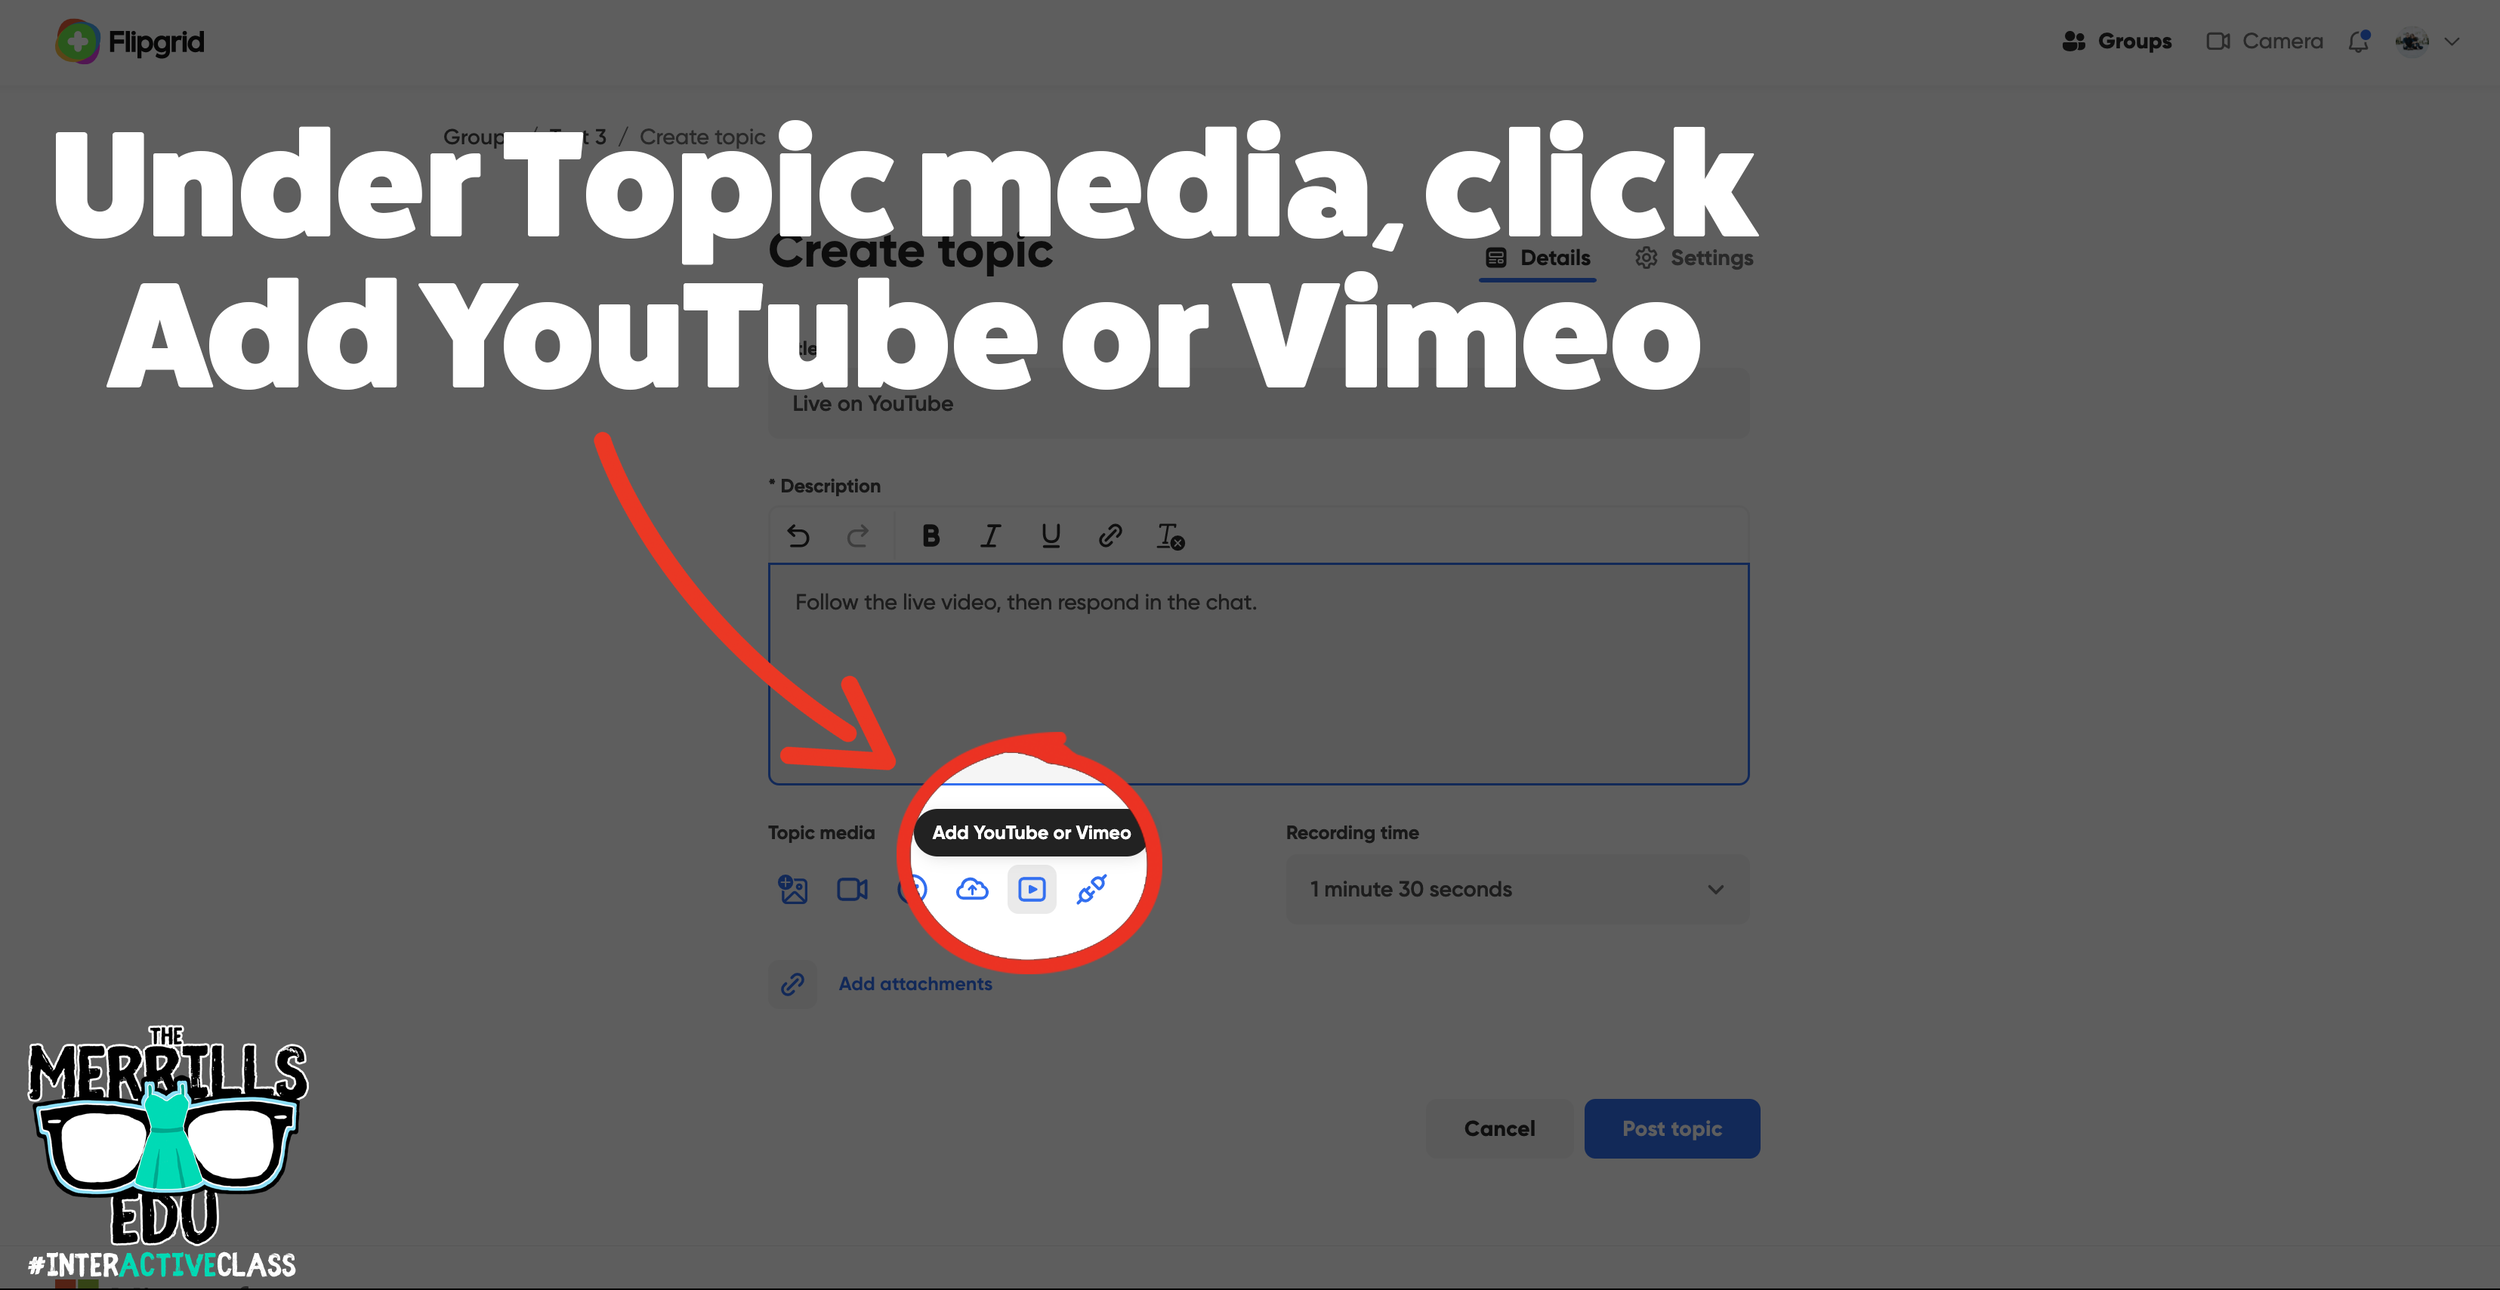
Under the Topic Media, click on “Add YouTube or Vimeo.”
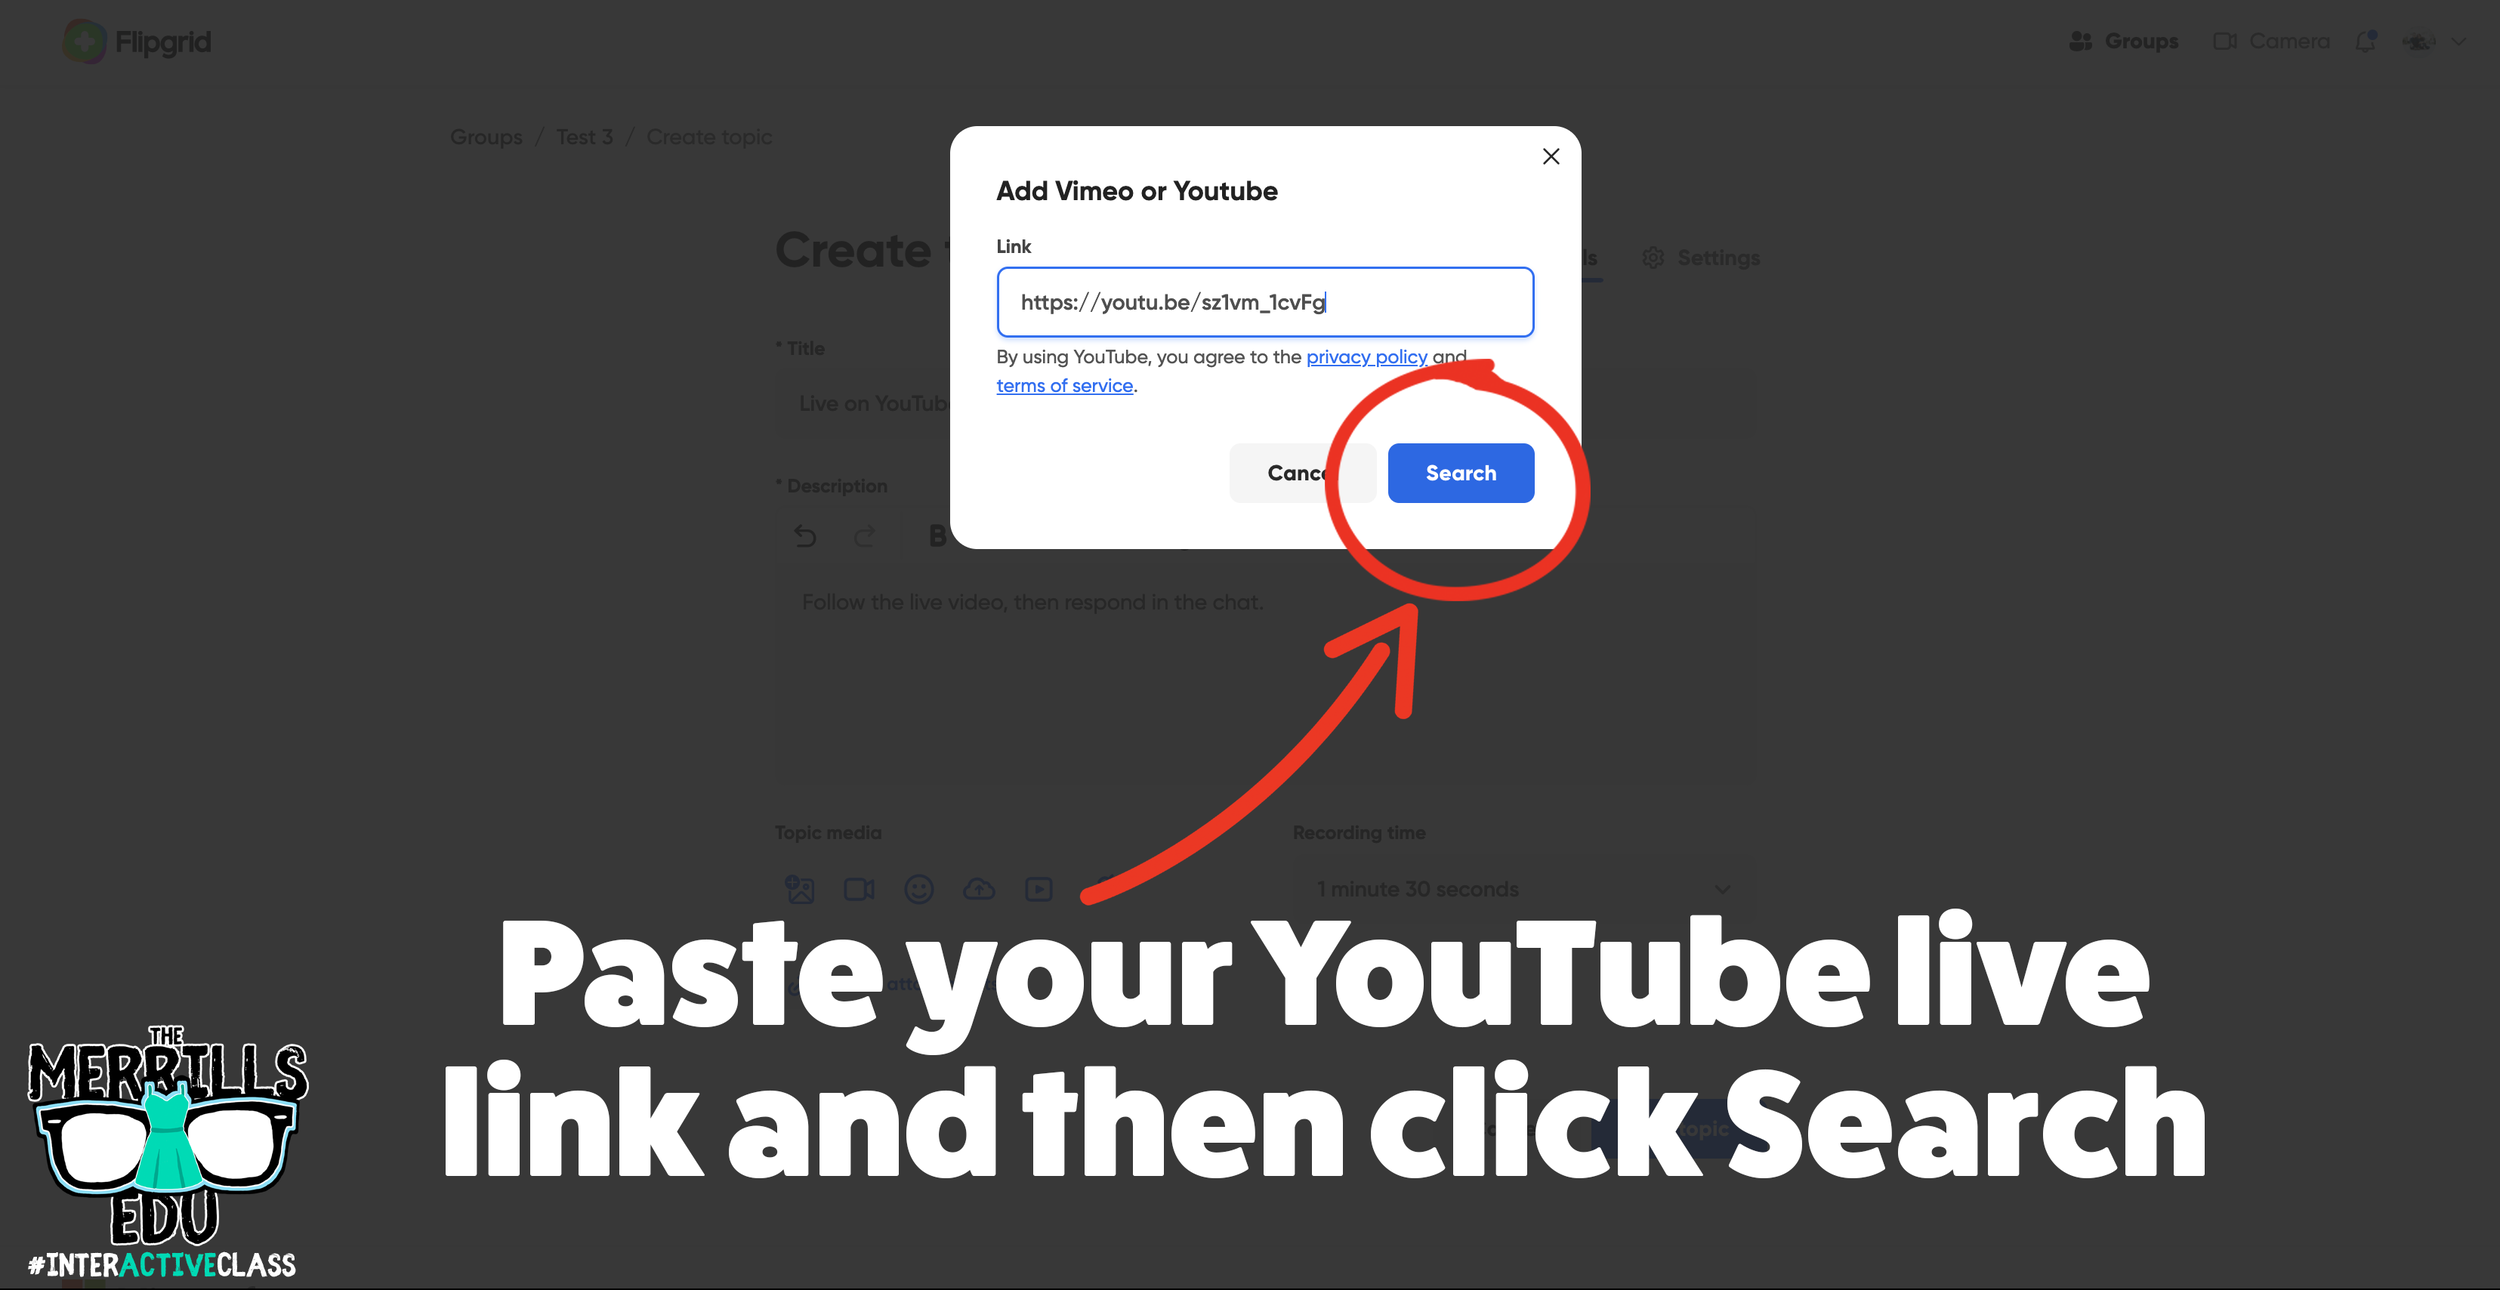
Paste the link of your Live YouTube video in the pop up, then click “Search.” (note: you will need to set the YouTube video to either “Public” or “Unlisted” for this hack to work)
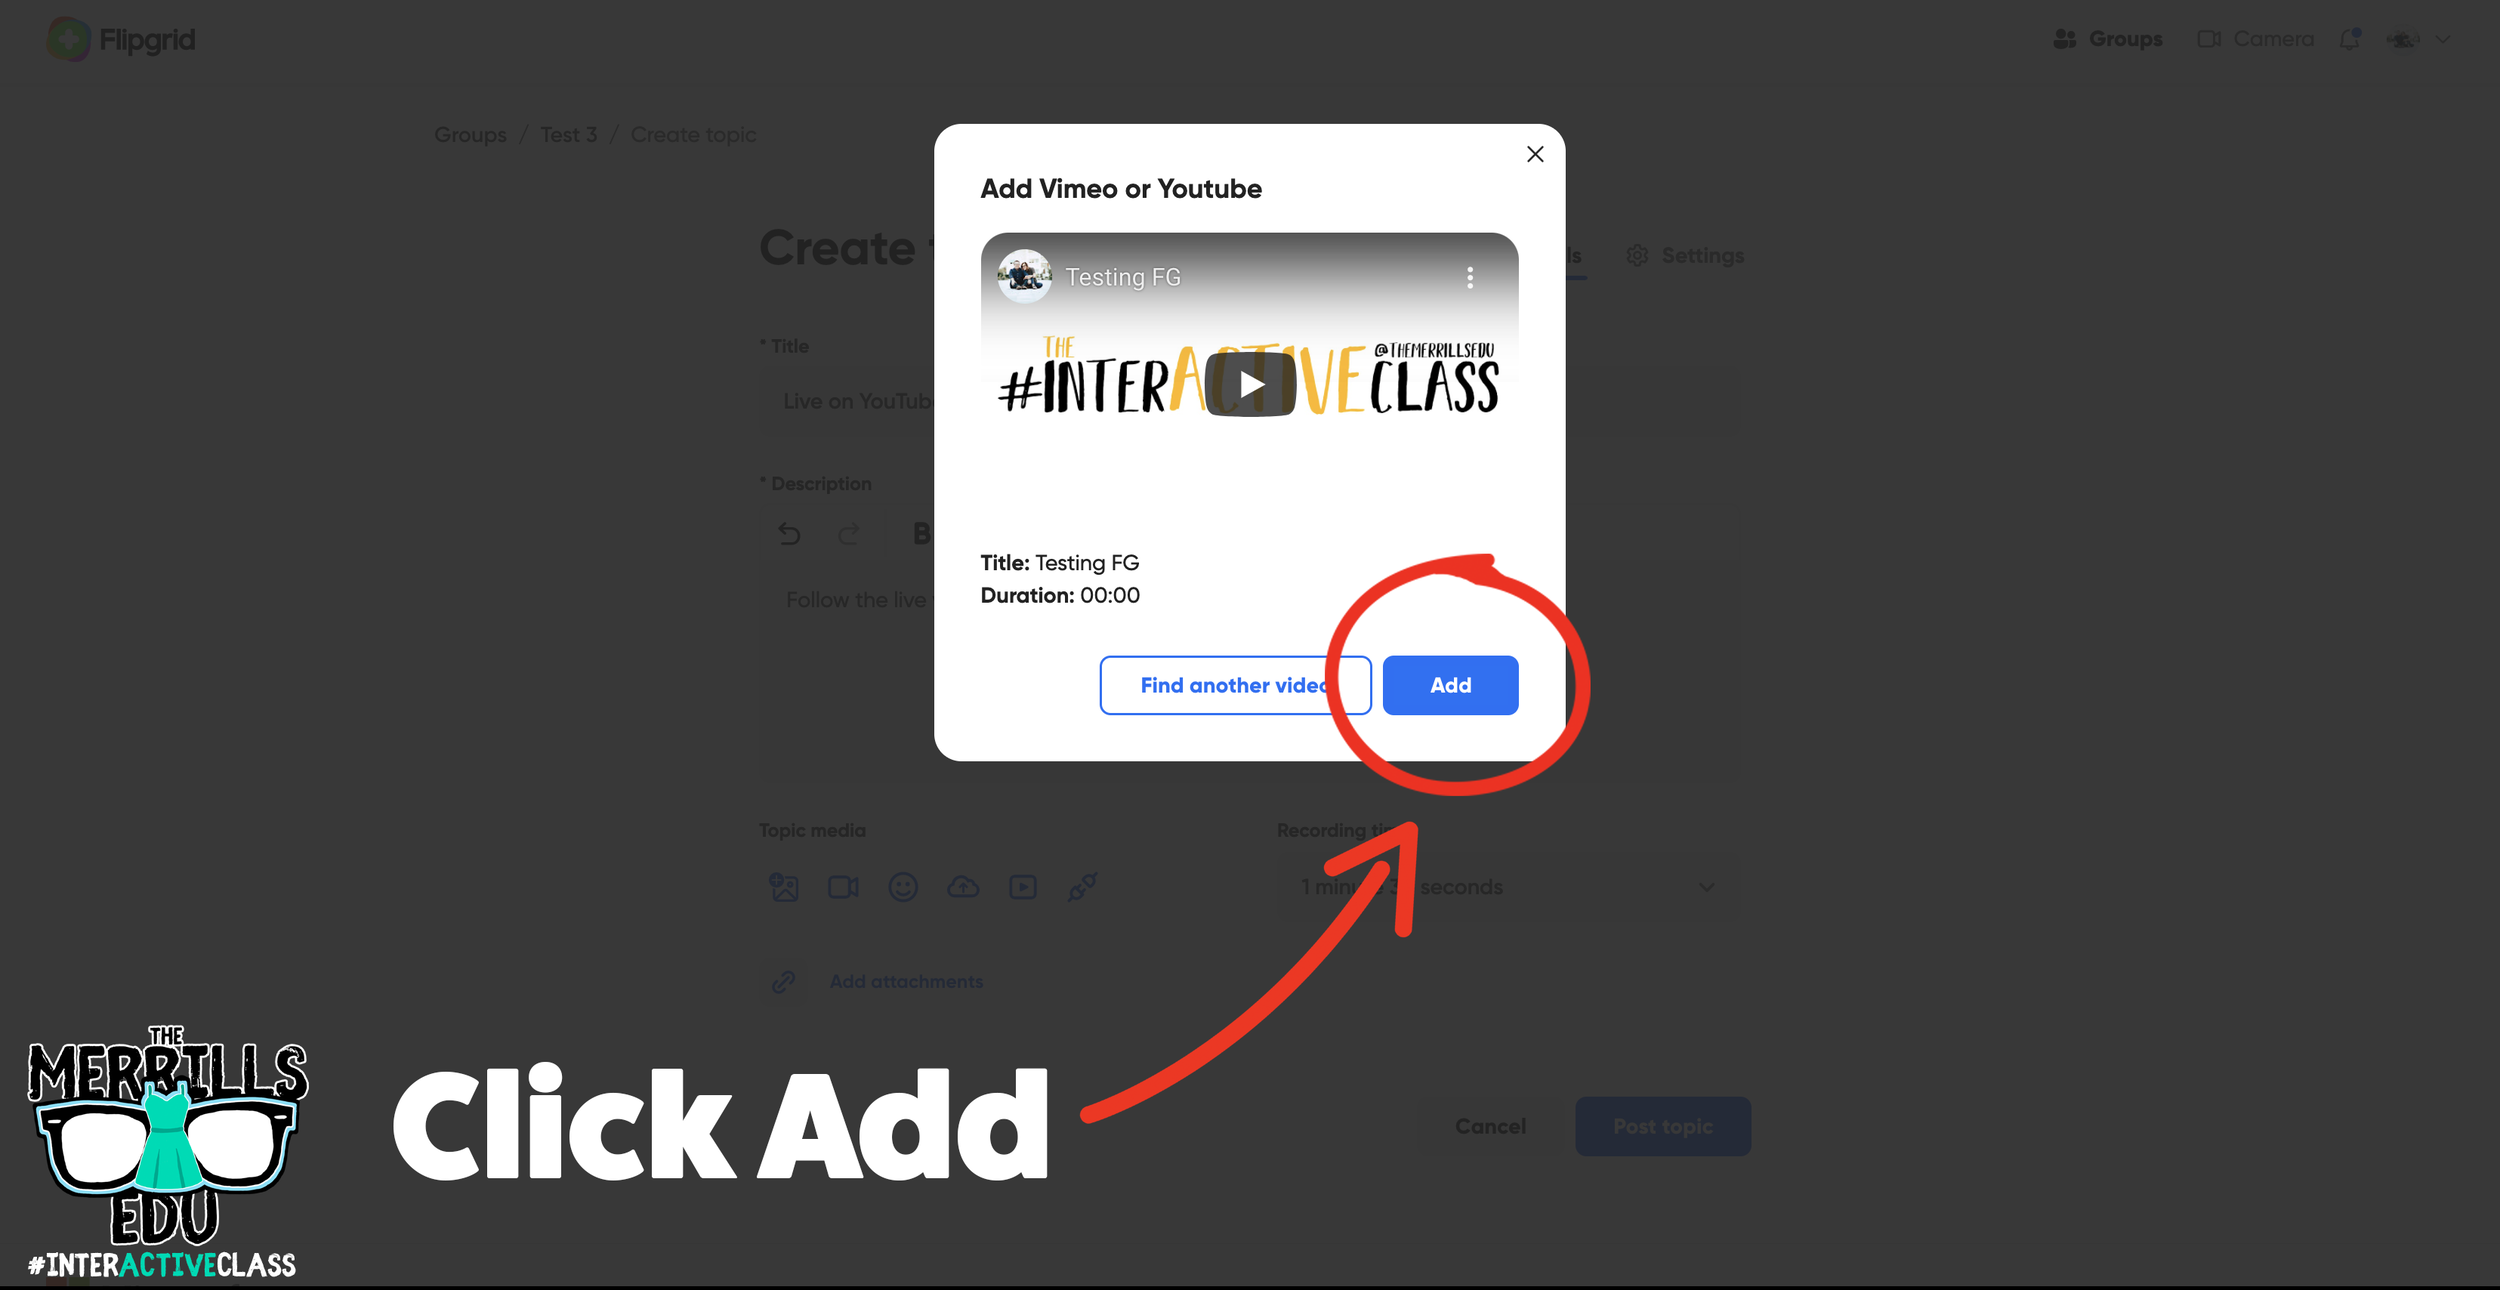
Once Flipgrid finds your live stream, click on “Add” to add it to the Topic.
Need to see it all from the beginning? We’ve got you covered. Here are all the steps from start to finish! Check it out below.
Creating a Breakout Game Using Flipgrid
Creating a breakout game using Flipgrid is a great way to engage your students. In order to make this happen, you’ll need to “hack” Flipgrid a bit. Here’s how to set up your own breakout game:
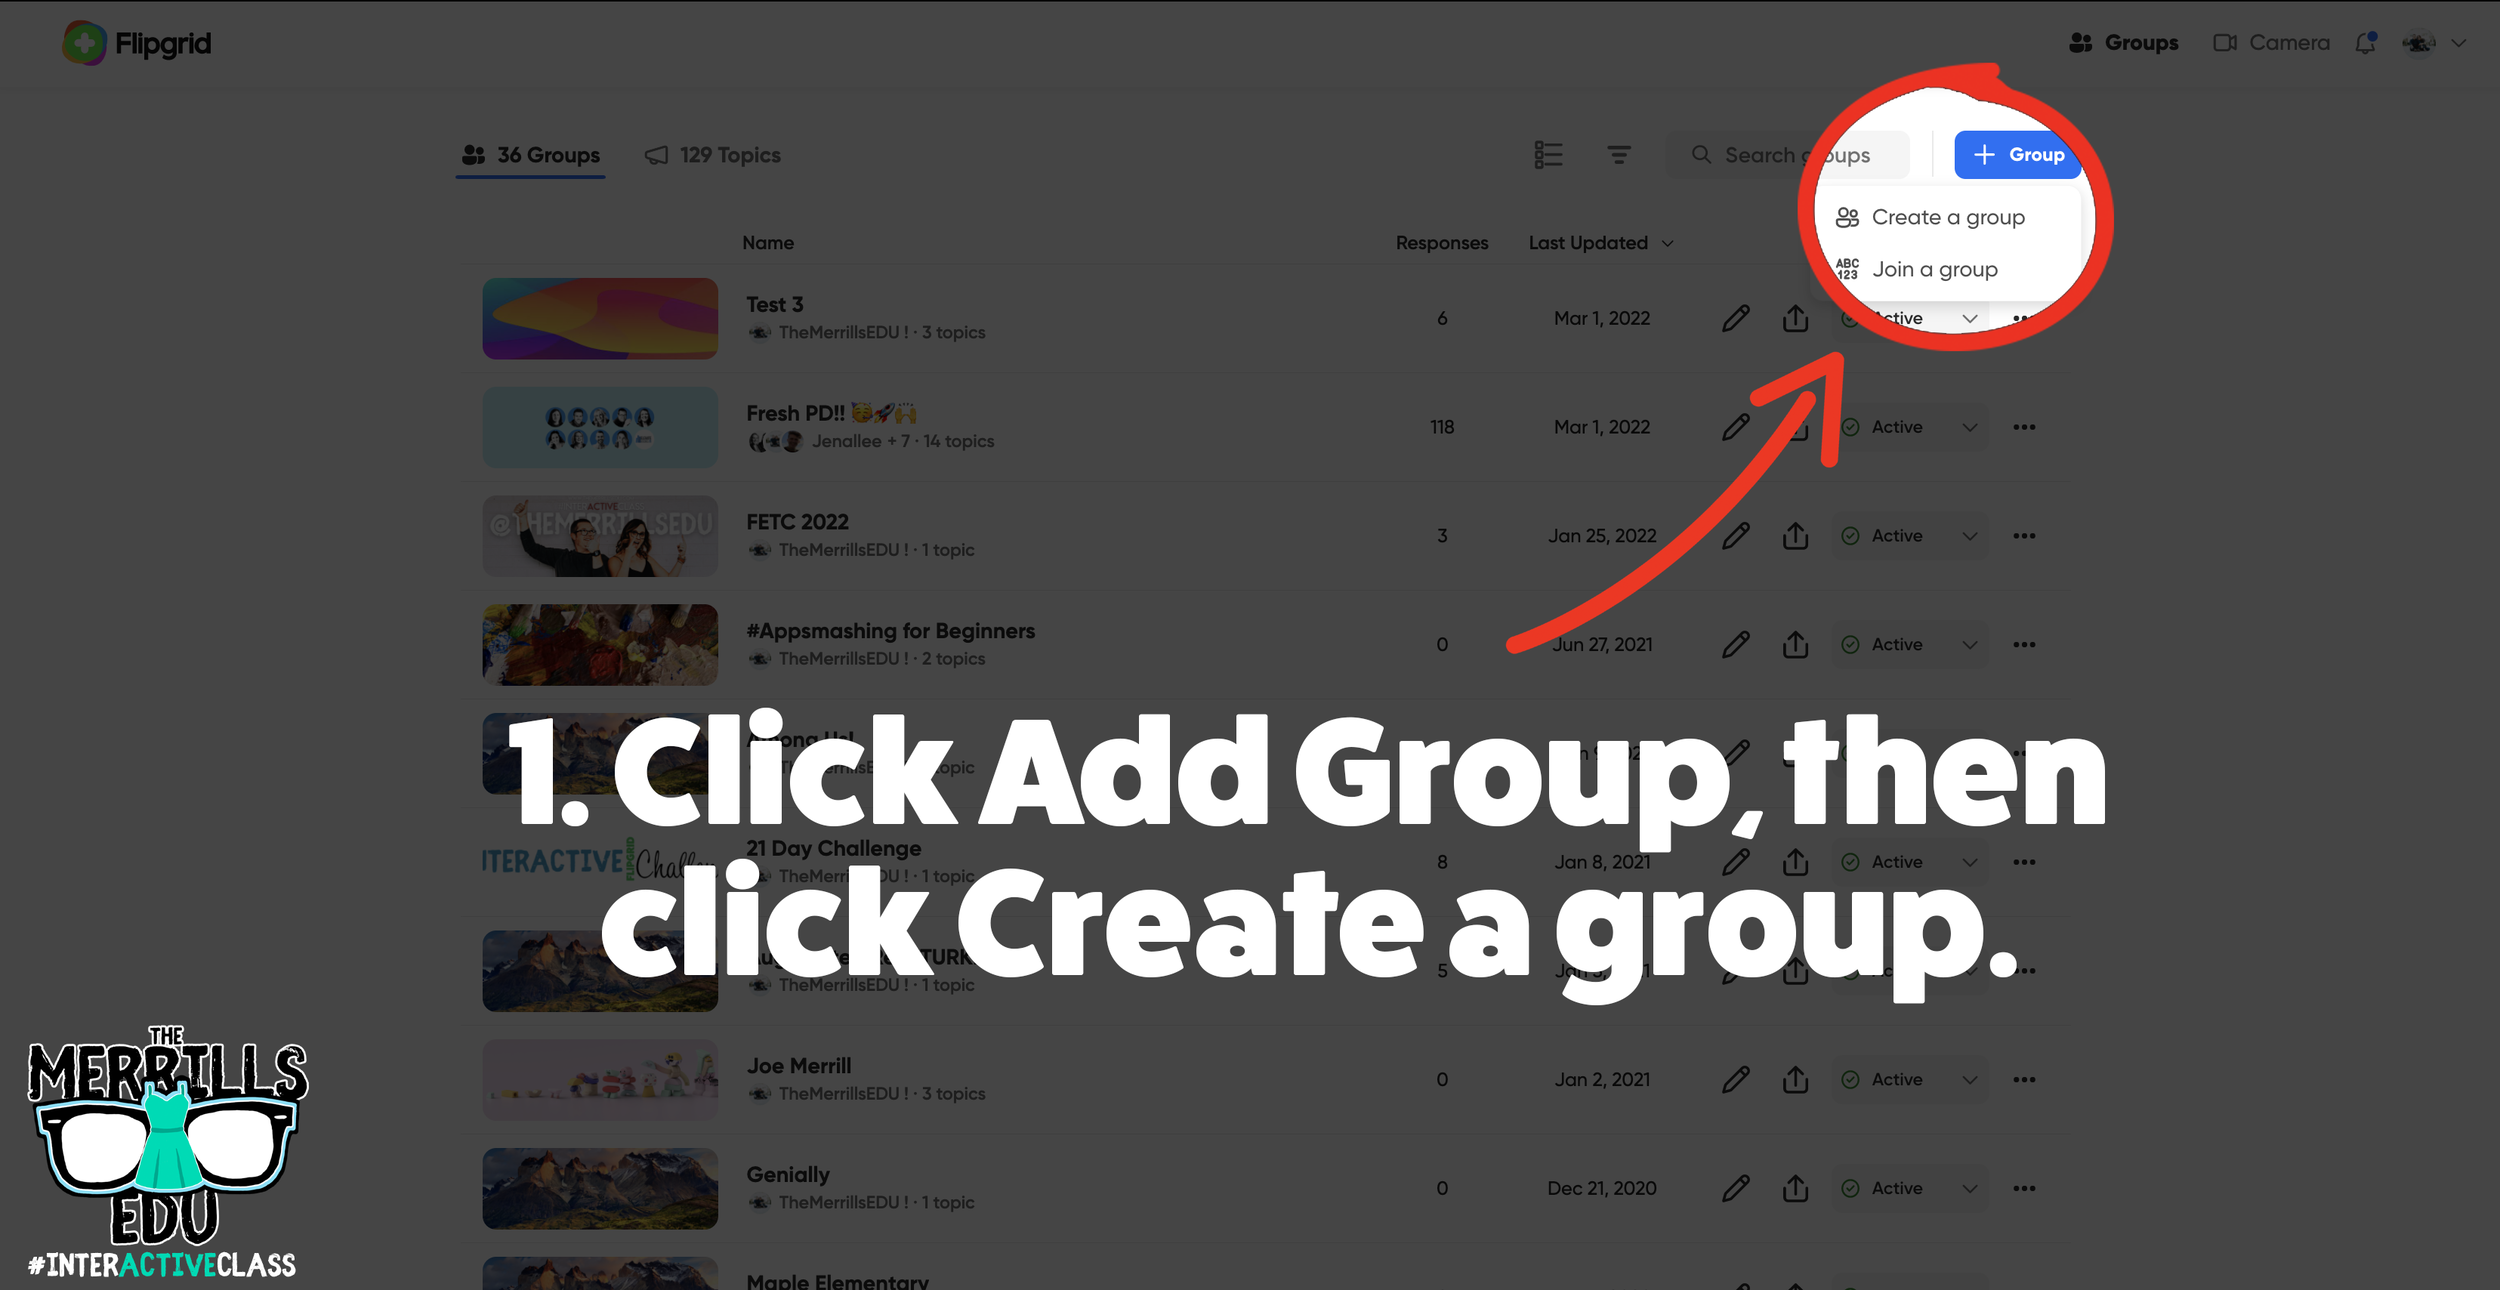
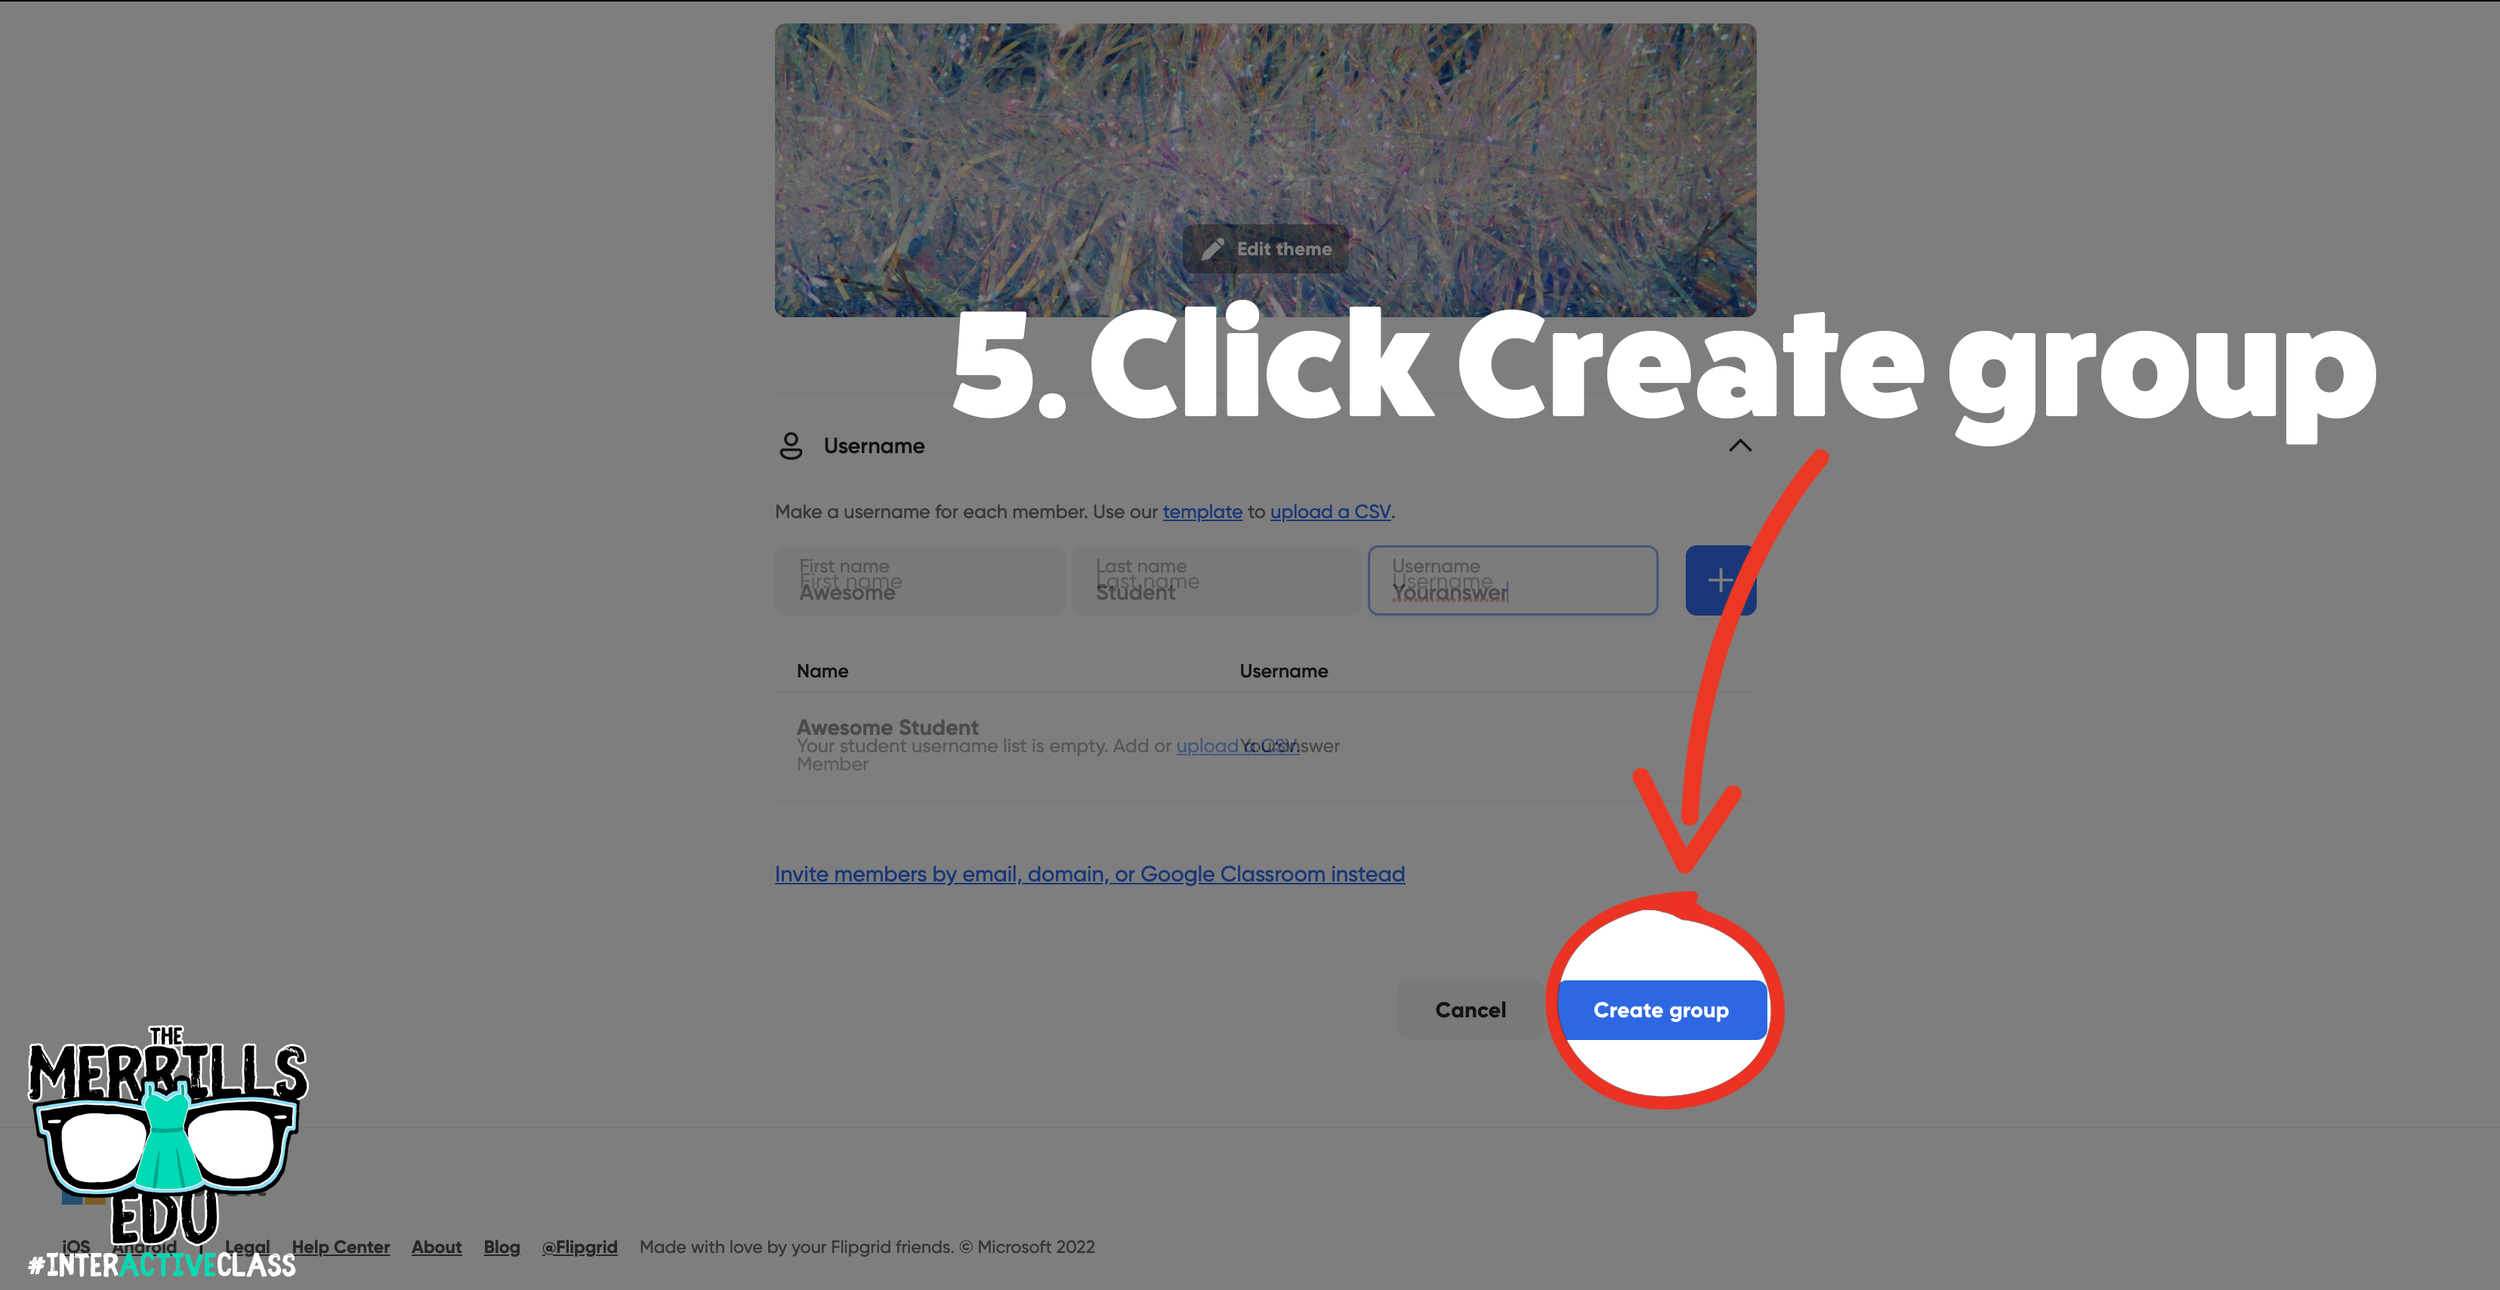

Log onto Flipgrid and click the “+Group” button at the top, then click “Create a group.”
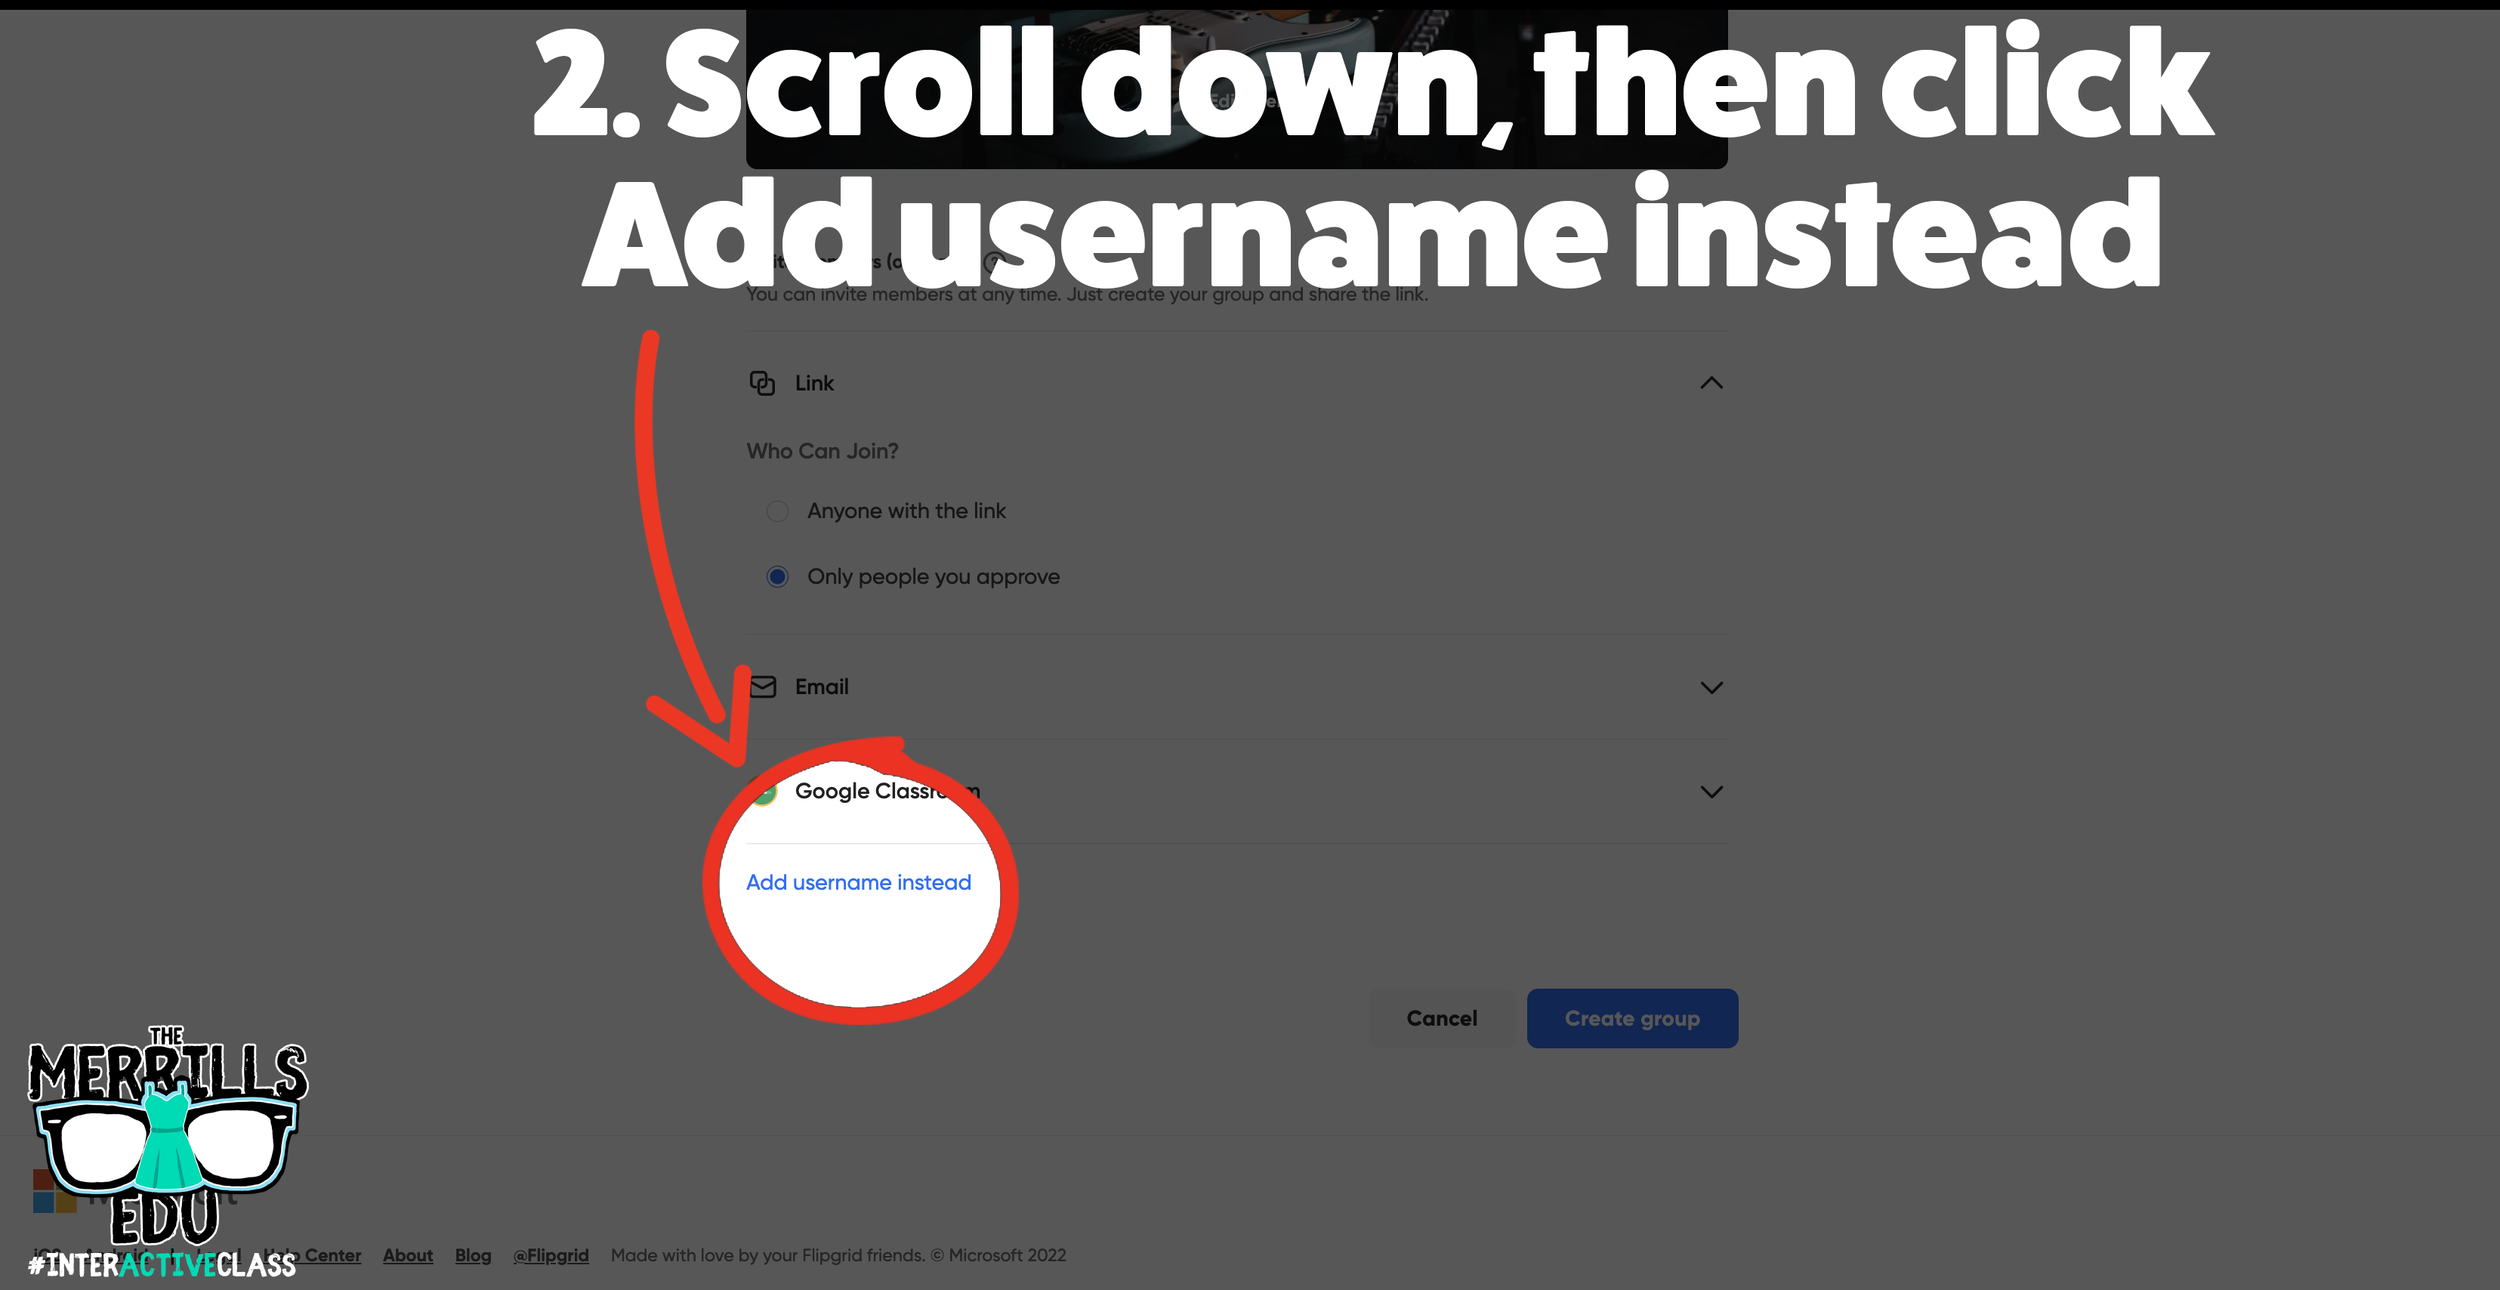
Fill out the information on the next page, then scroll down to the bottom and click on “Add username instead.”
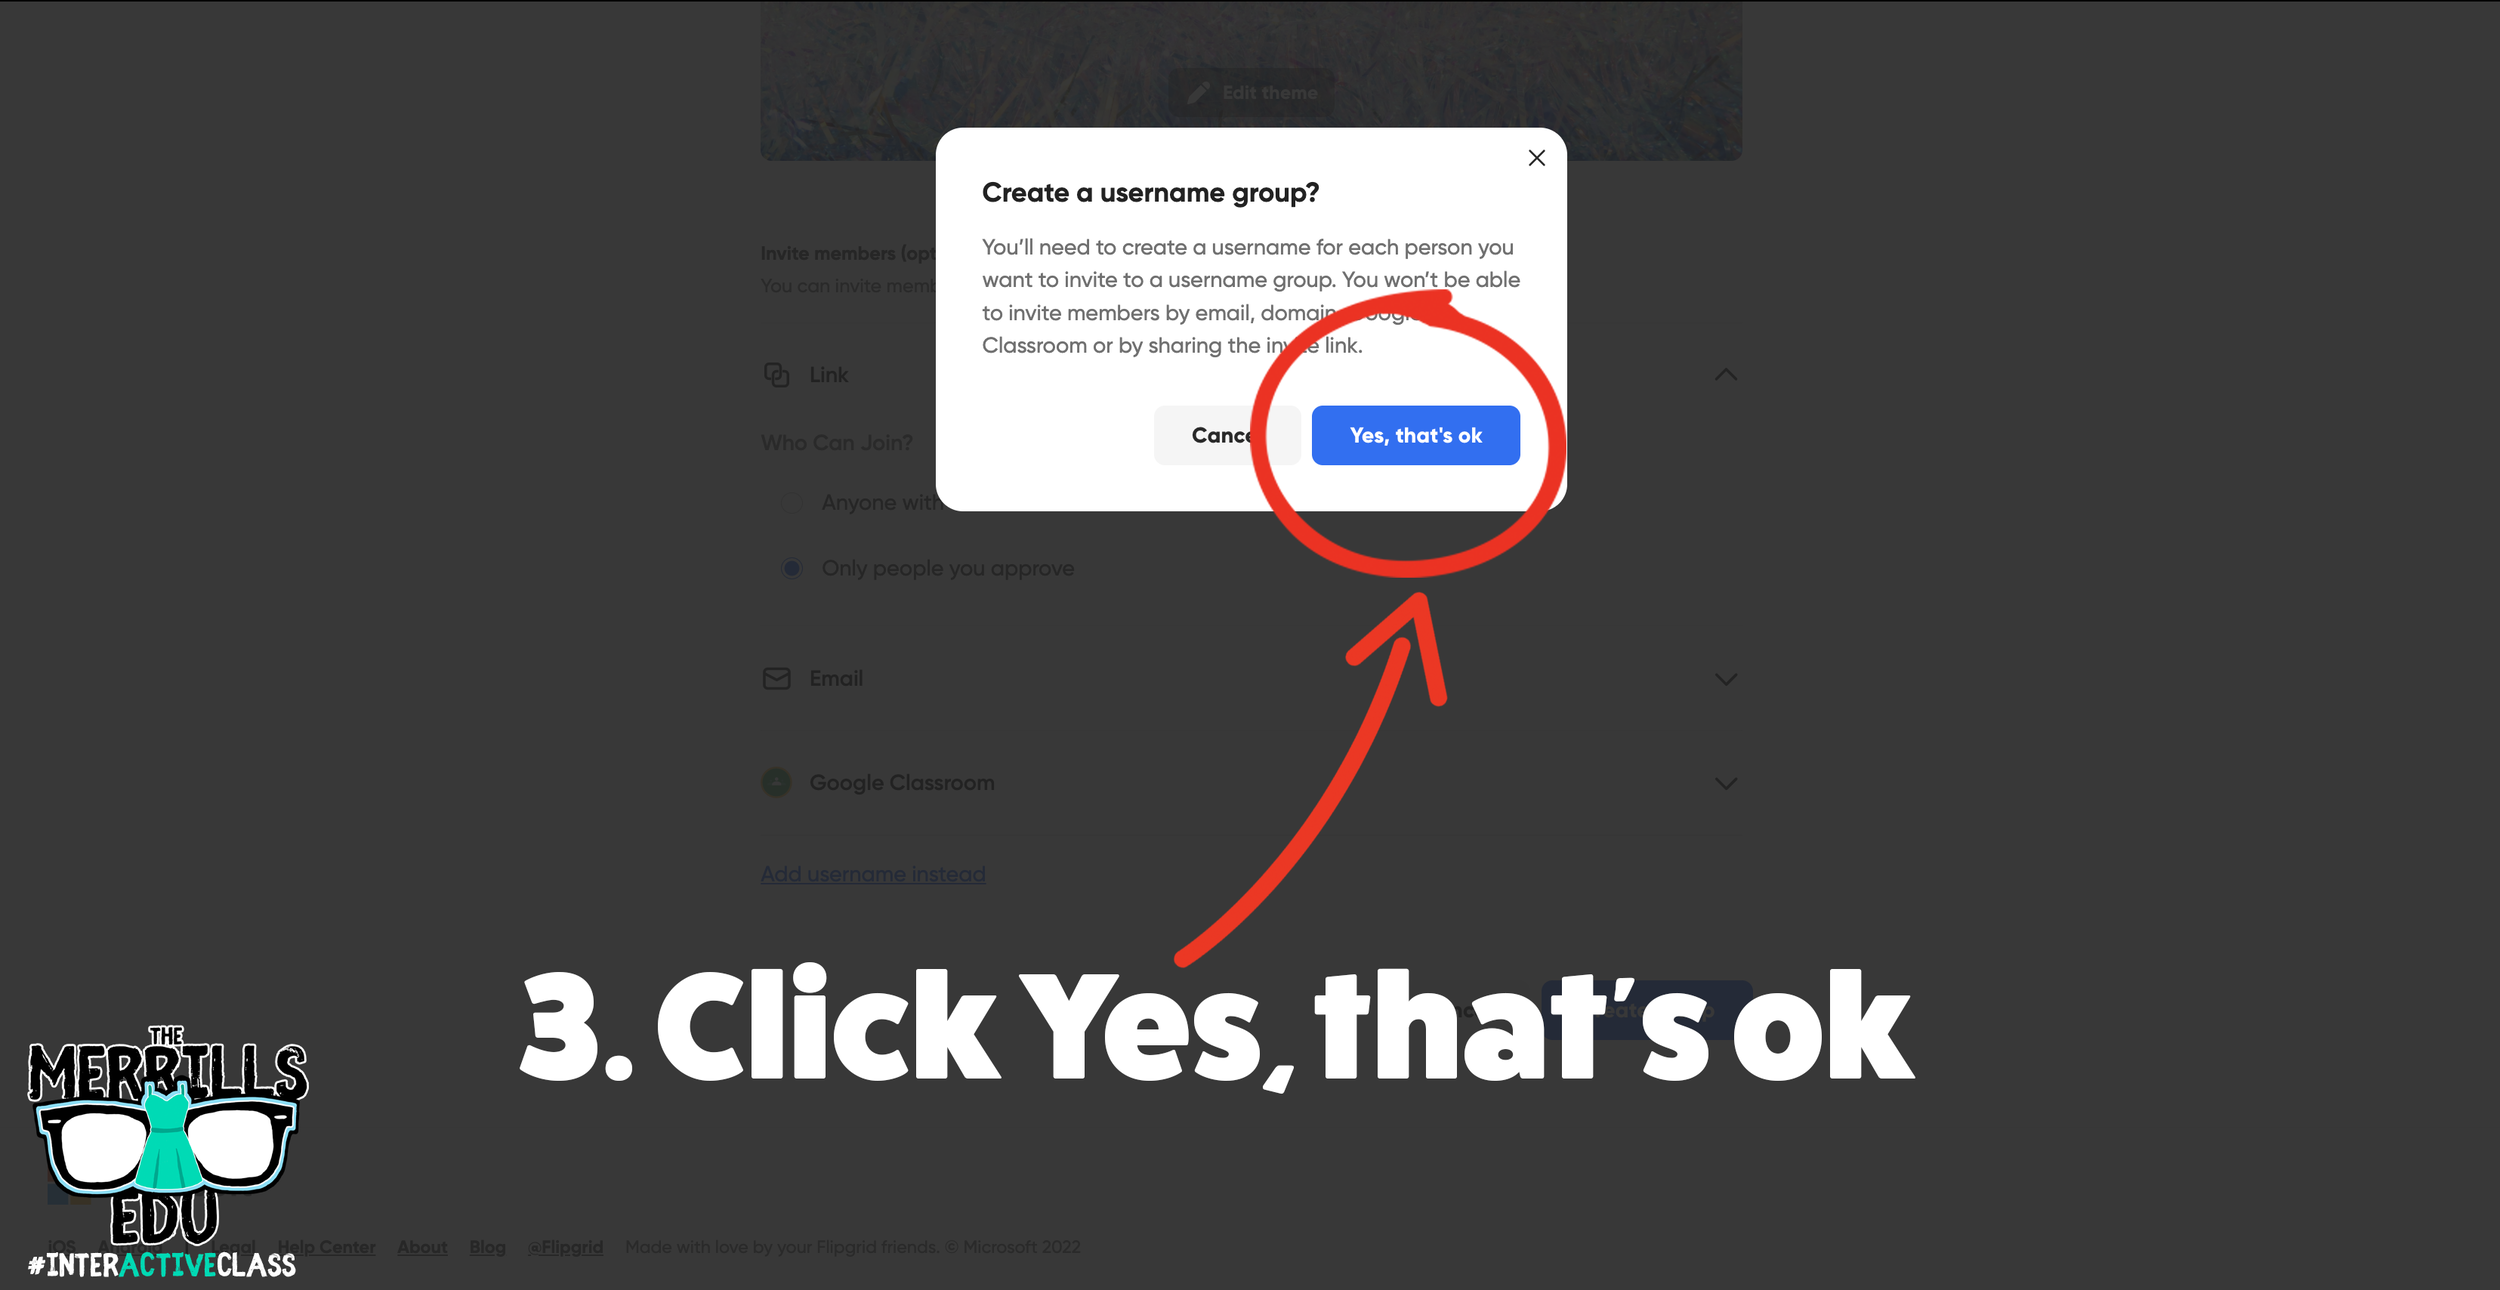
On the next window, click “Yes, that’s okay.”
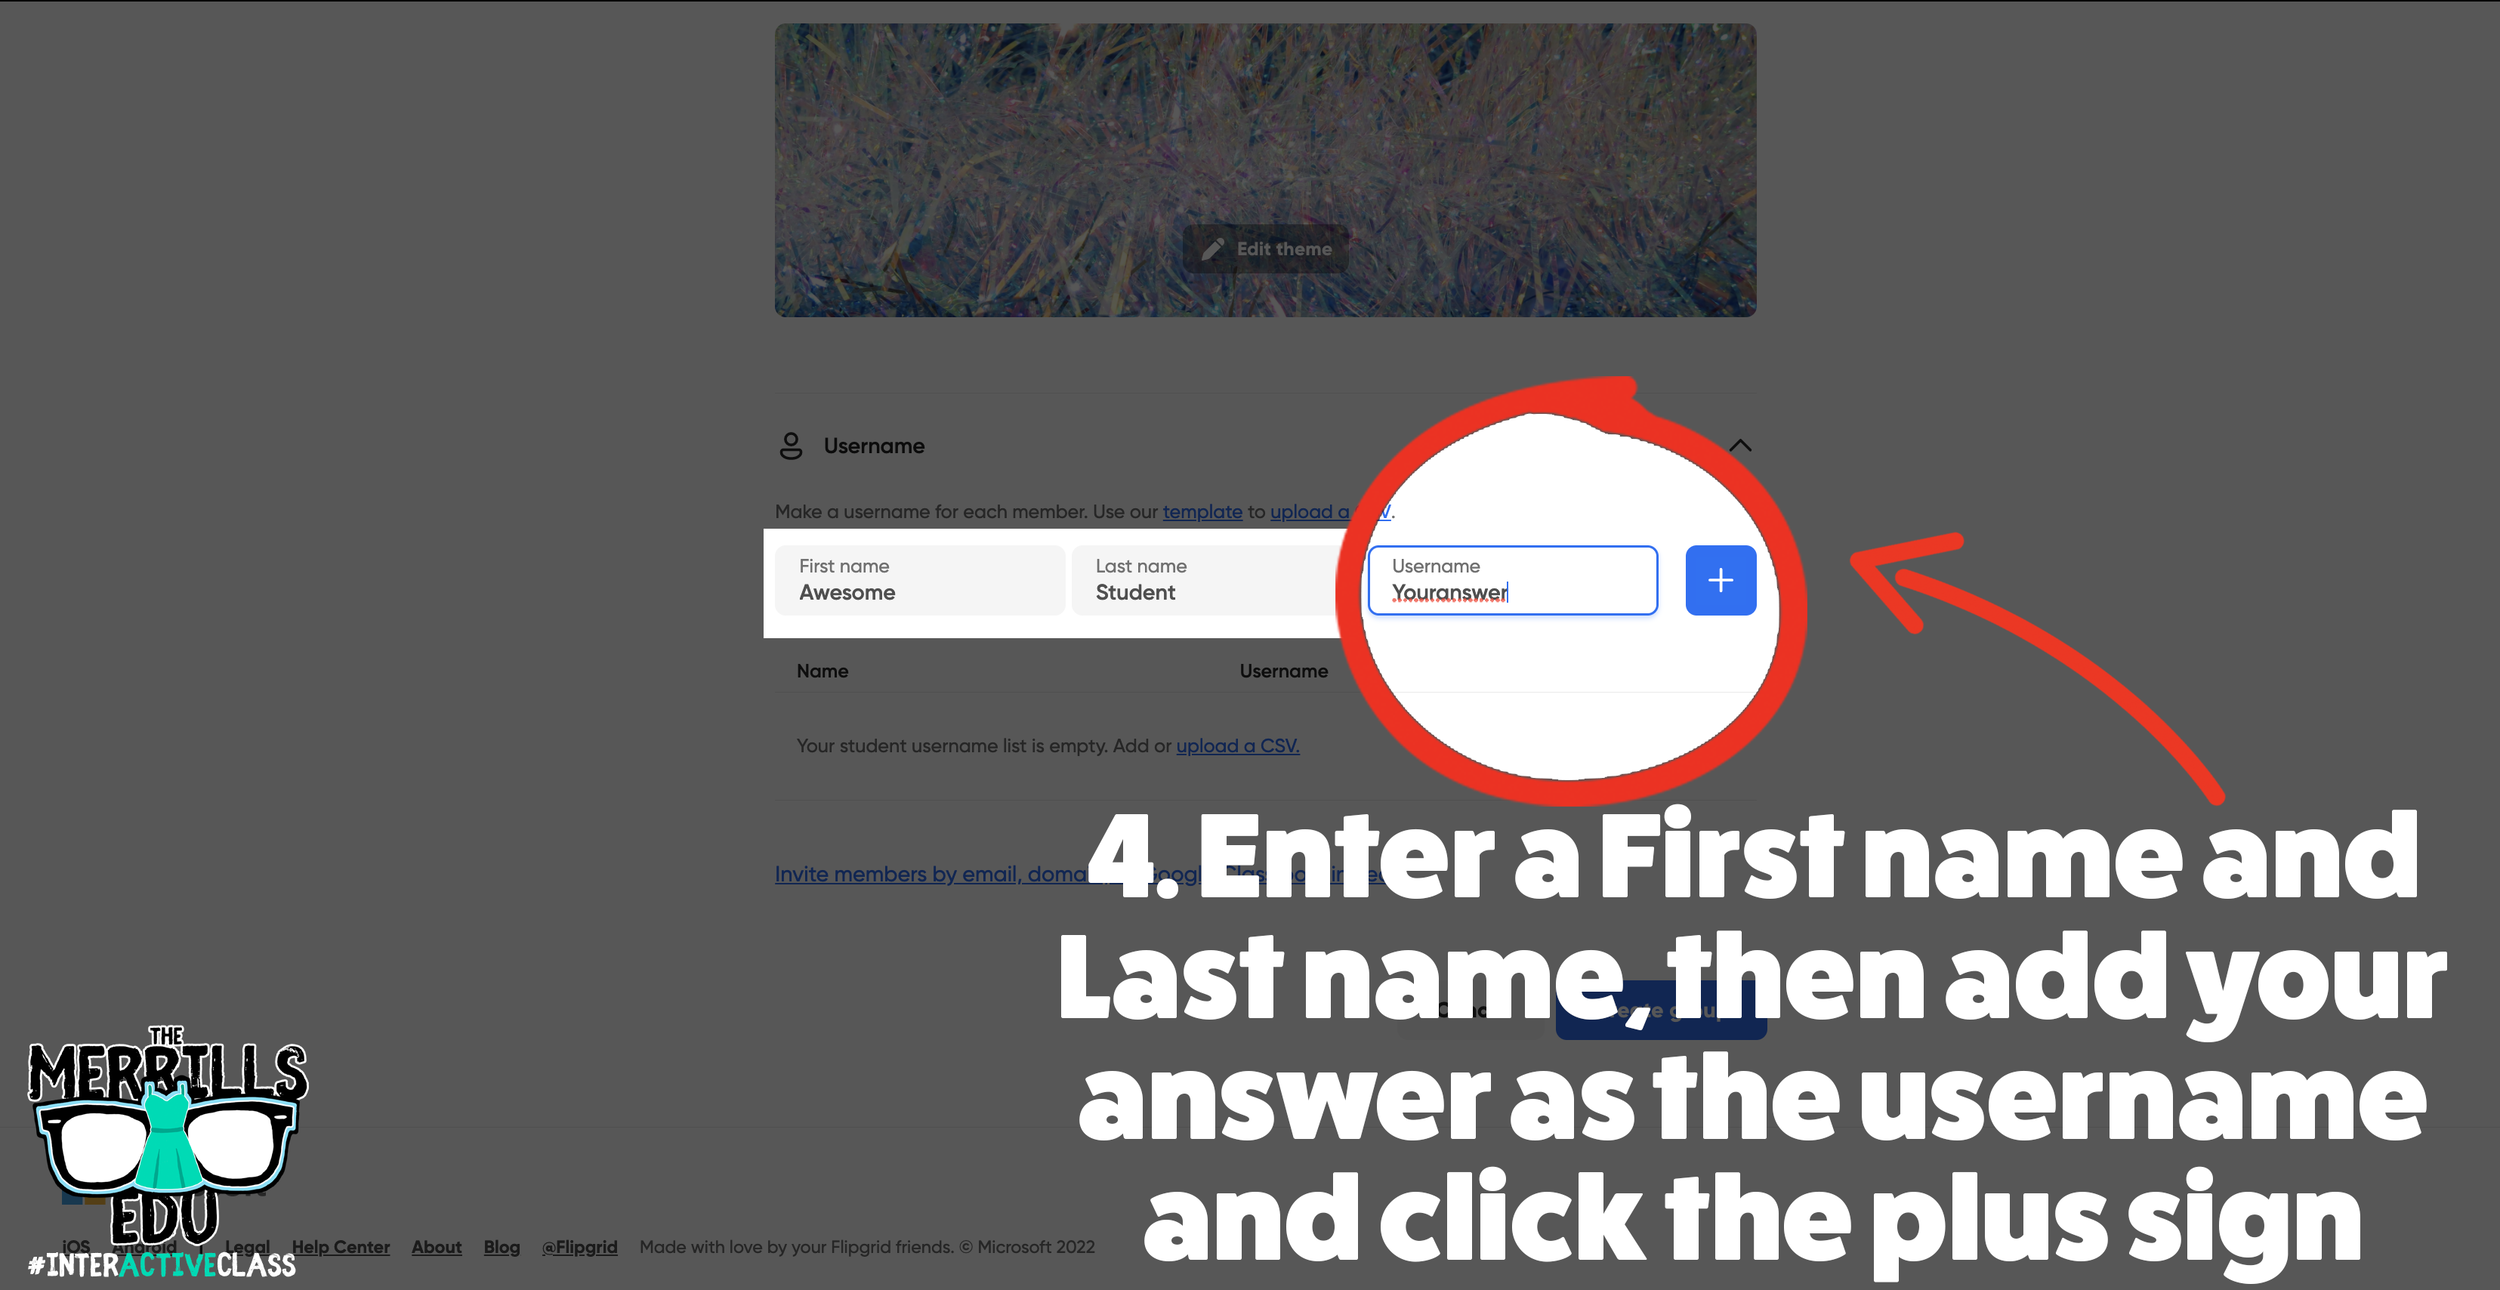
Enter a pseudo name (for example, “Awesome Student”) for First and Last name.
Under username, enter whatever it is you want the answer to be. Keep in mind - you will not be permitted to use spaces (so this may work best for a math assignment).
Then click, “Create group.”
Share the group on your LMS, Teams, or Google Classroom.
Explain to the students that they will need to answer your question to be able to “break into” the Flipgrid Group. Once they think they have the answer to your question, they can attempt to use the answer to log into the Flipgrid Group.
We recommend creating a topic within your new group that the students will land on once they’ve broken in. For example, maybe it’s something fun like, “Record a victory dance now that you have arrived here!”
A Collection of Flipgrid Ideas
Let’s keep the awesomeness going! Here are a few of our favorite Flipgrid ideas. Feel free to add your own!
-- Let us know what your favorite Flipgrid hacks are! Be sure to follow us on social media (@TheMerrillsEDU everywhere) and tag us! 👓👗
For more tips, tricks and lesson ideas for making learning more interACTIVE, check out our books The InterACTIVE Class and Flipgrid in the InterACTIVE Class on Amazon!