

How to Use Canva's Magic Tools in the Classroom

Now, generating content for your classroom is even easier thanks to Canva’s new Magic features. Whether you’re trying to find resources for lessons, create engaging activities, promote accessibility, or adding some glitter to your creations - Canva’s Magic tools can help. In this post, we’ll take a dive into each of the features and how they can help you in your classroom.
Please note: This blog post was hand-crafted and was not created using AI.
(click on any subheading to jump to that section)


EDU Library in Canva
Canva’s EDU Library is full of teaching resources broken down by subject areas, grade levels, and more. These lessons are free and ready-to-teach. At the time of this original post, there were over 1,000 K-12 lessons designed by teachers, for teachers.
To access the EDU Library, click here or on the video. Then, you can narrow down your search by selecting the appropriate grade level and subject. Click on a lesson to view a preview of the contents, along with the design. Then, click Use this lesson to add it to your own Canva account. These lessons are fully editable, so if you’d like to change anything, you can. Additionally, you can share the lesson with other teammates by clicking on the “sharrow” or share icon.
You can check out our step-by-step video tutorial up on our Youtube channel (click here) or watch it to the left!


Creating Courses in Canva
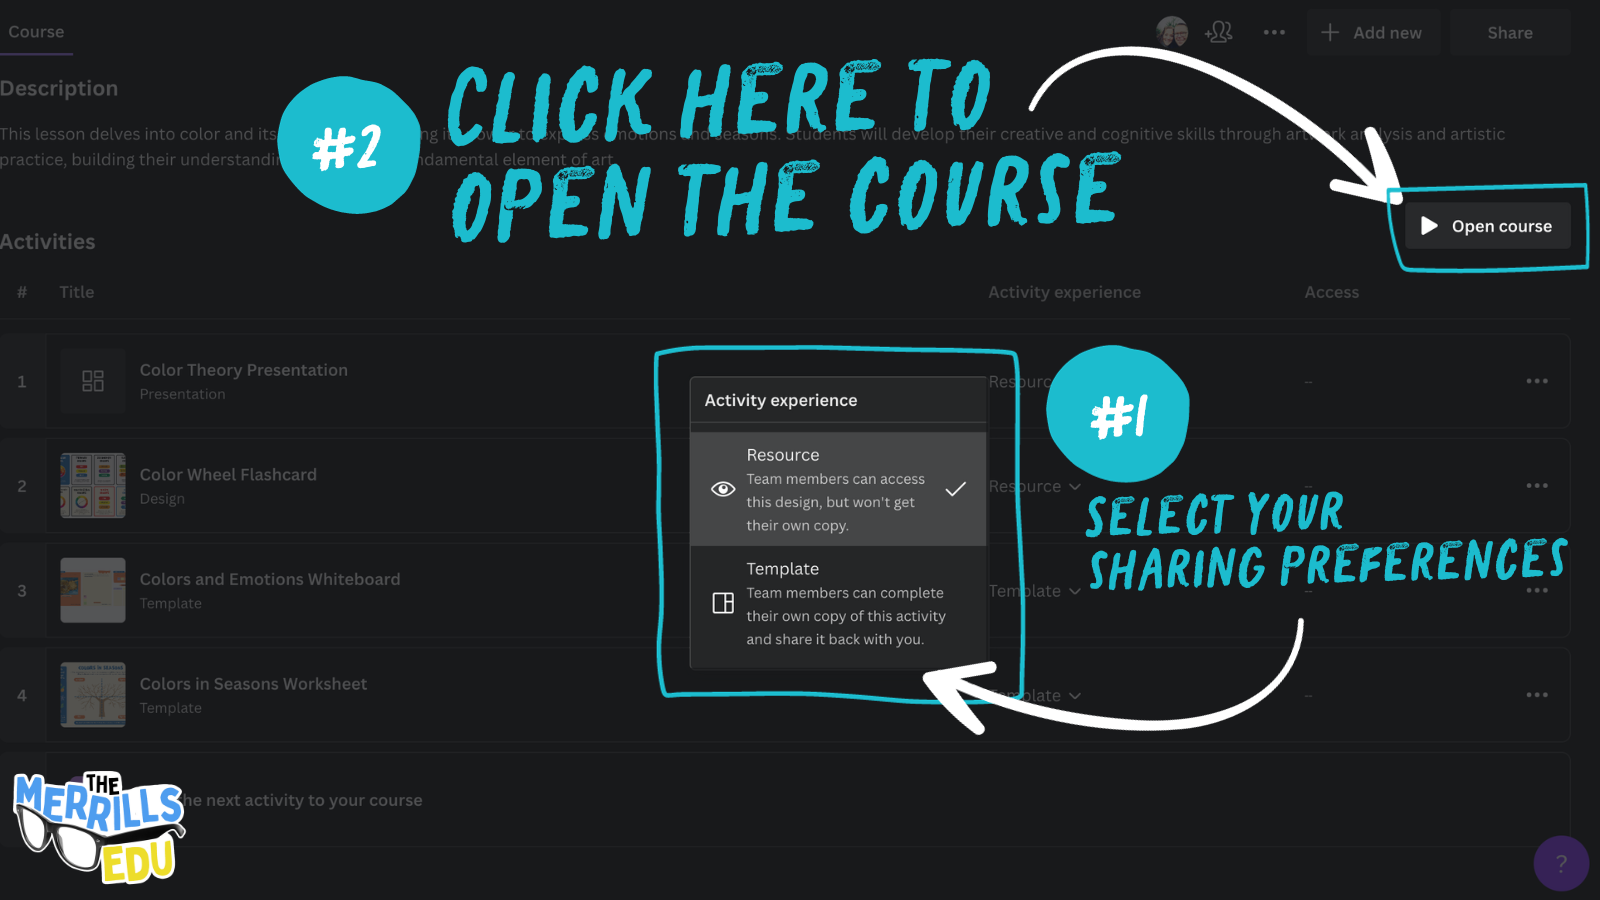
Once you’ve added the content from above to your Canva account, Canva will automatically break down the content - essentially creating a course. From here, you can choose the type of experience for users. For example, you have the option to grant students to download the lesson(s) as a template file, giving them their own copy to edit and submit. Or, students can just use the design as a resource - which will not let them edit the design. Click on the play icon (or “Open course”) to launch the entire project. Now your class will have access to the course.
You are always able to remove or add content the course by returning to it and selecting “Add the next activity to your course.” You can even edit the description at the top of the page by clicking on the pencil icon. All of the contents within this course get saved into a Folder located in your Canva account. If you need to revisit the content, just click on the file from your dashboard.

Ready to Teach Lessons in Canva
We’ve shared how to find the EDU Library, and now you know how to design a course - but we though we would share some of our favorite lessons that we found in the library. For convenience, we’ve broken them down by grade level. Check them out below!


How to Use Magic Animate in Canva
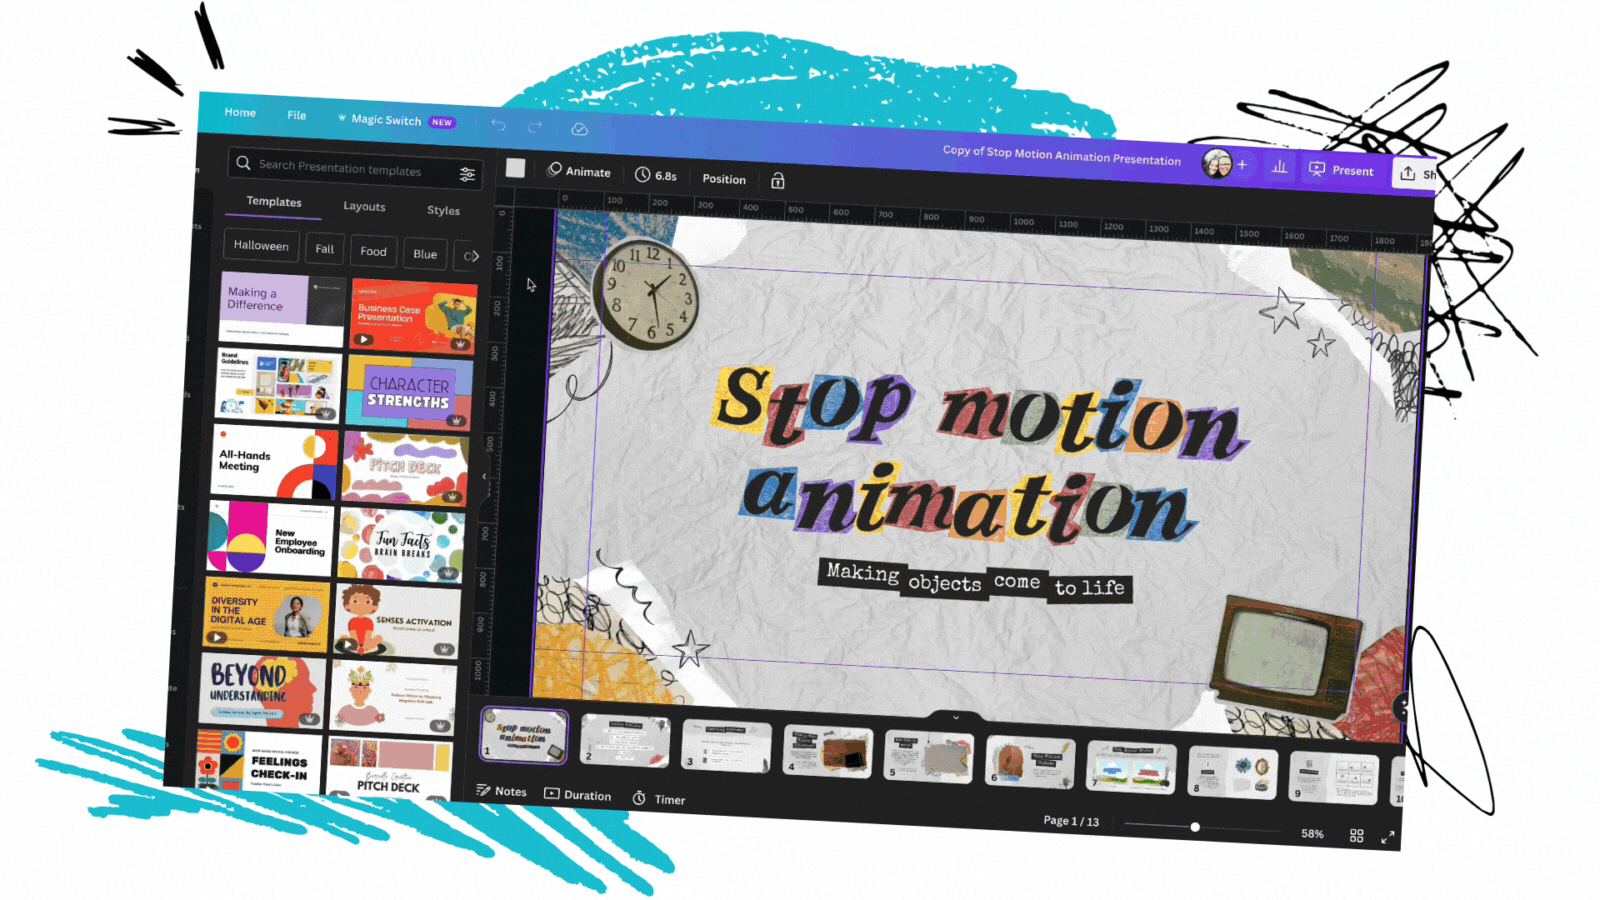
Canva’s Magic Animate instantly applies perfectly suited animations and transitions to your schoolwork. To try Magic Animate, open a project and then click on Animate. A new panel will open on the left hand side. Click on Magic Animate, then select your desired effect. Now, the animations and transitions will be automatically applied. If you’re saving the design, it’s important to remember that animations and transitions will not be saved if the file is downloaded as a JPEG or PNG. In order to preserve the animations and transitions, the file will need to be saved as a video/movie or GIF. Check out how it works below!

How to Use the Design Accessibility Tool in Canva

Canva’s Design Accessibility Tool ensures that educational resource you share is effortlessly designed with accessibility in mind. The tool will check for potential accessibility issues, create inclusive lessons and activities, and improve the accessibility of your designs without having to leave Canva. Here’s how it all works:
Open a Canva project, then click on File on the top left.
Then, select “View Settings.” A list of options will appear.
Now select, “Check design accessibility.” This will coach you through any potential issues with your design.
For a video tutorial, check out our YouTube channel here, or click on the video below!

How to Use Canva’s Magic Grab

Canva’s Magic Grab allows you to easily transform images. Using Magic Grab, you can make any image editable, even the text within it. Here’s how it works:
Start by uploading a photo or screenshot of an activity
Grab a part of the photo to edit, reposition, or resize.
This allows you to transform the look of the design.
This feature pairs well with other Magic Studio features like Text to Image. Give it a try!
For a video tutorial, check out our YouTube channel here, or click on the video below!

How to Use Canva’s Magic Write AI in the Classroom

Canva’s Magic Write is a handy teaching assistant. This tool will save you time, utilizing Canva’s AI-powered generators to create content. Simply type a promopt and watch Magic Write generate the teaching content. Or, try streamlining tasks like creating lesson plans or activities. As with all AI generated content, educators will need to review the material to make sure it aligns with learning standards. So, all of Magic Write is fully editable. To try it out, click on a piece of text, then select Magic Write to generate a different description.

How to Use Canva’s Magic Switch
If you’ve ever been working on a Canva design, only to stop and wish you had sized the project for something else - then this is for you! Magic Switch will resize schoolwork into multiple formats all at once. So, now you can transform your presentations into a doc or a whiteboard. Previously, users would have to copy the design and then rearrage all the elements so that they appeared correctly on the design. Now, with Magic Switch, the AI does the work for you. Check it out below!
Open the Canva design that you wish to resize
Click on Magic Switch located on the top left
Select or search for your preferred size
Choose to either copy and resize into a new document (which will duplicate the document into the new size), or resize the current document (which will change the size of the current document that is open).
Let the AI do the work, and then open the template or design!
For a video tutorial, check out our YouTube channel here, or click on the video below!
-- Please follow us on social media and tag us with how you’re using these Canva activities in your classroom! 👓👗
For more tips, tricks and lesson ideas for making learning more interACTIVE, check out our books The InterACTIVE Class and Flipgrid in the InterACTIVE Class on Amazon!


