
Using Seesaw is the easiest way to connect the daily learning happening in the classroom with families at home. Whether you’re using Seesaw as a “house” for your student’s content or as a creation tool, this app has plenty of amazing abilities. In this blog post, we’ll cover how to connect families, how to teach students how to use Seesaw, new Seesaw features and more! Click on any subheading image below to jump to that section!


🙌🏼 How to Connect your Families to Seesaw 🙌🏼
One of Seesaw’s most powerful features is it’s ability to connect families with what is happening in the classroom. This is done in a safe and secure way. Families can receive an email indicating that there is a new addition to their child’s portfolio, or they can receive a notification if they have the Seesaw Family App installed (click here for the download link). But, if you’re new to Seesaw, here’s a pro-tip: Use it without advertising it for the first month or so of school. This way, you won’t feel the pressure once your families are invited and you’ll already be comfortable with the platform. Here’s how to get your families connected:

Log into your class on Seesaw and then click on the gear icon (top right)
A new window will pop open. Click on Families
Enter the email addresses of your family members, then click invite!
You can also print out invitations or share an invite link, but we find that the above method gets our families connected easiest!

🎨🖌️ Teaching Students How to Use Seesaw’s Features 🎨🖌️
Seesaw is much more than just a portfolio app. Students have the ability to create right from the app with lots of key features. Our favorite way to teach students the basic features is to have them create what we call a “Seesaw Selfie,” or a self portrait of themselves. The kids can use the pen / drawing tools, shapes and more. We even have a ⚡️FREE DOWNLOAD⚡️ of this activity to download by clicking here! To assign this activity, follow the steps below.
Download the activity by clicking the link here.
Log onto your Seesaw class and assign the activity!


✌🏼😀 Customized Student Avatar in Seesaw 😀✌🏼
While we love the Seesaw emoji’s that are automatically assigned to students, we’ve noticed that personalized customization helps students find their profiles much quicker. So, we use our “Seesaw Selfie” activity (see above, or click here)! Students create their own Seesaw self portrait, which you (the educator) can turn around and download. After you’ve downloaded the “selfie,” you can upload it to change out the Seesaw emojis. This gets students on quicker. Here’s how it all works:


Assign your students the “Seesaw Selfie” activity (download it here)
Select a student, then click the three dots in the Seesaw Selfie assignment.
Click Save.
This will automatically download the Seesaw Selfie image. Unfortunately, there is no way to do this for the entire class all at once (if you know of a way to do so, please let us know!). So you’ll have to go one-by-one. The next step is to upload the Selfie as their profile avatar. Here’s how to do that:
(Click on the arrow in the image below to see a step-by-step)
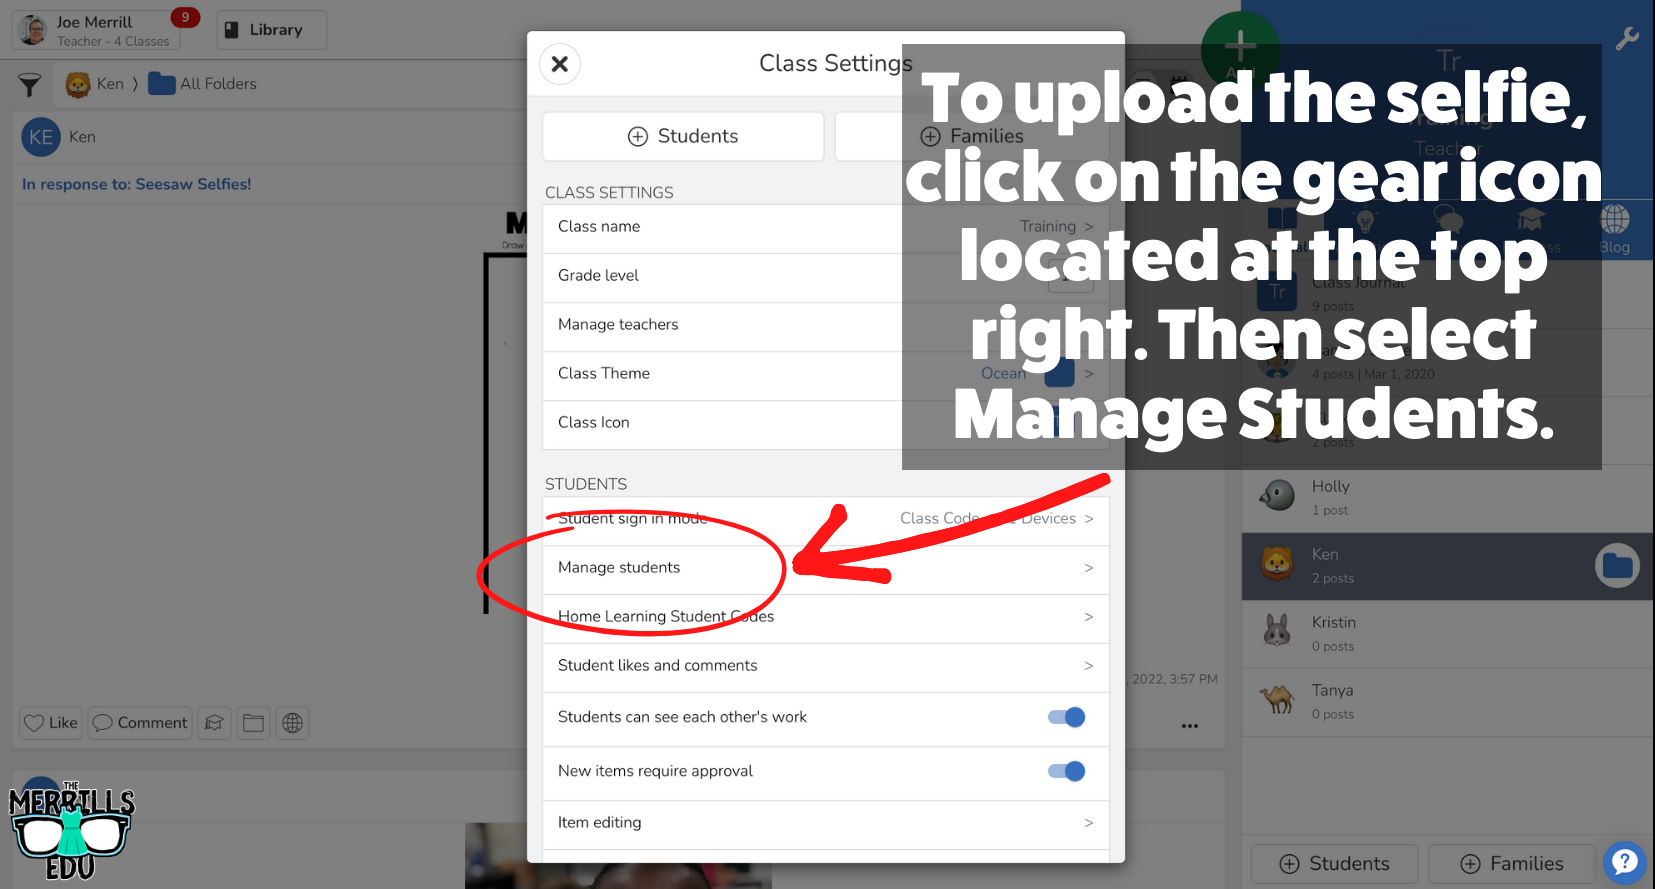
Once students have submitted their work, click the gear icon on the top right of the educators dashboard.
Click “Manage Students” in the new pop up window.
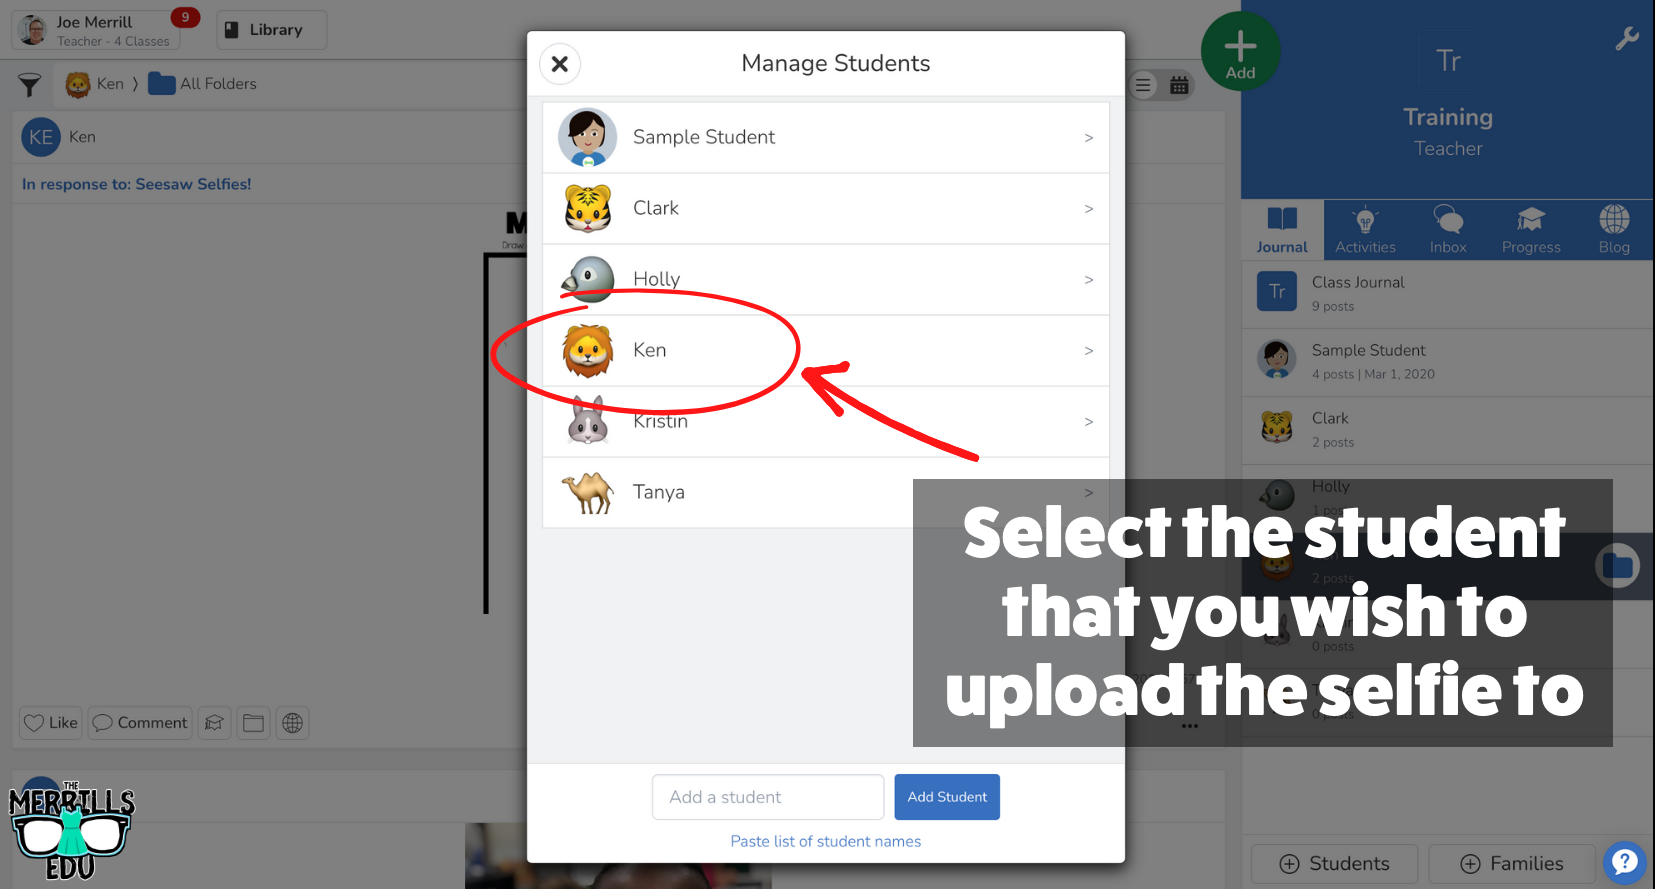
Next, select the student that you wish to edit.
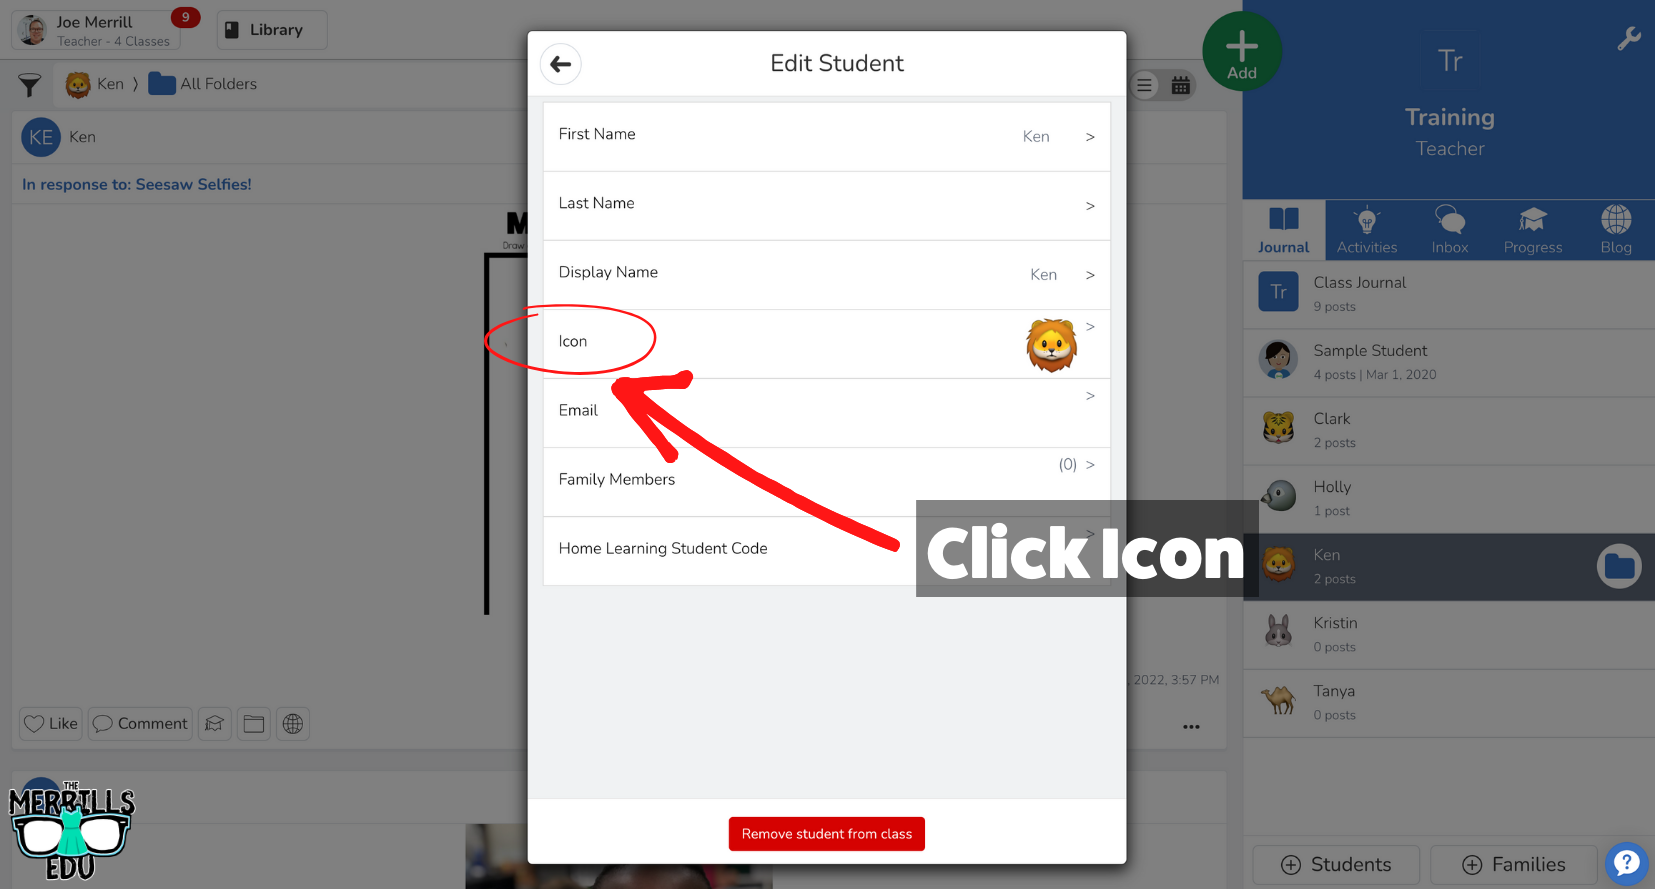
In the next window, click “Icon.”
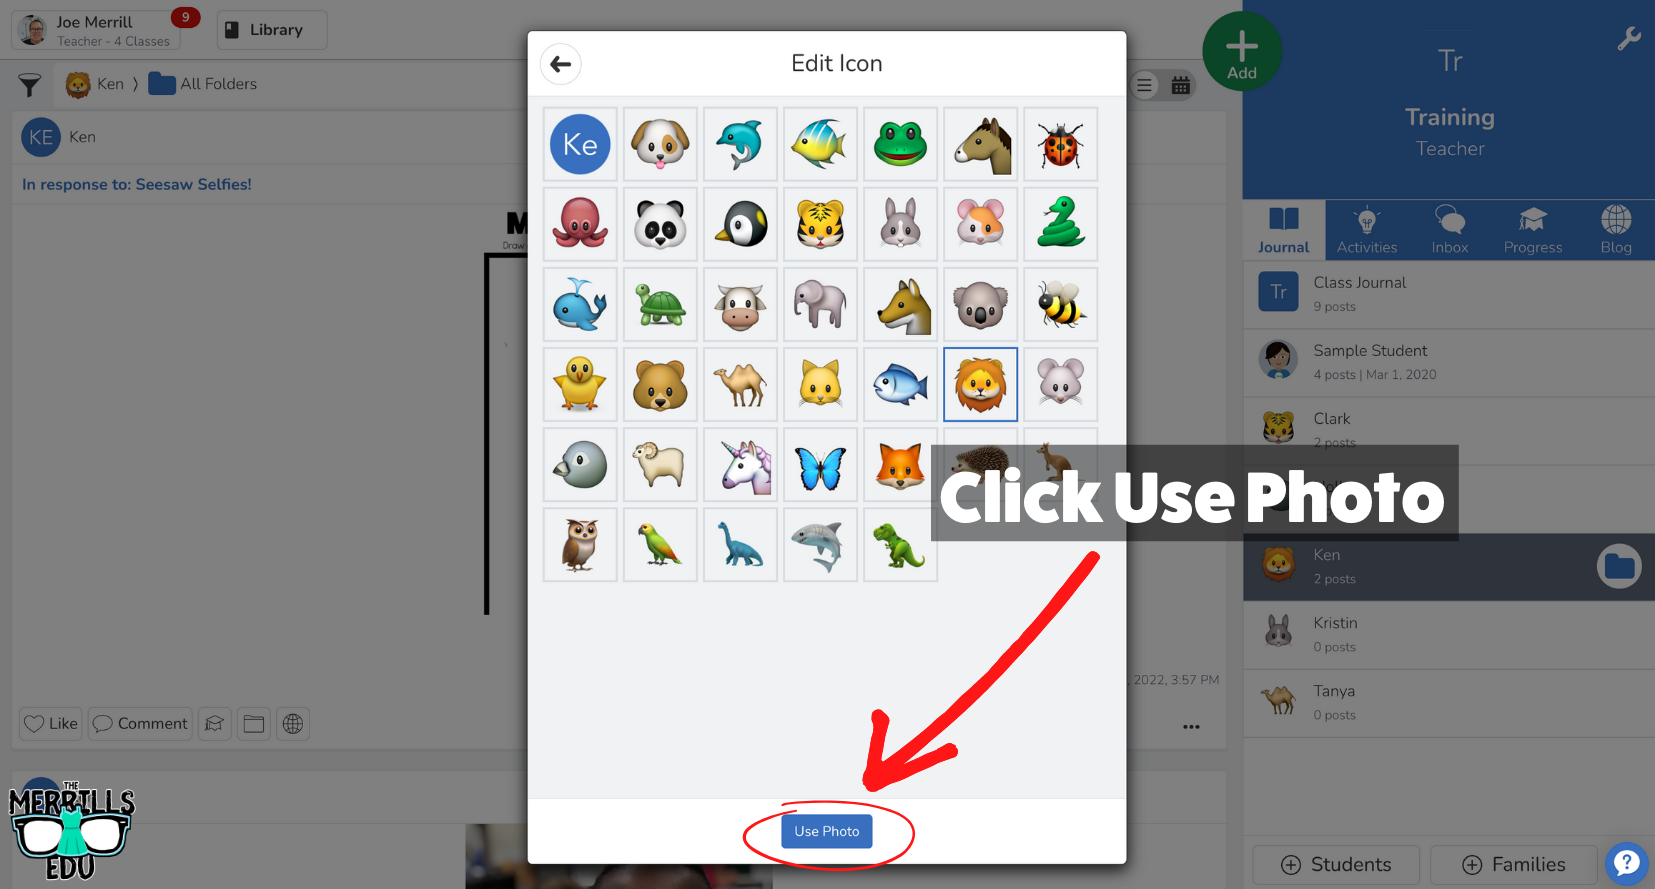
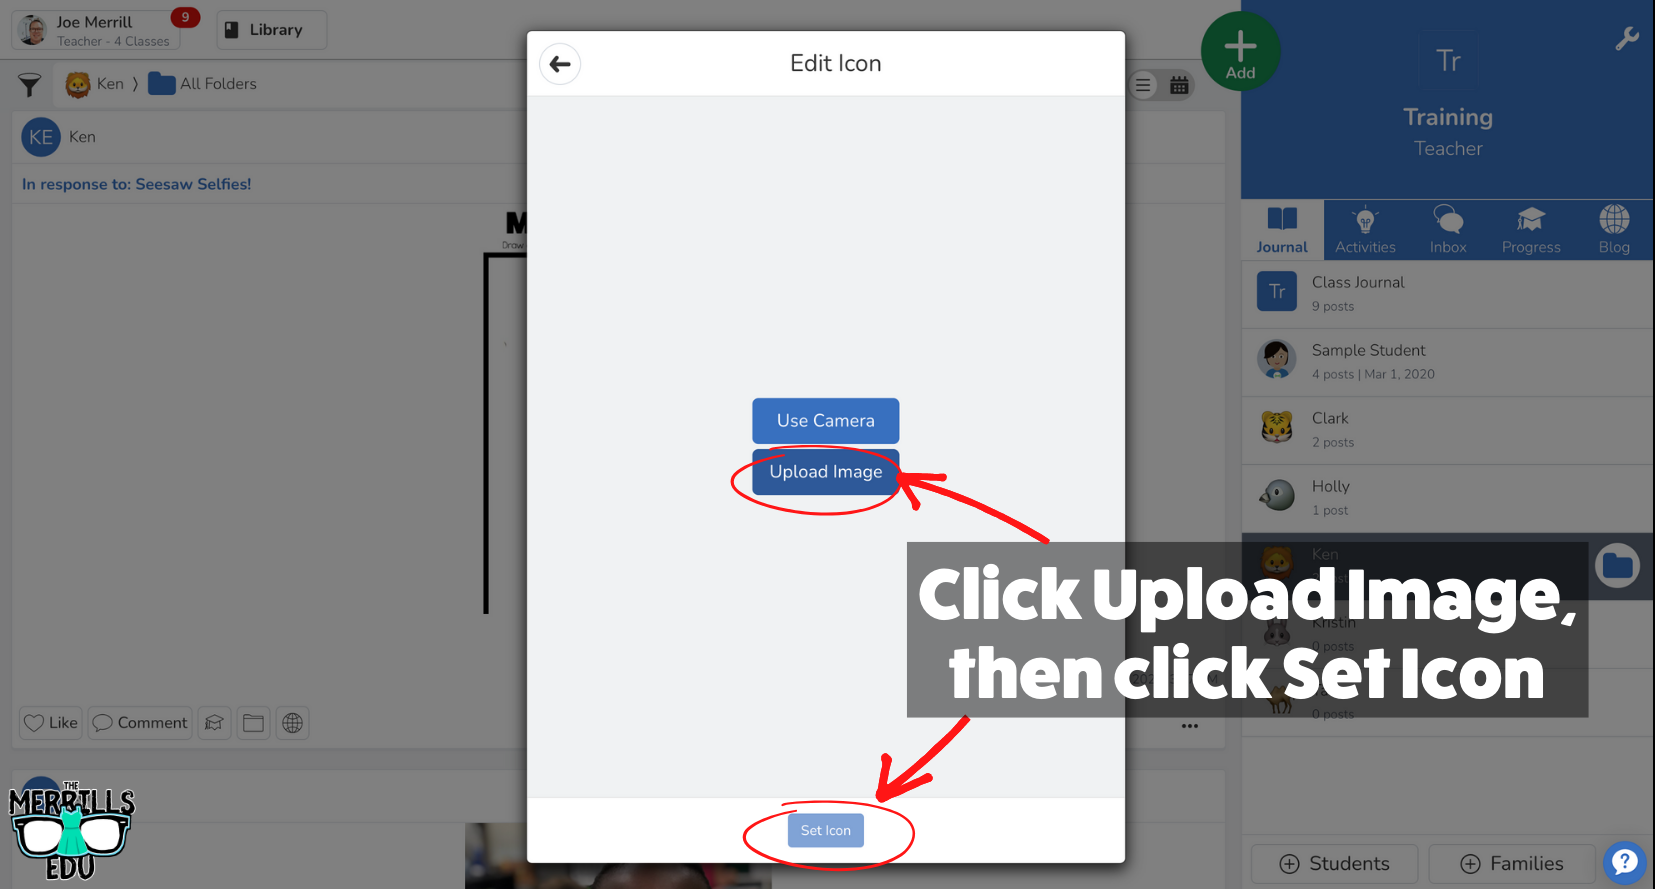
A new pop up will open with the Seesaw emojis. Click “Use Photo” located at the bottom.
Upload the downloaded Seesaw Selfie from the student by clicking “Upload Image,” then click “Set Icon” to save!
Once you’re done, you may not want to delete all of those selfies! Be sure to check out how we used all of our class selfies to design a class t-shirt! All the info is below!

🤔 How to Create a Student Choice Board in Seesaw 🤔
So now you have your students on Seesaw and they’re starting to learn the in’s and out’s of the application. But the fun doesn’t have to stop there! You grab instant engagement by turning any of your centers or assignments into Student Choice Boards. These offer different choices for students when completing tasks, but at the end of the day, everyone is completing the same assignment. To create Student Choice Boards on Seesaw, follow the steps below!
(Click on the arrow in the image below to see a step-by-step)
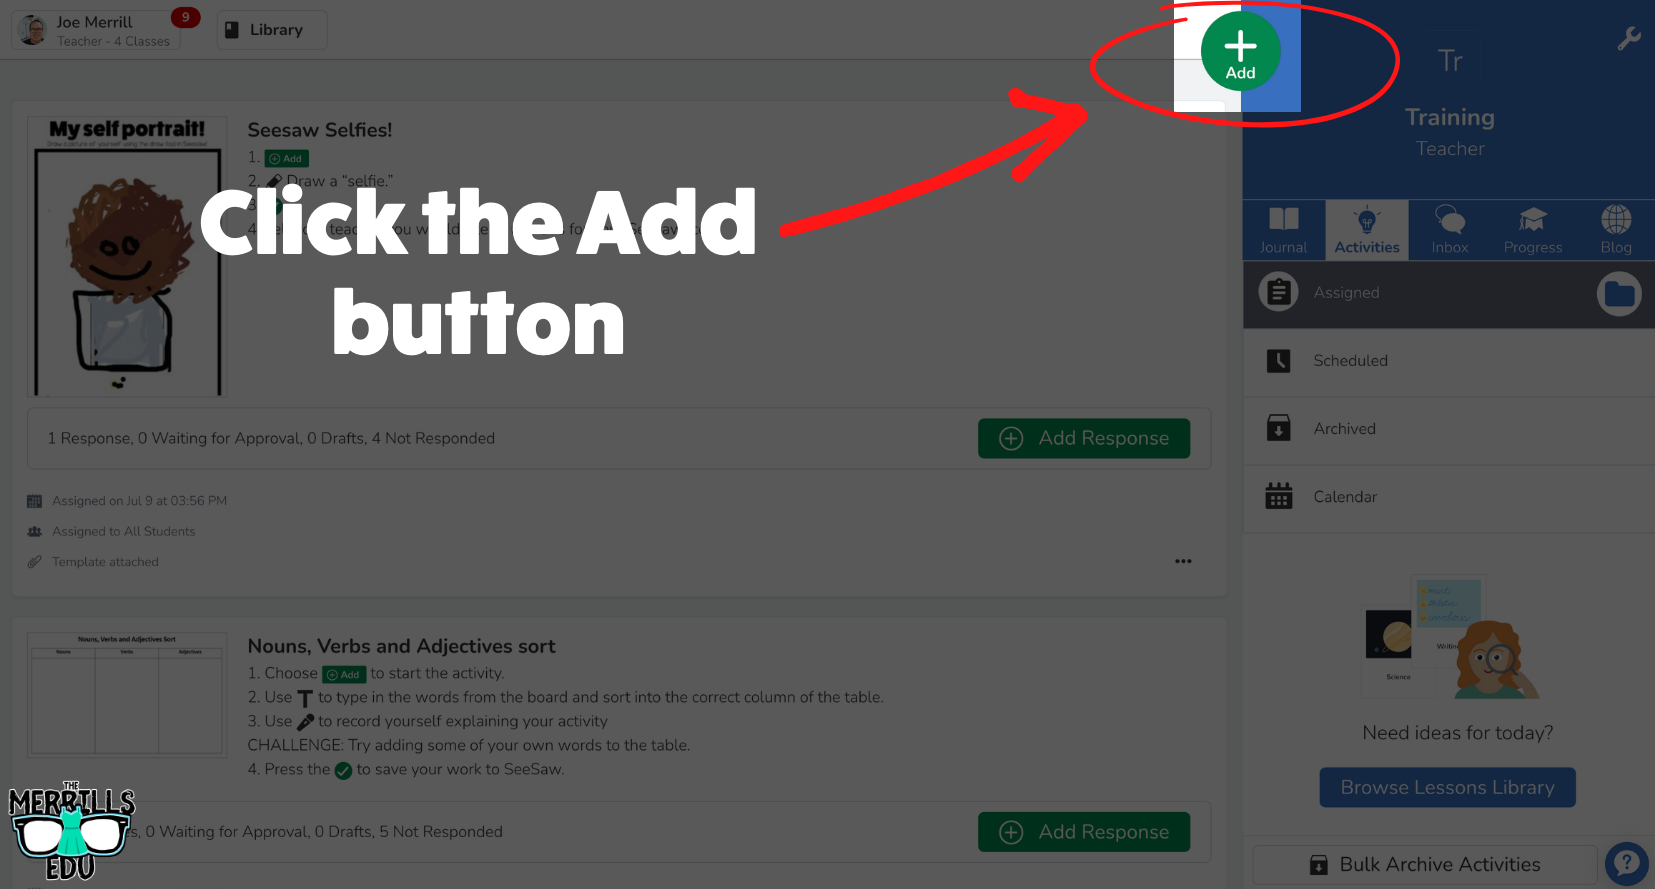


Click the Add button.
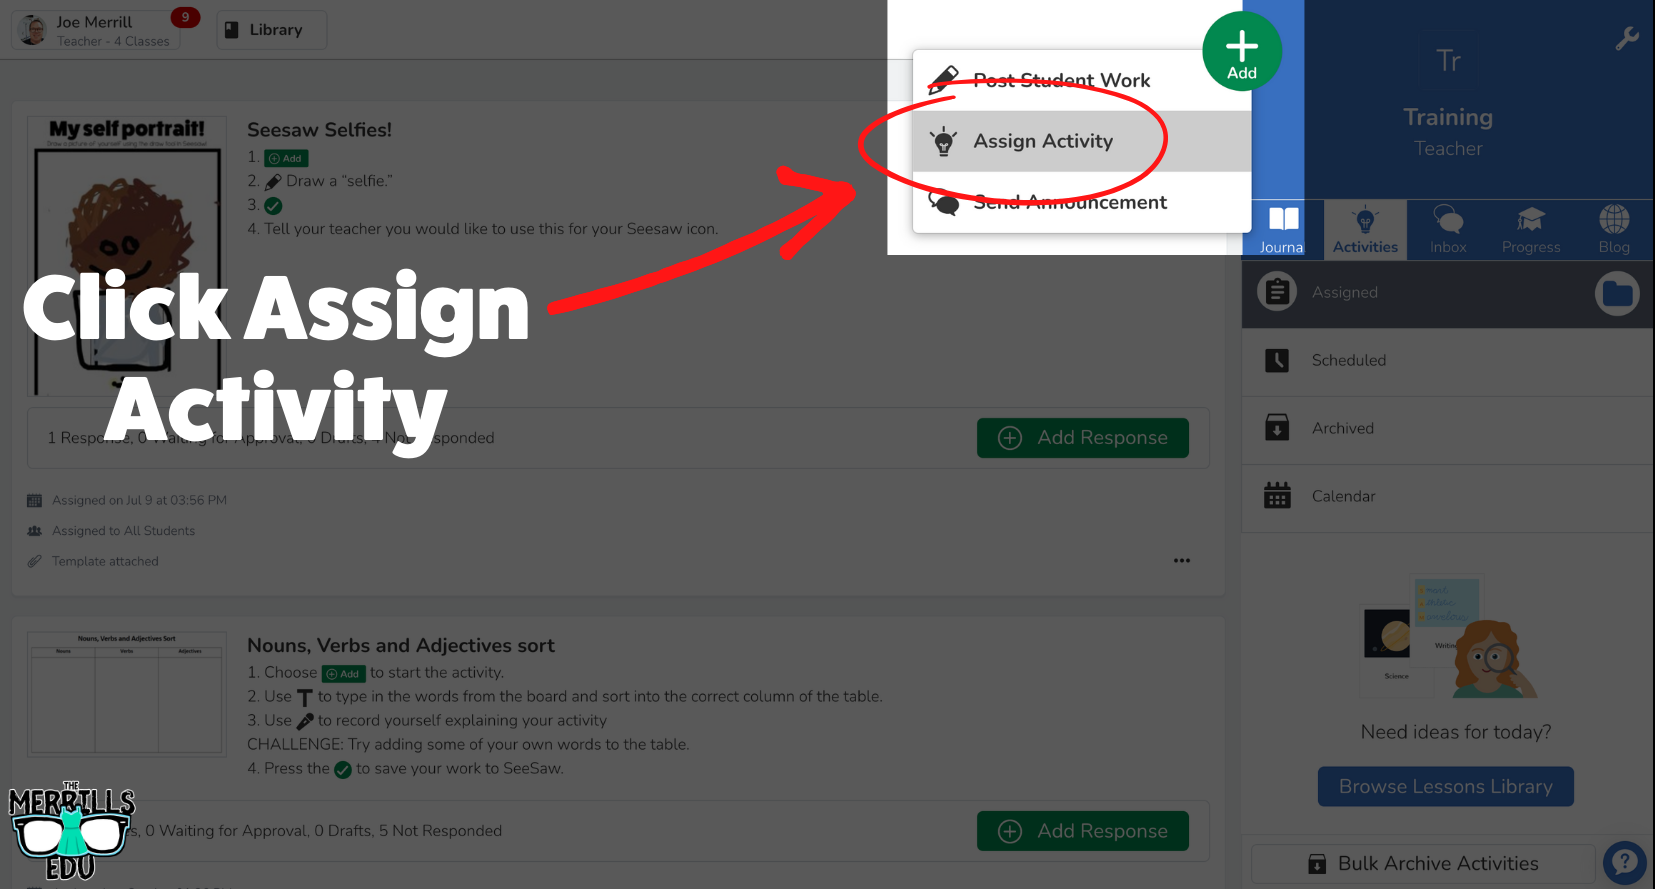
Click Assign Activity.
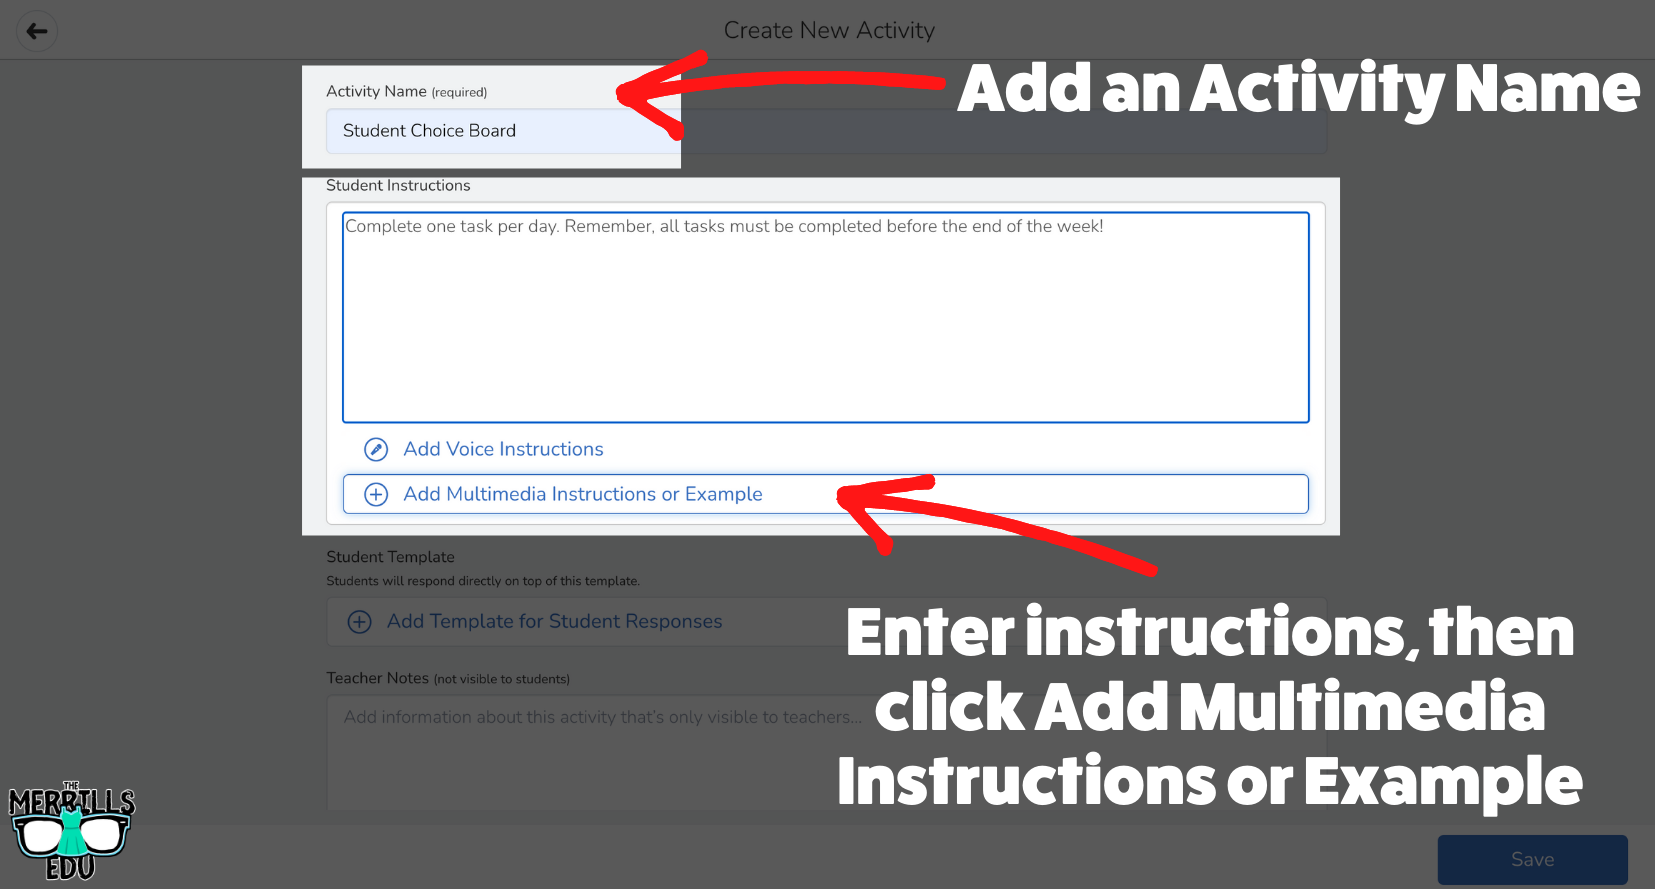
Under My Library, click Create New Activity.
Add an Activity Name and then enter instructions. Next, click Add Multimedia Instructions or Example.
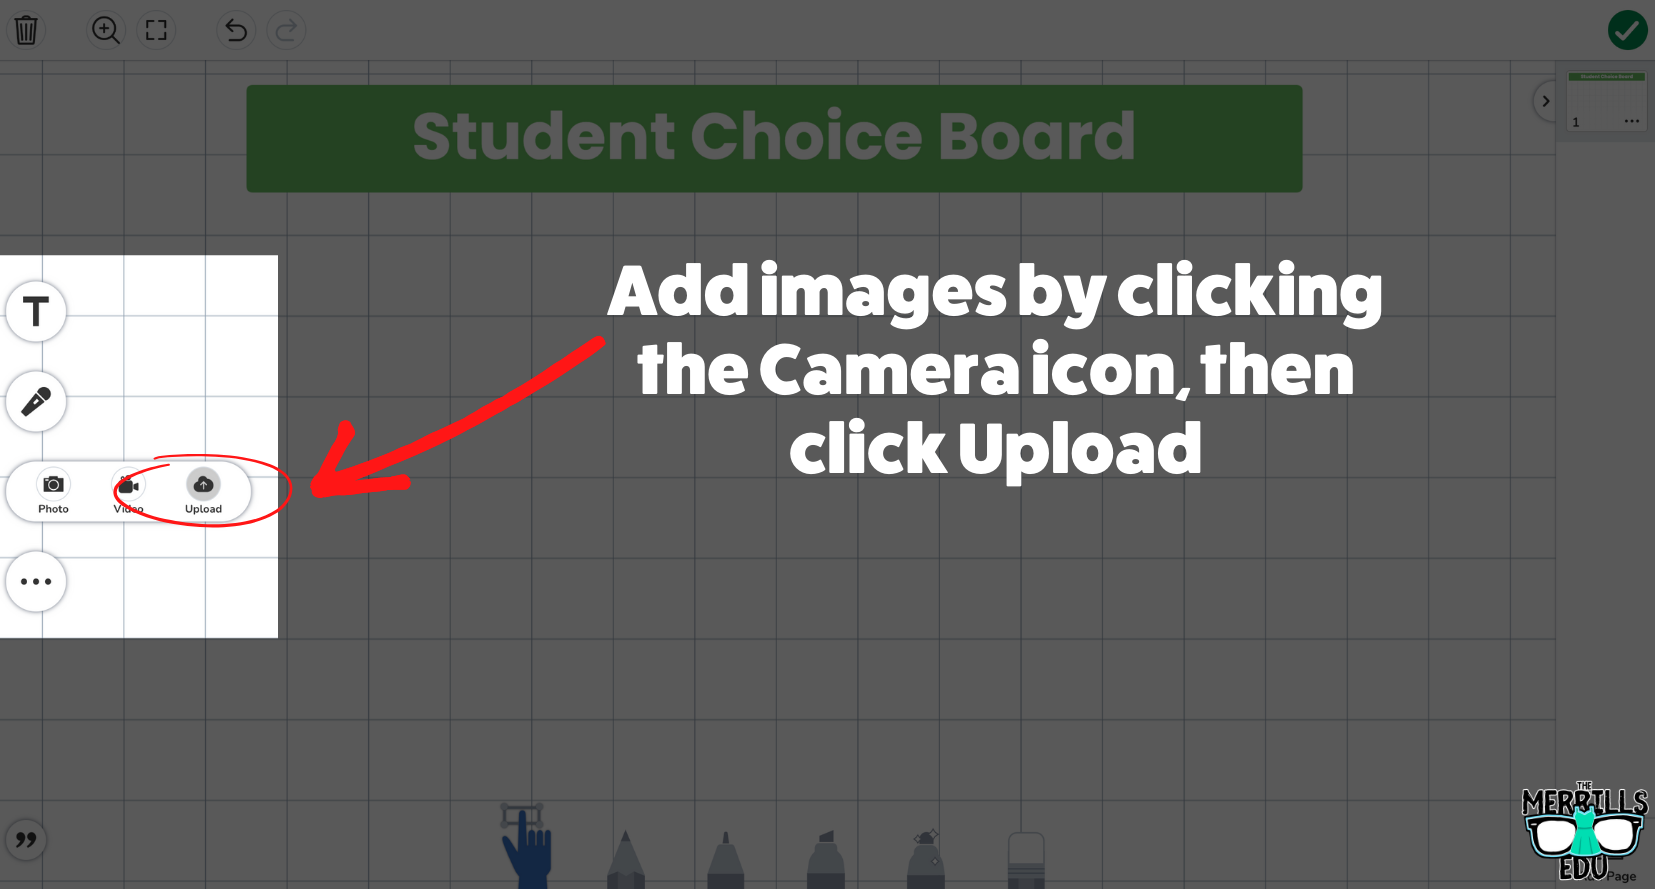
In the following window, click “Drawing.”
You can add images by clicking the Camera icon, then click Upload.
To hyperlink something, click on the three dots. Then, click “Link,” and enter your URL. Tip: You can link outside of Seesaw! Try linking to Flip, Nearpod and more!
Save your Choice Board and click “Assign” to assign it to your students!

🗣️ Adding Audio Captions on Seesaw: A Hidden Seesaw Feature!
There’s a well hidden feature in Seesaw that might be one of our favorites: Adding Audio Captions! This is PERFECT when working with littles who may have a difficult time typing out their thinking. To enable this feature, follow these steps:

From an activity, click on the Caption icon.
Click “Record Voice.” Doing so will launch the audio recorder, so be ready to speak!
Click the green Done button to stop the recording.
Now your students have the ability to express their thinking by explaining their thoughts - all in just several clicks!

📲 Using Messages on Seesaw 📲
A new feature is heading into Seesaw: Messages. With Messages, teachers manage the student and family experience. Admin and teachers are able to block and remove messages, and students can only message one another with teacher supervision. We love the ability to open new possibilities here, but the best part of all of this comes with communicating with families. With Messages, you will be able to translate messages to families into over 100 languages, which will provide read receipts (so you know when they see it)! To learn more about Messages, watch the video below!

🗃️ Create Hints or Pull Tabs in Seesaw 🗃️
This idea comes from our good friend Kris Szajner, the Curriculum Manager at Seesaw. In the video below, Krist demonstrates how to create hints or tabs that students can pull out on Seesaw assignments. Check it out below!

👕 How to Create Seesaw Selfie Class Shirts! 👕

Remember that Seesaw Selfie activity? Well, what the kids didn’t know was that we planned to take their creations and add them all together to make a class shirt. We do this every year, and we wear them on spirit days. It’s a great way for students to learn about community and how their work can go beyond the four walls of the classroom. Check out a shirt that Joe designed with his co-teacher!
The shirt can be designed on anything, but we recommend a program like Canva or Adobe Express to guarantee that your design will have the necessary requirements. Just search for “shirt design” on either of those platforms and you’ll be able to find a template. The best part of all is that once you finished your design, the hard part is over! You will not have to collect any money or write down shirt sizes. Your families at home will do all of that! So, once you have downloaded all of your Seesaw Selfies and designed your class shirt, follow the next steps to have them printed.
(Click on the arrow in the image below to see a step-by-step)
(Note, there are other options to do have shirts printed, but this is a method that we have found to work best for us)
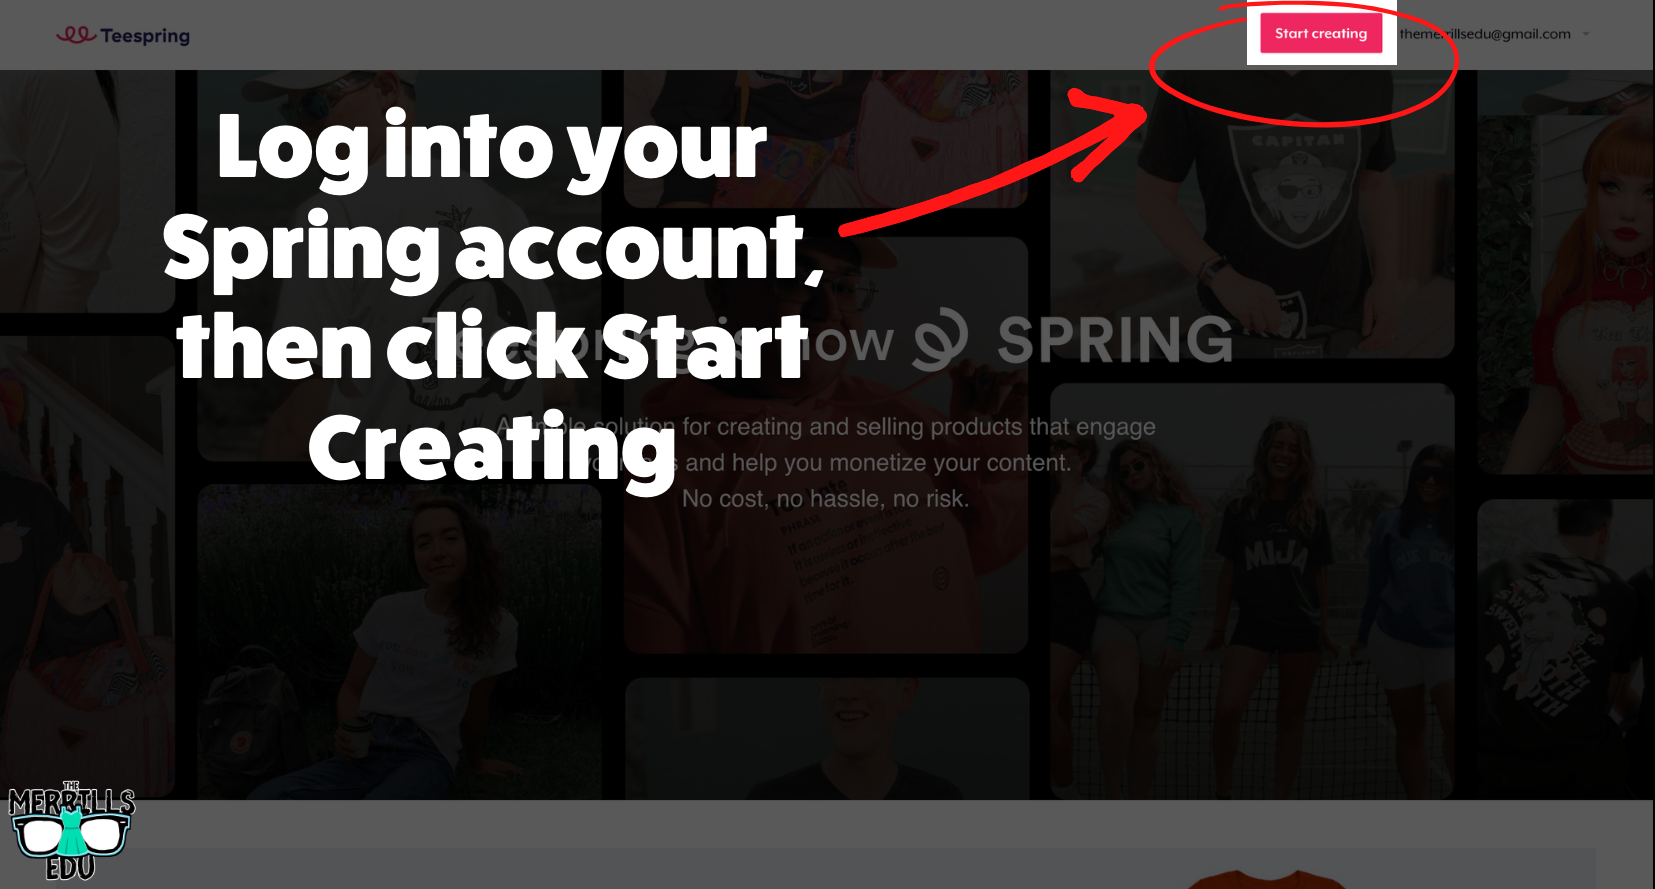
Head over to Spring (click here) and create an account.
Click Apparel, then select Kids and Babies. Note: you can also create a separate listing for adult sizes (order one for yourself or if your families at home would like one)!
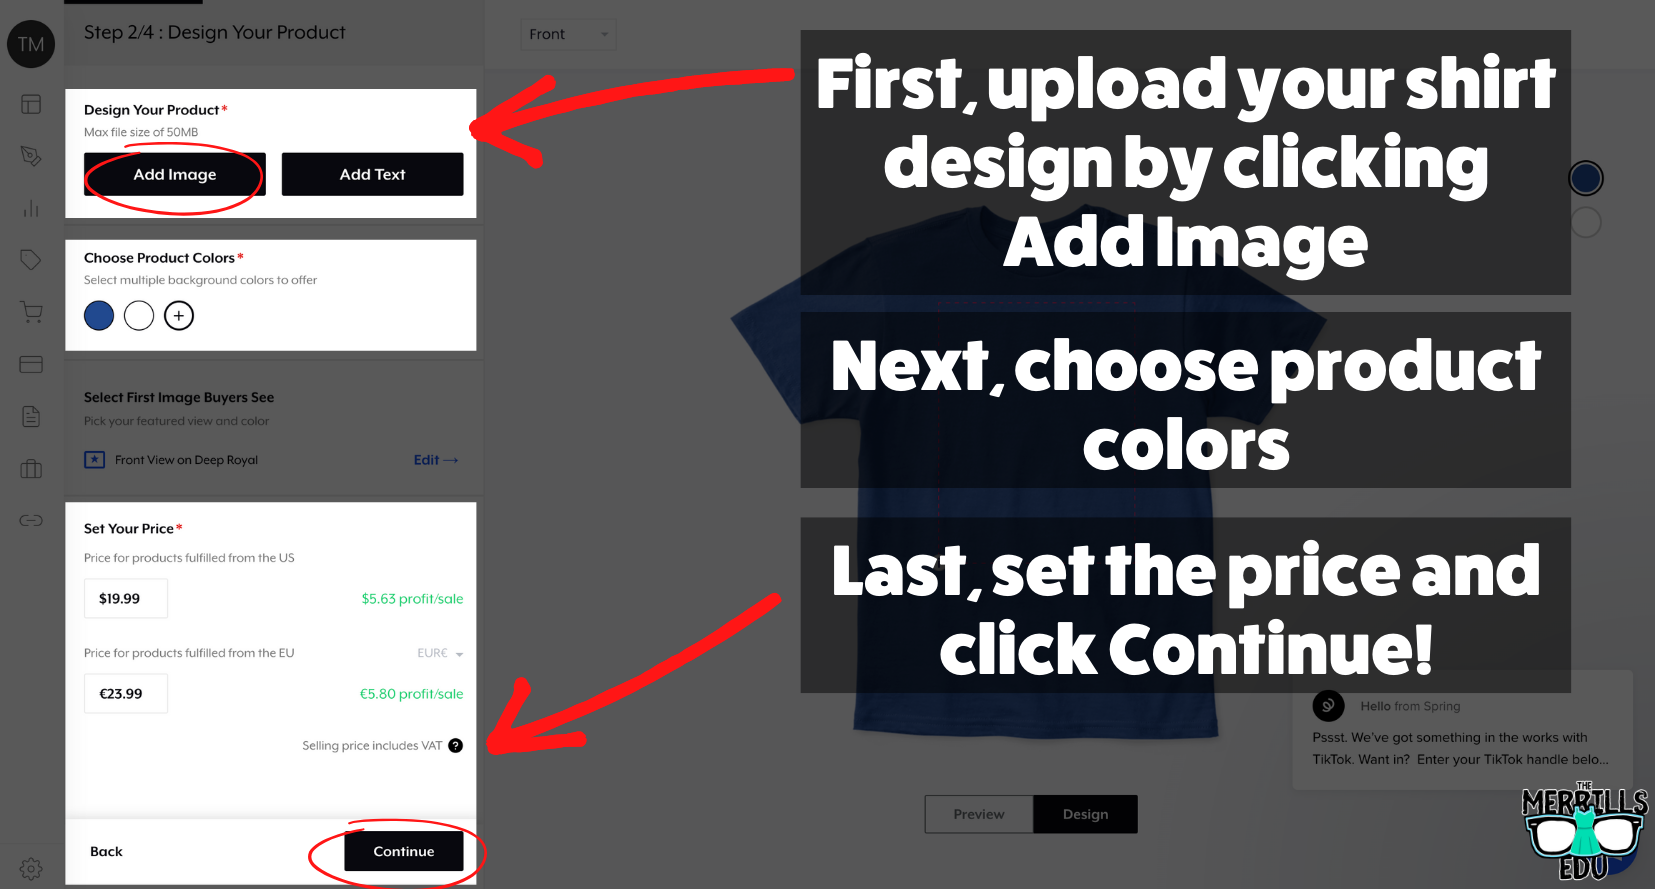
Next, upload your shirt design (that you created in Canva or Adobe Express) by clicking Add Image.
Be sure to choose several product colors. This will allow your students and families to select from different shirt color options when purchasing. Tip: Be sure to check your artwork to make sure it looks good on the colors you’ve selected before continuing!
Now, set the price. We are NOT trying to make a profit on these, so we drop the price as low as Spring will allow it to go (you will need to edit the numbers based on your design). You will also need to do the same in for prices in the EU (this is mandatory, even if you are only selling domestically). Once you have it set as low as possible, click Continue!
Enter a title and description for your shirt and then follow the steps to complete your listing. Once you have everything completed, your shirts are ready for purchase! Repeat the steps above to create options for adult sizes or other products (like hoodies!).
-- Let us know if you’re using Seesaw or any of these ideas in your classroom! Be sure to follow us on social media (@TheMerrillsEDU everywhere) and tag us! 👓👗
For more tips, tricks and lesson ideas for making learning more interACTIVE, check out our books The InterACTIVE Class and Flipgrid in the InterACTIVE Class on Amazon!


