


How to Use Gimkit Ink
@theMerrillsEDU “unpack” how to use Gimkit’s latest tool: Ink. In this blog post you’ll learn: what Gimkit Ink is, how to launch it for your students and how students can publish their work and share it with their classmates!

Gimkit is notorious for building engagement and with Ink, Gimkit delivers on a whole new level. Ink creates a refreshing take on writing, storytelling and much more. In this blogpost, you’ll learn:
(click on any subheading to jump directly to that section)
✏️What is Gimkit Ink and How Does It Work?
⚡Quick Start Guide:⚡
🚀 Launch a Project
💪 Having Students Add Content
📚 Publishing Student Work
👀 Viewing Other Students Work
💡What are The Paper and Time Machine Features?
What is Gimkit Ink?

Gimkit Ink is a fresh take on how writing should look in 2021. Instead of turning in documents or PDF’s, Gimkit Ink allows students to publish their work online and share them directly back to the educator, classmates and beyond (if they chose to do so). Students may be reluctant to share their writing, so Gimkit Ink provides them with several key elements to help. For example, students who submit their writing can share directly to the teacher or with the entire class. But, if they are nervous about sharing with the class, they may post their work under a pseudonym. The key here is that the students understand that they are creating for a broader audience them just themselves. With this understanding, they will likely place more effort into the quality of their work (since they know it will be shared).
Gimkit Ink is available to all users! However, the free version of Ink is limited. Teachers can create 10 projects on the Gimkit Basic plan. There are no other restrictions at this time.

Quick Start Guide
Step #1: Launch a Project

Educators can launch Gimkit Ink tasks from their Gimkit Hub (or login page). Click “Gimkit Ink",” which will take you to the educators dashboard. To get started immediately, click on “New Project” under Projects. Fill out the information on the next page, then select your privacy settings. Once everything looks good, click the blue “Start Project” button. Doing so will launch a live link / webpage where content will be shared and delivered. Share this link with your students to have them start adding content. This link is important, as it also acts as the “house” where all of the content submitted will “live” or be posted. Students will be able to return to this link to view content from their peers after they have submitted their own work.
Step #2: Having Students Add Content

After you have shared the link with your students, they are ready to start adding content. Have them click the blue “+ Create New Post” button. This opens several options for them: create a new article or story.

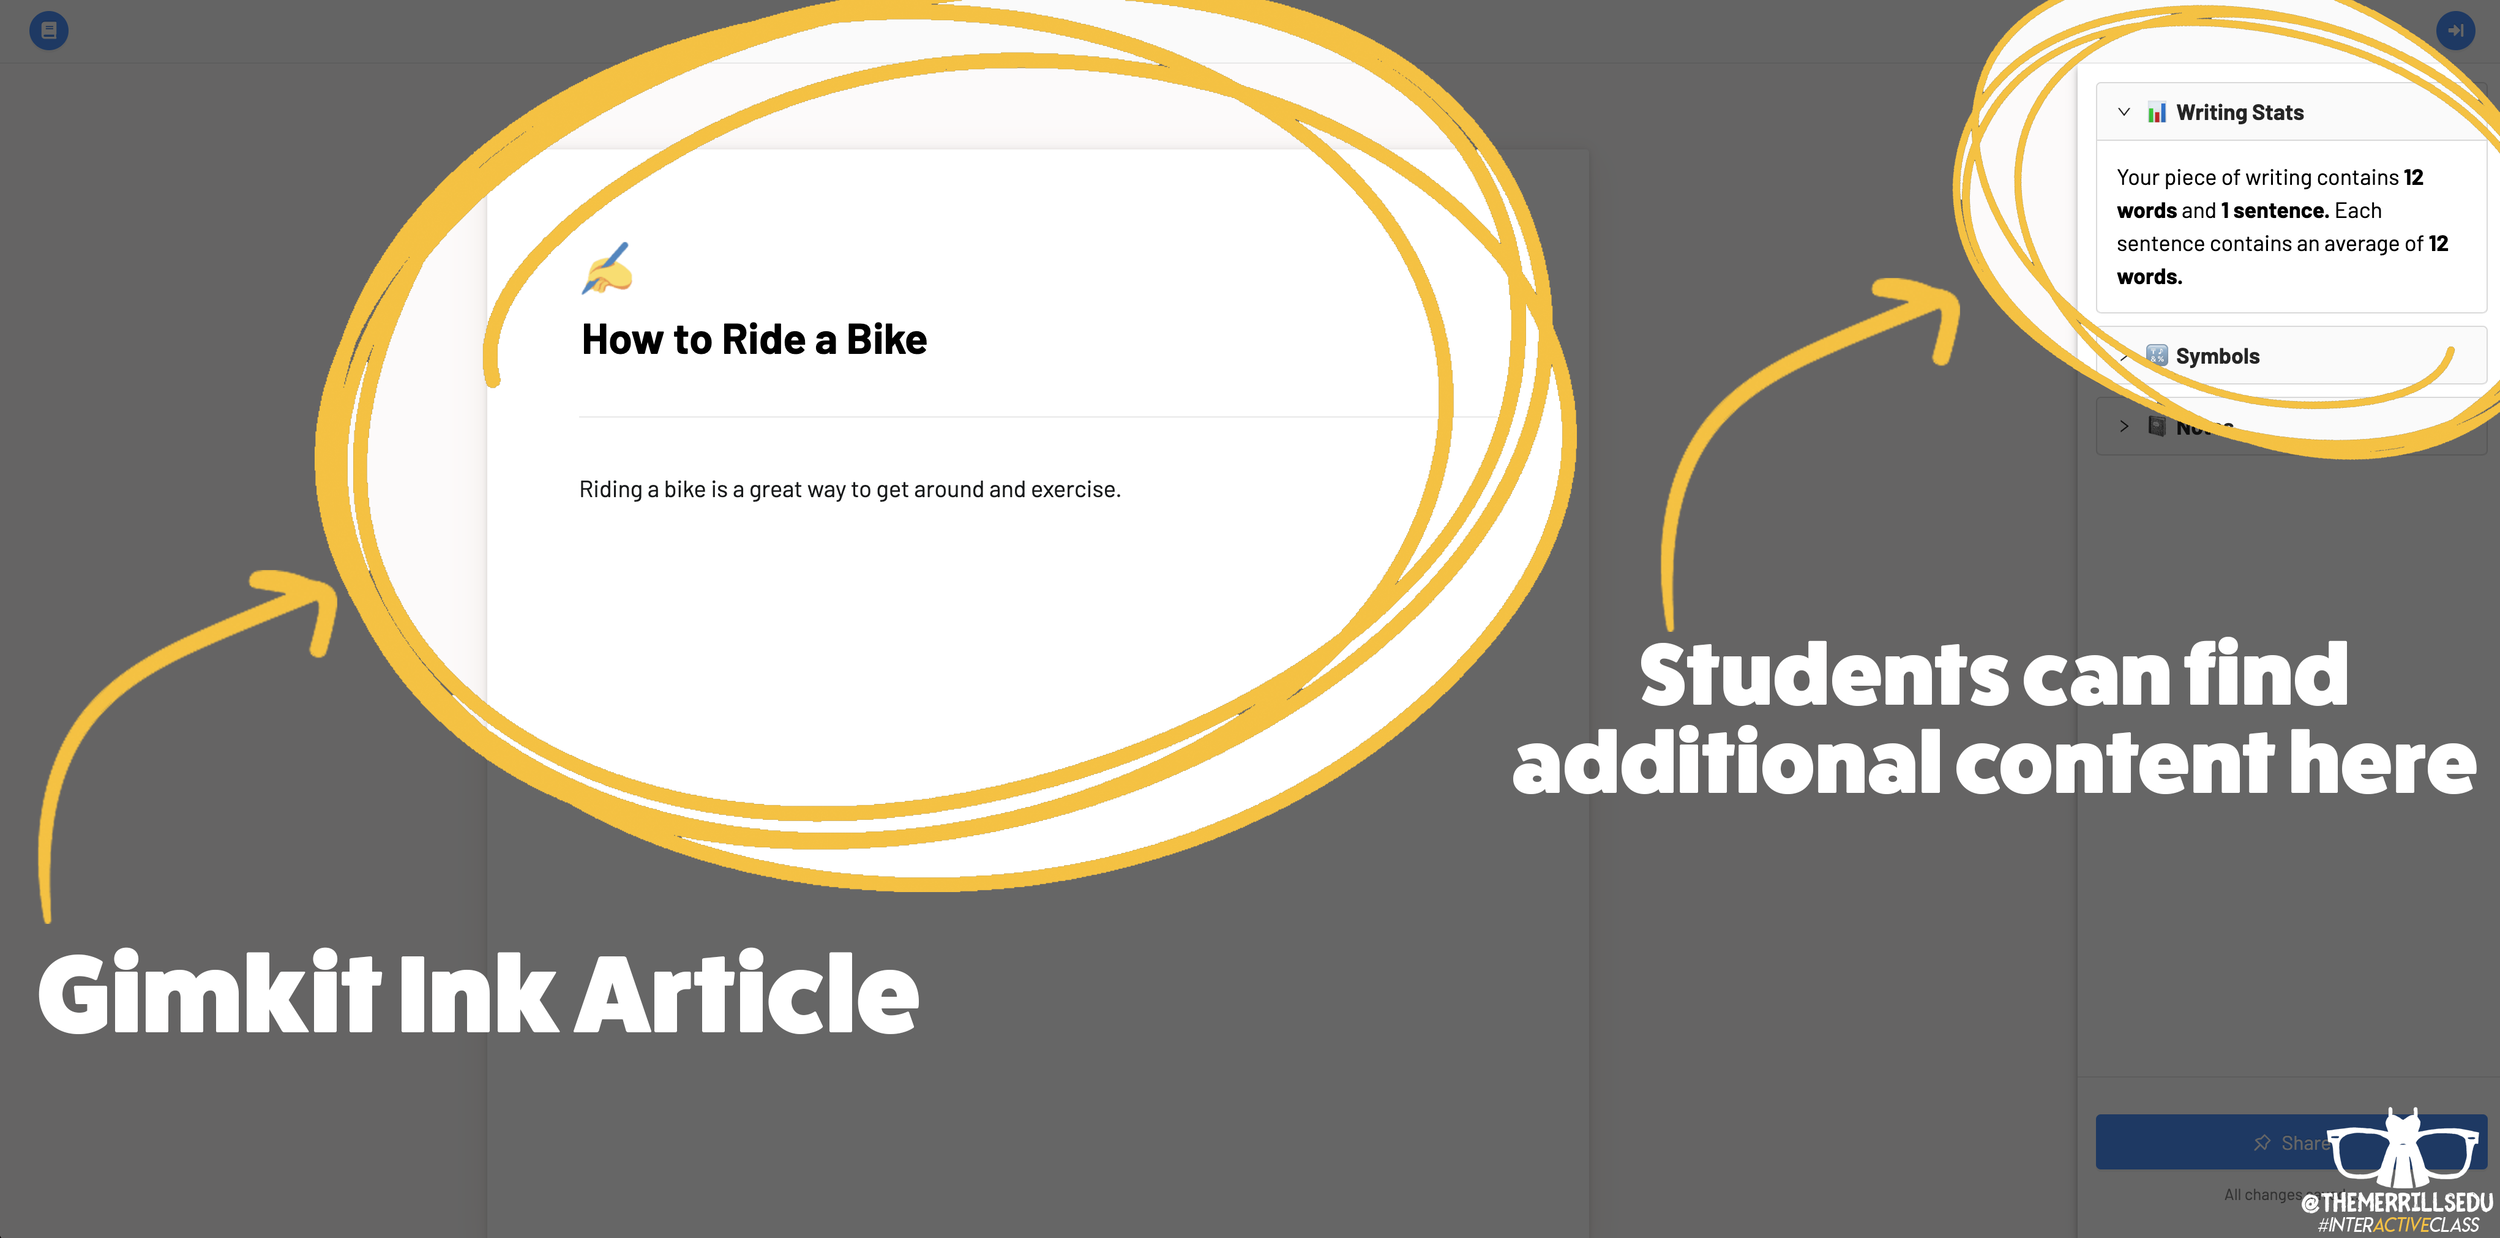
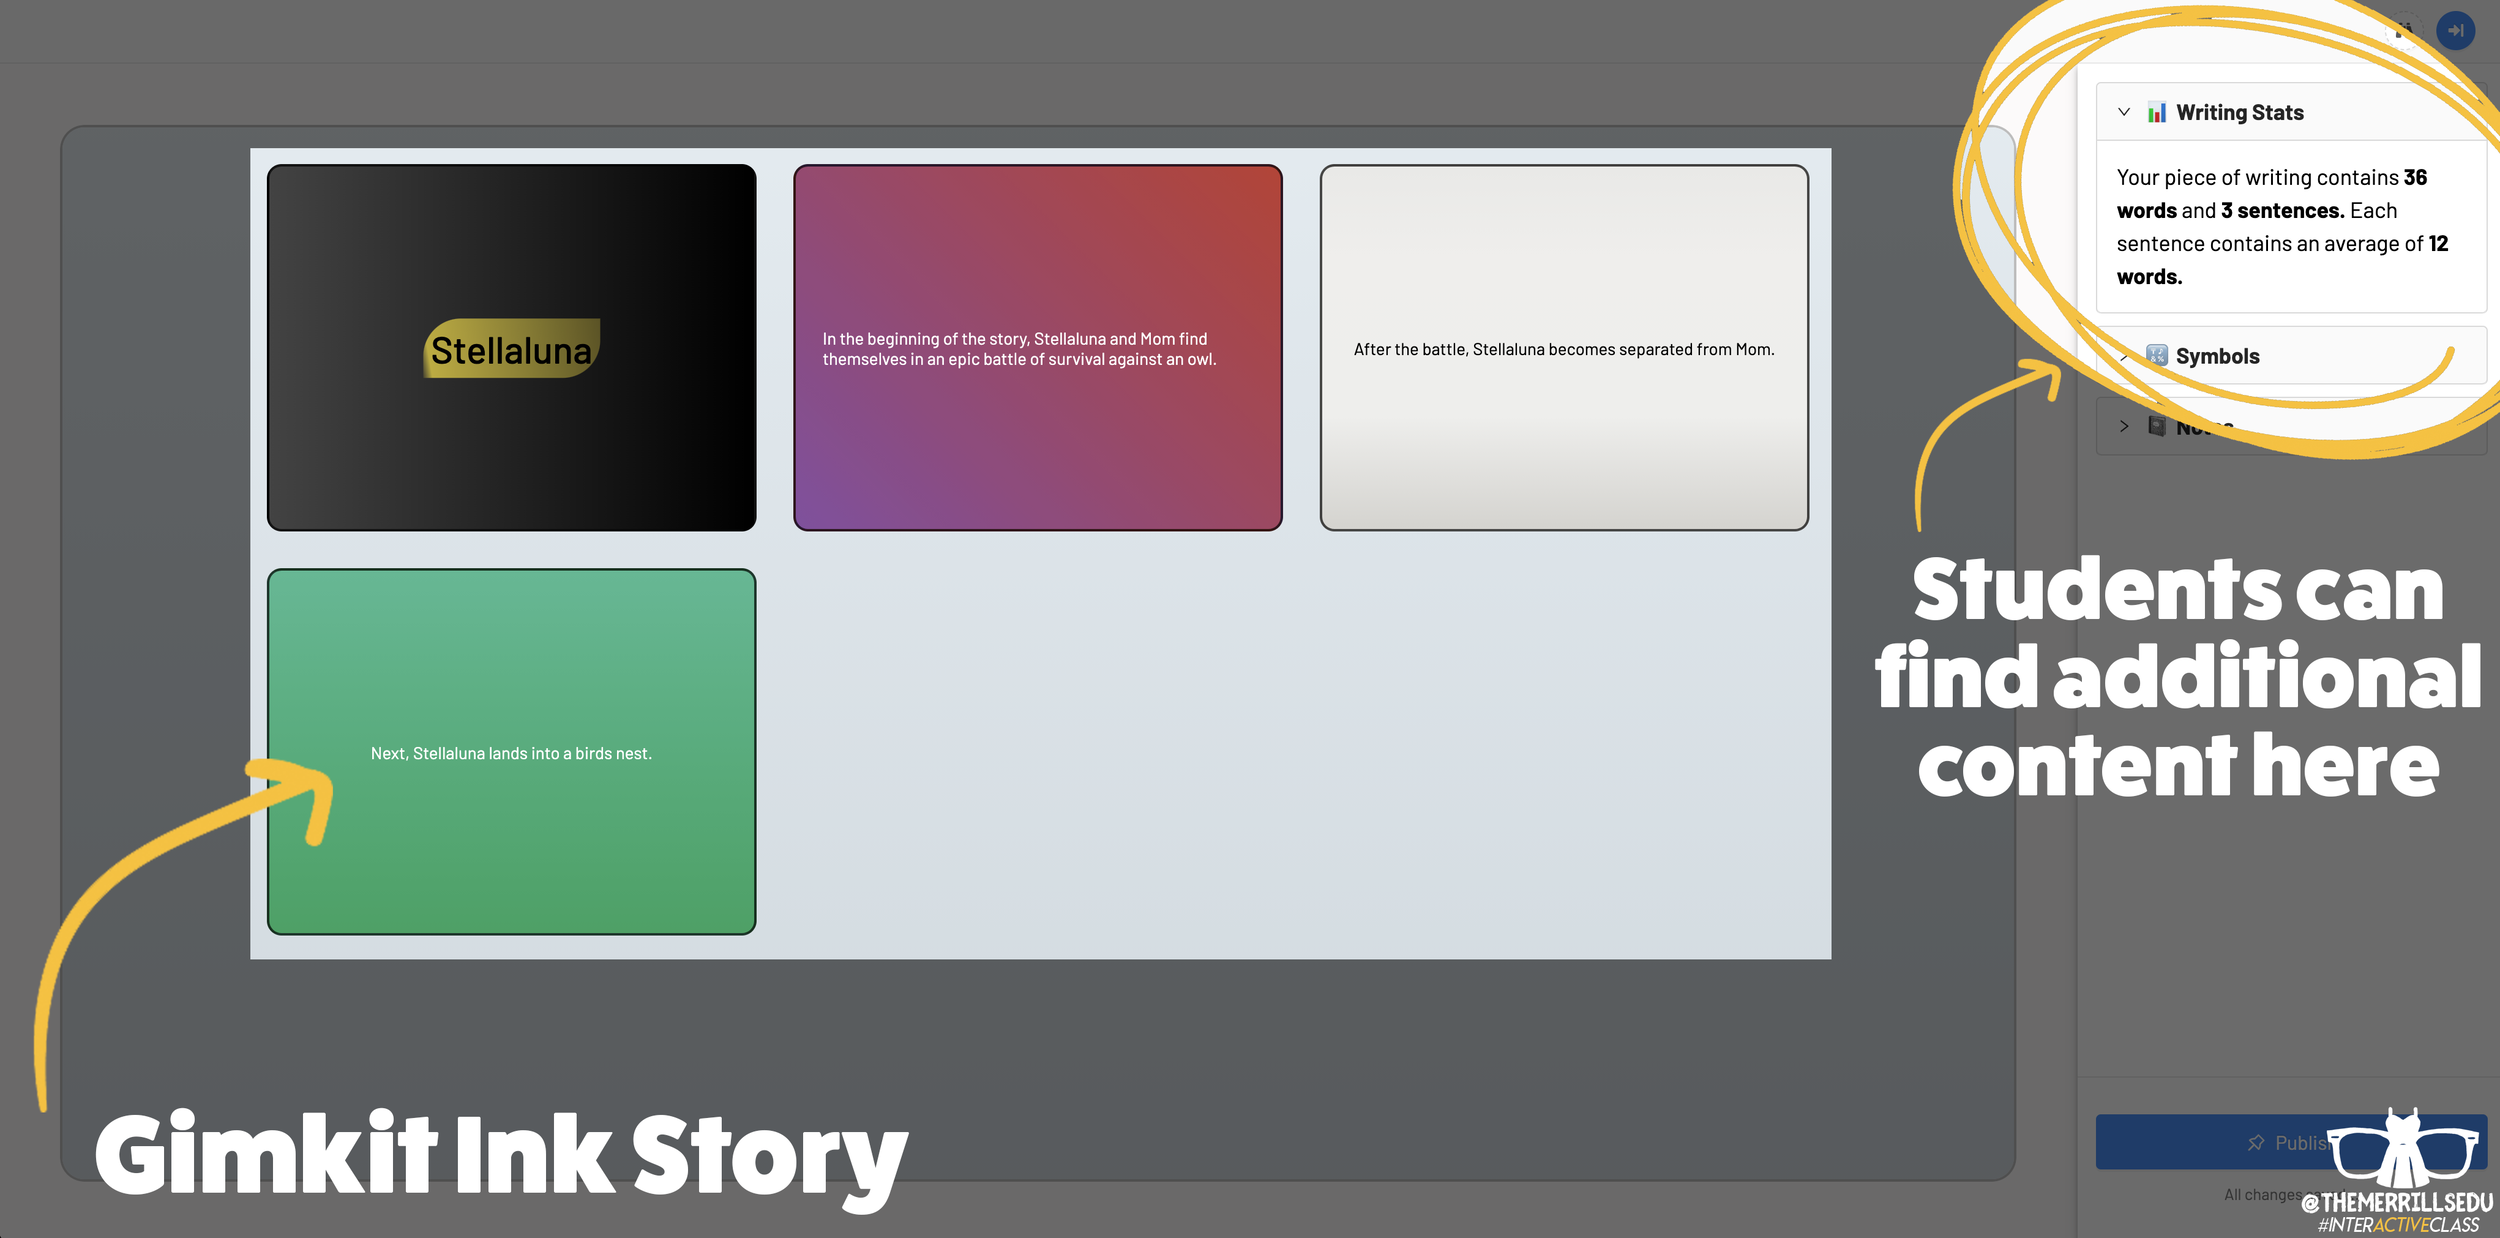

Writing an article on Gimkit Ink provides an editable document where your students can add titles, subtitles, text and more. This is perfect for sharing an idea - similar to a newspaper, blog post, etc. Adding a story gives students options to generate a storyboard or mind map experience to generate their writing. It’s more visual and allows the writer to control the pace. This is ideal when working to tell a story, and can be extremely powerful for young learners who are trying to organize their thoughts. In a Story, students have the capability to add features such as: images, YouTube videos, Desmos Graphs, Flipgrid Shorts recordings, Scratch projects, Google slides / sheets / docs, Anchor podcasts and Codepen. Students can add additional frames to their story, creating an easy to follow flow map - but Gimkit intelligently permits students to move their frames around (in case something gets placed out of order, just move it around!). This allows for easy editing and correction.

Step #3: Publishing Student Work
Once Your students have completed adding their information, they are ready to publish their work. To do so, they click the blue “Publish” button. It will prompt them to check their work - are you ready to publish or should you go back and edit? Once they are sure everything looks good, have them click the blue “Ready to Publish” button. The next screen asks your students to enter a title for their work and to select an emoji that they would like associated with it. After entering this info, students are to click the blue “Continue” button. Next, they must pick who can read their work: anyone or just the teacher. After making the first selection, Gimkit asks if they would like to share their name. Students may choose anyone or just the teacher. From here, they are to click the blue “Publish” button. Now, their work is live and ready to be viewed. Note: each student post has it’s own unique URL. So, this may be shared with families at home through other apps like Seesaw, Microsoft Teams, Google Classroom, etc.
Step #4: Viewing Other Students Work

Once your students have published their own work, they are prompted with a screen that shares their own personal URL to their project. Additionally, they have the option to “Open the Project,” which will take them back to the original landing page that you the educator created (“the house!”). Now your students can see everything that is and has been shared. If enabled, students can leave emoji reactions for quick peer-to-peer feedback. It’s a great way to provide an outlet for your students to share content with their friends!

The Paper and Time Machine
The Paper is Gimkit Ink’s workflow that shares all of the latest post from across all of your projects. This is helpful if you have multiple projects going at the same time and need to bounce back and forth efficiently. Your posts can also be found by clicking on “Time Machine” from the Gimkit Ink dashboard.
-- Stay tuned for more on how you can embed Gimkit’s Ink into your classroom! 👓👗
For more tips, tricks and lesson ideas for making learning more interACTIVE, check out our books The InterACTIVE Class and Flipgrid in the InterACTIVE Class on Amazon!


Remote Learning 101: Presented by The InterACTIVE Class
As more and more schools look towards the possibility of Remote Learning, we understand that you probably have lots of questions. We’re here for you.
As more and more schools look towards the possibility of Remote Learning, we understand that you probably have lots of questions. We’re here for you.
What is remote learning?
Remote Learning occurs when the learner and instructor, or source of information, are separated by time and distance and therefore cannot meet in a traditional classroom setting. This is also being referred to as “distant learning.”
I don’t know much about educational technology. How will I learn fast enough to teach remotely?
Remote learning will undoubtedly push many teachers into the realm of digital teaching and learning faster than they may have on their own. If you are one of those teachers who hasn’t used classroom specific applications, we would recommend starting with our book The InterACTIVE Class. It was not written specifically for remote learning, but it couldn’t be out at a more relevant time.

In it you you find two page explanations for applications like Flipgrid, Seesaw, Book Creator, Buncee and many more, followed by pages of lesson ideas that you can take and immediately implement into your remote learning environments. In addition to the book, you can join our InterACTIVE Class Community on Facebook where educators from around the world share and help each other in regards to integrating technology in meaningful and relevant ways.
Where do I start?
If you are tasked with teaching remotely, our advice is to keep it simple and routine. Do not use the event of remote learning to try something new or to introduce a new platform. That is stressful enough when in the classroom with your students. Deliver content through platforms or programs that your students have already used, and if you have not used much (or any) technology before, choose 1 platform and walk your parents and students through it as you go. This is where the importance of being routine comes in. If you have the opportunity or choice to decide how to deliver content and monitor learning while teaching remotely, do it using the same program(s) while out of the classroom. Also, if you can structure the format of how you deliver content it will help parents and students navigate the unknown world of remote learning. We suggest explaining content through teacher direct lessons or online material, giving the students time to explore and create baed on their new learning, and possible assess after if necessary. If you can do this in the same way through the same program(s) repeatedly it will help students and families efficiently get acclimated with remote learning.
Not all of my students have internet access. How can I reach them during this challenging time?
One way to help students with limited internet access is to think about how you are delivering content while out of the classroom. Is there a way you can front-load assignments—maybe give the week’s worth of assignments out at one time rather than going day by day. That way, students with limited access can see more at one time if their access is limited. Also, possibly reach out and look into how local community centers, libraries and other community outreach places could help families with limited access to resources. Finally, try to use applications that are smart phone friendly in addition to being web-based. This way, in the case that a student doesn’t have a computer at home or internet, they could still possibly access information through a parent’s smart phone.
Comcast has recently announced that new customers are able to receive 60 days of complimentary Internet Essentials service, which is normally available to all qualified low-income households for $9.95/month. They are also increasing Internet speeds for the Internet Essentials service from 15/2 Mbps to 25/3 Mbps for all new and existing customers, which will be the speed of the service going forward. For more information on this, please visit the website below and feel free to share with families and colleagues.

Comcast Internet Access
Click the button below to learn more about Comcast’s internet access.
Where do I get started as I prepare for remote learning?
When getting started, it is important to settle on the platform or programs you are going to utilize while out of the classroom. As mentioned before, we highly recommend choosing ones you have already used this year, but if you have not used much or are unsure if the programs you have used will work best, here are some tools we suggest considering for creating “learning hubs”, keeping students engage, allowing real-time collaboration and much more!
How can I create a safe and cohesive learning environment for students while away from the classroom?

Seesaw
Seesaw is a platform for empowering students to demonstrate and share their learning. Students use powerful tools in the Seesaw app to create, reflect and demonstrate learning. When students share their learning in their Seesaw portfolio, teachers and families gain valuable insights into what their students know and can better support their development. Think of it as a digital portfolio.
Pros: Available anywhere, on any device.

Microsoft Teams
Microsoft Teams is your hub for teamwork in Office 365. All your team conversations, files, meetings, and apps live together in a single shared workspace, and you can take it with you on your favorite mobile device.
Pros: Available anywhere on any device (with a free Office 365 account - sign up here).
I want my students to maintain the collaboration that they would normally have within the walls of the classroom. Which tool should we use?
Educators can pose questions / tasks and generate collaboration by using Flipgrid. Flipgrid is a social learning / web-based platform where educators ask a question (called “topics” in Flipgrid), and then students respond to the question in the form of a video. Students can get creative and add external links, drawings, music, and more to their responses. The video responses appear in a grid style display, where other students can then view and respond to. This generates a web of discussion, similar to that of a video message board. With Flipgrid, your students will still be able to support one another and share their thinking. They will also be able to critique and respectfully generate positive discussions based on your topic.

Flipgrid
Flipgrid is simple. Educators spark discussions by posting Topics to a classroom, school, professional learning community, or public Grid. Students record, upload, view, react, and respond to each other through short videos. Flipgrid is video the way students use video ... social, engaging and fun!
Where can I access high quality, digital materials for my students to use while learning online?
Taking print material and converting it to digital platforms can be time consuming and overwhelming. There are many companies stepping up to provide teachers with high quality, interest provoking content while you are out learning remotely.

Newsela
Newsela is committed to bringing authentic, engaging, diverse and accessible content to all learners. They believe the best lessons start with the best content. All teachers can now access Newsela ELA, Newsela Social Studies, Newsela Science, and the SEL Collection for free for the rest of the year.

Scholastic News
Scholastic known for publishing, selling, and distributing books and educational materials for schools, teachers, parents, and children. Their classroom magazines are found in many classrooms. Scholastic is creating 15 lessons for various age groups of students ranging from Pre-K to high school filled with quality nonfiction articles similar to the ones found in their magazines. Check out the curated articles for grades 3-5 here!
Pebble Go
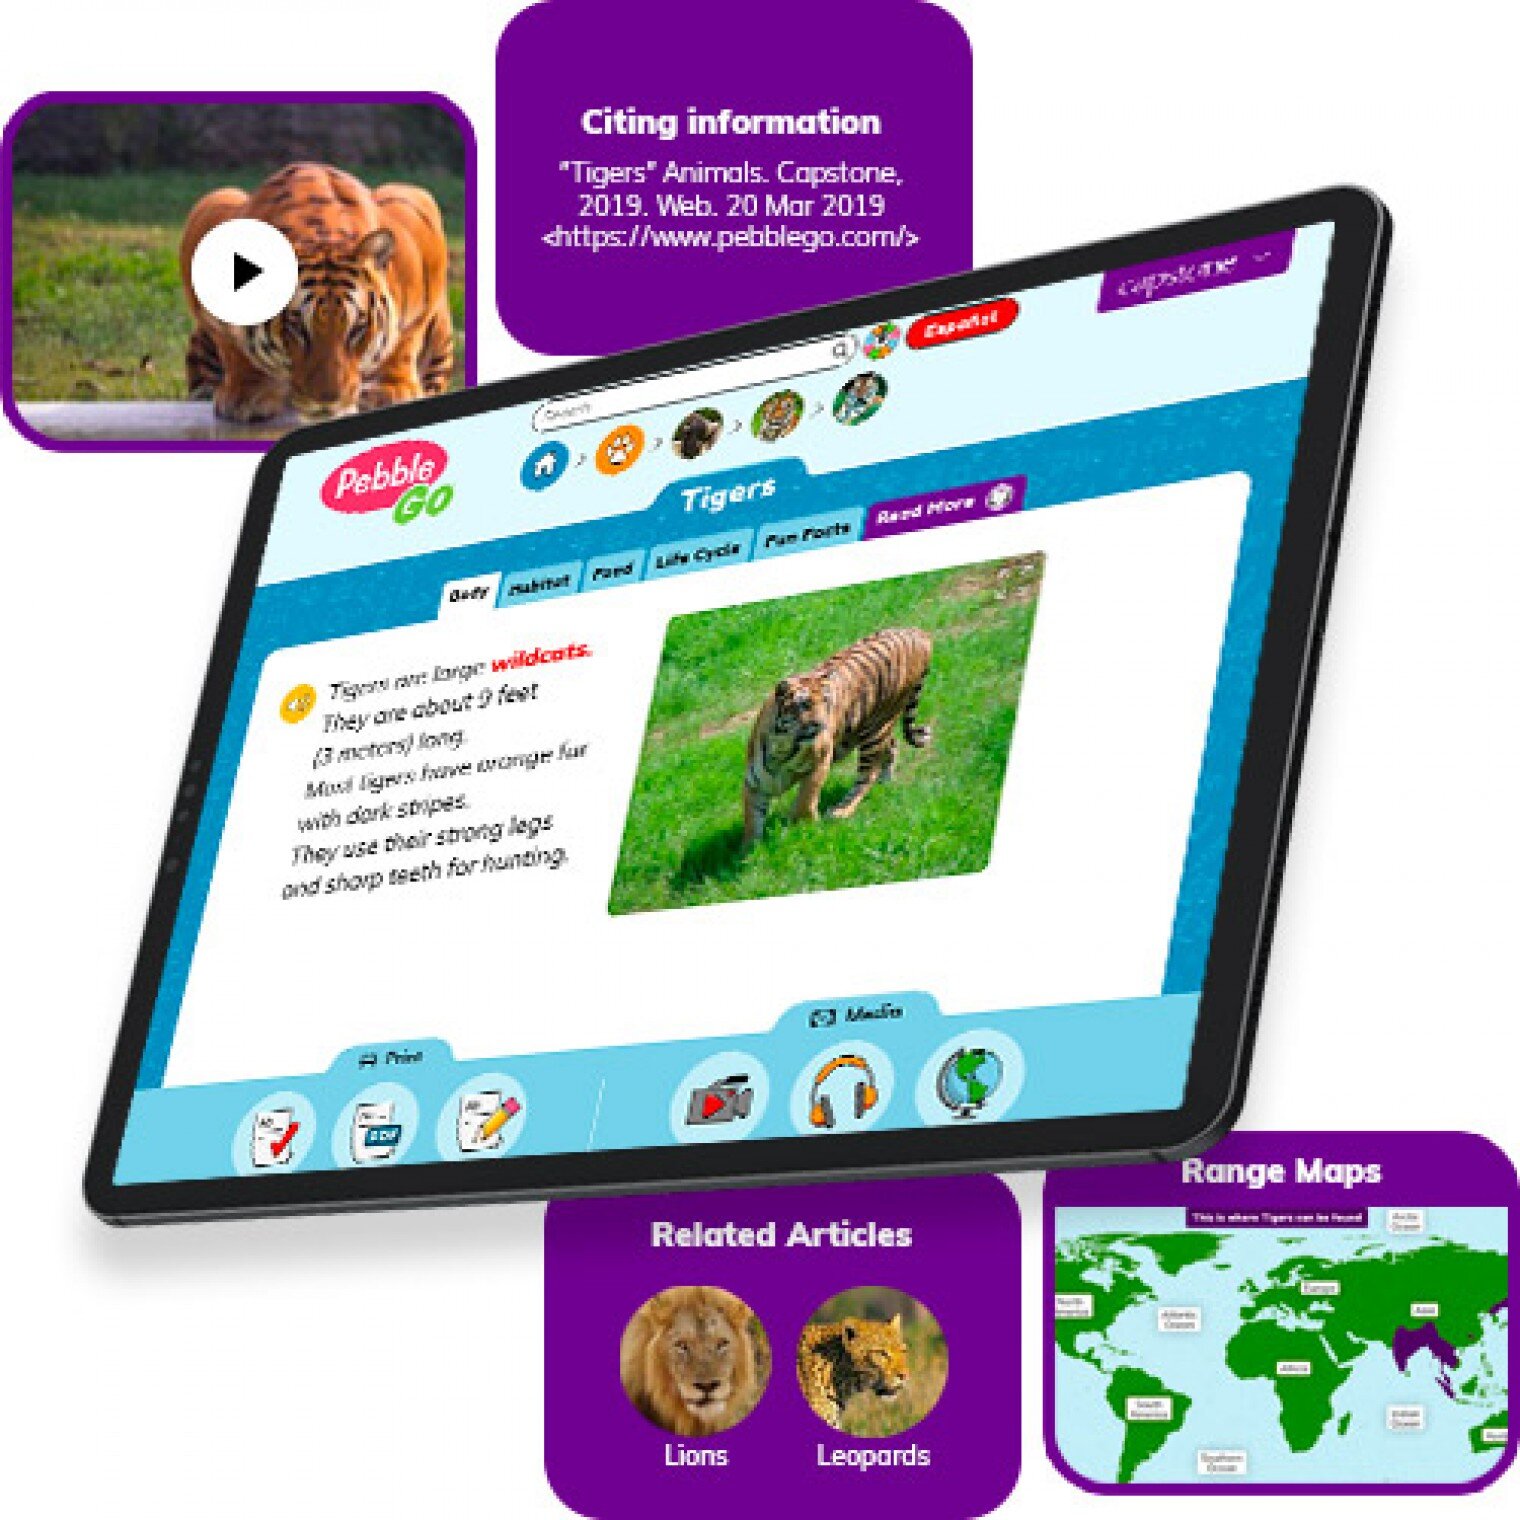
PebbleGo is a curricular content hub specifically designed for K-3 students. Packed with informational articles, ready-made activities, and literacy supports for students of all abilities, it boosts engagement and fosters independent learning in core subject areas. To learn how you can gain free access during school closures, click on the learn more button below.
Compatibility: Web based only
What tools can my students use to keep the creativity going?
Just because your students are away from the classroom, doesn’t mean that they have to lose their creativity. The list of apps below are highly recommended platforms that will have your students creating rich and authentic content that you can tie directly to your standards. If you have any questions on how to implement these, please don’t hesitate to reach out to us.

Buncee
With Buncee’s assortment of media options, creating a virtual lesson is quick and easy. Teachers can include text, video, audio, or even links to additional resources. Record your lesson using the video feature, or create an activity template for your student to complete at home. The classroom dashboard can then be utilized to share and track assignments. Teachers could also create a Buncee Board, so students can access materials, share their work, interact with their classmates, and participate in class discussions no matter where they are. Students can also create and submit Buncees back to their teachers. For more information, click the learn more button below.
Compatibility: all devices

Adobe Creative Cloud
Adobe has announced that they are giving their higher education and K-12 institutional customers globally — who currently make Creative Cloud apps available to students who login through on-campus labs — the ability to request temporary “at-home” access for their students and educators. This will be granted through May 31, 2020 at no additional cost. To learn more, click the learn more button below.
Compatibility: all devices

Minecraft: Education Edition
To help teachers and students stay connected to the classroom, Minecraft: Education Edition is now available through June 2020 for all educators and learners who have a valid Office 365 Education account. Click on the learn more button below for more information.

Book Creator
Book Creator is a simple tool for creating awesome digital books. You can create your own teaching resources or have your students take the reins. Combine text, images, audio and video to create stories, portfolios, journals, comic adventures, science journals and much more! Book Creator is offering everyone the ability to collaborate together on books in real-time. This is a premium feature that is usually only available with a paid subscription, but they’re offering 90 days free use of this tool, to help keep students and teachers connected.
How can I make learning engaging and interACTIVE during remote learning?
Distance learning doesn’t need to equal dull learning. There are many apps that not only allow students to learn alongside one another in real time, but they also help the teacher facilitate information in unique and different ways.

GimKit
GimKit is a live gameshow for the classroom. Students answer questions on their own device at their own pace. Throughout a Kit, each student will get exposure to the questions multiple times to ensure mastery.
Compatibility: all devices

Nearpod
What if we told you that you could have your students log onto your presentations, and literally switch slides to all devices logged on at the same time. With Nearpod, you can do just that. Students log onto your presentation with a code. Educators can also add slides for collaboration, drawing, 360 images, and more. Check out the learn more button below fore more information.
Compatibility: all devices

Hyperdocs
HyperDocs are free digital lessons that are easy to edit for your eLearning students. They are all about hyperlinking your docs for amazing learning experiences for kids! With one shortened link, students can access a lesson that contains instructions, links, tasks, and many clever ways to get thinking. Hyperdocs focus on creating opportunities for choice, exploration, and ways for kids to apply their knowledge. Explore these docs plus more by clicking the learn more button below.
Compatibility: all devices

Brain Pop
From the very beginning, BrainPOP was built on the belief that curiosity through short animated movies can make complicated ideas simple and clear. Today, BrainPOP’s rigorous learning experiences go far beyond a movie and quiz, offering a rich array of resources and tools that meet each student’s interests and needs while developing their critical, computational, and creative thinking skills across the curriculum.
For more information on how to make learning more engaging and relevant by using technology, check out our book The InterACTIVE Class.


Here is a Wakelet of other platforms that we are updating daily as we come across new resources and offers.
We are happy to connect and discuss which tool would work best for your particular remote learning experience. This is an unprecedented situation, and leaning on one another is more important now than ever before. Please don’t hesitate to reach out.
👓👗💚