20 Ways for Students to Use Adobe Express in the Classroom
Discover 20 creative and engaging ways students can use Adobe Express in the classroom! From animating book characters to designing logos, crafting timelines, and inventing gadgets, this post highlights versatile projects that enhance learning across subjects. Perfect for fostering creativity, collaboration, and critical thinking, these ideas bring lessons to life with Adobe Express!

Adobe Express is a game-changer for classrooms! It’s packed with tools to help teachers and students create stunning designs, from videos to posters, all while making learning interactive, creative, and fun. This tool is 100% free for all teachers and students. To sign up for your free account, click here. Now, let’s check out some ways that students can use it in the classroom.
Please note: This blog post was hand-crafted and was not created using AI.
(click on any subheading to jump to that section)


Animate Characters in Adobe Express
Remember the app Chatterpix? Well, now Adobe has integrated similar technology right within their platform. Students select a character and then record their voice. Adobe uses the recording to animate the mouth of the character, making it look like the character is doing the speaking. Here’s how it works:
Log onto Adobe Express.
Click on the + button on the top right, then select Video.
Under Media, click Animate characters.
Select your character, background, and size.
Click Record to start capturing your voice (Tip: if you are in a noisy environment, try toggling the Enhance Speech feature on).
Once the video processes, you can download and share it on your preferred platform.


From Page to Stage: Animate Any Character or Figure in Adobe Express
If you enjoyed the activity above, but wish that you could use the feature on a custom figure - this idea is for you! In this lesson, students will animate a figure by adding a mouth over the top of an image. Check out our video tutorial or below to see how it all works:
Log onto Adobe Express.
Click on the + button on the top right, then select Video.
Under Media, click Animate characters.
Under the Character tab, find a mouth that you think will work best.
Next, under the Background tab, click transparent (this removes the background)
Under Size, select your preferred size.
Now, click Record to start capturing your voice (Tip: if you are in a noisy environment, try toggling the Enhance Speech feature on).
Once the video processes, it will appear in the video editor.
Upload a custom image of the character or figure you are trying to animate.
Make sure that your mouth is layered on top of the uploaded image. Your layers can be found on the top right side (the squares). If necessary, rearrange them so that the mouth is on top.
Resize the mouth to make it look as real as possible.
When you’re finished, download and save the file to share on your preferred platform.

Action Figures in Adobe Express
Action figures may seem like they are a thing of the past, but these AI generated models are sure to engage today’s learners. This activity can be used to describe characters or figures, express their strengths, or share their accomplishments. The best part of all - Adobe Express has this activity in their Guided Activities library. So, students can watch a tutorial demonstrating each step of the way. Here’s how it all works:
Log oto Adobe Express, then click here to launch the template.
With the template open, click on the text layers to edit them as needed. Colors can also be changed.
Click on the original action figure image and move it to the trash.
Click on Generate image, and then choose Square for the size.
Enter the prompt of what you are trying to create. Tip, if you have an original image, upload this as the Composition. Doing so, will generate an image that uses the composition of the original image.
Generate the image and then resize and crop it as needed.
When you’re finished, download the image and share it on your preferred platform.


AI Generated Hidden Story Creatures
These AI generated creatures can be used as a hidden creature in a story. The creature can can act as an invisible character who is always watching what is happening. The lessons learned from the test / story can be featured in the project. See our example below, and find this lesson in the Guided Activity library by clicking here. Let’s check out how it all works:
Log onto Adobe Express, then click here to launch the template.
With the template open, click on the text layers to edit them as needed. Colors can also be changed.
With the text and colors now edited, click on the creature and then click on the Generate image icon.
Edit the prompt with the details you prefer, and then click Generate.
When you’re finished, download the image and share it on your preferred platform.


Solar System Selfies
This lesson is out of this world! Here, students use Adobe’s AI to generate an image of an astronaut standing on a planet or the moon. Then, the students use the Insert Object tool to add planets behind the astronaut. The planets can be labeled and used as an assessment piece. Here’s how it all works:
Log onto Adobe Express and click on the + symbol.
Click on Landscape 16:9 to launch a new project.
With the new project open, click on Media.
Now, click on Generate image and then click Widescreen 16:9.
Enter your prompt (the one we used in the example was: An astronaut standing on the moon taking a selfie), and then change the Content Type to Photo.
Click Generate, and then select your preferred image. If necessary, resize your generated image to take up the entire screen.
Click the X in the Generate image window (left side panel) to close the sidebar.
Next, click on Insert object and enter the information in the prompt (we used the planet names for ours). Use the brush to draw over the area where you would like the object to be inserted.
Click Generate to create the object, then click Keep to add it to your design. Repeat this for the other planets.
Now, click on the Text tool (located on the left hand side) and add a text box to label each planet.
When you’re finished, download the image and share it on your preferred platform.


Hidden Text: Finding the Theme in Adobe Express
In this project, we’re going to use Text Effects to explore the theme of a story. Students first read or create a short story, and then identify its theme – the main idea or message. Once they know what the theme is, they’ll use Adobe Express to choose an image that represents the setting of the story. Then, they can add the theme to the image using text effects. The goal is for the text to blend seamlessly into the scene, so it feels like a natural part of the setting. This will help students connect the theme with the visual elements of the story, making it easier to see how they work together! Check out the steps below:
Log onto Adobe Express and click on the + symbol.
Click on Landscape 16:9 to launch a new project.
With the new project open, click on Media.
Now, click on Generate image and then click Widescreen 16:9.
Enter a prompt that best describes the setting, then click Generate.
Select an image, then make sure that it is resized to fill the background.
Next, click on Text (on the left side panel) followed by Generate text effects (located at the bottom of that same panel).
Select one of the styles (it doesn’t matter which one you choose - we’ll change it on the next step), and then enter the prompt of what you are looking for (in our example, we used the prompt: red wood).
Now, click on the text in the text box to edit it. Resize and reposition the text box so that it blends in with the setting’s environment.
When you’re finished, download the image and share it on your preferred platform.


Logo Maker in Adobe Express
With Logo Maker, students can create custom branded logos for individuals, businesses, and more. In our example, our middle school students were learning about Katherine Johnson, one of many African American women who performed critical calculations for NASA in the 1960s. The students were tasked to create a logo for her using Adobe Express. Here’s how they did it and be sure to check out an example below!
Log onto Adobe Express and scroll down until you see Suggested quick actions.
Scroll to the right until you see Logo Maker. Click on Logo Maker so that it launches.
Enter the information and then click Next.
Next, select a style and click Next.
On the next screen, click a logo to customize and then add an icon. Click next to move on.
The AI will generate the logo automatically. If needed, you can always select Edit more to add on finishing touches (like in our example below).
When you’re finished, download the image and share it on your preferred platform.


Character Alter Egos in Adobe Express
Creating a figure’s alter-ego is definitely a higher level thinking skill. The thought that goes into the process is naturally creative, and Adobe Express now has a way for students to show their thinking. Alter Egos can be found as a Guided Lesson in the activity library by clicking here. Let’s check out an example below.
Log onto Adobe Express, then click here to launch the template.
With the template open, click on the text layers to edit them as needed. Colors can also be changed.
With the text and colors now edited, click on the main image and then click on the Generate image icon.
Edit the prompt with the details you prefer, and then click Generate.
When you’re finished, download the image and share it on your preferred platform.


All About Me Projects in Adobe Express
All About Me activities don’t always need to be about a person. We’ve used this idea a bit more broadly when learning about different types of habitats. Students can list key components of a habitat including plants and animals that live there, temperatures, and how it may impact life on Earth. Check out our second grade example below! If you’d like to give it a try, this Guided Activity can be found in the Adobe Express Library by clicking here.
Log onto Adobe Express, then click here to launch the template.
You can change out the main image by clicking on it and deleting it.
Click Media and search for an image that relates to the project.
Add your selected image to the design and resize it so that it takes up the entire background.
Now, click on the text layers to edit them as needed. Colors can also be changed.
When you’re finished, download the image and share it on your preferred platform.


AI Generated Book Covers in Adobe Express
This activity can be used as an extension of the writing process, a way to summarize a chapter, or create a potential book about a particular figure. Using the AI in Adobe Express, students can generate images and construct what looks like a book cover. This activity can be found in the Guided Activities library by clicking here, but there also plenty of templates available by searching for “Book Cover.” Here are the steps, and be sure to check out our first grade example below!
Log onto Adobe Express, then click here if you wish to use the guided activity template. For our example, we’ll start from scratch.
Search for Book Cover in the search bar at the top of the login screen.
Click on a template that you think will work best, and then click Customize template in the pop-up window.
You can edit the background by removing it and searching for a new image. Click on Media to search for a new image or generate one using AI.
If your image is blocking out your text boxes, check to make sure that it’s layered behind all of your other elements - or add the image as a background by clicking on it and then clicking on Set image as background (located on the image panel on the left side of the screen). This will make sure that all other elements are placed on top of the image.
Edit the text layers with the necessary information.
When you’re finished, download the image and share it on your preferred platform.


AI Generated Animated Characters in Adobe Express
This lesson idea is perfect for describing characters, or creating characters in a narrative writing piece. Here, the students create a graphic and learn how to refine generative AI prompts using Generate image. What we love about this activity is that it teaches the importance of AI prompting. There’s even a section to share the prompt that the students use. This is valuable, as even the slightest changes and edits can generate totally different outcomes. Check out the activity in the Guided Activities library by clicking here, and see how it works below!
Log onto Adobe Express, then click here to launch the template.
With the template open, click on the text layers to edit them as needed. Colors can also be changed.
With the text and colors now edited, click on the main image and then click on the Generate image icon.
Edit the prompt with the details you prefer, and then click Generate.
Select an image that you think represents your thinking.
Once you have an image picked, be sure to copy the prompt that you used. Paste the text into the bottom right corner to share what you used to generate the image.
When you’re finished, download the image and share it on your preferred platform.

Retro Reels: AI Vintage Videos in Adobe Express
This activity can be used to retell historical events, recall events from a story that happened in the past, or even a historical figure’s history. Students can add a vintage feel to the project, and use text boxes to do all the talking. We especially love this for our students who may be shy or reluctant to record a video of themselves or using their voice. This provides a comfortable creative outlet for them, capturing their thinking. We’ve created a free template which you can grab by clicking here, and see how it works below! (Tip: we recommend modeling how to use layers in Adobe Express before introducing this idea!)

Log onto Adobe Express, then click here to open the template.
Click Remix on the top right corner.
The first two scenes of the video can be left alone and act as an introduction bumper. Click on the third scene.
Locate the layer squares on the right side of the screen. Move the image layer on top of the rectangle. With the image now on the top layer, click Generate image (alternatively, you can also find images in the Media section).
Type in what you are looking for to generate the image. Then, select an image to add to the scene (you can delete the original image from the template).
Be sure to resize the image to take up the entire size of the canvas, or set it as the background.
Next, reorganize the layers so that the image you generated is now on the bottom layer (this preserves the “vintage” effect we used in the template - it must be on the top layer to work).
Move onto the fourth scene (the first scene with a text box). Rearrange the layers so that the text layer is now on the top. This will allow you to edit and see the text box.
Add your text in the box, then rearrange the layers back so that the text layer is on the bottom.
Repeat these steps as needed. Note: the image and text layers can be duplicated, so if you have more than three images or text slides, you can easily add them.
Lastly, add your name to the final credit scene. Move the text layer to the top, edit it, and then move it back to the bottom.
When you’re finished, download the image and share it on your preferred platform.


Dreams to Devices: Create an Invention in
Adobe Express
Students better get the creative juices flowing for this idea! Here, they have to create an invention and also think of how to prompt the AI to create the look of their invention. This involves thinking critically about the prompt being entered, and most likely revising it in order to arrive at the proper outcome. Check out the activity in the Guided Activities library by clicking here, and see how it works below!
Log onto Adobe Express, then click here to launch the template.
With the template open, click on the text layers to edit them as needed. Colors can also be changed.
With the text and colors now edited, click on the main image and then click on the Generate image icon.
Edit the prompt with the details you prefer, and then click Generate.
Select an image that you think represents your thinking.
Once you have an image picked, be sure to copy the prompt that you used. Paste the text on the bottom to share what you used to generate the image.
Click Media, then click Audio.
Click Record voiceover, and record your thinking. This will add your voice as a voiceover to the work.
When you’re finished, download the image and share it on your preferred platform.


AI Generated Geometry Gardens in Adobe Express
Geometry may not come naturally to younger students. But, when you have them pause and take a look at their surroundings, they notice that their environment iis surrounded by shapes. This idea takes AI generated images and creates scenes full of shapes for students to locate. These images can be shared with the rest of the class, and students can challenge each other to hunt down every shape. Check out the activity in the Guided Activities library by clicking here, and see how it works below!
Log onto Adobe Express, then click here to launch the template.
With the template open, click on the text layers to edit them as needed. Colors can also be changed.
With the text and colors now edited, click on the main image and then click on the Generate image icon.
Edit the prompt with the details you prefer, and then click Generate.
When you’re finished, download the image and share it on your preferred platform.


Fortunes in a Fold: Where Writing Takes Shape
(Digital Fortune Tellers in Adobe Express)
Paper fortune tellers were one of those hyped trends that never really died. From time-to-time, we still see students cheerfully playing with them in the hallways. So, that got us thinking…How can we find an academic way to integrate these into the classroom? After a bit of brainstorming, we came up with this idea: Fortunes in a Fold: Where Writing Takes Shape! Students develop 4 characters, 8 adjectives (2 adjectives to describe each character), and 8 different settings or plot twists. Students can use our template to edit the text, or start with the blank version (on page 2 of our template). Iif you’re thinking to yourself…I have no ideea how to fold one of those things! Weell, we have you covered! Check out the tutorial above. You can also download our template by clicking here, and learn more about how this activity works below.
Download our template by clicking here. Students can edit the text version (Page 1), or start with a blank version to add images (Page 2).
If students are using page 1, they can edit the text with the appropriate content. If they’re using page 2, they can use images from Media, or generate their own.
After the students have created the four characters, they need to come up with two adjectives to describe each character (8 in total). These adjectives get places right underneath the character slots.
Next, students need to create 2 settings or plot twists for each character (8 in total). These will be placed directly underneath the adjective slots.
When the fortune teller is completed, they may be printed and then used in the writing process to help create a narrative piece.


Redact and React: What's the Big Idea?
This activity features an editable template where you can add an article or brief passage and redact information. For example, perhaps the main idea is redacted and the article just lists the supporting details. We have also used it with author’s purpose to have the students try and understand the relationship between purpose and structure. This template is fully editable. Just drop your own passage onto it and move / duplicate / delete the redaction marks as necessary. We’ve included the steps and template below!
Log onto Adobe Express, then click here to launch the template.
Delete / edit the text that is already on the template by pasting your own text.
Move / resize the black redation lines to fit your own passage.
Download the design by clicking on the Download button, then selecting PDF or PNG (this will flatten all the layers so that when the students gain access, they cannot move the redactions out of the way to see the answer(s).
Start a new Adobe Express project by clicking on the + sign.
Type Worksheet in the search bar, then select Worksheet.
Upload your downloaded file by dragging it into the new Worksheet design.
Share the new Worksheet design as a template by clicking on Share.
Under the Share menu, Click View only link under Posts.
Toggle on Allow others to use this. This generate a new hyperlink that can be shared with your students to access the assignment.
Paste the hyperlink on your LMS and now your students will be able to voiceover the design.


Reel Lives, Real Stories
This lesson takes a bio about a figure and transforms it into a video in Adobe Express. We highly recommend using School AI to launch the lesson, and then have your students create the video in Adobe Express with the information they have curated. There’s even a Guided Activity for this lesson in Adobe library. Click here to launch the template and check out our example below!


Websites in Adobe for Education
Creating a website sounds like a difficult task. But, with Adobe Express, even your youngest learners can get in on the fun. Whether it’s a website documenting the steps of a science experiment, recalling an era of time, or acting as a student portfolio, Adobe’s website templates can get students creating quickly. There are lots of templates to help you get started, but check out a few of our favorites below and click on them to remix them for yourself!


Timeline Tales: Charting Your Story in Style
Adobe has an awesome selection of infographics and timelines available right within their templates. We love using these for history projects, sequencing the events of a story, and detailing the lifetime of a figure or character. Check out our example below, and be sure to search for Timeline in the templates.


Book Bumper Stickers
This activity sounds easier than it actually is…Have your students consider the theme of a story and then challenge them to think about how to relay the message in just one sentence. But, the one sentence has to be catchy and maybe even a bit humorous. Check out our student example below, and if you need a bumper sticker-sized template, click here!

-- Please follow us on social media and tag us with how you’re using these Padlet ideas in your classroom! 👓👗
For more tips, tricks and lesson ideas for making learning more interACTIVE, check out our books The InterACTIVE Class on Amazon!


Top Tools to Use Now That Flip is Gone
Discover top alternatives to Microsoft Flip for creating engaging video content in education. Explore tools like Adobe Express, Canva, and other innovative platforms that enhance student learning, creativity, collaboration and critical thinking. Find the perfect tool for your classroom today!

Over the summer of 2024, Microsoft announced that it would be shutting down beloved ed tech app, Flip (aka Flipgrid). The absence of such an innovative app leaves a hole in many of our classrooms. So, now that Flip is no more, where do we go from here? We want to be very clear, these apps and suggestions are NOT a replacement for Flip. These platforms contain similar features or integrations that may be used as a way to replicate what you were doing with Microsoft Flip.
THIS BLOG POST IS HAND CRAFTED AND WAS NOT GENERATED USING AI.
IT HAS BEEN UPDATED ON: November 2025
(click on any subheading to jump to that section)


Video Creation Platforms


Adobe Express
Price: Free for both students and educators
Compatibility: Web based, iOS, Android
Similarities to Flip: Students can create and download videos
Differences from Flip: Students do not have a collected space to share their videos, but they can collaborate on the creation of a video.
Sign up: https://www.adobeforeducation.com/k-12/express-for-education/
Adobe Express, formerly known as Adobe Spark, is an excellent tool that can help students create and edit videos easily. Although Adobe Express is more focused on graphic design, it does have features that can be utilized for video creation and editing. Check out what it offers for students in terms of recording and editing videos in the image below.


Canva
Price: Free for both students and educators
Compatibility: Web based, iOS, Android
Similarities to Flip: Students can create and download videos
Differences from Flip: Students do not have a collected space to share their videos, but they can collaborate on the creation of a video.
Sign up: https://www.canva.com/education/
Canva offers a range of features that can help students with recording and editing videos, making it a valuable tool for various educational purposes. Canva also places an emphasis on graphic design, and many of it’s features can be utilized while creating videos. Check out the image below for a breakdown of some of our favorites!


Seesaw
Price: Free and paid options
Compatibility: Web based, iOS, Android
Similarities to Flip: Students can create and download videos and use the screen as a white board.
Differences from Flip: Educators are able to enable the ability for students to view each other’s work, but students do not have a way to comment (with a video) back-and-forth.
Sign up: https://seesaw.com/
Seesaw is an educational platform designed to engage students in learning by allowing them to create, reflect, share, and collaborate on various types of content. When it comes to recording videos, Seesaw offers several features that can be beneficial for students. The image below shares a few of our favorites!

Any of these apps can be used to create videos, and all of them do it exceptionally well. However, if you’ve ever seen us speak, or read our books, you know that we have a passion for providing students with an outlet to share their creativity to broader audiences. While the apps above will permit students to create content, they do not provide a space for students to be able to view and provide feedback to their classmates (as we mentioned above - Seesaw does have a feature where students can view each other’s work, but it doesn’t have the same feel as Flip did). So, let’s take a look at some other apps that might provide a way for students to both record, share, and comment back and forth.

Platforms That Allow for Video Creation, Sharing, Reflection and Commenting


Snorkl
Price: Free and paid options
Compatibility: Web based
Similarities to Flip: Students can record whiteboard-styled annotated videos and submit them for other student’s to view and comment on.
Differences from Flip: Videos are whiteboard-style only. AI is integrated within the platform, which will assess the student work and provide feedback.
Sign up: https://snorkl.app/
Snorkl is an educational app designed to help students record and explain their thinking visually and verbally. It provides tools for students to record their voice while using a digital whiteboard to represent their ideas. The app’s AI offers instant feedback on these recordings, helping students deepen their understanding and improve their explanations. This is a step above where Flip left off - providing a way for students to receive instant coaching on their submissions. On the educator side, teachers can use AI-powered analytics to monitor student progress and gain insights into their thinking. Check out some of our favorite features below!

Let’s take a look at Snorkl’s platform. On the educator side, teachers create a class. Then, you can add assignments to the class (or classes). When assigning an activity, you can choose from Snorkl’s library (Grades 3 and up), or create your own. If you’re starting your own activity, you can use the Snorkl whiteboard to provide a template for your students to work on top of. Setting up the AI feedback is optional, but can be easily generated with Snorkl’s autofill. Educator’s have full control, and can choose to auto-approve or teacher-approve the AI feedback. Check out our walkthrough below!


On the student side, students log on with an email address. Assigned activities will appear when they log in. The whiteboard is the same as the one on the educator side (where you can add your own template for students to work on top of). Check out our deep dive of the tools the students have access to within the app below.


MirrorTalk
Price: Free and paid options
Compatibility: Web based, iOS and Google Play
Similarities to Flip: Students reflect on the assignment, sharing their thinking.
Differences from Flip: Videos are not seen by classmates, but are visible to the educator.
Sign up: https://mirrortalk.ai/
MirrorTalk is an educational app designed to help students and teachers build reflective thinking skills. Educators create a class, then set up a topic that they would like the students to reflect on. MirrorTalk provides several options for how students log in. If the educator selects “Login,” the students will need to enter an email address which will create an account for them. The benefit here is that with a student account, students have access to the entire dashboard: start a new reflection, view past reflections, and access AI-driven insights. If the educator selects “Session” under the Access menu, this will provide a unique link where students will only need to enter their name to add a reflection. They will not see the dashboard, and only be able to respond to the prompted question. This method is highly recommended if you are a K-2 educator, as the reflections can be hyperlinked on your LMS for quick and easy access. In “Open” access, students do not need to enter a name. After clicking on the reflection link, they are immediately prompted with the question.


When a student launches a reflection, they are prompted to answer questions. Their responses are recorded and then analyzed using AI. The AI then prompts the students to explain in more detail, analyzing the response. The app then provides educators with AI-driven insights to identify learning gaps, develop understanding, and manage mindsets. Here’s what we love about MirrorTalk!


Book Creator
Price: Free and paid options (collaboration requires a paid version)
Compatibility: Web based, iOS and Google Play
Similarities to Flip: Students can record videos and comment on classmates work with either text or video.
Differences from Flip: The camera does not contain additional add-ons and is strictly meant to capture raw video (no filters, effects, etc.) and comments appear off to the right side of the book.
Sign up: https://bookcreator.com/
Don’t let the name fool you! Book Creator is an amazing tool to create books, but it’s capabilities go far beyond what the name suggests. With a paid version of Book Creator, a teacher can turn collaboration on, providing ways for students to work together on the same assignment. As cool as this is, one of our favorite features in Book Creator is the commenting feature (and it comes with the free version). Clicking on the comment icon in the lower right panel opens up an area for students to record a video, audio message, or leave a GIF / emoji. We like to encourage the student who’s project is being viewed to record a video explaining their thinking alongside their book. Then, their classmates can read the book and add comments below the original message. We love how the comments stay in a thread, making it easy and accessible.


This feature can be used similarly to Flip by allowing students to comment on each other’s work. This builds constructive and critical thinking, all while providing a creative outlet for your students. The best part of all: books can be shared with families in just several clicks! Check out what we love about Book Creator below!


Padlet
Price: Free and paid options
Compatibility: Web based, iOS and Google Play
Similarities to Flip: Students can record videos and comment on classmates work with either text or video.
Differences from Flip: The camera does not contain additional add-ons and is strictly meant to capture raw video (no filters, effects, etc.).
Sign up: https://padlet.com/
For those who have been around ed tech for some time, you most likely have used Padlet at some point in your career. While nothing can fully replace Flip, Padlet’s work into video integration within their platform definitely feels familiar for Flip users. Educators create a Padlet board and share the link with the students. The students click on the + symbol, followed by “More attachment types.” In the pop up menu, students click “Video Recorder” to launch the camera. Unlike Flip’s camera, there are no flashy add-ons, filters, or effects. We actually prefer this to the last version of Flip’s camera. This keeps the attention on the objective, but Padlet also offers the option to upload video (so you can always use a different app to create the video and then smash it with Padlet). Students have up to 2 minutes of recording time, and the recording can be paused at any time during the process. Also like Flip, students have the ability to watch their videos back before submitting their response.

After submitting a video response, the video thumbnail will appear on the Padlet board. Clicking on a video’s thumbnail will open a familiar view to Flip users. Here, the students can view the original video and all other comments made to the video. Just like on Flip, the content is threaded and organized, making it easy for students to interact with.

Padlet also stepped up and created a Flip importer tool to bring all previous content in Flip into Padlet. Click this link to learn more and transfer your videos. The attention to detail is impressive, and as we have mentioned before - nothing will replace the Flip(grid) that we all knew and loved. But, Padlet’s efforts are definitely recognized and appreciated. This gives it our highly recommended rating, and if you are desperately looking for a replacement option, start with Padlet.

-- Please follow us on social media and tag us with how you’re using these apps in your classroom! 👓👗
For more tips, tricks and lesson ideas for making learning more interACTIVE, check out our books The InterACTIVE Class and Flipgrid in the InterACTIVE Class on Amazon!


20 Read aloud Activities to Use with Novel Effect (and Other Apps)!
Novel Effect is a MUST TRY app for any classroom! See how you can use this app with books that you’re already reading. Check out some of our favorite classroom activities to use Novel Effect with - including ideas with Microsoft Flip, Canva, Adobe Express, Seesaw and more. Here’s 20 of our favorite!

If you teach reading, you HAVE to check out Novel Effect. Novel Effect is an award-winning app that follows your voice as you read out loud from a children's story book and responds at just the right moment with interactive music, sound effects, and character voices. You can learn more and download it by clicking here!
So how can we fit this amazing app into our standards? It’s easy! Novel Effect’s library is FULL of books that you most likely already have in your collection - and they continue to add more weekly. Now that we have had some time using the app, we’d like to share 20 of our favorite activities. Click on any subheading to jump to that section/activity!


The Bad Seed
Jory John’s “The Bad Seed” has a bad temper, bad manners, and a bad attitude. But, it doesn’t last long in this popular story. One of our favorite activities to do with this book is with Novel Effect and Microsoft Flip. Follow the steps below:
Read The Bad Seed on Novel Effect
Have students use the Bad Seed sticker in a Microsoft Flip video
Students can retell the story, or explain what positive actions they can do to help promote kindness in the classroom and school campus
You can download The Bad Seed sticker by clicking here or the image.


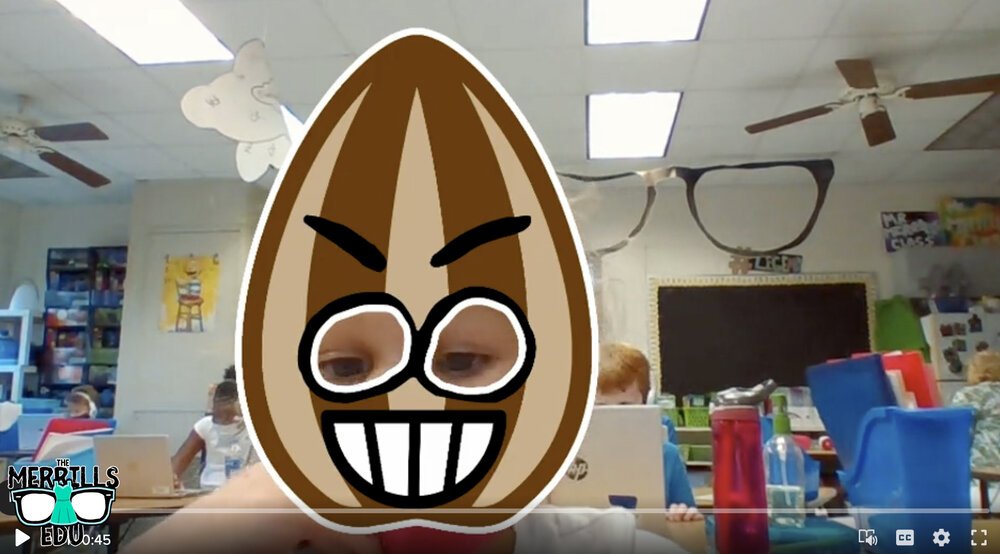
The Good Egg
In part two of Jory John and Pete Oswald’s series, The Good Egg is trying to look out for others but forgets the most important person: themself. After some careful reflection, The Good Egg decides to do what’s best and make a change. We absolutely love to use this book as a classroom management tool. Here’s how:
Purchase an Egg plastic trophy here (you might want to remove the name plate)
Click here to read The Good Egg on Novel Effect
Give the egg trophy to a student who is meeting your expectations
Move the egg frequently, “catching” students who are doing the RIGHT thing.
The person who has the trophy at the end of the day earns a prize!

Purchase an Easter Egg trophy by clicking here
Here’s another idea that is great for the beginning of the year!

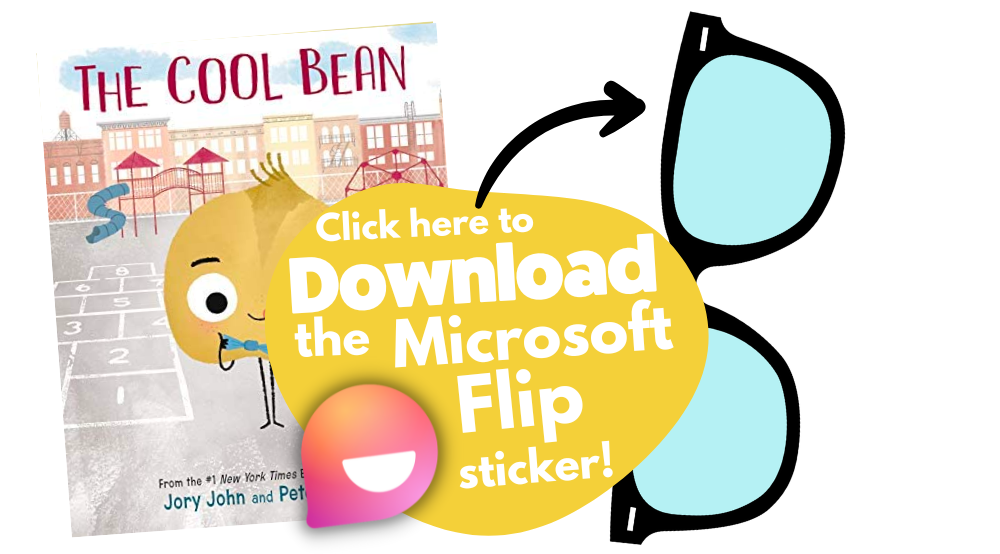
The Cool Bean

In part 3 of John and Oswald’s series, a bean always finds himself on the sidelines. After unsuccessfully trying everything he can to fit in with the crowd— the cool beans step in to show him how it’s done. Just when if it couldn’t get any cooler - it does! Now you can read this book on Novel Effect! Here’s our favorite activity includes using Microsoft Flip:
Read The Cool Bean on Novel Effect
Have students use the The Cool Bean “Raybean” sticker in a Microsoft Flip video
Students can retell the story, or explain how they would act like cool beans around the classroom and school campus.

The Couch Potato

In part 4 of John and Oswald’s series, The Couch Potato has everything within reach and doesn't have to move from the sunken couch cushion. But when the electricity goes out, Couch Potato is forced to peel away from the comforts of the living room and venture outside. Bring this story to life with Novel Effect and check out this activity:
Read The Couch Potato on Novel Effect
Have students use The Couch Potato “webcam” sticker in a Microsoft Flip video
Students can use the sticker to explain why using technology all the time may not be best.
Click here to download the The Couch Potato “Webcam” sticker


The Smart Cookie

In part 4 of Johns and Oswald’s series, This cookie has never felt like a smart cookie no matter how hard she tries, especially in comparison to all the clever cupcakes and brilliant rolls in the bakery. But, a dash of creativity and a sprinkle of confidence helps her learn that perfect scores and having all the answers aren’t the only ingredients for intelligence! But the cookie doesn’t have to be the only creative one. With this activity, your students will be creating the perfect cookie with all the right ingredients!

Here’s how:
Read The Smart Cookie on Novel Effect
Download the Smart Cookie Canva template
Assign the template to your students
Students use the template to design a smart cookie and use text boxes to include things that you are good at!
Save your work and then share it on Seesaw!


Chrysanthemum

Kevin Henke’s “Chrysanthemum” gets children thinking about and bonding with their own names and the names of everyone else in the class. It's the perfect vehicle for starting a discussion about treating classmates with tolerance, kindness, and compassion. With Novel Effect, this book comes alive! Here’s an activity that we’ve done in our own classrooms:
Give each student a copy of the Chrysanthemum name tag
Students create a design for the name tag that describes Chrysanthemum’s feelings in the beginning, middle and end.
(This can be done digitally on Canva or Adobe Express - or simply with crayons)
Share your work on Seesaw!
Click here to download the Chrysanthemum name-tag (Canva) template


Wemberly Worried

Okay, we might be a bit biased on this one…Together, we’re the voice actors for the mother and father of this book on Novel Effect. In this book, Wemberly worried about everything. Big things. Little things. And things in between. Then it was time for school to start. And Wemberly worried even more. If you ever worry (or know someone who does), this is the book for you! Here’s one of favorite activities to do with it:
Read Wemberly Worried on Novel Effect
Have students use the Wemberly Worried “cover” sticker in a Microsoft Flip video
Students can use the sticker to explain what are some things that they worry about.


Enemy Pie

Derek Munson and Tara Calahan King’s “Enemy Pie” is a funny yet endearing story where one little boy learns an effective recipe for turning a best enemy into a best friend. This book is perfect for any time of the year - and often we see ourselves re-visiting it throughout the year. Here’s our favorite “Enemy Pie” activity!
Read Enemy Pie on Novel Effect
Use Canva or Adobe Express to find a recipe template (or use our Canva below!)
Assign the template to your students
Students use the template to design a recipe that includes ingredients to become a good friend.
Save your work and then share it on Seesaw!

A Bad Case of Stripes

David Shanon’s “A Bad Case of Stripes” is about a little girl who secretly enjoys lima beans. However, she’s concerned about what others might think of her if they learn that she loves them. Until one day - when everyone finds out! Here’s our favorite “A Bad Case of Stripes” activity:
Read A Bad Case of Stripes on Novel Effect
Have students use the Bad Case of Stripes sticker in a Microsoft Flip video
Students can use the sticker to explain what happens in the story, or even share something unusual that they like.
Click here to download the Bad Case of Stripes sticker


Hey Little Ant

Phillip Hoose’s “Hey Little Ant,” is about a surprising conversation between a tiny ant and a little girl. The book is bound to inspire important discussions about caring, kindness and respect for both animals and humans. Here’s our favorite activity:
Read Hey Little Ant on Novel Effect
Have students use the magnifying glass sticker in a Microsoft Flip video
Students can use the sticker to explain how the illustrations in the book may portray a different message. than the words.


Grumpy Monkey

In “Grumpy Monkey,” Suzanne and Max Lang bring hilarity and levity to this very important lesson on emotional literacy, demonstrating to kids that they are allowed to feel their feelings. This is a great lesson for any time of the year, and here is our favorite activity:
Read Grumpy Monkey on Novel Effect
Have students use the Grumpy Monkey sticker in a Microsoft Flip video
Students can use the sticker to explain how the illustrations in the text told a different story than the words.


Mae Among the Stars

Roda Ahmed’s “Mae Among the Stars,” is an inspiration to students to reach for the stars - no pun intended. We love how it encourages girls (specifically) to aspire for the impossible, and to persist with childlike imagination. Here’s our favorite “Mae Among the Stars” activities:
Read “Mae Among the Stars” on Novel Effect
Have students use the astronaut sticker in a Microsoft Flip video
Students can use the draw tool to add planets, stars, etc. Or, students can add stickers like a rocket!
Have the students retell the story as an astronaut!

Duck! Rabbit!

Amy Rosenthal and Tom Lichtenheld’s, “Duck! Rabbit!” has a clever take on the age-old optical illusion: is it a duck or a rabbit? Depends on how you look at it! Readers will find more than just humor here; there's also a subtle lesson for kids who don't know when to let go of an argument. Here’s our favorite “Duck! Rabbit!” activity:
Read “Duck! Rabbit!” on Novel Effect
Have students use the Duck Rabbit sticker in a Microsoft Flip video
Students can use the draw tool to add a duck bill or rabbit ears to share their opinion on whether the image is a duck or a rabbit
Have students watch the other responses and see if another student can convince them otherwise!
Click here to download the Duck Rabbit sticker


The Oldest Student

Rita Hubbard and Oge Mora’s “The Oldest Student” is based on the true life story of Mary Walker. Imagine learning to read at the age of 116! Mary, the nation's oldest student, did just that. We love this story for so many reasons and it can be used in lots of different ways. Here is just one of our favorite ways to use it:
Read “The Oldest Student” on Novel Effect
Have students use the Grandma Glasses sticker in a Microsoft Flip video
Students can use the sticker to retell the events of the story and Mary Walker’s life!


I Want My Hat Back

Jon Klassen is one of our favorite authors. We love his writing and artistic style. “I Want My Hat Back,” is a take on the classic repetitive tale, but it plays out in sly illustrations laced with visual humor. The reader(s) feels to be in on the joke, as the bear frantically looks back to find his beloved hat. Here’s our favorite activity:
Read “I Want My Hat Back” on Novel Effect
Have students use the red hat sticker in a Microsoft Flip video
Students can use the sticker to retell the sequence of events in the story!


This is Not My Hat

In part 2 of Klassen’s series, the hat series takes a bit of a twist. This time, we follow the character who deliberately took a hat from its owner. The character is confident, perhaps overly confident, which leads him into trouble. We really enjoy reading this book after “I Want My Hat Back.” This allows us to complete this activity:
Read “This is Not My Hat” on Novel Effect
Have students use the tiny hat sticker in a Microsoft Flip video
Students can use the sticker to compare / contrast “I Want My Hat Back” and “This is Not My Hat.”


Are You Scared Darth Vader?

In Adam Rex’s “Are You Scared Darth Vader,” nothing can scare Lord Vader! Not monsters or witches or ghosts, and especially not the dark. So what is Darth Vader scared of? A surprise at the end, that’s for sure! If you’re a Star Wars fan - or have kids that are, then this book is for you! Here’s our favorite activity:
Read “Are You Scared Darth Vader” on Novel Effect
Have students use the Darth Vader sticker in a Microsoft Flip video
Students can use the sticker to recreate the ending of the story: What else do you think Darth Vader might be scared of?


Those Shoes

In Maribeth Boelts’ “Those Shoes,” Jeremy desperately wants a pair of popular shoes. However, he soon sees that the things he has -- warm boots, a loving grandma, and the chance to help a friend -- are worth more than the things he wants. Here’s our favorite activity:
Read “Those Shoes” on Novel Effect
Give each student a copy of the Shoes template (this can also be done virtually on Canva or Adobe Express)
Students design a pair of shoes that they would like to give to a friend
Students share their thoughts in a Microsoft Flip video: “Why would these be perfect for your best friend?”


Shark Lady: The True Story of How Eugenie Clark Became the Ocean's Most Fearless Scientist

Eugenie Clark devoted her life to learning about sharks. After earning several college degrees and making countless discoveries, Eugenie wrote herself into the history of science, earning the nickname "Shark Lady." Through her accomplishments, she taught the world that sharks were to be admired rather than feared and that women can do anything they set their minds to. This book by Jess Keating walks through those accomplishments! Here’s our favorite activity:
Read “Shark Lady” on Novel Effect
Have students use the underwater, mask and shark fin sticker sticker in a Microsoft Flip video
Layering is important for this to look correct. The underwater scene must be in the back. The next layer should be the mask - but if students place the mask layer in the back (behind the underwater scene) - it won’t look right.
Students can use the stickers to explain some of Eugenie Clark’s accomplishments


The Day the Crayons Quit

This classroom favorite from Drew Daywalt and Oliver Jeffers features crayons that are feeling overworked and exhausted. What can the main character, Duncan, possibly do to appease all of the crayons and get them back to doing what they do best? We love spreading this book out over several days to talk about persuasion. One of our favorite activities uses trading cards made by the students for each character. Here’s the activity:
Read “The Day the Crayons Quit” on Novel Effect
Give each student a copy of the trading card template
Students select crayons of their choice and decorate the cards as they see fit
On the “level” section of the cards, students can rate each crayon on a scale of how persuasive was the color was in the story (1 being the lowest, 10 being the highest)
Students can save their work, then upload it to Seesaw!


Download all of our stickers!
Love what you see, but don’t want to have to download each sticker one-by-one? We’ve got you covered! Click here or the button below to download every Flip sticker from our activities above!

-- Please follow us on social media and tag us with how you’re using Novel Effect or these activities in your classroom! 👓👗
For more tips, tricks and lesson ideas for making learning more interACTIVE, check out our books The InterACTIVE Class and Flipgrid in the InterACTIVE Class on Amazon!